

Key Takeaways
- Finishing tools help enhance surface quality.
- Choosing the right tool can save time and effort.
- Proper use ensures long-lasting results.
- Ensure the workspace is clean and free of debris to prevent contamination of the pour.
- Utilize tools such as a trowel or screed to achieve an even surface during the initial pour.
- Trowels are ideal for smoothing and shaping wet concrete.
- Proper timing for using finishing tools is essential to avoid imperfections.
Introduction
Finishing tools are essential for achieving a refined surface in construction and DIY projects.
Familiarity with these tools and their appropriate applications can significantly enhance both the aesthetic and structural quality of a finished product.
In this overview, we will discuss ten common finishing tools and identify the specific stages in the pour process where each tool is most effectively utilized.
Understanding the timing and function of these tools will contribute to a more successful finishing outcome.
Introduction to Finishing Tools
Finishing tools play a crucial role in achieving a smooth and polished surface in various construction and DIY projects. Understanding these tools is the first step toward mastering the art of finishing, which is essential for both aesthetic appeal and structural integrity.
In this introduction, we will explore the general significance of finishing tools, their applications, and how they contribute to the overall quality of a project. Knowing what tools are available and when they are typically used can make a significant difference in the final outcome.
- Finishing tools help enhance surface quality.
- They are essential for both professional and DIY projects.
- Choosing the right tool can save time and effort.
- Proper use ensures long-lasting results.
- Familiarity with tools leads to better finishing techniques.
- Sanding blocks are ideal for smoothing out rough edges.
- Spackling knives are essential for filling holes and imperfections.
- Paintbrushes and rollers are used for applying finishes evenly.
- Detailing tools allow for precision work in hard-to-reach areas.
Quick Facts
Finishing tools typically require 15-30 minutes for setup and use.
Finishing tools not only improve appearance but also protect surfaces from environmental damage. Their proper application can influence the durability of the finish, making the selection process critical. Each tool serves a unique purpose, and understanding these nuances can elevate the quality of the work.
When selecting finishing tools, consider the material you are working with. For instance, wood surfaces typically require finer grit sandpaper, ranging from 180 to 220 grit, while metal may need a coarser grit, around 120 to 150 grit, to achieve a smooth finish.
Understanding the Pour Process
Understanding the pour process is crucial for achieving a smooth and even finish. Timing is essential, as the use of specific techniques at various stages can greatly impact the final appearance of the surface. For instance, applying a finishing technique too early or too late can lead to uneven textures or imperfections.
It’s important to monitor the curing time of the pour to determine the optimal moment for applying finishing techniques. This ensures that the materials are still workable, allowing for effective manipulation without compromising the integrity of the surface.
Quick Facts
Common pitfalls include using the wrong technique for the stage of the pour and rushing the finishing process.
Best practices involve waiting for the right consistency of the pour before applying finishing techniques and maintaining a steady hand for even application.
Here’s a quick rundown:
- Ensure the workspace is clean and free of debris to prevent contamination of the pour.
- Utilize tools such as a trowel or screed to achieve an even surface during the initial pour.
- Regularly check the temperature and humidity, as these factors can affect curing times and the final finish.
- Consider using a moisture meter to assess the pour’s readiness for finishing techniques.
Typically, the ideal temperature range for pouring is between 50°F and 90°F (10°C to 32°C) to ensure proper curing. Humidity levels should be monitored, as very high or low conditions can alter the drying process, potentially leading to cracks or surface imperfections.
After the pour, it’s advisable to wait at least 24 to 48 hours before applying any finishing techniques, depending on the thickness of the material and environmental conditions.
Essential Finishing Tools and Their Functions
In the realm of finishing, selecting the right tool is paramount to achieving a flawless surface. Each tool serves a unique purpose, making it crucial to understand their functions to maximize effectiveness during the finishing stages. Common finishing tools include trowels, floats, and edging tools, each designed to address specific tasks.
Using the appropriate tool at the right stage of the pour can greatly enhance the final appearance and durability of the surface.
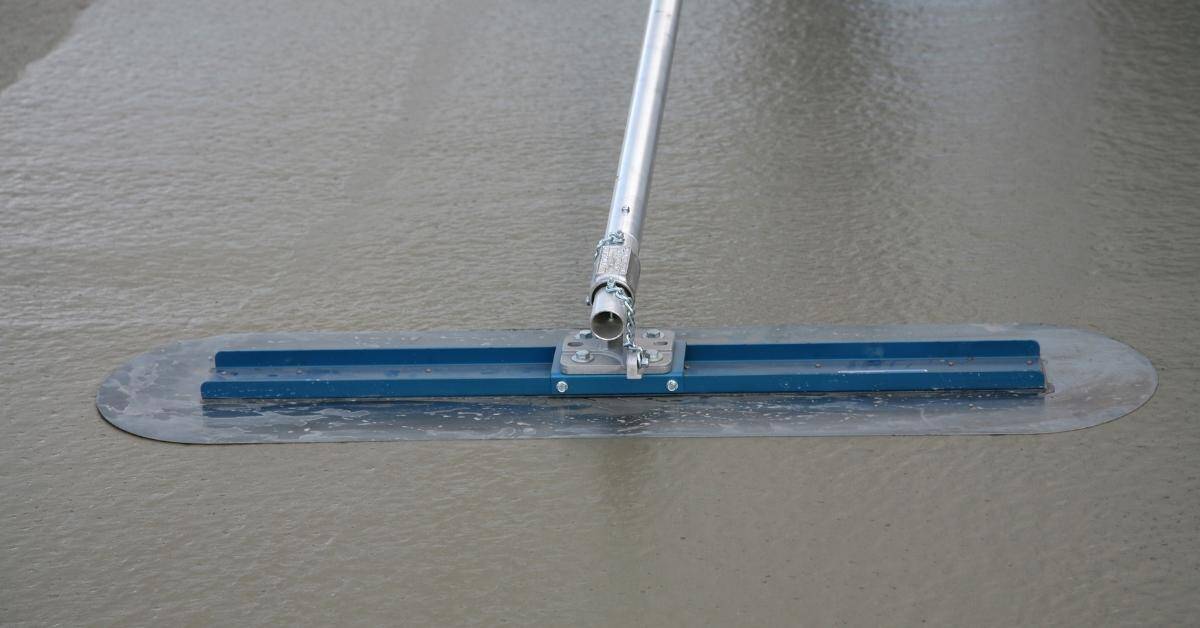
- Trowels are ideal for smoothing and shaping wet concrete.
- Floats help to level the surface and remove imperfections.
- Edging tools create clean, finished edges on slabs.
- Sanding blocks are useful for refining surfaces after initial curing.
- Spackling knives are essential for filling in small cracks and holes.
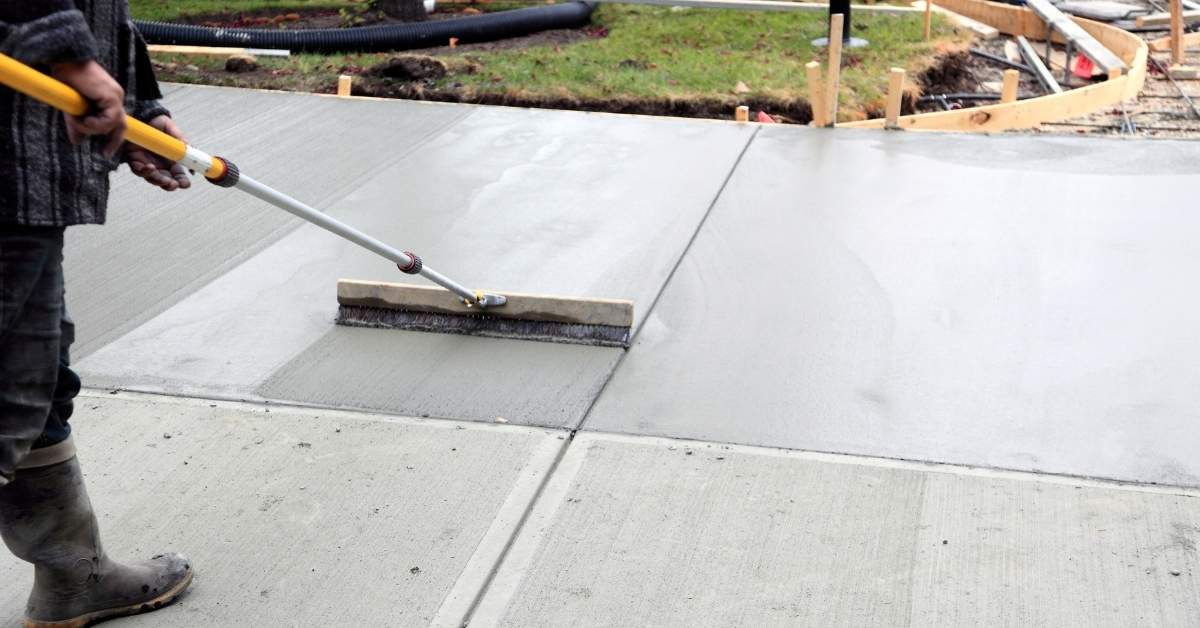
- Brushes are effective for applying sealers and stains evenly across surfaces.
- Power sanders can expedite the smoothing process on larger areas, typically used after initial curing.
- Concrete grinders are beneficial for removing stubborn imperfections and achieving a polished finish.
Quick Facts
Typical waiting time before applying finishing techniques is 24 to 48 hours.
Common pitfalls include using the wrong tool for the job and not monitoring environmental conditions.
Best practices involve keeping tools clean and using them within the appropriate curing timeframe.
When selecting tools, consider that trowels typically come in various sizes, ranging from 12 to 18 inches, depending on the area being worked on. Additionally, floats can be found in both hand-held and larger versions, with sizes usually spanning from 16 to 36 inches. It’s essential to choose the right grit for sanding blocks, as they typically range from 60 to 220 grit, depending on the degree of refinement needed for the surface.

Stages of the Pour Process Explained
The pour process typically consists of several key stages, each requiring specific attention to detail. Initially, after the concrete is poured, the surface must be leveled and smoothed, which is where tools like screeds come into play. As the concrete begins to set, using finishing tools at the right moment is crucial to avoid surface imperfections and achieve a smooth finish.
During the finishing stage, it is important to use the appropriate tools and techniques to ensure a high-quality surface. This includes knowing when to use trowels and floats effectively to create the desired texture and smoothness.
Quick Facts
- Proper timing for using finishing tools is essential to avoid imperfections.
- Common pitfalls include applying tools too early or late in the finishing process.
- Using the right tools for each stage is critical for optimal results.
- Typically, ideal pouring temperatures range from 50°F to 85°F (10°C to 29°C) for optimal curing.
- Humidity levels should be maintained between 40% to 60% to prevent rapid evaporation of moisture from the surface.
- Using curing compounds can help retain moisture during the critical curing phase.
- Scheduling pours during cooler parts of the day can mitigate the effects of high temperatures.
Additionally, monitoring environmental conditions can greatly influence the pour process. Factors such as temperature and humidity levels play a significant role in the curing time and quality of the concrete. Lastly, after the concrete has cured for the recommended time, performing a final inspection is vital.
This includes checking for any cracks or surface defects that may have developed during the curing process.
Common Challenges in Finishing
Common challenges in finishing include achieving an even surface and preventing defects such as cracks or bubbles. These issues can arise from improper timing in the finishing process or inadequate tool usage, leading to an unsatisfactory finish. Additionally, varying environmental conditions can complicate the finishing stage.
For instance, high humidity may affect the finishing process, while extreme temperatures can lead to rapid drying, both of which can cause imperfections in the final surface.
Quick Facts
Common pitfalls include applying finishing tools too early and neglecting proper surface preparation.
Here’s a quick rundown:
- Inconsistent application techniques, which can lead to uneven coverage.
- Improper selection of finishing materials that may not be compatible with the substrate.
- Failure to follow recommended drying times, typically ranging from 24 to 48 hours depending on the product.
- Neglecting to inspect the surface for contaminants before application, which can introduce defects.
- Inadequate mixing of finishing materials, which can result in inconsistencies in color and texture.
- Skipping the priming process, especially on porous surfaces, which can lead to absorption issues.
- Not allowing sufficient curing time, which typically should be followed according to the manufacturer’s guidelines, often extending from a few days to a week.
To mitigate these challenges, it is essential to maintain a controlled environment, ideally keeping temperatures between 60°F to 80°F and humidity levels below 50%. Regularly checking tools and materials for suitability can also prevent many common issues. To enhance the finishing process, it’s advisable to conduct a test application on a small area first.
This helps identify potential issues without compromising the entire project. Additionally, using a moisture meter can provide precise readings of surface conditions, ensuring optimal application times.
Best Practices for Effective Finishing
To achieve effective finishing, it is crucial to follow best practices that enhance the quality and durability of the surface. Regularly cleaning your tools and workspace helps prevent contamination and ensures a smoother final product. Additionally, conducting test applications on a small area can help identify the best techniques and tools for your specific project.
Monitoring the environmental conditions during the finishing process is also essential for optimal outcomes. Typically, maintaining a consistent temperature and humidity level will aid in proper curing and finishing. Moreover, keeping a close eye on the surface condition can help catch any potential issues early, allowing for timely corrections.
Quick Facts
Typical finishing time ranges from 24 to 48 hours.
Common pitfalls include neglecting to monitor humidity levels and using unclean tools.
Best practices involve maintaining a clean workspace and conducting test applications to ensure the best results.
Here’s a quick rundown:
- Ensure proper ventilation in your workspace to facilitate drying and reduce the risk of inhaling fumes.
- Use a suitable primer before applying finishes, as this can enhance adhesion and improve the final appearance.
- Sand between coats when applicable, using fine-grit sandpaper to achieve a smoother surface.
- Allow adequate drying time between coats, typically 1 to 4 hours, depending on the specific materials used.
It’s advisable to check the moisture content of the surface before applying finishes; ideally, it should be below 10% for optimal adhesion. Additionally, consider the type of finish being used, as some may require specific application techniques or conditions to achieve the best results.
Conclusion
In summary, mastering the use of finishing tools and understanding the pour process are essential for achieving high-quality results in construction and DIY projects.
Key actions include selecting the appropriate tools for specific tasks, adhering to optimal timing during the pour, and maintaining a clean workspace to prevent contamination.
These practices contribute significantly to the overall smoothness and durability of the finished surface.
However, challenges such as misjudging the curing time and using the wrong tools can lead to unsatisfactory results.
Additionally, environmental factors like temperature and humidity are critical and can complicate the finishing process if not monitored closely.
Addressing these challenges requires patience and attention to detail.
To improve your finishing outcomes, take the time to familiarize yourself with the various tools and techniques discussed.
Whether you’re a professional or a DIY enthusiast, investing in the right tools and understanding their functions can make a significant difference in the quality of your projects.
Start by assessing your current toolkit and consider making adjustments or upgrades as necessary for your next project.
FAQ
What are finishing tools used for?Finishing tools are essential for achieving a smooth and polished surface in construction and DIY projects. They enhance surface quality and contribute to both the aesthetic appeal and structural integrity of the work.
How do I choose the right finishing tool?Selecting the appropriate finishing tool depends on the material and the specific task at hand. For instance, finer grit sandpaper is typically used for wood, while coarser grit is better suited for metal surfaces.
What is the ideal waiting time before applying finishing techniques?It is generally advisable to wait 24 to 48 hours after pouring before applying any finishing techniques. This allows the material to cure adequately, ensuring a durable and high-quality finish.
What common mistakes should I avoid during the finishing process?Common pitfalls include using the wrong technique for the stage of the pour and rushing the finishing process. It’s crucial to monitor the curing time and maintain a steady hand for even application.