
Introduction
Testing anchors in hollow block is the process of measuring how much force it takes to pull an anchor out of a hollow concrete block.
This introduction explains what to expect from real-world, hands-on testing using simple, improvised walls. It focuses on practical outcomes you can relate to when mounting fixtures in hollow blocks.
A scrap-wall setup lets you observe pull-out behavior without affecting your main project. You’ll compare different anchor types and note how the hollow core of the block and the wall material influence pull-out. Use safe, repeatable steps and check manufacturer instructions or local rules for any limits before testing.
Key takeaways
- Prepare scrap-wall blocks and anchors to replicate real hollow-block conditions safely.
- Document anchor types and installation steps before performing pull-out tests.
- Use a standardized testing procedure to compare pull-out results across anchors.
- Assess impact of wall conditions and block geometry on pull-out performance.
- Follow safety protocols, PPE, and local codes during testing and installation.
- Provide practical guidance on selection, torqueing, and common installation mistakes.
Table of Contents
- Introduction
- Key takeaways
- Tools, Materials and Visual Checkpoints
- Testing Methodology and Data Protocol
- Anchor Types Tested and How They Work
- Real-World Pull-Out Results and Comparative Analysis
- Installation Techniques, Torqueing and Common Mistakes
- Impact of Wall Conditions, Block Geometry and Repairs
- Safety, Standards and Regulatory Compliance
- Cost Considerations, Selection Guide and Best Practices
- Conclusion
- FAQ
Tools, Materials and Visual Checkpoints
Prepare the test rig components and mounting hardware before any scrap-wall testing. Describe the concrete test frame, how anchors are loaded, and the mounting method used on hollow block panels. Include alignment aids and any jigging or restraint that ensures repeatability across tests.
List the measuring instruments and data capture tools, including the load cell range, displacement gauges, and data logger specifications. Note calibration steps and auxiliary tools for verifying hole diameter, depth, and anchor position with repeatable accuracy. Add quick visual cues to assess hole quality, block condition, grout presence, and seating alignment both before and after testing.
Instruments and Test Rig
Before starting your pull-out tests on hollow blocks, ensure you have the right tools and equipment to maintain accuracy and repeatability.
- Load Cell: Check its range covers expected forces. Verify calibration before use.
- Pull-Test Frame: Ensure it’s rigid, stable, and properly aligned with the anchor being tested.
- Torque Wrench: Inspect for proper calibration to ensure consistent anchor tightening.
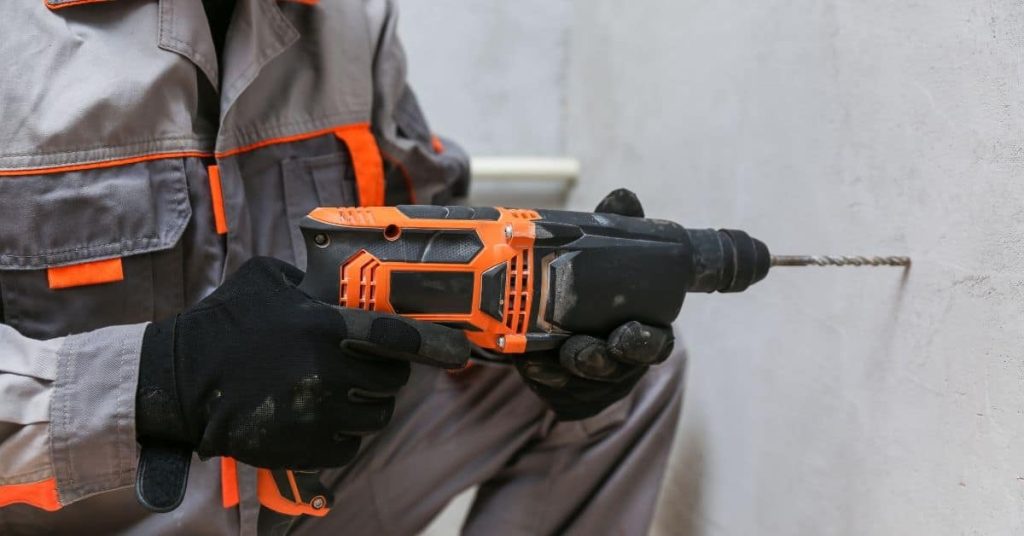
- Drill Equipment: Check functionality before testing. Ensure drill bits match hole diameter requirements.
- Data Logger: Verify connectivity and compatibility with load cell. Calibrate if necessary.
- Displacement Gauge: Use to measure anchor movement during the test.
- Calipers/Borers: Confirm hole diameter, depth, and anchor position accuracy.
- Alignment Aids: Use to ensure consistent anchor positioning across tests.
Quick rule: Always verify calibration and functionality of your instruments before testing to avoid inaccurate results.
Anchor Samples, Consumables and Visual Checkpoints
To maintain consistent test conditions and accurate observations, follow this checklist for anchor samples, consumables, and visual checks.
- Anchor Batches: Catalogue with unique IDs. Verify they match the ones used in previous tests for consistency.
- Grout/Adhesive: Prepare according to manufacturer instructions. Ensure it’s fresh and mixed properly.
- Drill Bits: Match bit size to anchor diameter. Verify they’re sharp and in good condition.
- Sleeves: Check for proper fit around anchors. Ensure they’re clean and undamaged.
- Fasteners: Inspect for damage or wear. Ensure they match the ones used in previous tests.
- Lubricants: Verify they’re compatible with anchors and grout/adhesive. Check expiration date.
- Cleaning Brushes/Compressed Air: Use to clean holes before testing. Ensure dust is minimal.
- Hole Quality: Inspect for clean bore, minimal dust, and correct diameter before testing.
- Block Condition: Check for cracks or broken cores that could affect test results.
- Grout Presence: Verify grout is present and evenly distributed in the holes.
Quick rule: Always inspect holes, blocks, and consumables before testing to ensure consistent conditions across tests.
Testing Methodology and Data Protocol
A repeatable pull-out test procedure and data protocol are outlined to enable consistent testing across hollow block specimens. The setup specifies hollow block type, wall thickness, anchor type, installation method, and target pull-out direction, along with the jig, loading rig, spacing, edge distance, and boundary constraints to ensure comparability. Data collection requires a load cell, displacement gauge, and defined sampling cadence, with clear zeroing and time stamps to support traceability and auditability.
This approach gives DIY readers a practical framework to replicate tests, compare results, and audit findings. It emphasizes controlling variables, documenting materials and installers, and maintaining an audit trail with photos and worksheets, so results are credible and repeatable. On-site checks, proper torque handling, and calibration verification help prevent common errors and improve safety and reliability.
Pull-Out Test Procedure
This procedure outlines a repeatable method for testing anchors in hollow blocks, ensuring consistent and comparable results across specimens.
- Mark the center of the block face for anchor installation. Ensure it’s at least 50mm from any edge or boundary constraint.
- Drill a hole through the marked point using a suitable drill bit. Follow the anchor manufacturer’s guidelines for hole diameter and depth. Clean the hole to remove debris.
- Install each anchor type according to its specific instructions, applying the recommended torque or setting protocol. If unsure about compatibility with hollow blocks, consult relevant standards and manufacturer guidelines.
- Apply a preload if required by the test setup. Ensure it’s within safe limits for both the anchor and block.
- Connect the loading rig to the anchor and apply a controlled monotonic pull at a rate specified in relevant standards. Stop the test when the anchor reaches its maximum pull-out force or exhibits clear signs of failure.
Data recording, repeatability and quality control
Accurate data collection is crucial for reliable and reproducible test results. Record the following information during each pull-out test:
Load: Use a calibrated load cell to measure and record the applied force at regular intervals throughout the test.
Displacement: Monitor and log the displacement of the anchor relative to the block face using a suitable gauge.
Failure type: Document the mode of failure, such as pull-through or breakage.
To ensure repeatability, run multiple tests under identical conditions. If environmental conditions vary significantly between tests, implement measures to control or document these variations to maintain test validity. Regularly check and calibrate measurement instruments to minimize errors.
Anchor Types Tested and How They Work
Anchor Types Tested and How They Work groups anchors into mechanical, screw, and chemical families, each with a one-line hollow-block use-case and installation context. Mechanical anchors (wedge or sleeve types) expand within the hollow cores to create friction and grip; screw anchors include self-tapping and masonry screws that thread into the block or into anchors set in a pilot hole; chemical anchors use epoxy or polyurethane systems to bridge voids and resist pull by adhesive bonding across the cavity. Representative products include common mechanical wedges and sleeve anchors, standard masonry screws, and epoxy or polyurethane anchors—use label guidance to verify suitability for hollow-block installations.
Each family relies on a distinct pull-resistance mechanism, and the scrap-wall results show how block cores, hollow spaces, and edge distances influence performance. Hollow-block geometry and wall construction affect failure modes, and installation variables such as pilot hole size, depth, surface cleanliness, and surface preparation materially change outcomes. Quick checks like ensuring a clean, dry hole and proper pilot sizing help prevent reduced pull-out, while edge considerations may favor shorter anchors in thin blocks. For quick reference, note that mechanical anchors rely on expansion, screw anchors on thread engagement, and chemical anchors on adhesive bridging; a pro inspection of block cores and consistent installation practices improve reliability for real-world use. Common mistakes to fix include rechecking surface prep and ensuring hole size matches the product label, with a stake that surface prep quality directly impacts pull-out performance and a pro check guiding deeper decisions on anchor selection based on wall construction.
Mechanical anchors (wedge, sleeve, power studs)
Mechanical anchors achieve pull resistance in hollow block by expanding within the drilled hole to create friction and mechanical interlocking with the block’s core. This expansion is typically driven by a wedge or sleeve action, which increases the anchor’s diameter once inserted into the hole.
The load transfer path for these anchors relies on the frictional forces generated between the expanded anchor and the block’s inner surface. In ungrouted cavities, this friction is crucial for maintaining pull-out resistance.
Common failure modes for mechanical anchors in hollow block include pulling through or shearing off due to insufficient expansion or improper installation. To mitigate these risks, ensure that the anchor’s expansion mechanism is suitable for ungrouted cavities and consider using larger diameter or longer anchors with greater expansion capabilities if premature failures occur.
Threaded concrete screws and adhesive (glue) anchors
Threaded concrete screws, also known as masonry screws, achieve pull-out resistance in hollow block by cutting threads into the block material. This thread engagement provides mechanical interlocking that helps resist pull-out forces.
Adhesive or ‘glue’ anchors, on the other hand, rely on chemical bonding to create a strong connection between the anchor and the block’s inner surface. In hollow block, grout or resin penetration can enhance performance by filling voids in the block core, further increasing pull-out resistance.
The performance of these anchors is influenced by several factors. For threaded concrete screws, the block material and edge distance play a significant role in determining their pull-out resistance. For adhesive anchors, the compatibility of the adhesive with the hollow block surface is crucial for achieving optimal bonding.
If anchors fail due to insufficient pull-out resistance, consider using longer screws with deeper thread engagement or applying additional adhesive to enhance performance. Additionally, ensuring proper surface preparation and pilot hole size can help improve anchor performance in hollow block applications.
Real-World Pull-Out Results and Comparative Analysis
Hollow Block Anchor Performance Summary
This section presents key findings from hollow-block tests, comparing various anchor types based on mean pull-out force, variability, and observed failure modes such as concrete breakout or pull-out from mortar joints. Results are ranked with clear considerations for sample size and block quality to ensure practical comparisons. Expect some variability due to factors like hollow core percentage, block size, and installation practices.
Leverage these rankings to select appropriate anchors for your hollow block walls, keeping in mind that mechanical anchors often excel in high-moisture or thicker walls. Drilling into mortar joints may require larger holes and higher setting torque. Note: Inadequate anchor selection can compromise pull-out strength, risking wall failure.
Installation Tips:
- Gently tug on anchors post-installation to ensure secure setting.
- Verify anchor compatibility with block size and hollow core percentage before installation. For high-moisture environments or thick walls, prefer mechanical anchors for enhanced pull-out strength.
- If drilling into mortar joints is necessary, use larger drill sizes and increase setting torque to compensate.
Common Mistakes & Solutions:
- If anchors pull out easily, re-drill with proper dimensions, use suitable anchor type, and ensure clean installation. Keep in mind that results from scrap walls may differ from new construction, so treat findings as directional and adjust with redundancy for safety.
Summary of Results by Anchor Type
The following summarizes the real-world pull-out results from our scrap-wall experiments, comparing different anchor types across various hollow block configurations.
Mechanical anchors, such as wedge and sleeve anchors, generally performed well in consistent block sizes. However, performance varied significantly with changes in block size and installation practices. Power studs showed high pull-out forces but had a higher standard deviation, indicating inconsistent results.
Threaded concrete screws and adhesive (glue) anchors demonstrated more consistent performance across different block sizes. However, their performance was sensitive to moisture content and installation cleanliness.
Performance Metrics and Failure Modes
The following key outcome measures were used to evaluate the anchors’ performance:
Displacement at failure indicates how much an anchor can move before failing. This is crucial for applications where minimal movement is critical.
Mode of failure, such as block breakout, anchor pull-through, or glue bond failure, provides insights into the anchor’s behavior under load. For instance, if anchor pull-through is unacceptable in a specific application, anchors prone to this failure mode should be avoided.
Installation Techniques, Torqueing and Common Mistakes
Installation techniques vary by anchor family, and proper sequence matters for hollow block. Expect step-by-step flow for masonry screws, drop-in anchors, sleeve anchors, and epoxy anchors, with notes on drill targets, pilot holes, and avoiding core collapse. Skipping proper hole cleaning can lead to reduced pull-out capacity, so verify hollow-core geometry and plan a drilling pattern before work, then check seating and torque as the work progresses.
This guidance helps DIY readers evaluate wall quality, identify edge and spacing risks, and choose appropriate anchors for varying block thickness and hollow-core types. It emphasizes practical troubleshooting, including re-drilling, retorque, or switching anchor types after encountering anomalies, and the importance of post-torque checks. Quick checks—feel for block flaws, verify hollow-core geometry, and document results—support safer, more reliable results, and if the block is too thin or flawed, consider a smaller anchor or epoxy option to protect pull-out performance.
Proper drilling, cleaning and torqueing
Correct drilling, cleaning, and torqueing are crucial for optimal anchor performance in hollow block construction.
Drilling: Use appropriate drill bits for each anchor type. Check the manufacturer’s instructions or product labels to verify recommended drill sizes. Ensure pilot holes are drilled straight and to the correct depth, staying within rebar-free zones.
Cleaning: Inspect holes for cleanliness before setting anchors. If a hole is dusty or debris-filled, clean it thoroughly to prevent reduced pull-out capacity. Use compressed air or a brush to remove dust and particles.
Torqueing: Apply recommended torque values using a calibrated torque wrench or power tool. Over-torquing can damage anchors and reduce their holding strength. If an anchor is over-torqued, remove it, clean the thread, and re-insert with correct torque application.
Common installation errors and remedial measures
To maximize pull-out capacity, avoid these common installation mistakes in hollow block construction.
- Incorrect hole depth: Re-drill holes to the correct depth, ensuring they are within rebar-free zones. Incorrect depth can lead to reduced holding strength or anchor failure.
- Dirty bore: Clean holes thoroughly before setting anchors. Dust and debris can reduce pull-out capacity and cause anchor failure under load.
- Over-torquing: Remove over-torqued anchors, clean the thread, and re-insert with correct torque application to prevent damage and maintain optimal holding strength.
- Missed grout: If grout is missed during drilling, switch to an adhesive anchor or re-drill through the grout line. Missing grout can result in reduced pull-out capacity and anchor failure.
Regularly inspect work for signs of incorrect installation, and check torque wrench calibration periodically to ensure accurate readings.
Impact of Wall Conditions, Block Geometry and Repairs
Hollow block geometry, core material, grout presence, and existing damage shape how anchors grip and fail during testing, with each factor shifting whether connections behave like through-wall or cell-wall anchors and altering the expected pull-out or shear resistance as blocks vary in cell count, wall thickness, and hollow core proportions.
A thoughtful retrofit approach considers how air, mortar, or loose fill inside cores changes fracture paths and load transfer, how full, partial, or absent grout influences rigidity, and how cracks, moisture staining, or previous repairs modify strength and failure mode, so testing interpretation translates into practical anchoring choices and spacing decisions for damaged or partially grouted walls; this often means selecting anchors that tolerate reduced concrete strength and adjusting retrofit plans accordingly, while using simple on-site cues such as visible damage or inconsistencies to guide immediate actions and checks.
Hollow block geometry and core material effects
The internal structure of hollow blocks significantly influences anchor performance. Understanding how these materials affect load paths helps in selecting appropriate anchors.
- Air-filled cores: Provide minimal resistance, leading to lower pull-out loads. Use anchors designed for low grip strength, like wedge or sleeve anchors.
- Mineral mortar in cores: Enhances grip but can crack under high loads. Look for anchors rated for medium grip strength and consider using expansion anchors.
- Loose aggregate: Offers variable resistance; use anchors tolerant of uneven grip, such as power studs or adhesive anchors.
- Internal obstructions: Can cause abrupt failure. Inspect cores visually or via endoscopy and avoid using anchors that rely solely on core material for grip.
- Thin webs: May lead to shear failures. Use anchors designed for thin webs, like sleeve or power studs, and consider additional support.
Degraded blocks, mortar joints and retrofit strategies
Assessing damage in blocks and mortar joints is crucial for determining appropriate retrofit solutions. Visually inspect for cracks, chipping, moisture staining, spalling, and previous repairs.
Mortar joint integrity should also be checked visually or via sounding. Damaged joints may require repointing or partial grouting.
For severely damaged blocks, consider the following retrofit strategies:
- Partial/full grouting: Reinforces cores and improves anchor grip. However, it may not be suitable for heavily damaged blocks.
- Backing plates: Provide additional support for anchors in damaged areas but may not address core damage.
- Alternate anchor strategies: Use anchors designed for specific geometries or consult manufacturers for recommendations on damaged walls.
Safety, Standards and Regulatory Compliance
On-site safety fundamentals include wearing appropriate PPE, using fall protection where required, controlling access to the testing area, and handling tools with care; establish a pre-test safety briefing and an exclusion zone around activity. A formal risk assessment and, where applicable, a permit-to-work should be in place, with a clearly assigned supervisor ready to implement immediate corrective actions if hazards arise. Always follow the manufacturer installation instructions and preserve test data records and labeling for traceability, and ensure the site has a plan for emergencies and site access control.
Readers should consult performance, installation, and testing standards and verify that anchors meet recognized benchmarks, while adhering to product declarations and manufacturer guidance rather than relying on general practices. Regulatory layers to check include building codes, inspection regimes, and permitting requirements, plus documentation such as certificates, warranties, and traceability records; maintain consistent data capture to compare results across hollow-block variations and moisture conditions. Stake and quick-check cues help: skipping safety fundamentals can lead to serious injuries or property damage, and a pro check ensures PPE is worn correctly before starting; if a risk assessment or permit is not obtained, do not proceed with testing until these steps are completed, and address any dust control or incorrect seating issues immediately to avoid health or structural hazards.
On-site safety and load testing safeguards
Ensuring the safety of workers and equipment is paramount during on-site anchor testing. Here are key precautions to take:
Personal Protective Equipment (PPE): All personnel should wear appropriate PPE, including hard hats, safety glasses, gloves, and high-visibility vests.
Establish an exclusion zone around the testing area, especially during destructive tests. This helps prevent accidents and ensures accurate test results. Regularly inspect equipment before, during, and after setup to maintain integrity.
Verify that the test rig’s load limit is suitable for the anchor being tested. Before returning an anchored element to service, inspect it to ensure there are no signs of damage or stress.
Standards, test codes and documentation to consult
Adhering to relevant standards and maintaining proper documentation is crucial for regulatory compliance and accurate interpretation of test results.
Consult relevant national and international standards, such as local building codes or EN/ASTM families. Verify that anchors meet recognized benchmarks before installation.
Review the manufacturer’s installation instructions and product declarations. Ensure all required documents are available on-site during testing.
Maintain records of test certificates, traceable documentation, and other relevant paperwork. This ensures traceability and facilitates future reference or inspections.
Cost Considerations, Selection Guide and Best Practices
Identify project cost drivers, including anchor type, load requirements, materials, grout or prep, and installation gear. Consider labor time and potential access constraints when planning a project.
Offer a concise decision framework for common hollow-block use-cases, comparing sleeve anchors, expansion anchors, concrete screws, toggles, and epoxy options. Include best-practice takeaways for clean holes, staggered layouts, and ongoing inspection routines.
Estimating costs and labour factors
To create a realistic project estimate for anchoring in hollow block walls, consider the following cost drivers:
Anchor unit price: Varies by type. Check local quotes to determine average costs.
Labour for hole prep and grouting: Includes drilling, cleaning, and mixing/grouting if required. Estimate time per anchor and multiply by labour rate.
Testing time: Allocate time for pull-out testing on representative samples to ensure anchors meet load requirements.
Access and repair costs: Consider any additional expenses due to limited access or necessary repairs before, during, or after installation.
Selecting Appropriate Anchors
Choose the most suitable anchor based on these factors:
- Load Level: Light (under 50 lbs), medium (50-200 lbs), or heavy (over 200 lbs). Opt for anchors rated to withstand the highest expected load.
- Block Condition: New, sound blocks have different requirements than degraded ones. Evaluate block geometry and core material effects before choosing an anchor type.
- Installation Permanence: Temporary or retrofit installations may need different anchors than permanent ones. Consider the need for easy removal or reusability.
Consult a decision matrix that matches these factors with recommended anchor families, such as sleeve anchors, expansion anchors, concrete screws, toggle bolts, and epoxy/wedging anchors. Mitigation strategies for uncertain conditions should also be considered.
Conclusion
The main message is simple: verify your wall’s condition, select the right anchor type from what you tested, and confirm it meets your real load needs before any permanent installation. Prioritizing safety protects durability, appearance, and future usability of the wall.
First, check the wall area in a calm, small-scale test: confirm hollow block integrity, geometry, and any repairs; compare your chosen anchors against the observed pull-out results and data protocol; then follow a measured installation sequence, torque to manufacturer guidance, and re-check after initial loading. Maintain a safety-first mindset, and base every decision on the data you collected and the standards that apply to your project.
Common mistakes to avoid include guessing load values, over-torquing anchors, and installing into damaged or unsupported sections of the block. Always verify the wall’s condition first, use the recommended tools and torque ranges, and test your setup in a controlled way before committing to a full install. Keep clear work zones, wear eye protection, and avoid sudden loads or dynamic forces once anchors are in place.
If the wall shows significant damage, uncertain block geometry, or if required loads exceed what your testing indicates, seek professional guidance rather than pushing ahead. When you proceed carefully, you gain reliability and long-term performance: use tested results as your rule of thumb, document any deviations, and approach future projects with confidence.
FAQ
How can you set up a scrap wall to test anchor pull-out in hollow blocks?
Use a section of hollow block wall that matches the project conditions. Build a small, stable frame to hold the test assembly and ensure the wall allows the anchor to be loaded in a similar orientation to real use. Follow manufacturer guidance for any temporary supports and safety checks.
What types of anchors are commonly tested in hollow blocks?
Tests often compare mechanical anchors, chemical anchors, and sleeve or expanding anchors. Each type has different installation steps, load paths, and failure modes. Always consult the manufacturer instructions for recommended use in hollow block masonry.
What is the basic procedure for conducting a pull-out test?
Attach the anchor as you would for a typical installation, then apply a controlled loading force until failure or a defined limit. Record the load at failure and observe how the anchor and block behave. Compare results against the expectations from the manufacturer and your project needs.
How do you analyze results and determine safe anchoring loads?
Review the failure mode and the pull-out or breakout behavior in the test. Assess whether the observed load aligns with project safety margins and manufacturer recommendations. If unsure, check product labels, datasheets, and local guidance before finalizing anchor choices.