
Introduction
This is about making stucco window sills that shed water properly and resist rot. You’ll focus on the right slope, install end dams, and plan for long-lasting rot prevention. Tackle it like a practical DIY project with common tools and careful flashing.
Choose materials and details that stand up to moisture, and verify with a product label or manufacturer guidance. Follow safe slopes and dam details as advised by local rules and the sill’s install method, and adapt to your climate. If in doubt, check the instructions and consider field-tested options.
Key takeaways
- Ensure proper slope away from the house to shed water effectively.
- Install end dams at window edges to stop stucco from bridging and leaking.
- Use corrosion-resistant flashing integrated with the sill for moisture control.
- Choose durable, rot-resistant materials and proper sealants to extend sill life.
- Regularly inspect for cracks and moisture intrusion; repair promptly to prevent decay.
- Safety: wear eye protection and follow ladder safety when working at openings.
Table of Contents
- Introduction
- Key takeaways
- Why Proper Stucco Sill Design Matters
- Tools and Materials Checklist
- Planning and Measuring the Right Slope
- Installing End Dams and Integrating Flashings
- Step-by-Step Stucco Application on Sills
- Preventing Wood Rot and Managing Moisture Around Windows
- Common Mistakes, Troubleshooting, and Repairs
- Costs, Safety, Visual Diagrams, and Long-Term Maintenance Plan
- Conclusion
- FAQ
Why Proper Stucco Sill Design Matters
A properly designed stucco sill acts as the first line of defense against water intrusion. It directs runoff away from the wall assembly and interior space, protecting the building envelope from moisture trips. The connection between slope, end dams, flashing, and long‑term performance is the backbone of durability.
Key features to verify include the slope or drainage gradient, end dams, flashing integrated with both window and stucco, drip edges, and caulk strategies that form a continuous moisture barrier. Sill geometry influences how water moves and how much capillary rise or wind-driven rain can reach the interior. Look for common failure modes such as poor slope, missing end dams, improper flashing, or inadequate caulking, and learn to diagnose them in the field. Use a practical planning checklist to confirm target slope guidance, dam dimensions, flashing type, material compatibility, and climate considerations before installing.
How water behaves at window sills
Water loves to follow the path of least resistance. At window sills, it typically collects and runs off along three areas:
1. The top surface, where runoff can be heavy if not properly sloped away from the wall.
2. The vertical faces, where capillary action can draw water upwards into the stucco or wall assembly.
3. The ends of the sill, where water can pool and find its way into the interior through gaps or cracks.
Risks of poor design (rot, leaks, staining)
Poorly designed window sills can lead to a host of problems. Here are the most common:
1. Wood Rot: Without proper drainage and protection, wood sills can rot from the inside out, leading to costly repairs.
2. Stucco Delamination: Water trapped behind the stucco can cause it to delaminate, leading to unsightly stains and potential structural issues.
3. Interior Leaks: Improper flashing or inadequate caulking can allow water to seep into the interior, damaging walls, ceilings, and contents.
Tools and Materials Checklist
Put together a DIY‑friendly core set of hand tools (trowel, margin trowel, hawk, grout/brick jointer, level, chisels, hammer, utility knife) and power tools (masonry mixer or drill with paddle, mixing bucket, drill/driver, oscillating tool). Quality matters: sturdy steel, sharp blades, and corrosion‑resistant bits save time and reduce mistakes.
Safety gear matters too: eye protection, hearing protection, gloves, dust mask or respirator, and proper footwear. For height work, plan ladder setup or fall protection and manage dust and silica exposure during mixing and scraping. Ensure lath, flashing, and end-dam prep uses corrosion‑resistant materials with proper fasteners and overlaps to prevent water bypass behind the stucco.
Tools list and PPE
Before you start, ensure you have all the necessary tools and personal protective equipment (PPE) to complete your stucco window sill project safely and efficiently.
- Trowels: 6-inch and 12-inch trowels for applying and smoothing stucco. Check they’re sturdy steel with sharp edges.
- Margin Trowel: For creating a smooth, even edge on the sill. Ensure it’s in good condition.
- Hawk: To hold and transfer material from the mix to your trowels. Check for stability and no cracks.
- Grout/Brisk Jointer: For smoothing and leveling the stucco surface. Make sure it’s straight and in good working order.
- Level: To ensure a proper slope on your sill. Check accuracy before use.
- Chisels & Hammer: For cutting and shaping lath or removing old material. Ensure chisels are sharp.
- Utility Knife: For trimming flashing and end dams. Check blade sharpness.
- Masonry Mixer/Drill with Paddle: For mixing stucco. Ensure it’s in good working order and corrosion-resistant.
- Drill/Driver: For securing lath and fasteners. Check battery life or cord condition.
- Oscillating Tool: For trimming and shaping material. Ensure blades are sharp and suitable for the task.
- Eye Protection: To protect from debris during mixing, cutting, and scraping.
- Hearing Protection: When using power tools to reduce noise exposure.
- Gloves: For handling material and protecting hands from cuts.
- Dust Mask/Respirator: To protect against silica dust during mixing and scraping.
- Appropriate Footwear: With good grip to prevent slips, especially when working at height.
Quick rule: Always check your tools before starting. Dull or broken tools can cause mistakes and waste time.
Materials and substrate components
Here’s a checklist of materials you’ll need for a successful stucco window sill project, including higher-grade options to consider.
- Flashing: To direct water away from the sill. Choose corrosion-resistant metal flashing or high-quality tape.
- End Dams: To contain the stucco mix and prevent it from running off. Ensure they’re secure and overlap properly.
- Lath/Mesh: For reinforcing your stucco. Opt for corrosion-resistant, alkali-resistant metal lath or mesh.
- Base Coat (Scratch Coat): A mix of cement, sand, and water with a 3:1 ratio. Consider adding polymer modifiers for improved performance.
- Finish Coat: A smoother mix with a 4:1 or 5:1 cement-sand ratio. Again, consider polymers for better durability.
- Sealants: For joints, corners, and around windows to prevent water intrusion. Choose compatible, high-quality sealants.
- Fasteners: Corrosion-resistant screws or nails to secure lath and flashing. Check they’re suitable for your substrate.
- Primer/Sealer: To prepare the surface and improve adhesion. Ensure it’s compatible with your stucco mix.
Quick rule: Don’t skimp on materials. Higher-grade options may cost more but save time and reduce mistakes in the long run.
Material specs and standards explained
Before purchasing, check these specifications to ensure your materials meet local codes and performance expectations.
- Cement: Look for Type N or Type S Portland cement. Check the bag for ASTM C150 compliance.
- Sand: Opt for clean, sharp, fine sand with a fineness modulus between 2.3 and 2.8. Check for ASTM C144 compliance.
- Polymer Modifiers: If using, ensure they’re compatible with your cement type and meet local code requirements.
- Flashing & End Dams: Check they’re made of corrosion-resistant materials like galvanized steel or plastic. Ensure they meet local building codes.
- Lath/Mesh: Look for G90 galvanized steel or stainless steel lath/mesh. Check for ASTM C865 compliance.
- Sealants: Ensure they’re compatible with your stucco mix and meet local code requirements, such as ASTM C1374 or C920.
- Fasteners: Check they’re corrosion-resistant and suitable for your substrate. Look for ASTM F1667 or F1852 compliance.
- Primer/Sealer: Ensure it’s compatible with your stucco mix and meets local code requirements, such as ASTM D4398 or C1062.
Quick rule: Always check local building codes before starting any project. Using non-compliant materials can lead to costly rework or even legal issues.
Planning and Measuring the Right Slope
The sill slope should promote positive drainage away from the window and the wall assembly. Rely on guidance from product data and local codes, and verify with manufacturer instructions before committing to a slope. Do not assume a fixed value; check the latest recommendations for your system.
Figure out whether you’re framing roughwork or applying the finish coat, and mark high and low points accordingly. Use a laser level, water level, or string line to establish a continuous slope along the sill, then create durable reference lines for install and coats to follow. Verify flashing, end dams, and drainage paths align with the slope plan before finishing.
How to measure and set slope in the field
To ensure a proper sill slope, you’ll need to lay out and verify it during rough framing or stucco application. Here’s how:
First, measure your existing sill height. Use a tape measure at both ends of the window opening to ensure consistency.
Next, transfer the slope to the sill form or substrate. You can use a straightedge and level, or a slope box. Mark high and low points along the length of the sill. Make these marks durable – use a pencil or marker that won’t wash off during construction.
Recommended slope ranges and what to check
Before you start, know the recommended slope range. It’s typically 1/8 inch per foot, but check your manufacturer’s instructions and local codes.
- Exposure and climate: More exposure or harsher climates may need a steeper slope.
- Window size: Larger windows might require a gentler slope to avoid excessive thickness at the outer edges.
- Sill material: Some materials, like metal or composite, may have built-in slopes that you’ll need to match.
- Flashing and end dams: Ensure they’re compatible with your chosen slope.
- Drainage paths: Verify they align with the sill slope to prevent moisture trapping.
- Window manufacturer requirements: Some windows may have specific slope recommendations.
- Local codes: Always comply with local building codes for slope and drainage.
- Consistency: Check that your slope is consistent along the entire length of the sill.
Quick rule: If you’re unsure, consult product data sheets, local code requirements, or seek professional input.
Visual checkpoints for correct slope
Before applying the finish coats, perform these quick visual and tactile checks to confirm your sill slope will shed water effectively:
- Drain channels: Ensure they’re clear of debris and aligned with the slope.
- Drip edge clearance: Check that there’s enough space for water to drip off without pooling or running back onto the sill.
- Water bead testing: Apply a small amount of water along the sill. It should bead up and roll off, following the slope.
- Flashing inspection: Verify that flashing is properly installed and won’t interfere with drainage.
Quick rule: If water doesn’t behave as expected, adjust your slope or consult a professional before proceeding.
Installing End Dams and Integrating Flashings
End dams direct water away from the window juncture and help the WRB and flashing system maintain continuity. They should sit at the outer edge of the sill and align with the intended drainage path.
Explain how end dams work with sill flashings, jamb flashings, and WRB seams to create a continuous waterproofing barrier. Compare material options—metal, polymeric, or pre‑formed dams—and outline compatible sealants and caulks, plus installation sequences to prevent delamination and failure.
Types of End Dams and When to Use Them
End dams serve a crucial role in directing water away from window sills. Here are three common types:
Integral Stucco End Dams are formed during the stucco application process, providing a seamless transition between the sill and wall. They’re ideal for new construction or when matching existing finishes.
Metal End Dams, usually made of aluminum or galvanized steel, offer durability and can be used in both new and retrofit situations. They’re great for areas with high wind-driven rain or where added strength is needed.
Backdams are applied to the backside of the sill, creating a barrier that prevents water from entering the wall cavity. They’re useful when there’s no room for an integral dam or in situations where additional protection is required.
Step-by-Step End-Dam Installation
Properly installing end dams ensures water is directed away from the window sill, preventing rot and leaks. Here’s a step-by-step guide:
- Prepare the substrate: Ensure the sill and jambs are clean, dry, and free of debris.
- Terminate flashings: Extend house wrap or WRB up the jambs and across the top of the rough opening. Flashing should extend beyond the end dams.
- Form/attach end dams: For integral dams, apply stucco to form a sloped dam at the outer edge of the sill. For metal or backdams, attach using appropriate fasteners and sealant.
- Seal to the sill and jambs: Apply a generous bead of compatible sealant along the end dams’ bottom edges, sealing them to the sill and jambs.
- Check for proper slope: Ensure the end dams are sloped towards the weep channels or drainage paths. Use a level if needed.
- Inspect your work: Perform a visual inspection and consider a water spray test to verify the installation’s integrity.
Flashing Integration with WRB and Window Flange
Integrating flashings with the water-resistive barrier (WRB) and window flange creates a continuous drainage plane, preventing water from bypassing these critical components.
Extend your house wrap or WRB up the jambs and across the top of the rough opening. Ensure it overlaps the flashing at the head and sill by at least 2 inches. Seal this overlap with an appropriate tape or sealant.
At the window flange, tuck the WRB behind the flange’s leg, creating a tight seal. This prevents water from getting trapped between the WRB and the window, which could lead to rot. Use a compatible sealant to reinforce this connection.
Regularly inspect these connections for any signs of damage or delamination. Reseal as needed to maintain their integrity over time.
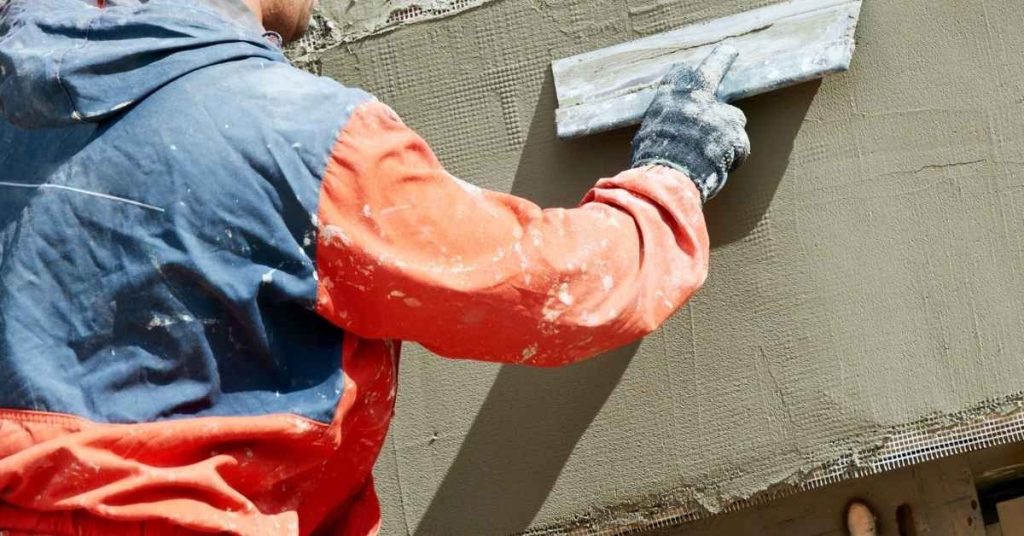
Step-by-Step Stucco Application on Sills
Outline the workflow from substrate prep through the three‑coat stucco sequence, with attention to timing and curing. Plan moisture management and flashing integration as you go, so the finish coats cap off a dry, solid base.
Substrate prep focuses on cleaning, patching, and ensuring a dry, sound base that accepts stucco. Choose lath or mesh that matches your climate and follow embedment, edge detailing, and fastener spacing guidance. Explain scratch, brown, and finish coat steps with key curing practices to minimize map cracking and keep the slope intact during final set.
Step-by-Step Process
This section guides you through the step-by-step application of stucco on window sills, ensuring a durable and long-lasting finish.
- Preparation: Check safety, gather tools, and ensure materials are ready. Why: Safety first, and having everything ready speeds up work.
- Substrate Prep: Clean, repair, and prime the substrate as per earlier instructions. Check: Surface is clean, dry, and sound.
- Lath/Mesh Installation: Attach corrosion-resistant lath or mesh, embed properly, space fasteners correctly, and anchor at the sill. Sign it’s right: Lath/mesh is secure, level, and follows movement joint spacing.
- Main Stucco Application: Apply scratch, brown, and finish coats following the sequence outlined below. Reason: Each coat serves a purpose in creating a strong, durable surface.
- Cleanup & Final Checks: Remove tools, clean up debris, and check for any missed spots or areas needing touch-up. Why: Proper cleanup maintains a safe jobsite and ensures no issues go unnoticed.
Substrate prep, lath, and mesh placement
Prepare the substrate by cleaning and repairing it. Ensure it’s clean, dry, and sound to receive stucco.
Lath/mesh: Use corrosion-resistant metal lath or fiber mesh. Embed it properly into the substrate for a solid bond. Space fasteners according to code requirements to allow for movement.
Anchor the lath/mesh at the sill per local codes and best practices. Detail edges to resist cracking by using approved methods such as edge bonding or reinforced corners.
Scratch, brown, and finish coat sequence
The three-coat stucco system consists of scratch, brown, and finish coats. Each serves a specific purpose in creating a durable, weather-resistant surface.
Scratch coat: Apply the first layer at a recommended mix ratio to achieve the target thickness. Use a brush or broom to create texture for better adhesion of the next coat. Allow it to cure initially according to manufacturer’s guidelines to minimize map cracking.
Brown coat: Once the scratch coat is cured, apply the brown coat at a suitable mix ratio and thickness. This layer helps to level out any imperfections and provides additional insulation. Allow it to cure before applying the finish coat.
Finish coat: Apply the final layer with a smooth, consistent texture. Ensure proper curing time is allowed to prevent efflorescence or shrinkage cracks.
Curing, sealants, and weep provision
Wet cure the stucco as recommended by the manufacturer to promote proper hydration and strength development. Keep the surface damp but not waterlogged.
Apply compatible sealants at the ends of the sill and around any penetrations according to the manufacturer’s instructions. This helps prevent moisture intrusion and rot.
Weep provision: Ensure there is adequate drainage at the bottom of the sill by providing weeps or other drainage methods. This prevents water from building up behind the stucco, which could lead to rot and other issues.
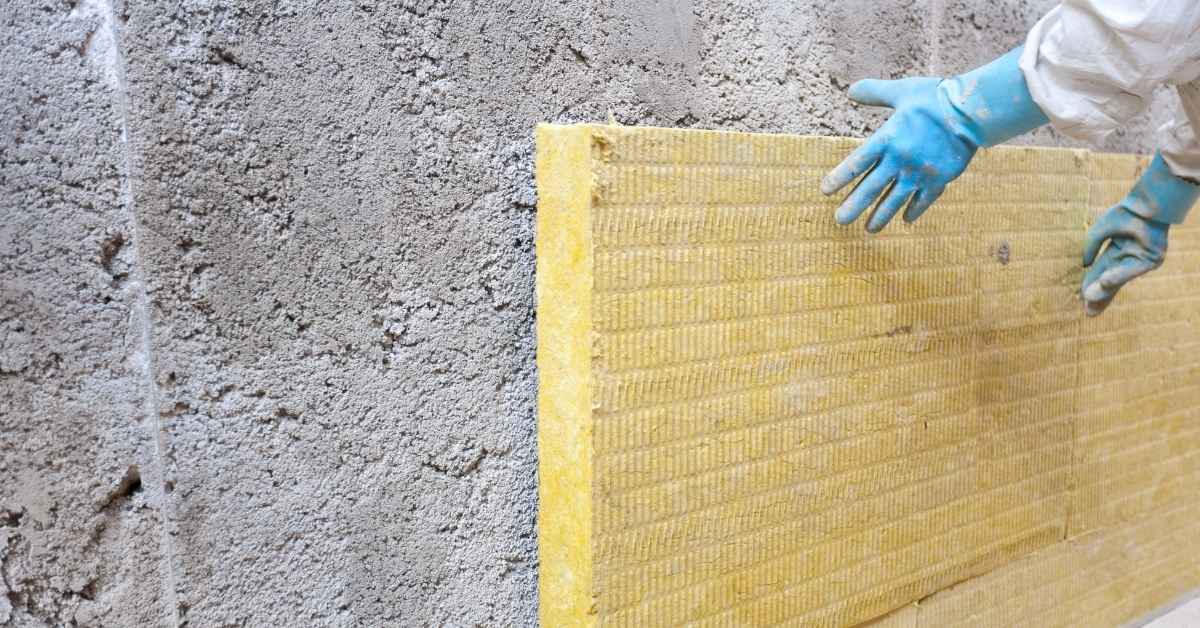
Preventing Wood Rot and Managing Moisture Around Windows
Moisture management should emphasize a proper drainage plane, continuous flashing, end dams, and a robust WRB around the opening. This setup keeps water out while allowing drying paths for any incidental moisture.
Design the sill and jamb to discourage wicking and include backer materials that won’t transfer moisture to wood. Choose rot‑resistant options where wood is involved, and integrate continuous flashing that works with the stucco system, plus proper drainage and ventilation to minimize moisture buildup.
Drainage plane, flashing, and backdam strategies
The drainage plane, flashing, and backdam work together like a team to keep water away from your window sills. Here’s how:
Drainage plane: This is the first line of defense. It sits behind your stucco, allowing any water that gets through to drain out. Make sure it’s continuous and extends all the way down to your sill.
Flashing: Flashing goes on top of your window frame and under your stucco. It directs water away from the window opening. Use continuous flashing that ties into your stucco system, and add kick-out flashing where necessary to direct water away from walls.
Backdam: This is a small dam at the end of your sill that stops capillary rise – that’s when water wicks up from the bottom. It’s usually made of metal or plastic and should be installed before you apply your stucco.
Material choices to resist rot
The right material choice can save you a lot of trouble down the road. Here are some options:
- Treated Lumber: Pressure-treated lumber is affordable and durable. Look for ACQ or CBA-A treated lumber, which have better resistance to rot and decay.
- Rot-Resistant Species: Woods like cedar and redwood naturally resist rot. They’re more expensive but last longer.
- Composite Trims: These are made from a mix of plastic and wood fibers. They don’t rot, crack, or split, and they hold paint well.
- Non-Wood Alternatives: In high-moisture zones, consider materials like fiber cement or PVC. They won’t rot but can be more expensive.
- What to Avoid: Stay away from untreated wood. It rots quickly and can lead to costly repairs.
Inspecting, diagnosing, and repairing rot
Regular inspections can help you catch rot early. Here’s what to look for:
Soft spots: If your sill feels soft or spongy, that’s a sign of rot. Use a screwdriver to poke at the wood – if it goes in easily, you’ve got a problem.
Cracking and mold: Cracks can let water in, leading to rot. Mold is another clear sign of moisture buildup. If you see either, investigate further.
If you find rot, act fast:
Local repairs: For small areas, you might be able to cut out the rot and replace it with a patch. Make sure to use a wood preservative first.
Partial or full replacement: If the rot is extensive, you may need to replace part or all of your sill. This is a bigger job but necessary to prevent further damage.
Common Mistakes, Troubleshooting, and Repairs
Diagnose frequent failure modes such as insufficient slope, missing or poorly terminated flashing, improper sealant choices, weak end dam integrity, and wood rot. Learn to spot signs like standing water, flashing oxidation, or hairline caulk cracks early.
Follow a diagnostic workflow: inspect visually, test for moisture, probe for rot, and verify flashing continuity around window perimeters. Use practical fixes—reseal with compatible products, repair end dams, reflash correctly, and address framing rot if present, restoring the stucco with proper joint control. Consider when to DIY vs. call a pro, and plan seasonal maintenance to prevent recurring failures.
Top DIY errors and how to avoid them
Here are the most common mistakes homeowners make when installing stucco window sills, along with preventative checks to perform during work.
- Insufficient slope: Ensure a minimum 1/4″ per foot slope for water runoff. Check before applying any material.
- Improper flashing: Verify flashing extends past the face of the wall and terminates correctly under end dams. Inspect before lathing.
- Wrong sealant: Use only 100% silicone or polyurethane caulks rated for exterior use. Check product labels.
- Neglecting end dams: Install end dams to prevent stucco from cracking and water intrusion. Check before applying stucco.
Regularly inspect your work throughout the project to catch and correct any mistakes early.
Diagnosing leaks vs. condensation
Distinguishing between water intrusion through the sill and interior condensation is crucial for effective repair. Here’s how:
Leaks: Check for standing water at the sill edge, peeling paint or wallpaper, or musty odors. Perform a simple rain simulation to observe water entry points.
Condensation: Look for moisture on interior window surfaces, especially during cold weather. Use an infrared thermometer to detect temperature differentials indicating condensation.
If you suspect a leak, probe the area gently with a screwdriver to check for soft rot or hollow spots, indicating hidden water damage.
Repair methods and when to call a pro
Some repairs you can do yourself; others require professional help. Here’s how to tell:
DIY fixes: Reseal or replace sealants, retrofit or repair end dams, reflash with proper terminations, address minor wood rot by replacing affected framing, and restore stucco around the window with proper control joints.
When to call a pro: If you find extensive rot, hidden water damage, or complex structural issues. Also, if your DIY repairs don’t stop recurring problems, it’s time to consult an expert.
Promptly address any signs of water intrusion to prevent further damage and costly repairs down the line.
Costs, Safety, Visual Diagrams, and Long-Term Maintenance Plan
Lay out a budgeting framework with notes to verify local prices and regional variations. Cover material costs for stucco mix, lath, sealants, and fasteners, plus labor expectations, avoiding precise price figures.
Safety and PPE are essential: eye protection, gloves, dust masks, fall protection for elevated work, and ventilation considerations during mixing and application. Include suggested visual diagrams and short videos that illustrate slope design, end dam placement, crack control joints, and rot prevention, alongside a long‑term maintenance plan with inspection intervals and seasonal tasks.
Cost estimates and budgeting tips
Estimating costs for stucco window sills involves both material and labor expenses. Materials like stucco mix, lath, and sealants typically range from $2-$5 per square foot, while labor can vary widely depending on your location and the complexity of the job.
Materials: A basic setup might cost around $300 for a 10-foot sill (low), while high-end options with premium materials could reach $800 or more. Always verify local prices to get an accurate estimate.
Labor: Expect to pay between $25-$75 per square foot, depending on your region and the contractor’s experience. For a 10-foot sill, that’s around $250-$750 (low-medium) up to $1,000 or more (high). Get quotes from local pros for the most accurate budgeting.
Safety precautions and PPE
Stucco work can be hazardous, so safety gear is a must. Start with eye protection, gloves for handling materials, and a dust mask or respirator to protect against silica dust.
If you’re working at heights, use fall protection. When mixing or applying concrete/stucco, ensure proper ventilation to avoid inhaling harmful particles. Always follow manufacturer guidelines for safe handling and storage of materials.
Remember, safety isn’t just about you – it’s about everyone on your jobsite. Keep work areas clean, maintain good housekeeping, and communicate clearly with anyone nearby.
Long-term maintenance checklist and visual resources
Regular inspections and maintenance keep your stucco sills in top shape. Use this checklist annually to catch issues early:
- Inspect for rot: Check around windows, especially where water might collect or enter.
- Check sealants: Ensure they’re intact and not cracked or peeling.
- Examine flashing: Make sure it’s still in place and doing its job.
- Inspect weep holes: Ensure they’re clear to allow moisture escape.
- Check drainage plane: Verify it’s intact and functioning properly.
- Examine end dams: Ensure they’re still in good condition.
- Check for cracks: Inspect for hairline or larger cracks that need repair.
- Inspect caulking: Ensure it’s intact and not allowing water intrusion.
Quick rule: Consult diagrams, step photos, and videos to understand proper slope design, end dam placement, flashing details, and rot prevention. This helps you maintain your sills effectively over time.
Conclusion
Properly designed and installed stucco sills protect the window, prevent rot, and keep the look clean for years. If you get the slope, end dams, and flashings right, you reduce water intrusion and cost from repairs while improving durability and curb appeal.
First, follow a simple check sequence: verify the outside slope sheds water, confirm end dams are in place, install flashings as planned, mix and apply the base coat consistently, give each layer the recommended cure time, and test the area with a gentle water check before finishing. Make sure all joints are tight, edges are sealed, and the final finish matches the surrounding wall while leaving a clean drip edge.
Common mistakes to avoid are skipping the end dams, neglecting a proper slope, leaving gaps or poor flashing, rushing the crack and joint work, and bypassing moisture barriers. Safety rules to keep you out of trouble are to wear eye protection, a dust mask or respirator when mixing or sanding, steady ladder setup, and never work on wet or windy days that can cause slip or wind damage.
If you’re unsure about flashing details, end dam placement, or you see signs of rot beyond the sill, it makes sense to call a professional. When in doubt, don’t push ahead with risky improvisation. Stay methodical, test as you go, and you’ll finish with a solid, durable sill and a window that stays dry and looking good for years to come.
FAQ
How do I ensure the right slope for a stucco window sill?
Make the sill shed water away from the wall. Use a level and a straightedge to check that the top edge is higher than the front edge, so water runs off. Test with a small amount of water to confirm it drains toward the outside, not pooling near the jamb.
What’s the right way to install end dams for a window sill?
Place the end dam at the outer edge of the sill and embed it in the mud bed so it’s flush with the surface. Use compatible flashing and seal where the dam meets the sill and the jamb. Make sure the dam is solid and won’t lift with moisture during curing.
What materials help prevent rot and moisture at window sills?
Choose exterior-grade framing and sheathing, plus rot-resistant members or protective sleeves where water sits. Seal all edges with a durable primer or sealer and install flashing to direct water away from wood. Always follow the manufacturer instructions for bonding and curing of the stucco.
What tools and equipment do I need for stucco on sills?
Have trowels, a hawk, a margin trowel, a level, a straightedge, and a sharp utility knife. You’ll also want a hammer or drill with bits, screw gun or nails, and caulking supplies. Keep a clean bucket, mixing paddle, and protective gear handy, and follow all safety guidelines.