
Introduction
Yes, stucco can be installed over ICF walls—but ICF foam is not a generic substrate for arbitrary mesh, lath, or fasteners. Start by selecting one complete, manufacturer-approved assembly for your ICF brand: traditional cement plaster on mechanically attached lath, direct-applied cementitious stucco, or an adhered synthetic/EIFS-style system with fiberglass mesh embedded in base coat. Each has different attachment, drainage, reinforcement, coating, and curing requirements.
Do not choose fastener length, mesh laps, base-coat thickness, joint locations, or flashing dimensions from generic rules. Confirm the ICF product line, foam type, web or fastening-strip layout, and the finish-system details first. Openings, penetrations, terminations, and transitions deserve the most attention because a missing flashing connection, omitted diagonal reinforcement, or unsupported lath attachment can lead to cracks or water entry.
Table of Contents
- Introduction
- Key takeaways
- Why Choose Stucco over ICF Walls — Benefits and Trade-Offs
- Preparing ICF Walls for a Successful Stucco Application
- Step-by-Step Mesh Installation Techniques for ICF Walls
- Choosing Fasteners and Anchors for Stucco over ICF
- Crack Control and Movement Treatment at Door and Window Openings
- Sealing, Base Coats, Finishing, and Visual Quality Checkpoints
- Codes, Inspections, and Georgia-Specific Requirements for Stucco on ICF
- Cost Planning, Tools Checklist, Safety, and Common Mistakes to Avoid
- Conclusion
- FAQ
Key takeaways
- Select one tested finish path: traditional lath-and-plaster, direct-applied cementitious stucco, or adhered synthetic/EIFS-style finish.
- Use the specific ICF manufacturer’s approved attachment method. Foam alone is not assumed to provide durable structural backing for lath or heavy plaster.
- Determine whether the selected wall assembly needs a separate WRB, bond-break, drainage space, or weep screed; none is a universal retrofit step.
- Complete window and door bucks, flashing, sealants, and transition details before installing reinforcement.
- Use system-specific mesh, lath, fastener, lap, base-coat, curing, and joint requirements—not generic spacing or thickness ranges.
- Stop and obtain qualified help for multi-story work, uncertain backing or utilities, complex openings, water-producing cracks, or code-controlled assemblies.
Why Choose Stucco over ICF Walls — Benefits and Trade-Offs
Stucco can provide a durable exterior finish and a broad range of textures and colors on an ICF wall. Its insulating contribution is small compared with the ICF wall and depends on the complete assembly; use the ICF manufacturer’s reported performance for energy decisions rather than a generic R-value claim.
The trade-off is detail sensitivity. The finish must manage water at windows, doors, penetrations, grade transitions, and dissimilar materials, while the reinforcement and attachment must suit the exact system. A finish that works on masonry or framed sheathing is not automatically approved for EPS-faced ICF.
Choose the system before buying materials
- Traditional cement plaster: Uses approved corrosion-resistant metal or wire lath and mechanical attachment. The lath must engage the ICF manufacturer’s approved backing, such as fastening strips/webs, approved furring, or engineered anchors.
- Direct-applied cementitious stucco: Uses a named product designed to bond to prepared EPS. Preparation may include rasping or another manufacturer-specified treatment. Do not add lath unless that product requires it.
- Adhered synthetic/EIFS or thin-coat acrylic: Generally uses a specified base coat with embedded fiberglass reinforcing mesh, followed by compatible finish materials. It is a proprietary assembly, not simply paint over mesh.
For an example of why these paths cannot be blended, see Fox Blocks’ distinction between traditional lath stucco and mesh-based finish systems on ICF. Select the system from current manufacturer documents, then follow that system from substrate preparation through finish coat.
Preparing ICF Walls for a Successful Stucco Application
Before work starts, identify the ICF manufacturer and product line; obtain the current installation manual, evaluation report if applicable, web/fastening-strip layout, and approved exterior-finish details. Confirm the planned finish system, project exposure, permit requirements, fire and energy requirements, and any warranty conditions. Do not proceed with an unapproved combination of ICF and finish materials.
Cleaning, drainage plane, and weather-resistive barrier (WRB)
Inspect the EPS for contamination, open joints, damaged areas, protruding components, and unevenness. Repair defects with materials approved by the ICF and finish-system manufacturers. Clean away dust and loose debris. Rasp, prime, or otherwise prepare the foam only when the selected system requires it.
Do not assume a WRB is always required—or never required—behind ICF stucco. Determine whether the ICF itself is recognized as the WRB for the selected assembly and whether the code path or finish system requires a separate WRB, bond-break, drainage mat, or cavity. The answer also controls how window flashing, base drainage, and terminations connect together.
Starter strips, weep screeds, and termination details
Use the selected system’s details to establish the base termination, clearance above grade, weep screed if required, and transitions to masonry, siding, roof flashing, decks, and paved surfaces. A drainage feature is useful only when it is continuous with the intended drainage path; do not add a screed or membrane that blocks or bypasses that path.
Inspecting and repairing ICF surfaces and penetrations
Install and inspect windows, doors, bucks, sill pans, head and jamb flashing, penetrations, and their compatible sealants before reinforcement begins. Mark utilities and no-drill areas. Locate fastening strips or webs from as-built information and the manufacturer’s layout; verify locations by measurement, scanning, or controlled probing in a safe test area. Do not drill blindly into an ICF wall.
Step-by-Step Mesh Installation Techniques for ICF Walls
“Mesh” can mean embedded fiberglass reinforcing mesh or mechanically attached metal/wire lath. They are not interchangeable. Use only the type, weight, accessories, laps, orientation, and attachment method specified by the selected system.
Step-by-Step Installation Process
- Confirm the system and details: Keep the current ICF and finish-system instructions at the work area. Mark approved backing, joints, corners, openings, penetrations, and termination lines.
- Prepare the substrate: Clean and repair the EPS, then rasp, prime, or apply other preparation only as specified. Confirm flashing and drainage components are complete.
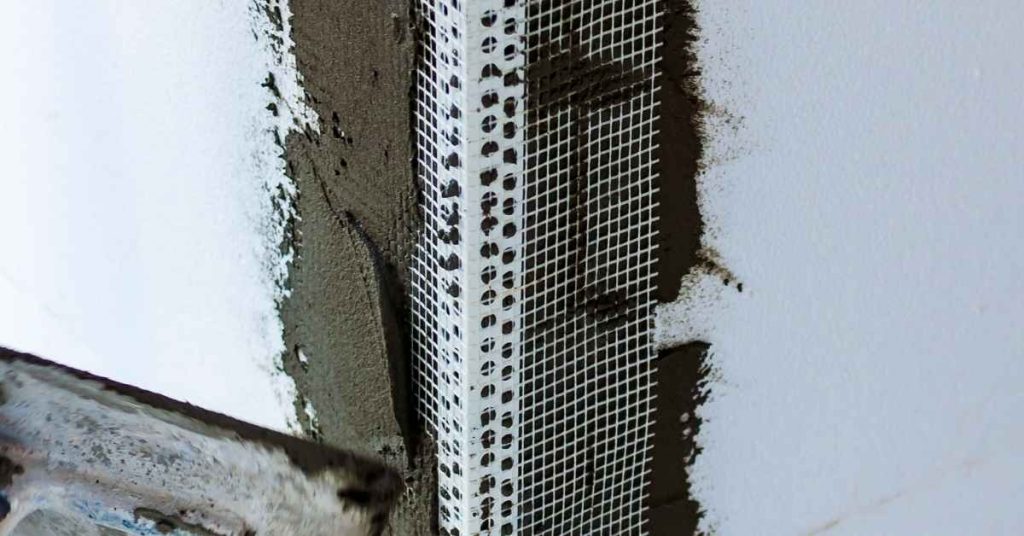
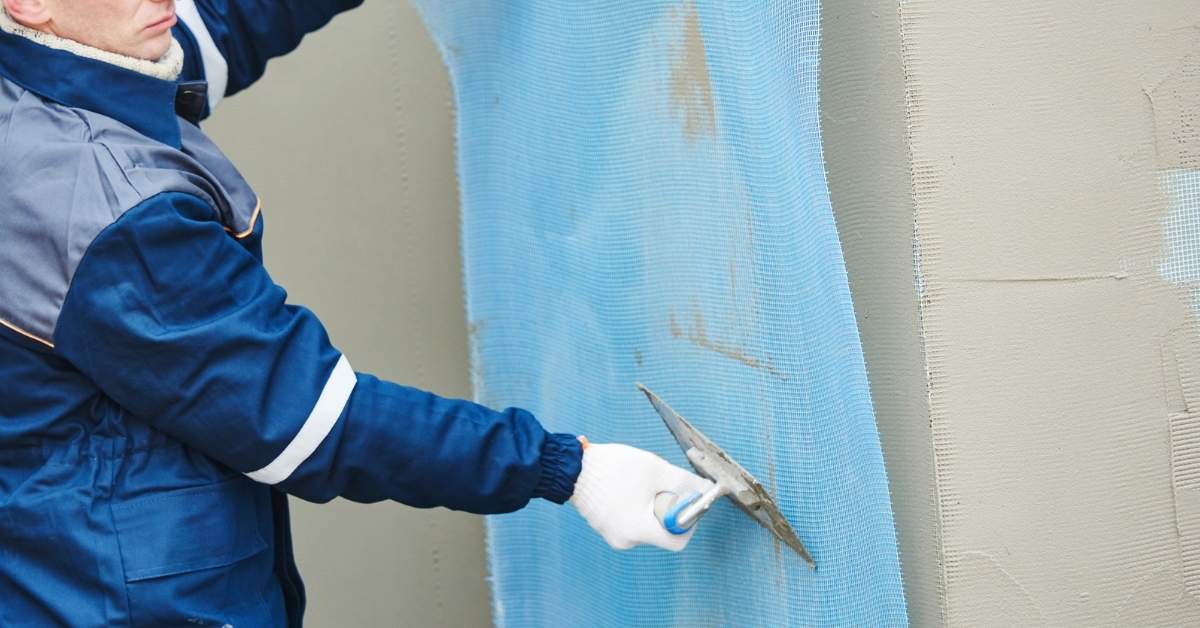
- Install the specified reinforcement: For lath, fasten only to approved backing. For direct-applied or adhered systems, spread the specified base coat and embed fiberglass mesh while it is wet; do not mechanically fasten mesh unless the system calls for it.
- Detail high-stress locations: Install approved corner accessories, transition reinforcement, and opening-corner reinforcement before field reinforcement conceals the work.
- Inspect before coating: Correct wrinkles, fish-mouths, loose lath, exposed mesh where base coat should cover it, incomplete laps, unfastened edges, and gaps at transitions.
Cutting, positioning, and overlapping mesh
Cut reinforcement cleanly and keep it flat. Use the manufacturer-specified overlap; a lap requirement for one fiberglass mesh or flashing detail does not establish a rule for another mesh or for metal lath. Avoid concentrating seams at opening corners, transitions, or other high-stress locations unless the system detail specifically shows that arrangement.
Securing mesh before base coat — patterns and spacing
For a mechanically attached lath system, use the approved lath orientation, self-furring or furring requirements, fastener type, washer where required, spacing, edge distances, and laps from the system and ICF documents. Do not transfer wood-frame fastening schedules to ICF foam. For direct-applied and adhered systems, mesh is normally held in the wet base coat and fully embedded according to the product instructions.
Special details at corners, reveals, and parapets
Use only system-compatible corner bead, reinforcing fabric, trims, and cap details. Reinforce inside and outside corners, reveals, parapet transitions, material changes, and penetrations as the system specifies. These locations need deliberate drainage and termination details as well as reinforcement; extra mesh alone does not correct a missing flashing or movement joint.
Choosing Fasteners and Anchors for Stucco over ICF
Fasteners matter only for systems that use mechanically attached lath or accessories. The foam face of an ICF wall should not be treated as structural backing for arbitrary fasteners or the weight of traditional plaster. Attachment must engage approved fastening strips/webs, approved furring, or engineered concrete anchors as directed by the ICF and finish-system manufacturers.
Fastener types, lengths, and embedment guidelines
Use the exact fastener, corrosion protection, head or washer, length, embedment, edge distance, and installation method listed for the approved assembly. Anchor selection depends on lath thickness, backing geometry, concrete cover, design load, exposure, and the ICF manufacturer’s limits. There is no safe universal screw-length rule for ICF stucco.
Where the project depends on concrete anchorage or has unusual loading, verify withdrawal/pull-out capacity using the approved anchor data and the project design. A representative test fastening can confirm that the planned location engages approved backing, but it does not replace an engineered or manufacturer-required attachment schedule.
Fastener spacing, patterns, and pull-out considerations
Mark the wall grid before installation and fasten only where approved backing has been verified. Follow the selected system’s spacing and pattern; do not use a generic maximum spacing, “brick” pattern, or foam embedment rule. Predrill only if the fastener instructions require it, and avoid overdriving fasteners, which can deform lath or strip backing.
Corrosion resistance and material compatibility
Use corrosion-resistant lath, accessories, and attachments required for the exposure and finish system. Confirm compatibility among fastener coatings, lath, base coat, flashing, sealant, and adjacent metals. Exterior plaster provisions in the 2024 IRC wall-covering chapter reference exterior-plaster and lath standards, but the approved ICF assembly remains the controlling installation detail.
Crack Control and Movement Treatment at Door and Window Openings
Openings are high-risk because wall movement, bucks, flashing transitions, and finish restraint meet at the same location. Complete the ICF opening detail first; stucco reinforcement is installed after the ICF concrete work and is not created by placing concrete against mesh during the pour.
Placement of control joints and movement joints near openings
Locate control joints, expansion joints, and sealant joints from the selected finish-system drawings and the project design. Their placement depends on wall geometry, substrate transitions, opening layout, building movement, and the particular plaster or EIFS system. Do not lay them out from generic distances measured from windows and doors. Related guidance: Control Joints Vs Expansion Joints in Concrete: Placement, Spacing, and Timing.
Reinforcing jambs, sills, and heads with mesh and back-blocking
Follow the system’s head, jamb, sill, buck, and lintel detail. Install diagonal reinforcement at opening corners where the selected system requires it, then integrate the field reinforcement so it remains continuous and flat. Use the specified mesh and accessories; do not substitute a generic mesh size or an improvised “back-blocking” step.
Flashing integration, backer rods, and sealant choices
Install sill pans, jamb and head flashing, and transition materials in the sequence shown by the window manufacturer, ICF detail, and finish system. Each flashing layer must direct water to the intended drainage plane rather than behind it. Use backer rod and compatible exterior sealant only where the joint detail calls for a sealant joint; size and joint geometry come from that detail and the sealant manufacturer.
Repairing a crack without hiding the cause
- Hairline, stable, and dry: Photograph and monitor it; use only a compatible repair material if repair is needed.
- Wider or recurring