
Introduction
Control joints are planned gaps in stucco that help prevent random map cracking on large walls. Place them at regular intervals and where the wall planes change. Check manufacturer instructions and local rules for spacing and placement guidance.
This is a hands-on task you can plan during framing and stucco work. Mark the joints on the wall before you start applying the base coat, then cut or install joints as you go. If you’re unsure, verify spacing with the manufacturer instructions and local rules.
Key takeaways
- Plan control joint spacing around large walls before any stucco application begins.
- Use appropriate joint profiles and anchors per manufacturer instructions and local code.
- Sealants must be compatible with stucco and joint material; check curing times.
- Inspect after installation with non-damaging visual checks and water tests.
- In large walls, stagger joints and avoid creating continuous cracking paths.
- Keep tools and materials organized; document joint locations for future maintenance.
- Wear gloves and eye protection when cutting profiles or handling adhesives.
Table of Contents
- Introduction
- Key takeaways
- Understanding Map Cracking in Stucco
- Why Control Joints Matter for Large Walls
- Planning Control Joint Layout Before Construction
- Types of Control Joints and Where to Use Them
- Installation Details: Profiles, Anchors, and Sealants
- Material Specs and Tools Checklist
- Visual Checkpoints and Quality Assurance During and After Installation
- Troubleshooting, Repairs, and Long-Term Maintenance
- Conclusion
- FAQ
Understanding Map Cracking in Stucco
Map cracking is a network of fine cracks on the stucco surface. It happens when the plaster contracts as it dries and when the wall moves with temperature and sun. Shrinkage, thermal movement, and differential substrate movement are the main culprits, and control joints are the fix to stop it from propagating.
Knowing why it happens helps you plan and talk to your crew. The payoff is fewer cracks and less call-back work when you install proper control joints and address movement early.
Visual characteristics of map cracking
Map cracking in stucco appears as a series of cracks that form a random, interconnected pattern, resembling a ‘map’. Unlike hairline or structural cracks, these cracks are wider and follow no straight lines. They often start at the surface and extend deep into the stucco.
The key visual clue pointing to movement-related causes is the irregular, map-like pattern. These cracks typically radiate out from a central point, indicating that the stucco has moved or shifted in some way.
Another telltale sign is the presence of multiple cracks within a small area. This indicates that the stucco is under stress and unable to accommodate the movement without cracking.
Primary contributing factors
Map cracking in stucco is primarily caused by four main factors: material properties, substrate type, ambient conditions, and workmanship.
Material properties play a significant role. Stucco with high shrinkage potential or low flexibility can crack more easily under stress. Similarly, substrates with poor compressive strength can contribute to cracking.
Ambient conditions also influence stucco performance. Extreme temperatures and humidity changes can cause the stucco to expand and contract, leading to cracks. Additionally, rapid drying of the stucco can increase shrinkage and thus cracking risk.
Inadequate workmanship can contribute significantly to map cracking. Poor mixing, improper application techniques, or insufficient curing can all lead to increased stress on the stucco, resulting in cracks.
Why Control Joints Matter for Large Walls
Control joints give you planned relief points to guide cracking and relieve stress in concrete walls. This is especially important on large, uninterrupted wall spans where cracks tend to start and run.
For a DIY project, joints mean fewer surprises and easier fixes if movement happens. They help keep the wall looking straight and stay stronger over time.
Movement management versus aesthetic protection
Control joints serve two main purposes: managing movement and protecting the wall’s appearance. Let’s break these down.
Managing movement: Stucco is rigid, so it cracks if not given room to move. Control joints direct where this movement happens, preventing random ‘map cracking’.
Protecting appearance: By controlling where cracks form, we keep them out of sight and prevent unsightly patterns. It’s like giving the wall a planned haircut instead of letting it get shaggy.
Interaction with building structure and envelope systems
Control joints work best when they align with other parts of the building. Here’s how:
Structural movement joints: These are gaps in the wall system that allow for expansion and contraction. Control joints should line up with these to maximize their effectiveness.
Windows, doors, and envelope transitions: Control joints should also align with these openings and transitions. This helps prevent cracking around them and maintains a neat, uniform appearance.
Planning Control Joint Layout Before Construction
Plan your control joint layout before you start lath and plaster. Measure wall geometry and locate where walls, openings, and substrate breaks are. Put those joints into your design drawings so they line up with framing and detailing.
Doing this early saves you from cracks and awkward finishes after plastering. It keeps joints aligned with structure and substrate changes, so the work goes smoother and lasts longer. If you’re unsure about how to place joints, check the label or datasheet for your chosen products and follow local guidance.
Mapping wall bays and logical joint lines
Large walls need to be divided into smaller sections, called bays, to control cracking. Don’t just draw random lines – plan it out.
Look at your wall’s geometry. See those long stretches with no breaks? Those are potential bays. Mark them off on your drawing.
Remember: Joints should follow predictable movement paths, like where walls meet or change direction. That’s where you want your joints to be.
Coordinating with openings, corners, and offsets
Windows, doors, wall returns, and offsets – they all need attention when planning your joints.
Joints should terminate at these features, not pass through them. So, plan your joint lines to end right at the edge of openings or corners.
For offsets, like a wall that steps back or out, you’ll want a joint at that change in plane. But again, it should terminate there, not continue on the offset wall.
Types of Control Joints and Where to Use Them
Control joints in stucco help manage cracks. There are vertical joints, horizontal joints, termination/expansion joints, and isolation joints. Use them where movement or separation is expected.
Choosing the right joint type keeps stucco from cracking and helps you maintain the look longer. It matters at corners, edges, transitions to other materials, and long walls where movement can occur. When in doubt, check the label or datasheet for installation guidance.
Vertical control joints: placement strategy
Vertical control joints are your first line of defense against random cracking. Here’s how to place them:
Align with framing or substrate breaks. Run vertical joints along studs, blocking, or other structural breaks. This helps manage movement where it’s most predictable.
Keep continuous runs under 20 feet. Longer runs can’t handle wall movement as well. Break them up with more joints if needed.
Maintain consistency across the elevation. Joints should line up vertically, helping distribute stress evenly.
Horizontal and offset joints: when to specify
Sometimes you need more than just vertical joints. Here’s when:
For tall walls, add horizontal joints every 8-10 feet. This helps manage the extra weight and movement.
On stepped foundations or where differential movement is expected, use offset joints. They help control cracking at these tricky spots.
Remember, every additional joint reduces stress on the stucco, but adds labor cost. Only add them where needed.

Installation Details: Profiles, Anchors, and Sealants
Choosing compatible joint profiles and terminating the lath correctly is where the job starts. You anchor the system solidly and finish with proper sealants and backer rods. Do it right and the joint lasts.
Good choices upfront prevent leaks, cracks, and failed joints down the line. Proper lath termination and solid anchoring make the sealants work and stay in place. Get the details right now, and the DIY work will save you headaches later.
Ensuring secure lath termination and joint continuity
The key to effective control joints is maintaining a clear separation plane. Here’s how:
First, cut the lath at each joint line. Don’t bridge it. This lets the wall move independently on either side.
Next, fasten the lath to the substrate with anchors or screws. Make sure they’re secure and evenly spaced. This keeps the lath from moving and maintains that crucial separation.
Lastly, ensure your joint profiles are properly aligned and installed. They should sit flush with the lath on both sides of the joint line.
Sealant and backer rod considerations at joint faces
A good sealant job is crucial for preventing water intrusion and allowing movement. Here’s what you need to know:
First, use a compatible sealant. It should match your stucco mix and be flexible enough to handle wall movement.
Next, ensure the joint depth is correct. It should be about 1/4 inch wider than the joint profile. This gives you room for the backer rod and sealant.
Finally, install a backer rod. It goes in the joint before the sealant. This creates a barrier to prevent adhesion between moving surfaces and keeps the sealant from being squeezed out when the wall moves.
Material Specs and Tools Checklist
This section helps you verify product information before you start. Look for compatibility with the substrate, movement capability, and how well it will bond. Make sure you have the right materials and the basic tools on site.
Doing this helps prevent cracks, peeling, and delays. It also keeps you from mixing incompatible products or using the wrong adhesives. Check the label or datasheet for exact guidance on each item.
What to verify on product data sheets
Before you start, check these details on your stucco and joint products’ data sheets.
- Compatibility: Ensure your chosen joint system works with your stucco mix and base materials.
- Recommended Joint Types: Check which joint types (e.g., straight, angle, expansion) are recommended for your wall layout.
- Movement Capacity: Verify the joint’s movement capacity matches your wall’s expected movement.
- Adhesion: Confirm the joint’s adhesion properties suit your base materials.
- Joint Width: Ensure the recommended width aligns with your planned joint spacing.
- Joint Depth: Check the required depth to ensure proper embedding in your stucco mix.
- Installation Temperature: Verify installation conditions match your jobsite’s expected temperatures.
- Curing Time: Understand how long it takes for joints to cure and gain full strength.
Quick rule: Don’t assume products are interchangeable. Always check data sheets.
Installer tools and consumables checklist
Before you start installing, make sure you have all these tools and materials on site.
- Joint Profiles: The right profiles (straight, angle, expansion) for your joint layout.
- Sealants: Compatible sealant for filling and sealing joints.
- Backer Rod: To create a uniform joint depth and prevent overfilling.
- Fastening Tools: Nail gun or staple gun, depending on your lath type.
- Cutting Tools: Utility knife or scissors for cutting sealant tubes and backer rod.
- Straightedges: Tape measure and straightedges (e.g., t-square) for accurate joint placement.
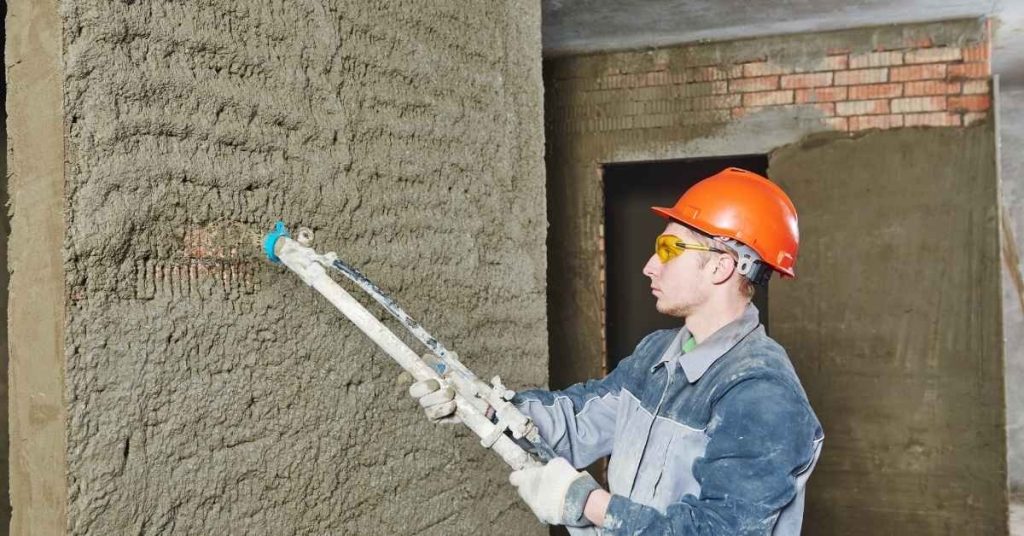
- Safety Gear: Safety glasses, gloves, and ear protection as needed.
- Joint Cleaning Tools: Brushes or compressed air to clean joints before sealing.
Quick rule: Missing tools or materials can lead to improper installation and failed joints.
Visual Checkpoints and Quality Assurance During and After Installation
During and after install, perform visual checkpoints and quality assurance to confirm joints were placed and installed correctly. Inspect alignment, gaps, tooling marks, and surface finish. Take clear photos to document conditions for warranty claims and future troubleshooting.
That on-site record helps you catch mistakes early and makes warranty questions easier later. It also gives a clear reference when you compare the finished work to manufacturer instructions and your plan. If anything seems off, check the product label or datasheet for guidance on acceptable finishes or curing, and follow local rules.
Pre-application inspection checklist
Before you start applying stucco, use this checklist to ensure your substrate and preparation are ready. This will help prevent costly mistakes and rework.
- Check substrate condition: Ensure the surface is clean, dry, and free of any defects like cracks or holes. Use a flashlight to inspect closely.
- Inspect joint placement: Verify that expansion joints are properly placed every 8-10 feet to control cracking due to natural movement of the structure.
- Check joint alignment: Ensure all joints are straight and align with each other. Misaligned joints can lead to uneven stucco application and increased risk of cracking.
- Verify lath termination: Confirm that the metal lath extends at least 2 inches beyond the edge of the substrate, providing a solid base for the stucco to adhere to.
- Check lath alignment: Make sure the lath is straight and evenly spaced (usually 1/4″ or 3/8″ apart). Misaligned or unevenly spaced lath can cause an uneven finish.
- Inspect fasteners: Ensure all fasteners are securely attached, with no loose or missing ones. Loose fasteners can cause the stucco to pop off over time.
- Check weather readiness: Make sure temperature and humidity conditions are within the manufacturer’s recommended range (typically 40-90°F and below 85% humidity).
- Verify primer application: Ensure a compatible primer has been applied to seal the substrate and improve stucco adhesion.
Quick rule: Always follow manufacturer’s instructions for specific product requirements. This checklist provides general guidelines, but local conditions and product specifics may vary.
Post-application visual checkpoints
Once your stucco has cured for the recommended time (check manufacturer’s instructions), use this checklist to ensure a quality job.
- Check Joint Adhesion: Gently press along all joints. They should feel solid and not give way. If they’re soft or crumble, recheck your mixing ratio and application technique.
- Inspect Straightness: Use a level to ensure walls are plumb and flat surfaces are straight. Any significant deviations may indicate settling issues that need addressing.
- Examine Sealant Finish: Check all sealant areas, like corners and openings, for proper adhesion and smooth finish. Bubbles or gaps could lead to water intrusion.
- Look for Cracks: Inspect the entire surface for hairline cracks. These can be normal but should be minimal. Wide or numerous cracks may indicate a problem with substrate preparation or application.
- Check Control Joints: Ensure control joints (slots cut into the stucco) are clean and free of debris. They help control cracking, so keeping them clear is crucial.
- Verify Color Consistency: Check that the color is uniform across the entire surface. Inconsistencies could indicate improper mixing or application.
- Inspect Textured Finish: If applicable, ensure your textured finish is even and consistent. Irregularities may require touch-up work.
- Check for Efflorescence: Look for white powdery deposits on the surface, which could indicate moisture issues behind the stucco. If present, investigate further.
Quick rule: Always recheck your work from different angles and in varying light to catch any issues you might miss at first glance.
Troubleshooting, Repairs, and Long-Term Maintenance
Cracking usually comes from missing or misplaced joints, substrate movement, or material failure. Check whether joints exist where they should and look for signs of movement under the slab. From there, choose a repair plan and set up a maintenance routine to prevent recurrence.
Understanding the cause helps you pick the right repair and avoid wasted effort. Using the right repair method and keeping up with simple maintenance reduces future cracking and extends the life of the concrete. If you’re unsure about products or steps, check the label or datasheet for guidance.
Diagnosing pattern cracks versus isolated failures
When you spot cracks in your stucco, the first step is to figure out if they’re due to missing or misplaced control joints. Here’s how:
Look at the pattern of the cracks. If they follow a map-like grid, it’s likely that control joints are needed where you don’t have them now. This is called ‘map cracking’.
If cracks are isolated, not following any pattern, and only in certain areas, it might be due to substrate movement or material failure at those specific points. In this case, targeted repairs could be enough.
Repair techniques and when to retrofit joints
If you’ve diagnosed that missing or misplaced control joints are causing your cracks, here’s how to fix it:
For minor cracks, a simple sealant repair might do the trick. Just clean the crack, fill it with a flexible sealant, and let it cure.
For larger cracks or areas where you need to re-stucco, first remove the damaged stucco. Then, apply new material following the same installation details as before.
If the pattern of cracking indicates that your joint layout is off, consider retrofitting joints. This involves cutting new control joints into the existing stucco to redirect stress and prevent further cracking. However, this should be done by a professional to avoid damaging the substrate.
Conclusion
Control joints aren’t optional on large stucco surfaces. Proper placement and reliable detailing prevent map cracking, protect the wall from movement damage, and keep the finish looking straight and solid for years. The right planning plus careful execution saves time and money and reduces the chance of costly repairs later.
Before you start, confirm your layout with a clear plan, check weather and surface conditions, lay out joints at the right intervals, choose the proper joint type, set profiles, anchors, and sealants as specified, and test a small area first. Inspect each joint as you go: alignment, clean edges, proper fastener installs, and proper sealant depth and continuity. In the end, walk the wall from several angles, note any deviations, and address them before the sealant cures.
Common mistakes to avoid are skipping the planning stage, overloading joints with too many or too few lines, and rushing the sealant or anchor installation. Always clean and dry surfaces before work, use the right profile and sealant for the wall, and follow safety rules: wear eye protection, guard against falling debris, and work within your skill limits to prevent cracks or damage. If a section seems unpredictable or the wall moves significantly, pause and re-check the layout and anchoring plan.
If the project feels beyond reach or you encounter hidden structural movement, call a professional for a second opinion and to confirm load paths and joint spacing. With careful planning, deliberate installation, and ongoing maintenance, you’ll keep the large stucco surface durable and looking sharp. Stay methodical, stay safe, and you’ll finish with confidence.
FAQ
How should I position control joints on very large walls to prevent random cracking?
Lay out a simple grid that follows the wall planes and transitions. Check the sealant and joint manufacturer for spacing guidelines and adapt to the wall shape. Always confirm with the product label or instructions before cutting or placing joints.
Can I extend or add control joints after the stucco is already applied?
Yes, but you must cut into the stucco along the planned joint lines and install proper joints or backer and sealant. Use compatible materials and follow the manufacturer’s instructions for bond, depth, and priming. If uncertain, consult the product label and local guidance.
What common mistakes lead to map cracking even with joints in place?
Avoid skipping joints at changes in wall direction or openings, and don’t over-tighten or undersize sealants. Poor substrate prep or using the wrong sealant can also cause cracks. Always follow the prescribed joint pattern and material specs.
How do I maintain control joints over time?
Inspect joints annually for hairline cracks or sealant deterioration. Reseal or replace the joint sealant as needed per the manufacturer’s guidance. Check that joint materials remain compatible with the stucco system and climate conditions.