
Introduction
Screed straightening of the stucco brown coat is the process of leveling and smoothing the outer layer to prevent visible waves. It relies on controlled, even passes with a straightedge to create a flat, true surface. The goal is to set the first and second coats with minimal movement after initial setting, while maintaining proper feather and joint alignment.
Key techniques include timing passes to work with the cure of the material and using a straight screed or screed rails as guides. Tools commonly needed are a straightedge, a screed board, and a reliable screed rule, plus consistent tool handling to avoid overworking the surface. Follow best practices for applying the first and second coats, and check labels or manufacturer instructions for any specific guidance on cure, joint treatment, and acceptable surface imperfections to avoid telegraphing waves.
Key takeaways
- Understand how brown coat texture can telegraph waves and schedule screed passes accordingly.
- Verify substrate and formwork are rigid, clean, and dry to improve screed results.
- Gather screed tools: straightedges, guides, and non-Absorbent float boards for consistency.
- Apply first coat and embed mesh or scratch coat per manufacturer guidance.
- Use staggered passes and light, even pressure to reduce telegraphing risk.
- Monitor cure and humidity; intervene if surface shows pinholes or ridges.
- Safety: wear eye protection and fall protection; mix and handle materials safely.
Table of Contents
- Introduction
- Key takeaways
- Understanding the Brown Coat and Telegraphing Waves
- Pre-Screed Planning and Surface Preparation
- Tools and Materials Checklist
- Screeding Techniques That Minimize Waves
- Common Mistakes, Diagnosis and Practical Fixes
- Timing, Setting and When to Intervene
- Visual Checkpoints, Testing and Acceptance Criteria
- Safety, Cost Implications and Long-Term Durability
- Conclusion
- FAQ
Understanding the Brown Coat and Telegraphing Waves
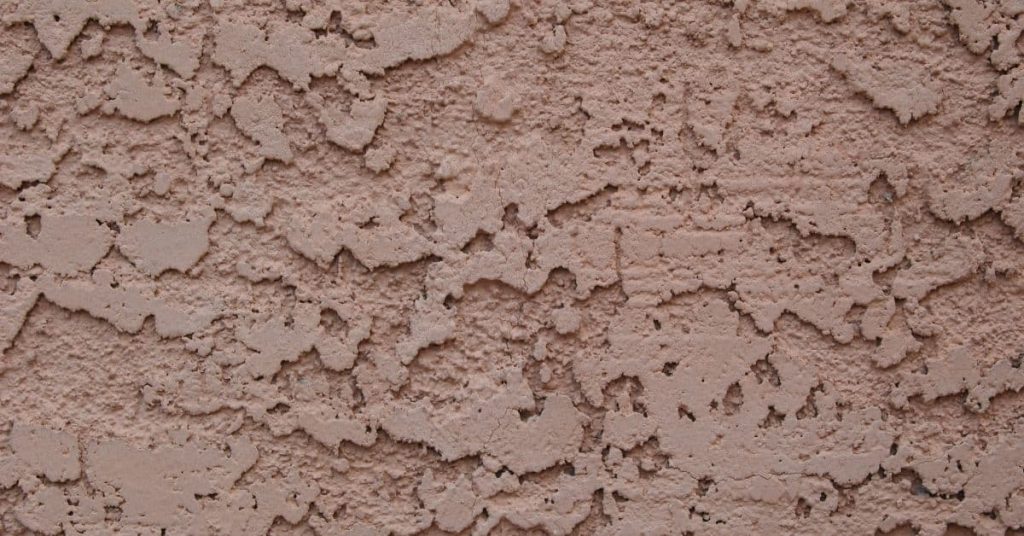
The brown coat in a three-coat stucco system serves as a stable base that supports the finish coats and helps resist weathering. It must bond well to the lath and provide a smooth, even plane for subsequent layers. Its condition directly affects adhesion and final appearance.
Telegraphing occurs when small texture or low spots in the brown coat become visible as raised lines or patterns after the finish coats cure. Finish coats exaggerate surface irregularities, making flaws more noticeable. Keep an eye out for indicators like hairline cracks, ridges, and inconsistent thickness during set and cure.
What the Brown Coat Must Achieve
The brown coat in a three-coat stucco system serves as a critical base for your finish coats. To prevent wave patterns from telegraphing through, it must meet specific requirements:
Flatness: The surface should be smooth and even to avoid creating lines or patterns later on.
Proper Keying: This ensures a good bond between the brown coat and your finish coats. Use a trowel to create a suitable texture for adhesion.
Consistent Thickness: Maintain an even thickness across the entire surface to prevent ridges or low spots from forming. Use a level to check this during application.
How Waves Form and Why They Telegraph
Waves in your stucco finish can be caused by various factors, which are then exaggerated by thin finish coats. Here’s how:
Uneven Substrate: If the underlying surface is not flat, it will cause undulations in your brown coat that will show through later.
Poor Screeding Technique: Inconsistent screeding can lead to low spots or ridges, which will become visible after applying finish coats.
Overworking the Coat: Over-troweling or working the coat too much can cause it to shrink and create waves as it dries. To prevent this, follow manufacturer instructions for proper application and curing.
Pre-Screed Planning and Surface Preparation
Start with a substrate condition audit to verify integrity, looking for cracks, delamination, laitance, and moisture history. Plan corrective steps such as patches or bonding agents so the brown coat can receive a clean, stable plane. Document findings before proceeding.
Check flatness with a straightedge or laser level and zone the area to guide screed curvature. Address deviations with appropriate patching or grinding before any screeding begins. Consider moisture and environmental factors to avoid rapid drying that can telegraph through the brown coat.
Substrate Inspection and Repair
Before applying the brown coat, ensure your substrate is in optimal condition to minimize telegraphing risks.
- Check for cracks: Inspect visually for hairline or wide cracks. Cracks can cause uneven surfaces and telegraph through the brown coat.
- Inspect for holes: Look out for any voids, gaps, or missing material that could affect the smoothness of your finish.
- Check substrate alignment: Ensure block, brick, or plasterboard substrates are plumb. Misaligned substrates can cause waves in the brown coat.
- Remove loose material: Scrape off any loose particles to prevent them from mixing with the brown coat and causing imperfections.
- Fill voids: Use appropriate materials like cement or mortar to fill any gaps, holes, or missing areas. This ensures a smooth base for your brown coat.
- Inspect for delamination: Check for any peeling or separation of the existing stucco from the substrate. Delamination can cause waves and affect adhesion.
- Assess moisture exposure history: Document any past or current moisture issues as they can lead to telegraphing problems.
- Check for laitance: Laitance is a weak, cement-rich layer that forms on the surface of concrete. Remove it using appropriate tools to prevent telegraphing through the brown coat.
Quick rule: Always re-inspect your substrate after repairs to ensure a smooth, even base for your brown coat.
Layout of Guides, Control Joints and Screed Rails
The layout of guides, control joints, and screed rails is crucial for achieving a consistent thickness and straight planes in your brown coat.
Screed rail placement: Position screed rails parallel to each other and at a consistent distance apart. This ensures even distribution of the brown coat.
Control joint positions: Plan control joints perpendicular to the screed rails. They should be spaced evenly to control cracking due to shrinkage or settling.
Reference lines: Establish reference lines along walls and floors to guide your screed rail layout. This ensures alignment with existing structures and promotes straight planes.
Tools and Materials Checklist
Identify essential tools: straightedges, screeds, darby, hawk, trowels, floats, a level, and a calibrated guide for thickness. Ensure each tool is clean and in good condition. Have a plan for adjustments if measurements drift.
Verify tool heights against the target thickness and establish a clear reference line. Inspect edges for damage and replace worn items to prevent telegraphing errors. Wear appropriate protective gear and prepare every supply needed for a smooth workflow.
Essential Tools and Measuring Aids
The right tools ensure a smooth, consistent brown coat with minimal wave telegraphing.
- Straightedges/Aluminum Screed Rails: Maintain straightness for accurate screeding. Inspect for bends or warps and replace if necessary.
- Darbies: Level the surface before screeding. Check edges for nicks or wear that could cause imperfections.
- Bull Floats/Magnesium Floats: Smooth the coat after initial application. Ensure blades are straight and secure.
- Laser/Line Levels: Establish a consistent screed height. Calibrate before use to ensure accuracy.
- Inspection Lights: Reveal imperfections in low light conditions. Use to check for telegraphing tendencies during trial screeds.
Material Specs and Mix Guidance
The quality of materials directly impacts the performance and appearance of your brown coat.
- Cement/Lime/Sand: Confirm ratios according to manufacturer specs or industry standards. Incorrect ratios can lead to cracking, weak bond, or staining.
- Admixtures: Check types and quantities based on desired properties (e.g., acceleration, retardation). Too much can cause excessive heat and cracking.
- Water Content: Maintain a consistent water-to-cement ratio for workability and strength. Too little or too much water can result in weak or poorly finished coats.
Screeding Techniques That Minimize Waves
The aim of a browny coat screed is a flat, stable surface that bonds well to the substrate while controlling set and temperature effects. Understand the balance between concealment of small irregularities and the need for even transfer. Establish practical targets for precision during work.
Wave-causing factors include substrate irregularities and improper tool pressure. Anticipate these with technique adjustments, such as controlled passes and consistent contact. Compare rail-based and hand-screeding approaches to choose the method that suits the space and finish you want.
Screed-rail (rail-and-strike) method
The screed-rail, or rail-and-strike, method is ideal for achieving a flat, minimal-waves surface. It involves setting up rails as reference lines and working between them to establish flatness.
Before starting, visually inspect your rails to ensure they are level and plumb. Align them to your reference lines, maintaining consistent contact with the rails during screeding passes to minimize scalloping.
For large areas or long runs, using screed rails is essential to maintain consistency and control weight distribution. If waves appear, recheck rail alignment for a quick fix.
Straightedge and strike-off strokes
Proper stroke patterns, pressure control, and sequencing are crucial when using a straightedge to screed your brown coat. This technique helps minimize ripples and maintains substrate bond.
Apply consistent pressure while making longer strokes for thicker lifts. After each pass, visually inspect the surface for evenness. If ripples form, adjust your pressure and stroke length accordingly.
Avoid pulling the mix off the substrate by maintaining contact with the surface throughout your strike-off strokes. Regularly check for any inconsistencies to ensure a smooth, wave-free finish.
Using laser or line-level guides
Laser or line levels and datum strings are invaluable tools for improving consistency across large areas. They help reduce cumulative error by providing a constant reference point.
Regularly check your screed’s level and plumb during the process to maintain accuracy. Ensure your laser/line level is aligned with datum strings, maintaining consistent readings across the entire area.
For large or complex areas, using laser or line-level guides is highly recommended. If readings vary significantly, recheck alignment for a quick fix and ensure consistency throughout the screeding process.

Common Mistakes, Diagnosis and Practical Fixes
Telegraphing arises from common screed mistakes like inadequate substrate prep, incorrect moisture, or uneven passes. These issues manifest as waviness or ripples in the brown coat. Watch for cure and ambient conditions that worsen surface irregularities.
Use a concise diagnosis checklist to assess flatness and moisture, and review mix ratios and slump. For minor issues, dampen dry areas or re-screed with deliberate passes. Persistent problems may require more extensive rework and re-screening to restore a true plane.
Diagnosing the problem
To determine the root cause of waviness in your stucco or concrete screed, perform a thorough visual inspection and conduct several simple tests.
Visual Inspection: Look for gaps, unevenness, or ripples on the surface. Check for localized hollows or global waves that indicate substrate or technique problems.
Straightedge Test: Use a long straightedge to inspect the flatness of the substrate. Gaps between the straightedge and the screed indicate low spots, while tight fits suggest high spots.
Daylight Shadow Check: Observe the surface in daylight to see if shadows cast by any irregularities. This can help identify subtle waviness that might not be apparent to the naked eye.
Corrective actions and when to re-do
Based on your diagnosis, choose appropriate corrective actions to address the waviness in your screed. The severity and cause of the problem will determine the best course of action.
Local Patching: If the issue is isolated and not extensive, local patching may be sufficient. Remove the affected area, prepare the substrate, and apply a fresh patch using the correct technique.
Grinding/Profile Sanding or Corrective Key Application: For deeper irregularities (greater than 1/8 to 1/4 inch), consider grinding or profile sanding to remove the high spots. Alternatively, apply a corrective key to help fill in low areas before applying the final coat.
Full Re-screed: If the waviness is persistent and cannot be resolved with surface-only treatments, it may be necessary to remove a portion of the existing coat, re-prepare the substrate, and apply a fresh screed using the corrected technique. Always consider the extent and depth of irregularities when deciding on the appropriate remedy.
Timing, Setting and When to Intervene
Differentiate between clock-time and actual set by performing practical tests such as touch or light indentation to judge readiness. Do not rely solely on timers. Adjust methods based on what the material is doing in real time.
Track environmental conditions and substrate temperature, as these influence set speed and wave risk. Note how mix behavior changes with additives and plan finishing steps to avoid late-stage deformations or dragging that reveals waves.
Working within the Set Window
The ideal time for smoothing or correcting your brown coat is during its initial set. Missing this window can result in damage to your finish.
Do not rely solely on clock time. Instead, perform practical tests to judge readiness:
- Touch: The surface should feel firm but still slightly tacky.
- Light Scratch: A light scratch with a trowel or screed should leave a mark without tearing the surface.
- Slight Indentation: A slight indentation with your finger should not leave an impression.
If the surface is still tacky but firm enough to handle, intervene for smoothing or correcting. If it’s hard and no longer accepts indentation, it’s too late, and you risk damaging the finish. If you miss this window, wait for full cure before attempting mechanical leveling or skim coats.
Post-Cure Interventions and Risks
After the initial set, you can opt for post-cure corrections like mechanical leveling or skim coats. However, improper timing or techniques can compromise your finish.
Before proceeding with any corrections, ensure:
- Surface Hardness: The surface should be hard and fully cured.
- Adhesion: Check for signs of delamination or soft spots.
- Cure Conditions: Ensure proper temperature and humidity conditions during cure.
If the surface is hard, with no signs of delamination, proceed with mechanical leveling or skim coats. If you notice any signs of delamination or soft spots, pause, reassess your cure conditions, and check substrate adhesion before proceeding. Improper post-cure corrections can lead to adhesion issues and compromised finish appearance.
Visual Checkpoints, Testing and Acceptance Criteria
Visual checkpoints for the brown coat should identify telegraphing early, using clear cues like tine marks, waviness, inconsistent screed lines, and variations in shine. Practical on-site tests include surface-spot checks, straightedge straightness, and identifying pattern repetition and high/low spots across the area, with acceptance criteria defined before work begins. Documentation should capture measurements and simple pass/fail notes to guide crews and clients.
This matters because skipping early checks can hide telegraphing until after cure, causing rework and delays. A quick straightedge pass and pro reviews help catch issues before finish coats, while documented notes and photos build a clear record for client acceptance and accountability. If waves or irregularities show up, the plan supports targeted rework and consistent screed technique to restore a smooth, flat brown coat.
Straightedge, Light-Angle and Feel Tests
Perform these simple checks early in the finishing process to detect subtle waves and inconsistencies.
- Check with straightedge: Place a long level or straightedge on the surface at various points and angles. Look for visible gaps or high/low spots.
- Raking light inspection: Hold a flashlight at a low angle to the surface, moving it across the area. This reveals any imperfections that may not be apparent under normal lighting.
- Tactile checks: Run your hands over the surface to feel for variations in flatness and smoothness. This can help detect issues that might not be visible or noticeable with a straightedge alone.
- Check edges and corners: Use a straightedge to check the flatness along edges and in corners, where waves often start.
- Inspect screed lines: Check for inconsistencies or waviness in the screed lines. These can telegraph through to the finish coat.
- Check for tool marks: Feel for any tool marks left by trowels, straightedges, or other tools. These can also telegraph through if not removed.
- Inspect for shine variations: Check for areas where the stucco has a different sheen than surrounding areas. This could indicate a variation in mix or application.
- Check for tine marks: Inspect for any visible imprints left by the tines of a hawk or other tools. These can telegraph through if not removed.
Quick rule: If waves or inconsistencies are detected, perform further tests or corrective actions immediately to prevent them from telegraphing into the finish coat.
Specifying Flatness and Finish Tolerances
Clearly define acceptable flatness and finish standards in your contracts to ensure all parties are on the same page.
- Define maximum allowable wave amplitude: Specify the highest acceptable peak-to-trough variation in inches or millimeters. This should be based on local standards or project requirements.
- Set thickness tolerance: Define the permissible range of thickness variations across the surface, usually expressed as a percentage of the average thickness.
- Permissible surface irregularities: Specify the maximum number of surface imperfections allowed per square foot. This could include things like pinholes, voids, or other defects.
- Reference local standards: Check with local building codes and industry standards to ensure your tolerances are in line with what’s acceptable in your area.
- Prescribe measurable criteria: If local standards aren’t sufficient, prescribe specific, measurable acceptance criteria based on the project’s requirements.
- Document tolerances: Clearly state these tolerances in the contract, along with any testing methods or inspection procedures that will be used to ensure compliance.
- Communicate expectations: Ensure all parties involved – crews, clients, and inspectors – understand and agree to these tolerances before work begins.
Quick rule: If tolerances are not clearly defined, define and document them immediately to avoid misunderstandings or disputes later on.
Safety, Cost Implications and Long-Term Durability
Safety basics include PPE and site rules for scaffold work, dust control, and trip prevention. Identify hazards and follow a clear pre-work safety checklist. Ensure everyone understands procedures before screeding begins.
Explain how poor initial screeding increases rework costs and affects durability, such as cracking or moisture penetration. Describe long-term implications and outline maintenance expectations to sustain performance and minimize future repairs.
Safety Precautions and Site Best Practices
Ensure your safety and the well-being of others by following these guidelines:
Personal Protective Equipment (PPE): Wear appropriate eye/face protection, gloves, and respirators where needed to protect against dust and debris.
Scaffold and Ladder Use: Set up ladders and scaffolds properly, ensuring they are secure and level. Always maintain three points of contact when climbing or working at heights.
Ventilation and Ergonomics: Ensure adequate ventilation to control dust levels. Maintain proper posture and use ergonomic tools to prevent strain injuries.
Cost of Rework Versus Correct Initial Execution
The quality of your initial screeding directly impacts project costs. Poor execution leads to:
Increased Sanding, Patching, and Material Waste: Improper alignment, unintended crowns, or wave formations require additional labor and materials for correction.
Budget Overruns and Scheduling Delays: Rework increases labor costs and extends project timelines. Regularly inspect work in progress to catch issues early and minimize these impacts.
Proactive Measures: Budget for proper prep and quality control during planning. Address any screeding issues promptly to prevent further waste and delays.
Conclusion
Maintaining a straight, durable brown coat matters for safety, appearance, and long-term performance; focus on consistent screed results to prevent telegraphing waves and costly repairs.
Proceed in sequence: verify the surface is prepared and sound, set and level the screed as you go, apply the brown coat with even passes, continuously check for signs of waviness or low spots, test a small area first and document your checks against acceptance criteria, complete curing within the recommended timing, and intervene promptly if any irregularities appear.
Avoid common mistakes such as rushing curing, ignoring surface flaws, or overworking the mix and screed, and always follow basic safety rules like wearing eye protection, gloves, and a tight-fitting mask when dust or aerosols are present, plus testing in a hidden or small area before full application to prevent irreversible damage.
If the area is large, the substrate is uncertain, or waves persist after the initial fixes, call a qualified professional to assess and intervene; staying within safe limits and recognizing when to escalate helps protect the structure and your project, and steady, methodical progress will deliver a clean, durable finish.
FAQ
What techniques help straighten the brown coat during screeding to avoid telegraphing waves?
Use a straightedge or screed with a stable reference line set at a consistent height. Work in small, overlapping passes and keep the screed moving to prevent gouges. Cross-check with a level or straightedge at multiple points to identify and adjust high or low spots.
What tools are essential for screeding stucco and how should they be used safely?
Essential tools include a straightedge or screed, a float for finishing, and a hawk for material transport. Use personal protective equipment as required and follow tool manufacturer instructions for handling and cleaning. Inspect tools before use to avoid embedding irregularities into the brown coat.
What are best practices for applying the first and second coats to minimize waves?
Apply the first coat evenly to establish a uniform base, using consistent thickness along the surface. Allow appropriate set time per manufacturer guidance, then apply the second coat using smooth, deliberate passes to blend transitions. Avoid overworking the surface, which can telegraph underlying irregularities.
What safety steps should be followed during stucco screeding and handling?
Work with proper PPE and keep the work area clear of trip hazards. Follow handling instructions for all materials and tools, and be mindful of dust and debris. Check labels and manufacturer instructions for any specific safety requirements and land-use considerations.