
Introduction
Stucco around a deck ledger boards is a method to seal and protect the joint where the deck meets the house. It relies on proper transitions and flashing rather than relying on caulk as the main waterproofing tool. The goal is to keep water from getting behind the stucco and into the wall cavity.
Focus on good water management at the ledger area, including how flashing is integrated and how moisture can drain away. Use materials and methods that suit your climate and follow the manufacturer’s instructions for any products you choose, checking for guidance on flashing, weep holes, and transitions. If you’re unsure, check local rules and look for practical, step‑by‑step guidance from the product labels and installation manuals.
Key takeaways
- Ensure ledger board is properly flashed and integrated before stucco coats apply.
- Use compatible materials to avoid staining, bonding failures, or water intrusion; wear PPE.
- Install proper flashing with weep holes, directing moisture away from the deck.
- Plan drainage and ventilation to prevent stucco moisture buildup at ledgers.
- Prep surfaces: clean, dry, and free of dust, oil, and loose stucco residue.
- Inspect for gaps and reseal with manufacturer instructions following local codes.
Table of Contents
- Introduction
- Key takeaways
- Why Caulk Alone Fails: Water-Management Principles for Stucco-to-Ledger Interfaces
- Codes, Standards, and Material Compatibility
- Tools and Materials Checklist (DIY-Friendly)
- Flashing Strategies That Don’t Rely on Caulk
- Step-by-Step Prep: Wall and Ledger Readiness
- Step-by-Step Integration: Flashing with Stucco Application
- Ventilation, Drainage, and Preventative Measures
- Common Mistakes, Maintenance Checklist, Safety, and Cost Trade-Offs
- Conclusion
- FAQ
Why Caulk Alone Fails: Water-Management Principles for Stucco-to-Ledger Interfaces
Caulk may seal a gap, but it doesn’t stop water from moving through the deck-to-stucco junction over time. Water can intrude at joints, through tiny capillary paths, and around fasteners where sealant loses elasticity with seasonal movement. Vapor movement and thermal expansion can carry moisture right behind the caulk into the substrate.
A continuous drainage plane and mechanical flashings are essential to directing water away from the ledger and stucco interface. Flashings should integrate with the ledger and be coordinated with a drainage mat or BB flashing to create a reliable path for water. Proper detailing keeps water from being sucked back into the wall assembly and helps control condensation behind the finish.
Building-science basics that matter here
At the ledger-stucco junction, water can move in several ways. Capillary action pulls water upwards through tiny pores. Vapor drive pushes moisture through permeable materials. Thermal movement causes expansion and contraction, opening up gaps. Wind-driven rain simply blows water into any openings.
Passive drainage paths are essential to direct this water away from the junction. They prevent water buildup that could lead to rot, corrosion, or stucco delamination.
Key takeaway: Understand these forces and plan for passive drainage.
Typical failure modes to avoid
Many water intrusion issues at the ledger-stucco junction stem from preventable mistakes. Here are some common ones:
- Missed flashings: Without proper flashing, water can seep behind stucco and cause rot.
- WRB discontinuities: Gaps in the weather-resistant barrier allow water to bypass it and get trapped.
- Trapped water: Water that gets trapped between the ledger and stucco has nowhere to go but inwards, leading to damage.
- Improper caulking: Caulk can’t handle movement or weathering, leading to gaps over time.
Regular inspections and proper installation practices can help avoid these issues.
Codes, Standards, and Material Compatibility
Check applicable codes and standards for decks, stucco, and exterior cladding, including any local amendments or permit requirements. Look for inspector expectations regarding flashing and weep screed placement. Document references and approvals as part of the project file.
Material compatibility matters for longevity and corrosion risk. Consider ledger materials, flashing metals, fasteners, and stucco lath in relation to each other and to the deck coating. Verify that chosen products support proper movement, moisture control, and warranty terms from the manufacturer.
What to check in local code and manufacturer instructions
Before you start, confirm these details to ensure your work meets codes and manufacturers’ requirements.
- Flashing types: Check with local officials and product literature for approved flashing types at the ledger-stucco interface.
- WRB integration: Ensure water-resistive barrier (WRB) is compatible and properly integrated with both ledger and stucco systems.
- Fastener allowable locations: Verify acceptable fastener spacing, size, and type for your ledger material.
- Required clearances: Confirm minimum clearances between ledger, flashing, and stucco to prevent moisture buildup.
- Permit implications: Understand if a permit is required and what inspections will be needed.
- Inspector expectations: Know what your local inspector will expect to see at the interface during final inspection.
- Ledger material-specific requirements: Check for any special installation guidelines or clearances related to your ledger material (e.g., pressure-treated lumber, metal).
- Stucco system compatibility: Ensure your chosen stucco system is compatible with the ledger and flashing materials.
- Flashing material-specific requirements: Follow manufacturer instructions for proper installation and integration of flashing materials at the interface.
Quick rule: Always double-check local codes and manufacturers’ guidelines to avoid costly mistakes and rework.
Material compatibility and corrosion considerations
Choosing the right materials is crucial for a durable, long-lasting interface between your ledger board and stucco.
- Ledger material: Use pressure-treated lumber or metal hardware that’s compatible with your chosen stucco system. Avoid using materials prone to corrosion or degradation from moisture exposure.
- Flashing material: Select flashing made of corrosion-resistant materials like galvanized steel, aluminum, or plastic. Avoid using dissimilar metals that can cause galvanic reactions.
- Fasteners: Use corrosion-resistant fasteners rated for exterior use and compatible with your ledger material. Stainless steel or hot-dipped galvanized fasteners are typically suitable.
- Stucco mix: Choose a stucco mix designed for exterior use, with appropriate cement-to-sand ratios, and additives to enhance durability and water resistance.
- Lath type: Use lath specifically designed for stucco applications. Avoid using lath that’s not compatible with your chosen stucco system or installation method.
- Avoid galvanic reactions: Do not use dissimilar metals in contact with each other at the ledger-stucco interface, as this can cause corrosion and weaken the bond between materials.
Practical tip: Always consult manufacturers’ guidelines for specific product recommendations and installation techniques to ensure compatibility and longevity at the ledger-stucco interface.
Tools and Materials Checklist (DIY-Friendly)
Core tools cover measuring, layout, cutting, and fastening, plus basic masonry power tools and hand tools. Keep a stock of blades, bits, trowels, hawk, mixing bucket, and a caulk gun alternative if you’re using non-caulk sealants. Have a plan for safe handling and height work.
Assemble flashing options, lath and drainage components, and compatible stucco mix or EIFS products. Choose corrosion-resistant fasteners and weep/drainage paths that suit your substrate. Always check the product specs for curing and installation requirements before starting.
Essential tools
Before you start, ensure you have the right tools to make your job easier and safer.
- Tape measure: Measure twice, cut once. Check accuracy before starting.
- Level: Keep surfaces plumb and level for a professional finish.
- Chalk line: Snap lines to mark cutting and installation points.
- Masonry hammer drill/rotary hammer: Drill into concrete, brick, or stone ledgers. Use appropriate masonry bits.
- Screwdrivers: Drive screws for lath and fasteners. Keep them clean to prevent stripping.
- Tin snips: Cut metal flashing accurately. Wear gloves to protect hands.
- Utility knife: Score and cut backer material, WRB, and sealants.
- Trowels and hawk: Apply stucco mix evenly. Keep trowels clean for smooth application.
- Margin trowel: Apply finish coats smoothly. Use light pressure to avoid overworking the mix.
- Caulk gun (or sealant applicator): Apply sealants neatly. Practice on scrap materials first.
- Safety gear: Wear gloves, safety glasses, and a dust mask when cutting or mixing stucco. Protect your ears with hearing protection if using power tools.
Quick rule: Always check tool condition before starting to avoid delays and injuries.
Recommended materials and acceptable alternatives
Choose the right materials for a durable, waterproof ledger-to-stucco interface.
- Exterior-grade flashing: Peel-and-stick metal or rubberized/bituminous flashing. Check UV resistance and temperature range.
- Drywall or stucco lath: Choose compatible with your ledger material (wood, concrete, metal). Check manufacturer specs for substrate compatibility.
- Cementitious stucco mix/EIFS: Select a pre-mixed EIFS that’s compatible with ledger details. Follow manufacturer instructions for mixing and application.
- Deck ledger waterproofing membrane: Apply behind the ledger to prevent water intrusion. Check ASTM ratings for compatibility.
- Corrosion-resistant fasteners: Stainless steel or hot-dipped galvanized screws. Avoid aluminum in high-corrosion areas.
- Control joints: Install at regular intervals to control cracking and allow movement.
- Mesh or lath ties: Secure lath to ledger for a strong bond. Check manufacturer instructions for proper spacing.
- Non-caulk sealants/alternatives: Silicone, polyurethane, or butyl-based sealants. Check compatibility with other materials and local climate conditions.
Quick rule: Always consult product instructions to ensure compatibility and proper application.
Flashing Strategies That Don’t Rely on Caulk
Three robust approaches provide water control: through-wall continuous flashing, integrated ledger flashing, and back-pan or drip edge details. Each has strengths for slope, drainage, and continuous WRB coverage, and all reduce dependence on sealants. Select details based on deck design and stucco system used.
Follow a practical sequence: place WRB above or behind the ledger, install ledger flashing, then add the stucco lath and drainage layer. Ensure overlaps direct water away from the ledger and connect with weep screeds and control joints as needed.
Continuous Through-Wall Flashing Method
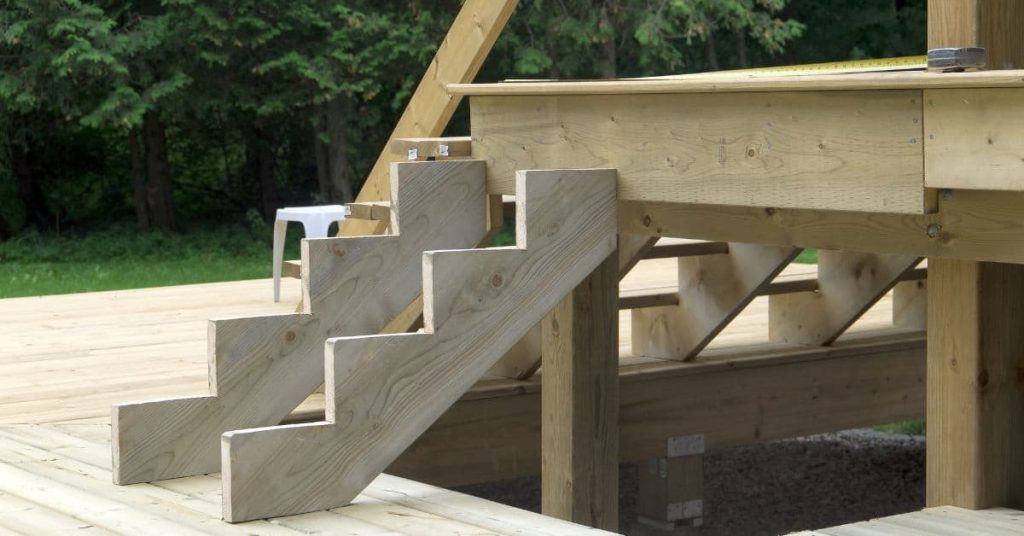
Insert a continuous piece of flashing that runs from the top of your wall, down one side, under the ledger board, and out over the stucco face. This creates a water-tight barrier that directs water away from the ledger.
This method ties into your wall’s weather-resistant barrier (WRB) at the top, ensuring continuous protection. The flashing should lap over the WRB by at least 4 inches to maintain this continuity.
The flashing also wraps under the ledger board, creating a tight seal that prevents water from getting behind it. Make sure to use a flexible flashing material like EPDM or metal to accommodate any movement in the ledger.
Step-Flashing, Back-Pan, and Drip-Edge Options
For a tight transition at the deck-to-wall junction, consider step-flashing. This involves installing flashing pieces that ‘step’ up the wall, lapping each one over the previous to create a continuous barrier.
Back-pans or drip edges can also help shed water away from the ledger. A back-pan is a small pan installed behind the stucco at the ledger line, creating a space for water to drain into and out of. Drip edges are metal strips that divert water away from the ledger.
Both step-flashing and back-pans require careful installation to ensure they’re properly integrated with your WRB. Drip edges should be installed after the stucco is applied, and should lap over it by at least 2 inches to direct water away effectively.

Step-by-Step Prep: Wall and Ledger Readiness
Start with a clear prep plan that covers safety, tools, and the sequence from wall inspection to ledger work. Document findings with photos and notes to guide repairs. Identify any hidden damage before proceeding.
Evaluate the ledger and WRB readiness, noting whether the ledger must be removed or reinforced. Plan flashing details and verify framing and seals so moisture won’t bypass the new work. Create a simple punch list for repairs and maintenance.
Step-by-Step Process
The following is a clear, numbered sequence of practical steps to prepare your wall and ledger for stucco application. This process ensures that you’re ready for flashing and stucco work.
- Preparation and safety checks: Wear PPE, set up ladders/scaffolds safely, and gather necessary tools.
- Wall inspection: Check for moisture staining, efflorescence, cracks, termite or rot indicators. Document findings with photos.
- Ledger evaluation: Determine if ledger needs removal, reinforcement, or cutback. Note fastener types and flashing needs.
- WRB and flashing readiness: Verify WRB condition, seam integrity, and routing of flashing around the ledger. Plan for repairs.
- Framing and structure checks: Confirm stud spacing, header condition, and deck ledger connection. Ensure no hidden damage behind siding or plaster.
- Hidden-damage risk mitigation: Reveal and address interior or wall cavity issues, moisture intrusion paths, and potential mold risks. Trim back existing stucco if needed to expose substrate.
- Cleanup and final checks: Remove debris, double-check all repairs, and ensure the area is ready for flashing and lath installation.
Site Inspection and Condition Assessment
Before starting any work, use this checklist to inspect your site for potential issues that could compromise waterproofing. It’s best to do this on a dry day.
- Check for rot: Tap wood with a hammer; hollow sound indicates rot. Inspect closely for signs of decay or fungal growth.
- Inspect fasteners: Check nails, screws, and other fasteners for corrosion or loosening. Tighten or replace as needed.
- Evaluate slope/drainage: Ensure water drains away from the wall to prevent moisture buildup.
- Assess WRB continuity: Check that the weather-resistive barrier is intact and extends around the ledger. Look for gaps, tears, or missing pieces.
- Check for corrosion: Inspect metal components like flashing, hangers, and anchors for signs of rust or deterioration.
- Inspect stucco for cracks: Check existing stucco for hairline cracks that could allow water intrusion. Document findings with photos.
- Look for termite damage: Inspect wood components for signs of termite activity, such as mud tubes or damaged wood.
- Check for moisture staining: Look for water stains on the wall or behind siding that could indicate a moisture problem.
- Efflorescence check: Inspect for white, powdery deposits on the wall, which can indicate past moisture issues.
Quick rule: If you find any significant damage or issues, address them before proceeding with stucco work to prevent further problems.
Preparing and Protecting the Ledger and Adjacent Wall
Proper preparation of the ledger and adjacent wall is crucial for a successful stucco application. Follow these steps to ensure your ledger edge is ready to accept flashing and lath.
Clean the ledger: Remove any dirt, debris, or old caulk from the ledger board using a wire brush or scraper. Ensure the surface is clean and dry.
Repair or replace damaged materials: If the ledger or adjacent wall has rot, corrosion, or other damage, repair or replace these components as needed. Use pressure-treated lumber for any new ledger installation to prevent decay.
Install blocking or furring (if needed): If your ledger is too thin or needs additional support, install blocking or furring strips along the ledger’s edge. This provides a solid base for flashing and lath attachment.
Ensure the ledger edge is ready: The ledger edge should be even, square, and free of any projections that could interfere with flashing installation. If necessary, trim back existing stucco to expose the substrate and create a clean edge.
Step-by-Step Integration: Flashing with Stucco Application
Goal: establish a continuous water-control path from the WRB behind the ledger to the stucco finish. Ensure flashing ties into the lath, mesh, and multiple stucco coats without gaps. Keep the system continuous through transitions from deck to wall.
Outline a practical flow: prep WRB, install flashing behind the ledger, apply lath over flashing, embed mesh, then apply coats. Emphasize overlaps and drainage to maintain moisture barriers at all joints.
Step-by-Step Process
The following steps guide you through integrating flashing with stucco application around your deck ledger, ensuring a continuous water-control path.
- Prep the ledger and WRB: Clean, prime, and protect the ledger and adjacent wall. Ensure the Weather Resistant Barrier (WRB) is intact and extends beyond the ledger’s top edge.
- Install flashing: Attach compatible flashing (hooded, back-flanged, or continuous metal) up and behind the ledger using appropriate fasteners. Integrate it with the weep screed and WRB for a seamless moisture barrier.
- Apply lath over flashing: Fasten lath strips to the flashing or substrate using rust-resistant fasteners. Ensure lath extends beyond the flashing’s top edge and overlaps at seams.
- Embed mesh: Place stucco mesh over the lath, ensuring it’s fully embedded in the scratch coat for added strength and stability.
- Apply multiple stucco coats: Start with a base coat, then apply the scratch and brown coats. Ensure each coat is properly cured before applying the next to maintain adhesion and integrity.
Lath, scratch coat, and weep plane details around the ledger
Properly terminating lath at the flashing and creating a clear weep/drain path are crucial for maintaining drainage plane continuity.
When applying lath, ensure it terminates at least 2 inches above the top of the flashing to prevent water from wicking up behind the stucco. Use rust-resistant fasteners to secure the lath to the flashing or substrate.
After embedding the mesh in the scratch coat, create a weep plane by installing a weep screed along the bottom edge of the lath. This allows any trapped moisture to escape, preventing water damage behind the stucco finish.
Quick tip: Ensure the scratch coat is properly sloped away from the ledger to facilitate drainage and prevent water from pooling.
Finishing coats, trim, and visual checkpoints
Before applying the final stucco coat, use this checklist to ensure proper installation and flashing integrity.
- Flashing overlap: Verify that the flashing extends at least 4 inches up the wall and overlaps the WRB by at least 2 inches.
- Lath termination: Confirm that lath terminates at least 2 inches above the top of the flashing to prevent moisture wicking.
- Weep screed installation: Ensure a weep screed is installed along the bottom edge of the lath, allowing trapped moisture to escape.
- Slope/drainage check: Inspect the scratch coat’s slope to ensure it facilitates proper drainage away from the ledger.
- Sealant compatibility: Verify that any sealants used are compatible with both the stucco and flashing materials to prevent delamination.
- Movement joints: Incorporate expansion and control joints in the stucco finish to accommodate seasonal settling and prevent cracking.
- Final visual inspection: After completion, inspect the stucco finish for any signs of improper installation, such as cracks, gaps, or discoloration, which may indicate moisture traps behind the stucco.
Quick rule: Always perform a final walkthrough after completing the project to ensure no issues have arisen during the curing process.
Ventilation, Drainage, and Preventative Measures
Ventilated underside decks and positive grading reduce moisture load at the stucco-ledger joints. Distinguish condensation, ponding, and capillary rise to guide design decisions. Promote air movement behind the stucco with accessible clearances and venting options.
Plan drainage and water diversion to keep the ledger interface dry. Include flashing, drip edges, and surface water routes that direct moisture away from the wall. Use design tactics that minimize chronic wetting at the junction.
Under-deck ventilation and airflow best practices
Promoting airflow under your deck is crucial to prevent moisture buildup against the wall. Here are some simple ways to achieve this:
Openings and Gaps: Ensure there’s enough space between the decking and the wall, typically 1-2 inches. This allows air to circulate and dry out any trapped moisture.
Vented Decking: If possible, use vented decking materials or install vents in solid decking to allow airflow through the deck itself.
Material Choices: Opt for materials that don’t trap moisture. For example, avoid using pressure-treated lumber directly against the wall as it can hold water and promote rot.
Site drainage and water diversion tactics
Keeping water away from your ledger and stucco base is essential. Here are some practical steps to achieve this:
Grading: Ensure the ground around your deck slopes away from the ledger at a minimum of 1 inch per foot. This prevents water from pooling near the ledger.
Gutters and Downspouts: Install gutters and downspouts to direct roof water away from the ledger. Extend downspouts far enough so water doesn’t flow back towards the deck.
Diversion Tactics: Use surface water management techniques like trenching, planters, or other barriers to divert runoff away from the ledger and stucco base. Avoid using caulk as a sole solution; it can crack or peel over time.
Common Mistakes, Maintenance Checklist, Safety, and Cost Trade-Offs
Common mistakes include poor flashing integration, reliance on caulk for long-term sealing, and neglecting proper slope and moisture pathways. Skipping weep paths or misplacing seals can invite corrosion and rot. Address these areas before finishing the project.
Establish a maintenance routine with visual checks, moisture indicators, and fastener inspection. Prioritize flashing and weep screed maintenance and document findings with dates. Consider safety reminders and a basic cost discussion that favors durable flashing over quick fixes when warranted.
Top mistakes to avoid and how to correct them
Before you start, review this checklist to ensure a solid, long-lasting stucco around your deck ledger boards.
- Improper flashing laps: Ensure each piece of flashing overlaps the next by at least 4 inches. If not, reinstall or add additional pieces.
- Misplaced fasteners: Check that all screws and nails are properly spaced (6-8 inches apart) and not too close to edges. Tighten or replace as needed.
- WRB breaches: Inspect the water-resistive barrier for tears or gaps. Repair with tape and sealant if found.
- Inadequate slope: Ensure stucco has a 4:12 slope away from the wall to prevent water pooling. Adjust as necessary.
- Missing drip edge: Add a drip edge at the bottom of the stucco to direct water away from the ledger board.
- Ignoring perimeter moisture pathways: Seal any gaps between deck and wall with backer rod and caulk. If not, water can enter and cause rot or corrosion.
- Insufficient fasteners at corners: Ensure there are extra fasteners at corners to reinforce the stucco. Add more if needed.
- Not using proper flashing with weep screed: Flashing should extend beyond the ledger board and have a weep screed to allow water to escape. Install or adjust as required.
Quick rule: Regularly inspect your work and fix any issues promptly to prevent minor problems from becoming major ones.
Maintenance and inspection checklist for long-term performance
Regular inspections help maintain the longevity of your stucco around deck ledger boards. Use this checklist seasonally or after heavy storms.
- Check for cracks: Inspect stucco for hairline cracks, which can let water in. Seal with a flexible caulk if found.
- Look for efflorescence: White powdery deposits indicate moisture intrusion. If present, investigate the cause and address it.
- Inspect flashing integrity: After heavy rain or freeze-thaw cycles, test flashing by pouring water onto it. It should shed water properly.
- Check for loose stucco: Gently tap stucco with a hammer. A dull thud indicates solid attachment; a hollow sound means reattachment is needed.
- Inspect fasteners for rust: Rust on screws or nails can indicate water intrusion. Replace if found.
- Clean surface to prevent mold and algae: Use a solution of bleach and water (1:4 ratio) to clean the stucco surface annually.
- Re-seal or reflash where needed: If caulk or flashing is damaged, replace it to maintain waterproofing.
- Document findings with photos and dates: Keep records of your inspections and repairs for future reference.
Quick rule: Regular maintenance extends the life of your stucco and prevents costly repairs down the line.
Safety reminders and qualitative cost trade-offs
Safety should always be a priority when working on your deck and stucco. Also, consider the long-term benefits of durable waterproofing methods.
- Use proper PPE: Wear gloves, eye protection, and non-slip footwear to prevent injuries.
- Stable ladders with spotters: Always use a stable ladder and have someone spotting you when working at heights.
- Avoid wet or windy conditions: Work in dry, calm weather for better grip and visibility.
- Watch for overhead hazards: Be aware of any objects that could fall from above while working beneath them.
- Know when to stop and call a pro: If you find structural concerns or complex water intrusion issues, consult a professional.
- Caulk vs. flashing trade-off: Caulk is cheaper but less durable. Flashing costs more upfront but lasts longer and performs better.
- Maintenance implications: Durable waterproofing methods require less frequent maintenance than quick fixes like caulk.
- Decision framework: For simple repairs, DIY is cost-effective. For complex issues or safety concerns, hire a professional.
Quick rule: Always prioritize safety over speed or cost. Durable waterproofing methods may cost more upfront but save you money in the long run.
Conclusion
Good waterproofing around deck ledger boards hinges on proper water management, solid flashing, and avoiding reliance on caulk alone. Get it right and you skip costly leaks, rot, and maintenance headaches while keeping the finish crisp and durable.
Now you should approach the next steps with a simple, repeatable flow: verify compatibility with all materials and codes, install the flashing correctly to shed water away from the ledger, prep the wall and ledger surfaces thoroughly, integrate flashing with the stucco application, allow for ventilation and drainage, and inspect and maintain regularly. Start by testing a small area to confirm fit and performance, then apply the plan across the project in the same order each time.
Two common mistakes to avoid are relying on caulk as a primary water seal and skipping proper flashing or drainage paths. Don’t shortcut the details or skip ventilation and crack-control measures, and always use hand and power tools safely with the right PPE. If you find a mismatch in materials, codes, or you’re unsure about flashing details after reading the guide, don’t push ahead—call a professional for guidance or help, and stay disciplined about small-area testing and careful assembly. Stay steady, stay safe, and you’ll finish with a deck that stays dry and looks sharp.
FAQ
What is the right way to apply stucco around a deck ledger board without relying on caulk?
Keep the stucco away from direct contact with the ledger’s face. Back-bedding a thin control joint or using a flashing detail at the ledger edge helps manage movement and moisture. Follow manufacturer instructions for the stucco mix and use a compatible seal or flashing where the ledger meets the wall.
How should water be directed away from the ledger area in a stucco system?
Install flashing that directs water down and out of the wall plane, not toward the ledger. Use weep holes or a drainage path behind the stucco to vent any moisture that gets behind the surface. Regularly inspect for blockages and keep the edge of the stucco clean of debris near the ledger.
What materials are commonly used for waterproofing the transitions at a deck ledger without caulk?
Common options include flexible flashing membranes, metal flashing with a drip edge, and water-shedding sealants only where specified by the product instructions. Choose materials compatible with both the stucco and the ledger material. Always check label guidance and local rules for compatibility and installation details.
What safety steps should I follow when working around a deck ledger and applying stucco?
Shut off power near the work area and wear eye protection, gloves, and a dust mask when mixing or applying stucco. Use a stable scaffold or ladder setup and have a spotter if you’re lifting materials around the ledger. Follow manufacturer and local instructions for equipment and weather precautions.