

Introduction
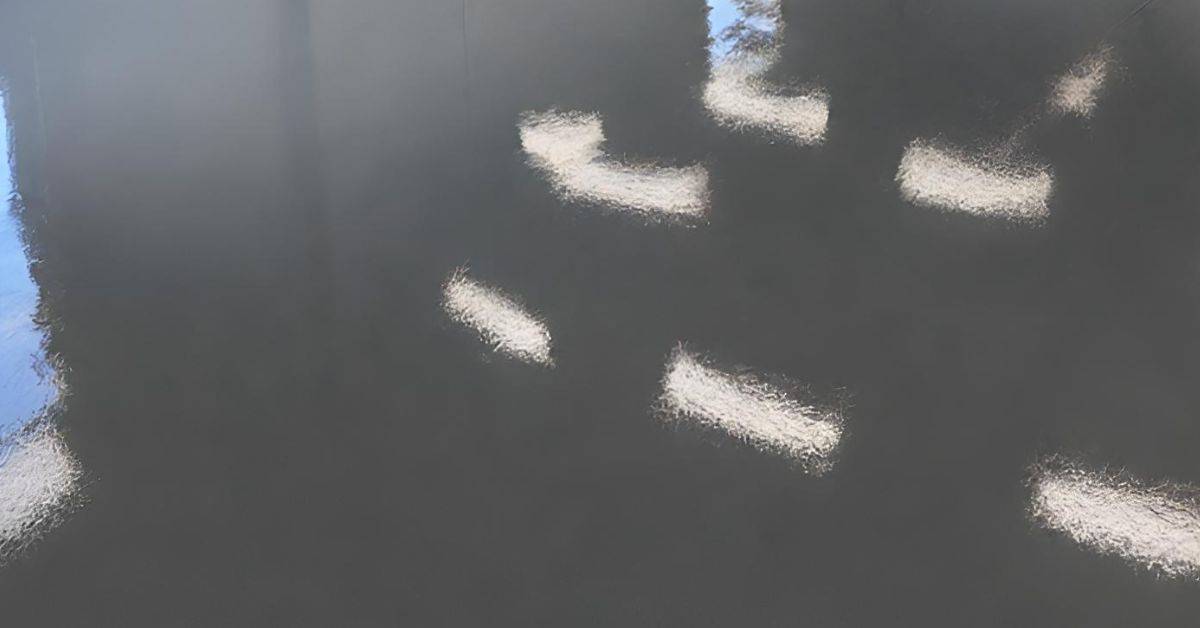
Spot-sealing stains are the shiny patches that can appear on a matte sealer after applying it. They usually form where the stain or moisture drew the sealer unevenly. In this guide we’ll keep things practical and show how to prevent those islands from showing up.
To avoid them, work in small, controlled areas and follow the product’s drying times. Keep surfaces clean, apply even coats, and test a small spot before a full pass. If something looks odd, check the label or manufacturer instructions and adjust your plan accordingly.
Key takeaways
- Inspect stain type and test in inconspicuous area before sealing to avoid glare.
- Use a clean, lint-free cloth and compatible sealer for spot work.
- Isolate the stained area with masking and avoid cross-contamination at edges.
- Work in thin, controlled passes to minimize sheen differences on matte finish.
- Check compatibility on a sample patch and follow manufacturer’s instructions.
- Safety: Ventilate area, wear gloves and eye protection when handling sealers.
Table of Contents
- Introduction
- Key takeaways
- Why Matte Sealers Develop ‘Shiny Islands’
- Tools and Materials Checklist for Safe Spot-Sealing
- Preparing the Surface and Isolating the Stain
- Step-by-Step Spot-Sealing Technique to Minimize Sheen Differences
- Product Selection and Compatibility Considerations
- Troubleshooting and Correcting ‘Shiny Islands’
- Preventive Strategies and Best Practices for Consistent Matte Finish
- Conclusion
- FAQ
Why Matte Sealers Develop ‘Shiny Islands’
Matte sealers can show localized gloss where the surface reflects more light or where the sealer has built up unevenly. This happens when absorption rates vary across the floor or slab, or when the finish dries with a more reflective film in small patches. Understanding these cues helps you see why spot-sealing carries extra risk on matte surfaces.
Regular wear, residue, or incomplete surface tension can create micro-areas that read as shinier than the surrounding work. The result is a visual island of gloss that reads differently under lighting. Framing the problem this way sets up careful spot-sealing as a precision task rather than a general cure-all.
How gloss perception works on matte surfaces
Matte sealers are designed to scatter light evenly, creating a soft, non-reflective finish. This is why they’re so appealing in the first place.
However, when a small area becomes glossy – even slightly – it stands out like a sore thumb. Here’s why:
Light reflection concentrates on these shiny spots, making them appear brighter than their surroundings. Plus, contrast between the matte and glossy areas amplifies the difference, drawing your eye to those ‘shiny islands’.
Common application- and material-related causes
The right materials and proper application are key to a smooth, matte finish. Let’s look at some common pitfalls:
- Overlapping or over-applying sealer: Too much product can cause it to pool and dry with a glossy sheen.
- Using the wrong applicator: Roller covers that are too dense or foam pads that aren’t designed for matte sealers can leave behind shiny streaks.
- Incompatible products: Using a sealer not suited to your surface (e.g., water-based on oily surfaces) can lead to weak bonds and cracking, sometimes with glossy patches.
- Trapped solvents: If the sealer doesn’t dry properly due to lack of ventilation or high humidity, trapped solvents can cause a glossy finish.
- Using old or improperly stored materials: Dried-out sealers or those exposed to extreme temperatures can change consistency and cause shiny spots when applied.
Environmental and substrate factors
Temperature, humidity, and the condition of your surface all play a role in how well your sealer applies and dries.
High heat or low humidity can cause sealers to dry too quickly, leading to an uneven, sometimes glossy finish. Conversely, high humidity can slow drying time, trapping solvents that create shiny patches.
Your surface’s porosity also matters. If it absorbs sealer too quickly or not at all, you might end up with shiny islands. And lastly, contaminants like dirt, grease, or previous sealers can interfere with adhesion and cause glossy spots.
Tools and Materials Checklist for Safe Spot-Sealing
Choose applicators, testing supplies, cleaning agents, and inspection lighting that minimize gloss variance. Look for pads or brushes designed for thin, even laydowns and materials compatible with matte sealers. Always verify that tools won’t introduce additional sheen.
Keep a small stain test kit and a light source that reveals sheen differences under your room lighting. Check product labels, datasheets, and manufacturer instructions before mixing or applying anything. If in doubt, confirm compatibility with your sealer and surface type with the manufacturer or local code guidance.
Applicators and finishing tools
Before you start spot-sealing, make sure you’ve got the right tools for the job. Soft, low-shed tools help avoid overworking the sealer and causing gloss variance.
- Soft-bristle brushes: Ideal for tight spaces and edges. They won’t leave bristle marks or cause excessive sheen.
- Low-nap rollers (3/16″ to 1/4″ nap): Great for large, flat areas. They apply sealer evenly without leaving roller marks.
- Microfiber pads: Perfect for buffing and finishing. They won’t leave lint or cause gloss issues.
- Avoid stiff-bristle brushes: These can scratch the surface and leave bristle marks, causing shiny spots.
- High-nap rollers (3/8″ to 1/2″ nap): Not recommended for matte sealers. They can leave roller marks and cause gloss variance.
- Sponge applicators: Can be useful for small areas, but they may leave sponge cells imprinted on the surface.
- Lambswool applicators: Soft and gentle, they won’t cause gloss issues. Ideal for matte sealers.
Quick rule: Always test your tools on a small area first to ensure they don’t leave marks or cause excessive sheen.
Test supplies and visual aids
Before you start spot-sealing, set up a test area to verify your results. This helps avoid shiny islands on your matte sealer.
- Test panels: Create small (6″ x 6″) test areas using masking tape. Apply sealer and observe drying process.
- Adjustable light source (e.g., inspection lamp): Check for gloss variance under different lighting conditions.
- Gloss meter: Measure the gloss level of your test areas to ensure it matches the surrounding surface.
- Magnifying glass: Inspect test areas closely for any signs of sheen or imperfections.
- White cardstock: Hold against test area to see if sealer appears darker, indicating excessive gloss.
- Avoid direct sunlight: It can cause false readings and make it difficult to spot shiny islands.
Quick rule: Always perform tests in a controlled environment with indirect lighting for accurate results.
Cleaning and prep materials
Before spot-sealing, ensure your surface is clean to avoid trapping dirt or debris under the sealer. Always check compatibility with your sealer first.
- Sealer-specific cleaner: Use the cleaner recommended by the sealer manufacturer for best results.
- Mild dish soap and water: A gentle alternative, but always test on a small area first.
- Tack cloth: Removes dust and debris from the surface before sealing.
- Avoid harsh chemicals: These can damage the surface or react with the sealer, causing gloss issues.
- Compressed air: Can be used to blow off loose dirt and debris before cleaning.
- Soft-bristle brush (dry): Gently removes dust from crevices and corners.
Quick rule: Always clean the surface thoroughly, but avoid over-wetting to prevent raising the grain of the wood.
Preparing the Surface and Isolating the Stain
Start with a thorough cleaning to remove dust, oils, and curing residues that can affect adhesion. Use a gentle cleaner and a clean, lint-free cloth to avoid introducing new residues. Rinse or wipe down as recommended by the cleaner’s label.
Work to minimize spillover by isolating the stain area with tape or an edge guard if appropriate. If the stain requires reduction, test a safe cleaner on a hidden corner first and document the results. Ensure the area is dry and free of cleaner before proceeding with spot sealing.
Effective cleaning and stain remediation steps
Start by sweeping or vacuuming the area to remove any loose dirt. Then, use a mild detergent mixed with warm water to scrub the stain gently. Avoid using harsh chemicals as they can damage the substrate.
Do not scrub too hard or use steel wool, which can scratch the surface and make it harder for the sealer to adhere properly.
If the stain persists after cleaning, you might need to use a specialized stain remover. Always test these products on a small, hidden area first to ensure they don’t discolor your surface.
Once the stain is gone or reduced as much as possible, rinse the area thoroughly with clean water and let it dry completely before proceeding with sealing.
When to use a stain-blocker vs spot-sealing
A stain-blocker is typically needed when the stain has penetrated deep into the substrate, making it visible even after cleaning. These products work by blocking the stain from bleeding through the sealer.
Spot-sealing, on the other hand, involves applying the sealer directly to the stained area without using a separate stain-blocking product. This method is usually sufficient for surface stains that have been removed or reduced through cleaning.
If you’re unsure whether to use a stain-blocker or not, it’s better to err on the side of caution and apply one. Using both a stain-blocker and sealer won’t cause any harm, but using neither when needed can lead to ‘shiny islands’.
Remember, using a stain-blocker may slightly affect the final sheen of the matte sealer, so always test it first on a small area.
How to set up and mask the repair area
Before applying any product, use painter’s tape to mark off the area you’ll be working on. Press down firmly on the edges to ensure a good seal and prevent sealer from bleeding under the tape.
For edge protection, you can use cardboard or plastic sheets taped down around the perimeter of your work area. This helps contain any overspray or drips and makes cleanup easier.
When taping off, consider the feathering effect – where the sealer will blend into the surrounding finish. You’ll want to tape about an inch beyond where you expect the sealer to reach to ensure a smooth transition.
Once your area is masked off, double-check that everything is secure and ready for application. A little extra time spent here can save you from having to redo work later.
Step-by-Step Spot-Sealing Technique to Minimize Sheen Differences
Begin with a small test patch to observe how the sealer lays down and dries on your surface. Apply a thin, even layer using a controlled motion, avoiding pooling. Allow the patch to set as directed by the product label and observe under your lighting.
Feather the edges into the surrounding area to blend the patch, then check for uniform sheen as it dries. If the sheen looks uneven, avoid reworking too soon and re-evaluate after a light cure before continuing. Do not rely on fixed cure times unless your product instructions specify them.
Step-by-Step Process
This sequence guides you through spot-sealing a stain to minimize sheen differences, ensuring a professional-looking result.
- Prep the area: Clean and dry the surface. Isolate the stain using painter’s tape.
- Gather tools: Have your sealer, applicator (brush or roller), test supplies, and visual aids ready.
- Main application: Apply a thin coat of sealer to the stain, working from one edge to the other.
- Feather edges: Use a clean, damp cloth to blend the sealer into the surrounding matte area, reducing contrast.
- Final checks: Inspect your work under different lighting. If satisfied, remove tape and let it cure. If not, repeat with adjustments.
Making a small test patch and evaluating results
Before tackling the entire stain, create a test patch to predict the final appearance.
Find an inconspicuous area near the stain. Apply sealer as you would on the stain itself.
Let it cure under controlled lighting conditions. Inspect for any sheen differences or changes in color. Be patient: Allow at least 24 hours for full curing.
If satisfied, proceed with spot-sealing the main stain. If not, adjust your technique and try again on another test patch.
Thin application and feathering methods
Applying sealer thinly and feathering edges help minimize sheen differences.
Thin application: Use minimal product to avoid excess buildup. Stir the sealer well before use to ensure consistency.
Feathering: After applying, use a clean, damp cloth to blend the sealer into the surrounding matte area. Work quickly and in one direction to avoid lifting the sealer.
This technique helps create a seamless transition between the sealed stain and the rest of the surface, reducing contrast and preventing ‘shiny islands’.
Timing checks and visual inspection during curing
Monitor your work as the sealer sets to ensure it’s curing properly.
- Check for bubbles: Ensure no air bubbles form on the surface. If so, gently pop them with a pin.
- Inspect under different lighting: Check the stain from various angles and lights to see any sheen differences.
- Feel for tackiness: Gently touch the area after a few hours. If it’s still sticky, let it cure longer.
- Look for leveling: Ensure the sealer isn’t pooling or creating uneven spots.
Quick rule: Consult your product data sheet for specific recoat or cure times to avoid damaging the sealant.
Product Selection and Compatibility Considerations
Choose matte sealers and accessories that are known to work with your surface type and climate, focusing on low-build options that reduce gloss variation. Look for products that warranties or labels indicate are suitable for spot repairs on matte finishes. Avoid combinations that have a history of causing high sheen under typical lighting conditions.
Pay attention to compatibility with cleaners, tapes, and masking materials, as some combos can trap residues or react with the sealer. Verify any compatibility notes on the product label or data sheet, and if unsure, contact the manufacturer for guidance aligned with your substrate.
Matte vs Satin vs Gloss: What Changes Visually
When it comes to sealers, the sheen level makes a big difference in how spot repairs look. Matte sealers have the least shine, making them most sensitive to local sheen changes.
Matte sealers show every variation in sheen, so matching the surrounding area is crucial. Even slight differences are noticeable.
Satin and gloss sealers hide minor sheen variations better due to their higher shine levels. But they also highlight any mismatches more than matte.
How to Read Product Labels and Data Sheets
Before you buy, check the product label and data sheet (PDS). They hold crucial info to avoid compatibility issues.
Look for:
– Recoat windows: Time between coats. Too soon can cause sheen problems.
– Solvent type: Check if it’s compatible with your stain remover and cleaner.
– Recommended applicators: Using the wrong tool can affect sheen.
Always follow manufacturer instructions. Don’t guess; check the PDS first.
Additives, Thinning, and Cross-Compatibility Cautions
Adding thinners or other additives to your sealer can change its sheen. Be careful!
Before adding anything,
– Check with the manufacturer first.
– Ensure it’s compatible with your specific product and stain remover.
Mixing incompatible products can cause:
– Uneven sheen
– Poor adhesion
– Surface defects
Troubleshooting and Correcting ‘Shiny Islands’
Start with minimally invasive fixes like gentle buffing or blending around the patch to reduce noticeable edges. Use a very light touch and clean between steps to avoid embedding residues. Reassess under the same lighting to see if the gloss stands out less.
If needed, escalate to scuff-sand and recoat following the sealer’s instructions, ensuring you protect surrounding areas. Make decision points based on the size of the patch and the consistency of the sheen after each intervention. If the problem persists, pause and re-evaluate surface preparation and product compatibility before proceeding.
Quick fixes for small gloss patches
If you’ve got a few tiny ‘shiny islands’, don’t worry. You can often fix them with minimal effort.
First, let the sealer cure fully. Then, grab some fine-grit sandpaper or a buffing pad. Gently buff the glossy spots to dull them down. Be careful not to overdo it and create visible scratches.
If your sealer allows, you can also apply a very light mist coat over the affected areas. This should help blend the sheen without making the patch too obvious. Just make sure your product is compatible with this method.
When to scuff-sand and reapply sealer
Sometimes, light buffing or mist coats aren’t enough. If you’ve got larger gloss patches or they’re still visible after your initial attempts, it’s time for a more intensive fix.
First, wait until the sealer is fully cured. Then, use fine-grit sandpaper to scuff-sand the glossy areas. This will help you create a uniform surface to work with. Be sure to follow your product’s guidelines for sanding and prep.
Once sanded, clean the area thoroughly to remove any dust. Then, apply a fresh coat of sealer, making sure to feather it out at the edges to blend it with the surrounding surface. Follow your product’s instructions for application and curing times.
Signs you need professional restoration
While DIY spot-sealing can work wonders, there are times when it’s best to call in the pros. Here are some signs that indicate you might need a pro for your ‘shiny islands’:
Widespread sheen mismatch: If more than 10-15% of your surface has glossy patches, it might be too much to fix with spot-sealing alone.
Structural substrate issues: If the underlying concrete has cracks, delamination, or other structural problems, you’ll need a pro to assess and address these before sealing.
Complex material incompatibility: If your sealer is incompatible with your substrate or existing sealers, or if you’re dealing with multiple types of stains or sealers, it’s wise to consult a professional. They have the experience and tools to handle complex restoration jobs.
Preventive Strategies and Best Practices for Consistent Matte Finish
Establish a repeatable workflow that includes surface prep, clean tools, and controlled application conditions to reduce surprises. Use environmental controls like stable temperature and limited humidity if your product data sheet suggests it. Keep a simple record of products used and any observations for future repairs.
Develop a standard approach to spot repairs, including testing, timing, and edge blending, so results stay consistent over time. When in doubt, reference manufacturer instructions and local rules to ensure your method aligns with official guidance and site safety practices.
Control your environment and workflow
Consistency is key when it comes to achieving a uniform matte finish. Here’s how you can control your environment and workflow:
Temperature and Humidity: Keep these steady. Ideal range for most sealers is 70-85°F (21-29°C) with humidity below 60%.
Lighting: Use consistent, natural lighting to avoid shadows and ensure even application.
Staged Work Areas: Section off your work area. Start in one corner, move systematically across the surface, and keep materials organized for each stage of the process.
Maintain product and application consistency
Consistency in your products and application methods will help you avoid shiny islands:
Product Batches: Use the same batch of sealer throughout the job. Mix a large enough quantity at once to avoid running out mid-job.
Label your tools – brushes, rollers, etc. – for each specific task. This helps maintain consistency in application methods.
Document your application steps. Note things like pressure, stroke direction, and drying times. This way, you can replicate the process accurately during touch-ups or future repairs.
Long-term maintenance to protect matte appearance
Regular cleaning and touch-up will help preserve your matte finish:
Cleaning: Use a soft, damp cloth with mild detergent to clean spills promptly. Avoid harsh chemicals that can dull the sheen.
For tougher stains, use a sealer-compatible cleaner following the manufacturer’s guidelines. Always rinse and dry thoroughly.
Touch-ups: Inspect your surface regularly. Spot-seal small areas as needed using the same methods you used initially. This will help maintain a uniform matte appearance over time.
Conclusion
Move forward with confidence by treating spot-sealing as a controlled, safety-first job that protects both the look and the surface. If you test small, work cleanly, and stay within compatible product choices, you keep the matte finish durable and avoid costly mistakes.
Put it into a simple, practical check: inspect the stain and surrounding area for porosity, isolate the work zone and protect adjacent surfaces, test your spot-seal product on a hidden spot first to verify compatibility and sheen, then apply the seal in light, even passes with minimal buildup, monitor the cure time and recheck the area for uniform sheen, and finally clean the site and document what you used for future touch-ups. Keep the process steady and conservative, and stop if anything looks off.
Common mistakes to avoid are guessing on product compatibility, over-applying or forcing the seal to change the sheen, and skipping a small-area test before a full repair. Safety rules you should follow are always wear eye and skin protection, work in a well-vented area, avoid solvents near heat or flames, and never rush the cure or overlook surface prep. If you see unexpected gloss, delamination, or inkling of damage after testing, pause and reassess rather than continuing.
If the stain resists or you’re unsure about product compatibility, it makes sense to call a pro rather than risk a permanent mismatch. When in doubt, prioritize safety, testing, and controlled steps, and you’ll keep the matte finish intact and your project moving forward with confidence. You’ve got this—steady work, good choices, solid results.
FAQ
How can I isolate the stain so it doesn’t affect nearby matte areas during spot-sealing?
Work with clean, dry surfaces and mask off the surrounding matte finish using painter’s tape or masking film. Apply your sealant only to the stain, and keep excess material off the edges to prevent feathering into the matte areas.
What’s the best way to apply sealant to a spot without creating a shinier edge?
Use a small, flat brush or fingertip applicator for precise control. Work in thin, even layers and wipe away any excess before it dries to reduce a visible edge or blob on the surface.
What should I check on product labels to ensure compatibility with matte sealers?
Read the label for surface compatibility and finish type. If in doubt, compare the stain-sealing product instructions with the matte sealer you’re using and follow the manufacturer’s curing and application notes.
What safe steps if the spot seals too shiny or uneven after it dries?
Let it cure fully and then assess. If needed, lightly rework with a clean brush or pad per label directions, or repeat a controlled thin application only on the affected area, avoiding over-application that could amplify sheen differences.