

Introduction
Skylight replacement is the process of removing a worn or failing skylight and installing a new one to restore leak-free performance. Look for signs of trouble like water stains on the ceiling, condensation inside the pane, or daylight where there shouldn’t be any.
Repair or replacement costs vary with material, size, and labor, so get a few written quotes instead of guessing. When in doubt, check the product label and manufacturer installation instructions, and follow local building rules. Consider a full replacement if leaks persist after repairs, the insulation performance is poor, or the skylight is notably old.
Key takeaways
- Signs of leakage: interior drips, fogging glass, staining around the skylight frame.
- When to replace: persistent leaks or compromised framing suggest full replacement may be necessary.
- Costs: DIY repair may save labor but costs rise with flashing, shingles, or sash damage.
- Process: evaluate skylight type, roof condition, flashing integrity before removal.
- Safety: always use fall protection, ladder safety, and PPE when working on roofs.
- Efficiency/insulation: replacement can improve daylighting while preserving insulation if sealed properly.
- Permits and pros: check local codes and hire qualified pro for weatherproofing and permits.
Table of Contents
- Introduction
- Key takeaways
- Signs Your Skylight Needs Replacement
- Common Causes of Skylight Failure
- The Skylight Replacement Process — Step by Step
- Cost Factors and Budgeting Considerations
- Energy Efficiency, Daylighting, and Insulation Impacts
- Preventative Maintenance and Lifespan Extension
- Safety, Permits, and Hiring the Right Pro
- DIY Vs Professional Replacement — Common Mistakes to Avoid
- Conclusion
- FAQ
Signs Your Skylight Needs Replacement
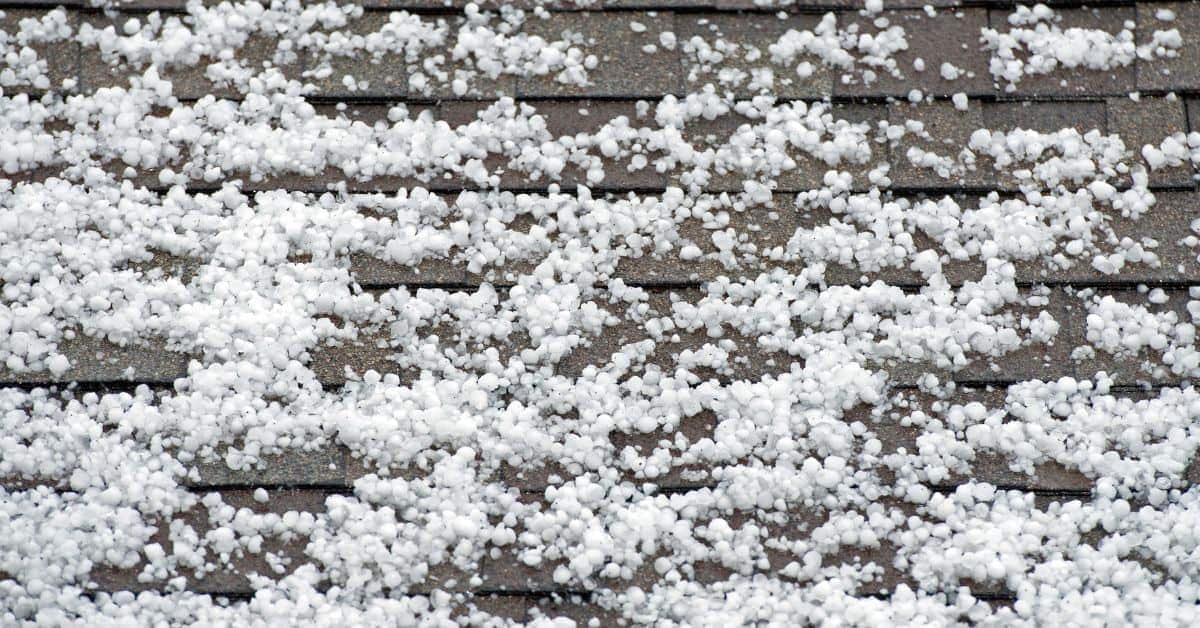
Visually assess the glazing and enclosure for cracks, spiderweb cracking, hail or impact damage, and any frame warping or rot that compromises water tightness. Look for water intrusion indicators such as active leaks, ceiling or wall staining, and soft or sagging interior finishes near the skylight. Condensation between panes, fogging that won’t clear with cleaning, and gasket or seal failures should also raise a flag for closer inspection.
Energy clues like drafts around the skylight and noticeable swings in indoor temperatures, along with operational problems such as a vent that won’t open or close, sticking or noisy movement, or improper opening that won’t secure, point to potential replacement needs. Aging materials like yellowing lenses or UV degradation, deteriorating flashing, and leaky curb flashing further justify triage decisions. In urgent cases, verify active leaks after rain, photograph interior leaks, check attic ventilation and flashing integrity, and consider temporary containment if water intrusion is ongoing while you plan repairs.
Visible damage (cracks, spiderwebbing, yellowing)
Cracked acrylic or plastic skylight lenses let water seep in. Spiderweb cracking spreads quickly, weakening the entire panel.
Yellowing happens when UV rays degrade lens material over time. It blocks light and signals irreversible damage.
Don’t ignore these signs. They mean your skylight’s performance is dropping fast.
Water intrusion and condensation
Active leaks, water stains, or damp interiors? That’s water getting in where it shouldn’t. Check your skylight’s seals and flashing.
Condensation between panes means the seal’s broken. Fogging or hazing that won’t clear signals a failed double/triple pane.
Don’t wait. Water intrusion leads to rot, mold, and costly repairs down the road.
Mechanical and safety failures (inoperable vents, smoke hatches)
Vent or hatch won’t open/close? That’s a fire safety risk. Sticking or noisy operation could be the same.
Improper opening that can’t be secured is a security issue. Deteriorating flashing around the curb lets water in, causing rot and leaks.
Safety first. Fix these issues ASAP to avoid bigger problems later.
Common Causes of Skylight Failure
Understand the four root causes—installation shortcomings, flashing failures, material degradation, and roof movement or thermal cycling—and connect each to the symptoms you observe, so you can target the right fix. Installation issues often show up as gaps, improper sealing around the flange, or incorrect curb height, while flashing problems manifest as step or interroflashing failures and poor integration with the roof. Material aging may present as crazing, coating wear, frame rot, or gasket failures, all of which accelerate water intrusion and heat loss.
Roof movement and environmental factors such as attic ventilation, thermal expansion, wind uplift, and UV exposure accelerate wear and hasten the onset of faults. Use these observations to guide diagnostic checks: cracks, leaks, condensation, loose fasteners, or loose flashing; plan for a replacement with a proper flashing kit, high-quality sealants, and verification of contractor qualifications. When planning, confirm compatibility with your roof and curb system and inspect for signs that indicate you should address underlying roof or structural issues first.
Installation and Flashing Problems
The most common cause of skylight failure is improper installation and damaged or missing flashing. Here’s what to look for:
Curb Installation: Incorrect curb height, leveling, or gaps around the skylight can lead to water intrusion.
Flashing Issues: Damaged or improper step/flashing around roof penetrations and incorrect integration with roofing material can cause leaks. Check terminations (valleys, peaks, joints) for deterioration.
Materials Aging and UV Damage
Material choices significantly impact skylight lifespan. Here are common issues:
- Glass/Polycarbonate: Crazing, hazing, or yellowing indicate sun damage. Choose materials with UV protection.
- Coatings: Deterioration leads to staining and weakens the skylight’s structure. Regularly inspect and maintain coatings.
- Frames: Corrosion or rot weaken frames, compromising structural integrity. Opt for corrosion-resistant materials.
- Gaskets/Seals: Failure causes leaks around the skylight perimeter. Inspect regularly and replace as needed.
- Compatibility with Roof Systems: Incompatible materials can cause weak bonds, leading to leaks or structural failure. Ensure materials are compatible during replacement.
Roof, Structural, and Environmental Factors
Environmental conditions and roof structure can stress skylights, leading to failure. Here’s what to consider:
Roof Slope: Flat or low-pitched roofs can cause ponding water, increasing the risk of leaks.
Attic Humidity: High humidity can lead to condensation and mold growth, damaging skylights over time. Ensure proper attic ventilation.
Wind Exposure: Wind uplift can loosen fasteners and cause leaks around the skylight perimeter. Regularly inspect and tighten fasteners as needed.
The Skylight Replacement Process — Step by Step
The skylight replacement process follows a clear flow: start with a thorough inspection and documentation, decide whether to repair or replace and scope the project, then prepare the area, remove the old unit, install the new one, and finish with verification and aftercare. You’ll see a timeline built around inspection findings, homeowner approvals, and any necessary permits. Contractors will handle sealing, flashing, and vent concerns to make sure the system stays watertight from attic to curb.
This matters because it sets expectations for what gets done, when, and why different steps are needed. You’ll understand what to look for, what decisions you’ll need to make, and how the work affects interior spaces, roof interactions, and long-term performance. If you’re DIY-ing, use the plan to spot potential rot, note moisture patterns, and confirm you have access, containment, and a clear set of homeowner approvals before work starts.
Step-by-Step Process
The following is a clear, numbered sequence of practical steps for the skylight replacement process. It starts from preparation and safety checks, then does the main work, and finishes with cleanup or final checks.
- Preparation: Protect interior spaces, seal off work area, power down adjacent fixtures if needed, set up temporary lighting or ventilation, confirm access and debris containment plan.
- Inspection: Assess attic and roof area, check skylight type, curb type, flashing condition, moisture/rot risk; note visible leaks and condensation patterns with photos for the homeowner.
- Removal: Safely remove the old skylight, inspect curb/roof deck for damage, repair/replace flashing, insulation, and decking as needed, address any rot or structural concerns.
- Installation: Install new skylight, reseal flashing, gasket, and flashing tapes; ensure watertight seal, proper alignment, and vent operation (if applicable).
- Finishing: Reseal interior sides and restore interior finishes, perform water test, check for drafts and lighting alignment.
Pre-install inspection, measurements, and permitting
Use this checklist before starting any work to ensure a smooth skylight replacement process.
- Roof assessment: Check for damaged or missing shingles, inspect roof deck for signs of rot or damage.
- Skylight type: Identify the type (fixed, vented, tubular) to determine if a direct replacement is possible.
- Curb condition: Inspect the curb for cracks, gaps, or rust; ensure it’s structurally sound and level.
- Flashing condition: Check flashing for damage, corrosion, or missing pieces; ensure it’s properly seated and sealed.
- Moisture/rot risk: Look for water stains, mold, or soft spots indicating potential rot.
- Measurements: Accurately measure the skylight size, curb dimensions, and roof pitch to ensure proper fit and installation.
- Permitting: Check local building codes and HOA rules; obtain necessary permits before starting work.
- Material choice: Decide on glazing type (tempered glass, plastic), tint, UV coating based on your needs and budget.
Quick rule: Always consult local building codes and HOA rules to avoid potential fines or rework.
Removal, flashing/curb repair, and installation
Safely removing the old skylight and properly installing the new one are crucial steps in the process.
Removal: Carefully cut around the skylight’s perimeter using a utility knife or circular saw with a sharp blade. Lift the skylight out, being mindful of any broken glass or sharp edges. Inspect the curb and roof deck for damage; repair as needed.
Flashing/curb repair: If the curb is damaged, replace it using new flashing and appropriate fasteners. Ensure the curb is level and properly sealed before installing the new skylight.
Installation: Position the new skylight on the curb, ensuring proper alignment with the roof’s pitch. Secure the skylight using appropriate fasteners, following the manufacturer’s instructions. Reseal flashing, gasket, and flashing tapes to ensure a watertight seal.
Post-install inspection, finish work, and documentation
After installation, follow this checklist to ensure your skylight is functioning properly and document the work for future reference.
- Water test: Perform a water test by simulating rain conditions; check for leaks around the skylight.
- Draft check: Inspect for drafts around the skylight; reseal if necessary.
- Lighting alignment: Ensure the skylight is properly aligned with the interior space, providing adequate natural light.
- Interior trim/ceiling repairs: Restore any damaged interior finishes caused by the removal or installation process.
- Warranty registration: Register your new skylight’s warranty with the manufacturer; keep records for future reference.
- Documentation: Keep detailed records of the replacement process, including photos, receipts, and any permits obtained.
Quick rule: Proper documentation ensures you’re covered in case of future issues or insurance claims.
Cost Factors and Budgeting Considerations
The main cost drivers are the skylight type, size, number of units, and how you install it (roof penetration vs. curb). Frame material, glazing and insulation options, and energy-efficiency ratings push the price up or down and affect long-term operating costs.
Define the scope clearly—assess the roof condition, flashing, interior finishes, and any drywall or finishing work, plus contingencies for repairs. Demand an itemized quote with labor vs. materials, exclusions, warranty terms, installation method, and manufacturer requirements to avoid surprise costs.
Primary cost drivers to request itemized quotes for
When requesting a quote for skylight replacement, it’s crucial to understand the primary cost drivers. This helps you compare apples to apples between different contractors and ensures you’re getting a fair price.
First, ask for a detailed breakdown of the skylight unit itself. The type (vented, fixed, or combo), size, number of units, frame/material, glazing/insulation options, and energy-efficiency ratings all impact the upfront cost.
Also request line-item pricing for flashing/curb work, roof repairs (if necessary), labor, permits, and disposal. This way, you can see exactly what’s included in the quote and make informed decisions about your budget.
When repair is more cost-effective than full replacement
In some cases, repairing or resealing your skylight can be a more cost-effective solution than replacing the entire unit. Understanding when to opt for repair can save you money in the long run.
If the frame is still in good condition but there are leaks due to worn-out flashing or sealant, resealing and flashing repair might be all you need. Similarly, if only the glass is damaged, a glass-only replacement could suffice.
Consider the longevity of your roof as well. If your roof is nearing the end of its life expectancy, it might make more sense to wait for a full roof replacement before addressing skylight issues.
Warranties also play a role. If your existing skylight is still under warranty, repairs might be covered. Always check with the manufacturer and installer about their warranties before making a decision.
Insurance coverage and warranties
Understanding your homeowner insurance policy and available warranties can help you make the most of your skylight replacement budget.
First, check with your homeowner insurance provider. If the damage is due to a covered event (like hail or windstorm), repairs or replacement might be fully or partially covered. However, wear-and-tear issues are typically not covered.
Next, look into manufacturer and installer warranties. Many skylight manufacturers offer warranties on their products, ranging from 10 to 30 years. Installers may also provide labor warranties. These can significantly extend the life of your investment by covering potential issues down the road.
When comparing quotes, always ask about warranty coverage and make sure it aligns with your insurance policy for optimal protection.
Energy Efficiency, Daylighting, and Insulation Impacts
Summarize how glazing options—from single to double or triple panes, along with low-E coatings and SHGC values—affect solar heat gain and cooling or heating loads, and tie practical choices to climate conditions without overstepping product claims. Explain how U-factor and air leakage relate to curb insulation and thermal bridging, and describe how replacement can reduce drafts and improve overall attic insulation effectiveness. This groundwork helps homeowners line up comfort with energy savings on a clear, actionable path.
Assess daylighting quality versus glare by considering skylight type, size, tilt, and orientation, and discuss how these factors influence usable daylight hours and interior shading needs. Compare fixed versus venting skylights for ventilation, humidity control, and seasonal comfort trade-offs, and provide a quick decision framework to estimate potential HVAC savings and payback timelines based on glazing and installation quality. Include a brief installer checklist to confirm proper flashing, airtight sealing, curb insulation, and compatibility with the roof assembly to maximize thermal performance.
Glazing and frame options that improve efficiency
When replacing your skylight, consider these glazing and frame options to boost energy efficiency:
Double or triple pane glass: More panes mean better insulation. Double pane reduces heat transfer by 24% compared to single pane.
Low-E coatings: These reflective coatings minimize heat loss in winter and reduce solar gain in summer. They’re especially useful in colder climates.
Gas fills: Argon or krypton gas between panes provides better insulation than air alone. It’s worth the extra cost for improved efficiency.
Thermally broken frames: These frames separate the indoor and outdoor parts of the frame, reducing thermal bridging and condensation risk.
How skylight placement and size affect energy use
The position, size, and orientation of your skylight significantly impact its energy performance:
Orientation and sun exposure: In northern climates, face skylights south for maximum winter heat gain. In southern climates, east- or west-facing skylights minimize summer solar gain.
Size matters: Larger skylights let in more light but also more heat. Balance size with your climate and desired daylighting benefits.
Tilt for control: Tilted skylights can be opened or closed to control ventilation, reducing energy needed for heating and cooling.
Preventative Maintenance and Lifespan Extension
A practical, seasonal routine keeps skylights dry and glare-free while catching small problems before they become big leaks. Create a simple spring, summer, fall, and winter plan that covers flashing seams, sealant wear, glass integrity, track cleaning, gasket replacement, and curb resealing. Include quick visual checks for condensation, cracks, chipped coatings, and frame warping, plus a note on resealing or replacement locations. Tackle interior diagnostics, ventilation, and humidity goals to slow condensation and extend life. Also outline how to inspect vents, hatches, and moving parts so they operate smoothly and don’t trap moisture.
This matters because regular, hands‑on upkeep reduces unexpected failures, protects insulation and energy use, and helps you time repairs before costly damage occurs. A clear checklist with safety reminders—ladder setup, weather awareness, and following product labels—empowers DIYers to do reliable maintenance without guesswork. You’ll understand lifespan indicators and have a straightforward decision path for replacements, keeping skylights performing well season after season and avoiding messy, expensive surprises.
Tools and materials checklist for regular maintenance
Before you start your skylight maintenance, make sure you have the right tools and materials. This will ensure safety and effectiveness.
- Soft-bristle brush: Gently clean dirt without damaging seals or glass.
- Ladder: Sturdy and tall enough to reach your skylight safely.
- Gloves: Protect hands from sharp edges and chemicals.
- Flashlight: Inspect hard-to-see areas around the curb.
- Caulk (silicone or polyurethane): For resealing, avoid chemical caulks that can damage lens materials.
- Resealable bag: Collect debris for disposal.
- Safety glasses: Protect eyes from falling debris or splashing chemicals.
- Tape measure: Ensure replacement parts fit properly.
Quick rule: Always prioritize safety when working on your skylight. Use stable ladders and appropriate protective gear.
Seasonal and visual checkpoints to inspect
Regularly inspecting your skylight can help prevent costly repairs. Here’s a seasonal checklist to follow.
- Spring: Check for winter damage, clean debris from curb and channels.
- Summer: Inspect sealant around the curb, check for warping or cracks in the frame.
- Fall: Ensure proper drainage, clear leaves and debris from gutters.
- Winter: Check for ice dams, inspect flashing seams for gaps.
- After storms: Inspect for damage, check for leaks around the curb.
- Annually: Examine glass for cracks or spiderweb cracks, check condensation patterns inside.
- Every 5 years: Reapply sealant around the curb, replace worn gaskets or weatherstripping.
Quick rule: If you notice persistent issues or signs of severe damage, it’s time for professional help or replacement.
Safety, Permits, and Hiring the Right Pro
Safety, permits, and hiring the right pro boils down to a solid safety baseline, proper permits when needed, and hiring with clear qualifications. You’ll want fall protection, proper ladder use, roof access rules, PPE, and weather checks as starting points. Verify licenses, manufacturer credentials, and proof of past skylight work before any money changes hands.
Why this matters is simple: permits affect timelines and who’s legally liable if something goes wrong. Vetting the contractor’s process and insurance reduces your exposure to leaks, injuries, and unfinished work. Ask about scope, warranties, lead times, disposal plans, and how they handle changes, then insist on written estimates and clear contracts so everyone stays on the same page.
Contractor vetting checklist and interview questions
Before hiring, use this checklist to ensure you’re choosing a competent and reliable skylight installer.
- Proof of insurance: Ask for certificates showing liability and workers’ compensation coverage. Without it, you could be held liable if an accident occurs on your property.
- Manufacturer training: Inquire about certifications from skylight manufacturers to ensure they’re up-to-date with installation techniques and product knowledge.
- References: Request contact information for at least three recent clients. Follow up to ask about the quality of work, professionalism, and project timeline.
- Sample warranties: Ask to see examples of warranties they offer. This will give you an idea of what’s covered and for how long.
- Detailed written estimate: Insist on a breakdown of costs, including labor, materials, permits, and disposal fees. This helps avoid unexpected charges later on.
- Previous skylight installations: Ask about their experience with similar projects to ensure they’re familiar with your specific needs.
- Project timeline: Discuss the expected duration of the project, including any potential delays due to weather or material availability.
- Disposal/recycling: Inquire about their plans for disposing of or recycling your old skylight. Some companies may charge extra for this service.
- Post-install inspection: Ensure they offer a post-installation inspection to address any issues that may arise immediately after installation.
Quick rule: Don’t skip these checks. It’s your home and your responsibility to ensure the job is done right and safely.
Site safety, roof access, and local code/permit considerations
Safety should always be your top priority when working on your roof. Here’s what you need to consider:
Fall protection: Ensure the contractor uses proper fall protection systems, such as guardrails or safety nets, especially if your roof has a steep pitch.
Roof access is crucial. Make sure they use appropriate ladders and follow safe climbing practices to prevent falls and damage to your property.
Local codes and permits: Skylight installations often require permits. Your contractor should be familiar with local building codes and obtain any necessary permits before starting work. This ensures your project is up to code and won’t cause issues during resale or inspections.
Compliant flashing and egress are essential for safety and waterproofing. Ensure the contractor uses compatible roof covering materials and follows manufacturer guidelines for flashing installation. If your skylight requires egress, ensure it meets local fire codes.
DIY Vs Professional Replacement — Common Mistakes to Avoid
DIY skylight work often leaks because small mistakes compound: flashing failure, improper sealing, incorrect shim/fastener setup, insulation gaps, and misaligned glazing or vents. Complex mounts and roof details, like curb versus flush installations, tip the balance toward professional help.
Warranty and building‑code implications can hinge on who does the work, and DIY methods often void coverage or require a pro inspection. If you face a high slope, multiple skylights, prior leaks, or roof/vent integration questions, use a clear decision framework and outline expectations with the installer.
Typical DIY pitfalls (improper flashing, sealant misuse, poor sealing)
Avoid these common mistakes to prevent leaks and ensure your skylight performs well.
- Incorrect flashing installation: Improperly installed or damaged flashing can lead to water intrusion. Ensure flashing is properly fitted and secured around the skylight curb.
- Overreliance on caulk: Caulk isn’t a cure-all. It can dry out, crack, or peel over time. Use it sparingly as a supplement to proper sealing methods.
- Using incompatible sealants: Not all sealants are created equal. Ensure the one you use is suitable for your skylight type and roof material.
- Improper curb integration: A poorly fitted or damaged curb can cause leaks. Make sure the curb is level, secure, and properly flashed.
Proper installation and maintenance are key to preventing these issues.
When you must call a professional
Certain skylight replacement jobs require the expertise of a pro. Here’s when to pick up the phone:
Steep or high roofs: Roof penetrations on steep or high-pitched roofs can be dangerous and challenging for DIYers. A professional has the necessary safety equipment and experience.
Complex flashing details: Some skylights require complex flashing systems to ensure a watertight seal. A pro can handle these intricate installations with ease.
Structural repairs or smoke hatch work: If your roof has structural damage or you need to install a smoke hatch, it’s best to leave this to the professionals. They have the knowledge and tools to ensure safety and compliance with building codes.
Additionally, if you want to register your skylight under warranty, a professional installation may be required.
Conclusion
Replacing a skylight is not just about brightening a room; it’s about staying dry, saving energy, and keeping the structure sound. Do it right, and the new skylight will look good and perform reliably for years.
Begin with a simple, repeatable check: confirm you’ve addressed signs of failure, chosen the right unit, secured any necessary permits, and lined up safety gear and help if you need it. Work methodically in the proper order: inspect the framing, remove the old unit only after you’ve isolated the area, install flashing and proper sealing, test for leaks, and clean up before you call it complete. If you’re unsure at any step, pause, reassess, and consider bringing in a pro rather than pushing through.
Common mistakes to avoid are clear: don’t rush the flashing or ignore the roof pitch and weather when you install, don’t skip safety gear or a second pair of hands, and don’t skip a proper test for leaks before finishing. Remember the rules: safety first, test in a small area if you’re unsure, and don’t cut corners that could lead to costly fixes later.
If you find yourself fighting persistent leaks, complex roof angles, or required permits and code issues, it makes sense to call a professional rather than pushing on alone. The right pro can save time, reduce waste, and get a durable seal that stands up to weather. Stay decisive, plan your path, and you’ll complete the job with confidence and a solid, long-lasting skylight outcome.
FAQ
How can I tell if my skylight is leaking and what should I do first?
Look for water stains on the ceiling or walls, damp spots around the skylight frame, and pooling water on the roof near the flashing. Inside, check for condensation that stays damp or dark spots that don’t dry. If you see active water, limit traffic near the area and call out a pro if you’re unsure about climbing on the roof.
When should I consider full replacement vs. repairing a skylight?
Think about replacement if leaks keep coming back after resealing, the frame shows rot or severe warping, or surrounding drywall shows ongoing water damage. If the glass or seal is only failing in one spot and the rest is solid, a repair might be reasonable. Always verify with manufacturer guidance and what your local pro recommends.
What are the typical labor and material cost considerations for skylight repairs?
Costs depend on the skylight type, size, flashing condition, and roof access. Labor time varies with roof pitch and accessibility, plus any incidental roof or decking work. Get multiple written quotes and check what your installer includes in the scope, such as flashing replacement or resealing.
What preventative maintenance measures help reduce leaks and extend skylight life?
Keep gutters and downspouts clear to prevent water backup, inspect and reseal flashing as needed, and reseal the skylight edges after heavy weather or seasonal changes. Clean dirt and debris from the curb and frame to prevent wear, and watch for condensation patterns that may signal seal issues.
What safety considerations should I know during repair or replacement?
Use proper fall protection and a stable ladder when working near the roof edge. If you’re unsure about roof integrity or electrical components, pause the job and consult a qualified pro. Never work on a wet or icy roof, and follow the manufacturer’s safety instructions and local guidelines for working at height.