
Introduction
Setting anchors in hollow block walls means choosing a fastener and method that grip the hollow cores and solid faces to hold a load.
For DIYers, two common paths are using a screen-type system or an injection method, each with its own prep and placement steps. This introduction explains what to expect and what to check as you plan your install.
You’ll learn how pullout strength varies by technique and what to verify before you drill. Gather basic tools and read the anchor labels or instructions to confirm suitability for hollow block, then compare recommended installation steps. If you’re unsure, ask the hardware store for guidance and follow local building rules.
Key takeaways
- Assess hollow-block layout and core conditions before selecting anchor method.
- Choose between screens, injection, or hybrid approaches based on load and block integrity.
- Prepare tools: hammer drill, correct bits, screens, grout or epoxy, PPE.
- Screening and post-install checks confirm proper coverage and alignment with anchors.
- Document pullout testing approach and verify performance through repeatable field checks.
- Safety: follow PPE, lockout, and fall prevention; stop if block is compromised.
Table of Contents
- Introduction
- Key takeaways
- Fundamentals of Hollow Block Anchoring
- Anchor Types Suited to Hollow Masonry
- Pre-Installation Screening and Visual Checkpoints
- Drilling, Screening, and Installation Methods
- Injection Materials and Grout Selection
- Pullout Testing and Performance Verification
- Safety, Common Mistakes, and Quality Control
- Planning, Cost Drivers, and Case-Study Lessons
- Conclusion
- FAQ
Fundamentals of Hollow Block Anchoring
Hollow blocks are built with exterior face shells, hollow cores, and often grout-filled cavities. These features create distinct load paths that influence how an anchor seating should perform. Understanding the anatomy helps determine where the grip will come from and how to seat the anchor properly.
Common failure modes in hollow blocks include pullout from the block face, shear failure across blocks, grout or mortar joint crushing, and anchor rim breakout. Each mode tends to dominate under different loading and seating conditions. Recognizing tension, shear, and combined loading helps choose between through-bolts, sleeves, or chemical anchors and guides embedment depth expectations.
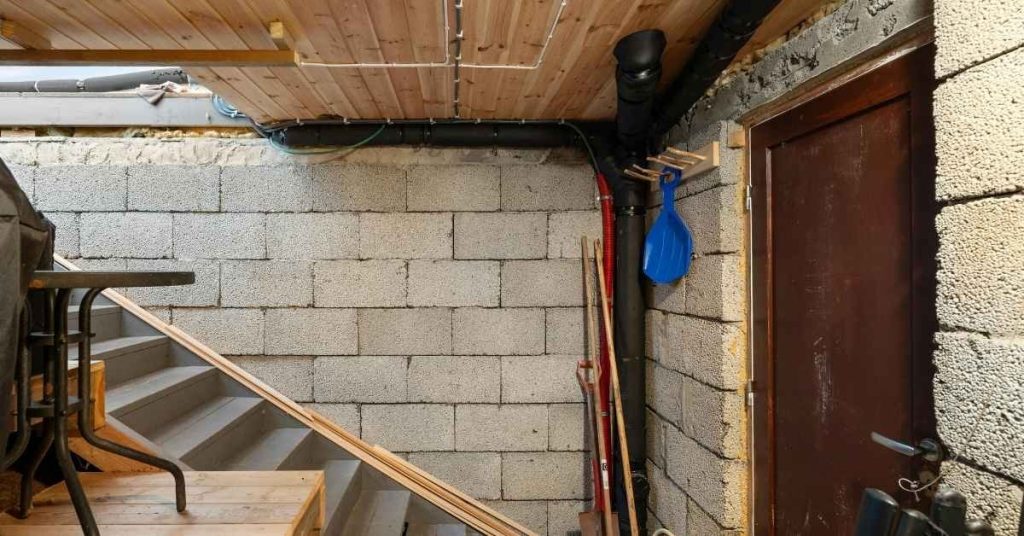
Hollow-block types and cavity geometry
Hollow blocks come in various types. You’ve got cored, cellular, and solid-wall variations. Each has its own cavity size, webs, and mortar joints.
Cored blocks have large cavities running through them. Cellular ones have smaller, closed cells. Solid-wall blocks are just that – solid with no cavities.
Before choosing an anchor, check these:
– Cavity size: Too small? You’ll struggle to fit your anchor.
– Webs: Thick enough for your load?
– Mortar joints: Strong and intact?
How loads affect anchor choice
Loads come in different flavors – tensile, shear, dynamic, eccentric. Each needs a different anchor approach.
Tensile loads? You’ll want mechanical anchors like through-bolts or sleeve anchors. They resist pullout forces.
Shear loads? Chemical anchors, like epoxy/injection types, are your friends. They bond the anchor to the block, resisting slide-off.
Dynamic or eccentric loads? Specialized anchors might be needed. Service conditions matter too – heavy use, vibration, exposure to elements? Plan for that.
Anchor Types Suited to Hollow Masonry
Major anchor families for hollow masonry include mechanical expansion anchors, chemical or resin anchors, toggle systems, and purpose-built hollow-wall options. Each type has typical load expectations and known failure modes to watch for. Matching the right family to the fixture helps avoid common install surprises.
Practical use cases vary with load direction, whether the wall is truly hollow or filled, and whether the fixture is temporary or permanent. Installation considerations such as drill size, embedment depth, setting torque or cure time, and the risk of substrate damage are important to factor in. Field tips cover compatibility with sleeves, through-bolts, and backer support to improve reliability.
Mechanical anchors (sleeve, wedge, expansion)
Mechanical anchors work best when you’ve got solid block webs to expand into. They’re quick and easy to install.
Sleeve anchors use a sleeve that expands within the hole, gripping the sides. Wedge anchors have a tapered plug that wedges itself in place. Both need solid webs – avoid them if your block has thin or weak webs.
Expansion anchors are similar but use a screw to expand a sleeve. They’re good for smaller loads and can work with thinner webs, but they might still cause substrate damage.
Chemical and injection anchors
Chemical or resin anchors are great when you’ve got large voids or weak substrates. They create a strong, bonded embedment.
Here’s how they work: You drill a hole, insert the anchor, then inject a resin or adhesive. As it cures, it bonds with the block, creating a solid base for your fixture.
These anchors are often preferred in hollow blocks because they can fill voids and create a strong hold even in weak substrates. But they do need time to cure, so plan ahead.
Toggle, channel, and specialized hollow-block anchors
Toggle bolts, channel inserts, and multi-part systems are designed to bridge cavities and distribute load across webs. They’re useful when you’ve got large voids or thin webs.
Toggle bolts have a wing that flips out once inserted, distributing the load across the back of the block. Channel inserts are hollow metal channels that fit into the block’s core, providing a solid base for screws.
Specialized hollow-block anchors like the E-Z Ancor or Tapcon systems use multi-part designs to expand within the block or create a mechanical bond across webs. They’re designed specifically for hollow masonry and can handle heavier loads than some other options.
Pre-Installation Screening and Visual Checkpoints
Start with exterior block condition and integrity. Look for cracks, spalling, and signs of water infiltration, and verify the block type and hollow-core layout. This helps set realistic expectations for anchor performance.
Next, assess internal obstructions and accessibility. Identify cores, voids, moisture pockets, and nearby rebar or embedded hardware that could block drilling or injection paths. A clear plan saves surprises on site.
Tools and materials checklist
Before you start drilling, make sure you have all the necessary tools and consumables at hand. This will save you time and prevent mistakes.
- Drill: A heavy-duty drill with adjustable speed is essential for accurate pilot holes.
- Drill bits: Have a variety of sizes to match your anchor types. Confirm the required bit size from the anchor product data sheet.
- Brushes: To clean out dust and debris from the block cores.
- Aspiration equipment: For removing moisture or loose material from the cores before injection.
- PPE (Personal Protective Equipment): Safety glasses, gloves, ear protection, and a dust mask are crucial for your safety.
- Anchor product data sheet: Verify the required hole size, drill speed, and other installation specifics.
- Tape measure: To ensure accurate placement of anchors according to your project’s requirements.
- Level or plumb bob: For ensuring your anchors are straight and level.
- Borescope or inspection camera (optional): For a closer look inside the block cores, if available.
Quick rule: Always double-check your tools and consumables before starting. Missing something can lead to damaged anchors or safety hazards.
Block and site inspection checklist
Before you start drilling, it’s crucial to inspect the blocks and the site to ensure everything is in good condition. This will help prevent issues during installation.
- Exterior block condition: Check for cracks, spalling, or signs of water damage. These can weaken the block and affect anchor performance.
- Block type and configuration: Verify the block type (hollow, solid, etc.) and its core configuration to choose the right anchors.
- Efflorescence: White, powdery deposits on the blocks can indicate water issues. Inspect for moisture pockets.
- Nearby loads: Check if there are any heavy loads nearby that could affect the block’s structural integrity.
- Rebar proximity: Tap the blocks to gauge hollowness and listen for rebar. Drilling into rebar can damage your drill bit and compromise safety.
- Embedded hardware: Look for any nails, screws, or other hardware that could hinder anchor installation.
- Load class and block grade: Confirm the load-carrying capacity of the blocks and their grade to ensure they can support your project’s requirements.
- Masonry reinforcement: Check for any additional reinforcement like steel lintels or vertical rebar that could affect anchor placement.
Quick rule: If you find significant cracks, signs of water damage, or other issues, consult a structural engineer before proceeding.
Drilling, Screening, and Installation Methods
Plan hole layout carefully to align with cores and avoid excessive core damage. Stagger patterns for multiple anchors when possible and aim for alignment with solid grip zones. Proper spacing and alignment matter for load transfer.
Use the recommended drilling technique and keep debris out of cavities. Control depth, speed, and dust to protect the hole interior. Screening or backing helps distribute load without impeding grout flow or causing fracture risks.
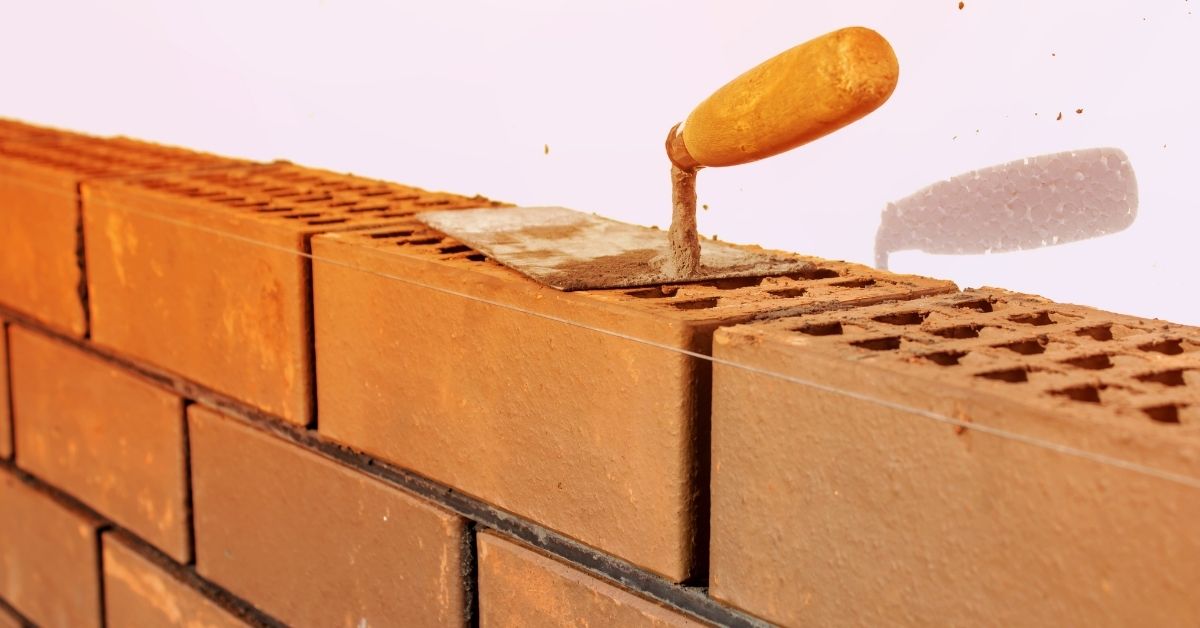
Hole preparation and cleaning techniques
Start by selecting the right drill bit – a carbide-tipped masonry bit for hollow blocks. The bit should be the same diameter as your anchor to ensure a tight fit.
Drill speed is crucial: Too fast can cause core breakout, too slow generates excessive heat and dust. Aim for 500-800 RPM with a steady feed rate.
After drilling, thoroughly clean the hole. Use a vacuum or compressed air to remove dust. A clean hole ensures better bond strength between the anchor and the grout or adhesive.
Using screens, sleeves and backing materials
Choosing the right screen, sleeve, or backing material is vital to prevent grout loss and center your anchor in the cavity.
- Plastic sleeves: Use for mechanical anchors. They protect the hole from debris and keep the anchor centered. Look for sleeves with ribbed or textured surfaces for better grip.
- Metal mesh: Ideal for chemical anchors. It helps distribute loads evenly, preventing cracking. Choose a mesh with openings smaller than your anchor’s diameter to prevent it from falling through.
- Temporary backer plugs: Use these to keep the hole clean and prevent grout loss before installation. Remove them just before inserting the anchor.
- Avoid: Using materials that are too flexible or have large openings. These can cause cracking, staining, and weak bonds.
Injection sequence and cure considerations
When using chemical anchors, follow a bottom-up injection sequence to ensure complete filling of the cavity. Start at the lowest point and work your way up.
Fill incrementally: Pour small amounts of resin at a time, allowing it to spread evenly before adding more. This helps prevent air pockets and ensures full coverage.
Always follow manufacturer instructions for mixing ratios, ambient conditions, and cure times. Cure time is critical: It’s when the anchor develops its holding strength. Do not load the anchor until it’s fully cured to avoid weakening the bond.
Injection Materials and Grout Selection
Grout compatibility with hollow block masonry affects bond behavior and moisture handling. Consider porosity and the potential for flow without saturating the block or causing surface staining. Choose materials that suit the environment and anticipated movement.
Compare epoxy, polyester, vinyl-ester, and cementitious grout systems. Note cure behavior, temperature tolerance, moisture resistance, and how each manages movement and load transfer in hollow cores. Align choice with interior or exterior use and expected conditions.
Resin versus cementitious grout: pros and cons
When choosing between resin and cementitious grouts, consider their unique strengths and weaknesses. Both have their place in hollow block masonry, depending on your project’s needs.
Pros of Resin Grout
- High bond strength, even in damp conditions.
- Suitable for thin cavities where cementitious grouts may not penetrate effectively.
- Faster cure times compared to cementitious grouts.
- Better resistance to chemicals and moisture intrusion.
Cons of Resin Grout
- Higher cost than cementitious grouts.
- Shorter working time, requiring careful planning and quick installation.
- Potential health hazards during application due to strong vapors.
- Less suitable for large cavities where the weight of the resin may cause block saturation.
Resin grouts are ideal when you need high bond strength in damp conditions, or when working with thin cavities. Always consult product data for specific working times.
Additives, reinforcement, and thermal/environmental compatibility
To enhance grout performance, consider adding fibers to improve flexibility and reduce cracking. Accelerators can speed up cure times in cold or humid conditions.
Corrosion inhibitors are crucial when using metal ties or anchors to prevent rusting and maintain long-term strength. Always check chemical compatibility with your chosen grout and exposure class guidance.
Consider the environmental factors at play. For exterior applications, ensure your grout can withstand freeze-thaw cycles and temperature extremes. In humid conditions, opt for a grout with good moisture tolerance to prevent efflorescence and maintain bond strength.
Pullout Testing and Performance Verification
Pullout testing helps verify that anchors will hold under real service loads and prevents edge or grout-related failures. It also confirms installation quality for DIY projects. A simple test plan adds peace of mind and safety.
Field approaches include in-situ pullout tests and basic shear tests, using safe setups suitable for non-lab environments. Document the results and compare them against project criteria and manufacturer guidance. Maintain clear records for traceability.
Field pullout test procedure overview
Select representative locations for testing, ensuring they’re typical of your installation. Mark them clearly.
Perform controlled tension tests using a calibrated jack or hydraulic ram. Apply load slowly and steadily, measuring peak load and failure mode.
Document each test thoroughly. Note embedment depth, anchor type, grout used, and any observed failures – whether it’s the anchor, grout, or substrate.
Interpreting results and next steps
Assess failure modes. If anchors failed, consider changing anchor type or increasing embedment length. If grout failed, adjust mix design or add reinforcement.
If failures are unexpected or frequent, engage a structural engineer or accredited test lab.
Compare results to predefined acceptance criteria and manufacturer specs. If tests don’t meet requirements, re-evaluate your installation process and consider further testing.
Safety, Common Mistakes, and Quality Control
Wear appropriate PPE and manage dust and debris to protect yourself and occupants. Use ventilation and dust collection as needed and decide between wet and dry cutting based on conditions. Plan around silica exposure and air quality.
Prevent structural risk by selecting the correct anchor size for hollow cores and verifying embedment depth and spacing. Typical mistakes include wrong anchor type, insufficient embedment, or over- or under-torquing. A simple QC checklist helps keep installation on track and documented.
Frequent installation errors and consequences
Here are some common mistakes that can lead to anchor failure. Avoid these to ensure a solid, long-lasting hold.
- Wrong anchor type: Using the wrong anchor for hollow cores can cause it to pull out easily. Always match the anchor type to your block’s core size and load requirements.
- Inadequate cleaning: Debris in the hole can prevent proper grout adhesion, leading to anchor failure. Clean holes thoroughly before installation.
- Premature loading: Loading anchors too soon after installation can cause them to pull out or break. Follow recommended cure times before applying load.
- Over-torquing/under-torquing: Too much or too little torque can damage the anchor and reduce its holding power. Always follow manufacturer’s torque recommendations.
Avoid these common mistakes to prevent costly repairs and ensure your anchors last as long as your structure.
Long-term durability and maintenance considerations
Maintaining anchor longevity involves protecting them from corrosion, environmental attack, and regular inspections. Here’s how to keep your anchors in top shape:
Corrosion protection: Use galvanized or stainless steel anchors where possible. Apply protective coatings if necessary, especially in harsh environments.
Environmental attack: Regularly inspect anchors for signs of damage from weathering, UV exposure, or other environmental factors. Address any issues promptly to prevent further deterioration.
Inspection intervals: Inspect anchors every 6-12 months, depending on your structure’s use and local conditions. More frequent inspections may be necessary in harsh environments or high-traffic areas.
Simple maintenance steps: Tighten loose anchors as needed. Replace damaged ones promptly to prevent further issues. Keep the area around anchors clean and free of debris to facilitate easy inspection and maintenance.
Planning, Cost Drivers, and Case-Study Lessons
Define the project scope and constraints for hollow-block anchors, including load types and environmental exposure. Explain how these drivers steer the method choice between grout-injection, mechanical anchors, or passive systems. Clarity here guides procurement and work sequencing.
Identify cost drivers early, such as labor, materials, testing, and contingency funds for rework. Map required testing steps and reference manufacturer guidance to stay within reasonable expectations. Use real-world lessons to avoid repeating common mistakes and to optimize planning.
Cost factors and budgeting guidance
Budgeting for a concrete project involves more than just the cost of cement. Here’s what you need to consider:
Anchor type – Different anchor types (like J-bolts, rebar, or expansion anchors) have varying costs. Check your design plans and local building codes to determine which is needed.
Grout volumes – More grout means higher cost. Estimate based on the size of your project. A good rule of thumb is about 1 gallon per square foot, but check product labels for specifics.
Access difficulty and labor can hike up costs. If your site has tight access or requires special equipment, factor this in. Always obtain multiple quotes from reputable contractors to compare prices. Don’t forget to consider life-cycle costs – cheaper materials may lead to higher maintenance or replacement costs down the line.
Short case studies and practical takeaways
Let’s dive into a couple of quick scenarios to see what works and what doesn’t. Remember, every job’s different, so use your noggin and adapt.
Light fixture install: Joe decided to upgrade his kitchen lights. He picked up some fancy LED cans at the big box store, but didn’t check their specs. Ended up with too many watts for his circuit, blew a fuse. Lesson? Always check your wiring capacity before buying fixtures.
Guardrail retrofit: Sarah wanted to add a guardrail to her deck. She found some cheap brackets online, but they weren’t rated for her load. When she leaned on it, the whole thing gave way. Bad news. Always check local codes and use rated hardware. Don’t skimp on safety.
Retrofit strengthening: Bob wanted to add a second floor to his house. He started framing without checking if his foundation could handle the extra load. Big mistake. His walls started cracking, and he had to spend more to reinforce it. Always check base compaction and foundation strength before adding major loads.
Conclusion
Anchoring into hollow block is doable if you plan for safety, proper materials, and clean execution. The right method protects people and keeps fasteners from failing, so you get a stable, lasting result that looks right too.
Check the wall and the plan in this order: verify the hollow masonry type and choose an anchor that suits it, inspect the area for concealed voids or moisture, drill and seat the anchor accurately, apply the correct screening or grout method as specified, and test pullout to confirm you’ve got adequate strength before loading anything heavy. Keep it simple, document your steps, and test small sections first to prevent costly mistakes.
Avoid these mistakes: overdrill or underdrill, mix or use grout or injection materials outside the recommended types or cure times, and skip pullout testing or safety checks. A practical rule is to verify each step with a quick visual check, keep tools clean, wear eye protection, and never skip cure times or load limits. If you hit uncertain material conditions, or if the wall has cracks, moisture, or inconsistent block cores, pause and reassess before proceeding.
If the project starts to feel beyond your comfort zone—uneven blocks, poor access, or large loads—don’t push on. Bring in a pro to confirm the plan, equipment, and load calculations. Stay disciplined, and you’ll finish with a solid anchor system that performs as needed and looks right on the finished surface.
FAQ
What’s the simplest way to set anchors in hollow block walls?
Choose an anchor type that suits hollow masonry, like screens or injection systems. Follow the manufacturer’s instructions for hole size, spacing, and cure time. Double-check you’re not drilling into cores you can’t anchor into and clean the bore before setting.
What are the main installation methods for hollow blocks?
Screens require drilling, inserting the screen, and grouting around it. Injection uses a slurry or resin that fills the voids and bonds the anchor. Each method needs proper cleaning, proper hole preparation, and adherence to product instructions.
What tools will I need and how do I use them safely?
Have a hammer drill with a masonry bit, a clean-out brush, a gravity-fed grout gun or injection syringe, and a level. Wear eye and dust protection, secure the block wall, and don’t force tools. Follow tool manufacturer safety notes and local rules for dust control.
How do I check pullout strength or verify the anchor performs?
Use the recommended pullout test procedure from the product instructions to verify performance. If you’re unsure about results, compare to the label’s guidance and consider a specialist’s test. Always stop if the test shows unexpected movement or cracking.