
Introduction
Scaffolding and pump jacks are temporary work platforms used to reach stucco or masonry work safely.
They rely on stable frames, proper planking, and correct setup to support workers and tools. Check base stability, footing, and connections before starting any task.
Stability checks include verifying level bases, secure braces, and guardrails, and inspecting for wobble or shifting during use. When setting planks, make sure they span the frame securely, have no cuts or structural damage, and extend over supports with safe overhang. Consider different systems such as bamboo, cantilever, cuplock, or frame and brace setups, and follow manufacturer and local rules for each. Always follow plastering or masonry material requirements and use the appropriate load ratings and tie-offs as directed.
Key takeaways
- Verify scaffold type suitability for stucco work, including bamboo, cuplock, frame-and-brace options.
- Check pump jack components, correct setup, and stable footing before starting tasks.
- Conduct pre-use stability inspections and document any deformation, leaning, or loose connections.
- Space planks correctly and secure platforms to prevent movement during stucco tasks.
- Follow safety practices: guardrails, fall protection, and access without overreaching.
- Consider local regulations, training, and cost factors affecting scaffold selection.
Table of Contents
- Introduction
- Key takeaways
- Types of Scaffolding Used in Stucco and Masonry Work
- Pump Jack Scaffolding: Components and Correct Setup
- Stability Checks and Inspection Checklist
- Plank and Platform Setup Basics for Stucco and Masonry Tasks
- Working Safely on Stucco and Masonry from Scaffolds
- Tools, Materials Checklist, and Visual Checkpoints
- Maintenance, Common Mistakes, and Troubleshooting Instability
- Regulations, Standards, Cost Factors, and Training
- Conclusion
- FAQ
Types of Scaffolding Used in Stucco and Masonry Work
Different scaffold systems support plaster and masonry tasks in distinct ways. Frame/scaffold, system/scaffold, suspended platforms, and cantilevered or mast climbers each offer specific access, load capacity, and surface compatibility. Understand where each type fits a given job site to balance speed and stability.
Evaluate key suitability factors such as reach, working height, and tolerance for rough exterior surfaces, along with how well the system works with pump jacks and chute setups. Consider pros and cons related to setup complexity, maneuverability, and adaptability to irregular sites like corners or openings. Include safety, inspection, and compliance steps to guide selection and use.
System Scaffolding (Cuplock, Ringlock, Kwikstage)
System scaffolds like Cuplock, Ringlock, and Kwikstage are modular systems that offer several benefits for stucco and masonry work. They consist of standardized components that can be quickly assembled to create a stable platform.
Speed is one of the key advantages of system scaffolds. The pre-engineered components allow for rapid setup, reducing labor costs and time spent on site preparation.
The stability of these systems makes them well-suited for heavy masonry work. They are designed to withstand significant loads, ensuring a secure working platform even when handling large quantities of materials like stucco or stone.
Before using system scaffolds, it’s crucial to inspect locking mechanisms and diagonal braces to ensure they are securely fitted. Always follow the manufacturer’s instructions for proper assembly and component compatibility.
Traditional and Modular Options (Frame & Brace, Tube & Clamp, Mast Climbers)
For repetitive heavy-lift façade tasks in stucco and masonry work, consider the flexibility of traditional frame-and-brace or tube-and-clamp systems alongside modern mast climbers.
Frame-and-brace and tube-and-clamp scaffolds offer flexibility for irregular job sites with varied access needs. They can be configured to adapt to corners, window openings, and multi-story elevations, making them highly versatile.
Mast climbers, on the other hand, excel in tasks requiring frequent access changes and heavy loads. They provide vertical access and have a high load capacity, making them ideal for lifting materials and equipment to significant heights.
When selecting between these options, evaluate access efficiency and setup complexity on-site. Assess stability and load capacity for specific masonry tasks, and ensure the chosen scaffold type aligns with task requirements and site conditions.
Specialized Scaffolds (Pump Jacks, Suspended, Mobile, Bamboo)
Certain specialized scaffold types are appropriate for specific situations in stucco and masonry work. Understanding their unique setup concerns is crucial for safe and efficient use.
Pump jacks and suspended stages are suitable for vertical access with limited ground space. They can be used to reach high elevations without consuming valuable ground area, making them ideal for tasks like painting or inspecting tall structures.
Rolling towers and bamboo scaffolds (where applicable) offer mobile access required for multiple locations. These systems can be easily moved around the job site, allowing workers to quickly access different areas as needed.
Before using any specialized scaffold, assess stability, load capacity, and safety features. Verify that the chosen scaffold type is suitable for the specific task, access needs, and site conditions. Always comply with local regulations regarding scaffold use.
Pump Jack Scaffolding: Components and Correct Setup
Pump jack scaffolding comprises base plates, standards, braces, pins, jacks, and winches. Each part contributes to stability and proper load transfer on stucco or masonry installations. Start with a solid understanding of the anatomy to reduce setup errors.
Gather required components and accessories such as platform planks, guardrails, toe boards, stabilizers, anchors, and fall-protection options suitable for stucco surfaces. Follow a setup sequence that includes site assessment, footing leveling, and secure planks with locking pins and engaged wheels. Account for vibration control and edge protection to minimize damage to finished work.
Pump jack components and platform options
Pump jacks are composed of several key components that ensure stability and safety when used for stucco and masonry work. Familiarize yourself with these parts to set up your pump jack correctly.
Base shoes provide the foundation, distributing weight evenly on the ground. Ensure they’re in good condition and suitable for your surface type.
Upright poles, also known as standards, support the platform’s height. Inspect them for any visible damage or wear before setup. Cross-braces connect uprights, providing additional stability.
Platforms can be made of wood, aluminum, or manufactured decks. Wooden planks should be in good condition, free of cracks, and properly secured. Always use compatible components to avoid accidents.
Setup sequence and alignment checks
Correct installation sequence and alignment checks are crucial for safe and effective pump jack operation. Follow these steps to set up your pump jack correctly:
1. Assemble the base: Start by placing the base shoes on a stable, level surface. If necessary, use shims to achieve levelness.
2. Extend uprights: Extend the upright poles vertically, ensuring they’re plumb using a level after each extension. Check for any wobble or unevenness.
3. Connect cross-braces: Attach the cross-braces to the uprights, following the manufacturer’s instructions. Ensure they’re properly secured and aligned.
4. Install platform: Place the platform on top of the uprights, ensuring it’s level and evenly supported. Recheck verticality and alignment before use.
Load ratings and when to consult manufacturers or engineers
Understanding your pump jack’s load rating is crucial for safe operation. Always compare expected loads with the rated capacity before use.
Check the manufacturer’s data sheet for the specific load rating of your pump jack. If expected loads approach or exceed 75% of the rated capacity, consult the manufacturer or an engineer to verify safety factors.
For heavy masonry loads, it’s recommended to use a conservative safety factor or have the setup reviewed by a professional engineer to ensure compliance with local codes and standards.
Never proceed if loads are too heavy. Reduce loads or use additional equipment to distribute weight evenly across the platform.
Stability Checks and Inspection Checklist
Pre-use stability checks should confirm that scaffold or pump jack type matches site plans and that footing is firm and level. Verify load ratings and clear each surface of soft soil or debris before work begins. This reduces the risk of unexpected movement.
Foundations and base support require inspection of base plates, mudsills, and casters where applicable. Look for sinking, shifting, or signs of ground movement that could compromise stability. Ties, braces, and connections must be correctly installed with secure pins and undamaged components for reliable performance.
Pre-shift and weekly inspection items
Before each shift and at regular intervals, perform these visual and tactile checks to ensure the safety of your scaffold or pump jack.
- Plank condition: Inspect for cracks, splits, or warping. Damaged planks can cause instability.
- Fasteners: Check bolts, screws, and other fasteners for tightness and signs of wear. Loose fasteners can lead to structural failure.
- Braces: Ensure braces are properly interlocked and secure. Bent or damaged braces should be replaced.
- Tie points: Verify ties to the building or structure are correctly installed and secure. Loose ties can cause the scaffold to shift.
- Unusual movement: Gently push or pull on the scaffold to check for excessive movement. Excessive movement indicates instability.
- Guardrails: Ensure guardrails are in place and secure, especially if working at heights over 6 feet.
- Toe-boards: Check that toe-boards are securely attached to prevent tools or debris from falling.
- Access points: Verify ladders, stairs, or ramps are secure and provide safe access to all working levels.
Quick rule: If any issues are found, document them and schedule repairs before continuing work.
Anchoring, ties, and base/ground checks
Before setting up or moving your scaffold or pump jack, perform these checks to ensure stability.
- Tie spacing: Verify tie spacing adheres to manufacturer guidelines. Incorrect spacing can compromise stability.
- Anchor selection: Ensure anchors are suitable for the substrate and load. Inadequate anchors can pull out under load.
- Base support: Check base plates or mudsills are level, firm, and free of soft soil or debris. Unstable bases can cause the scaffold to shift.
- Subgrade bearing: Assess the subgrade’s bearing capacity. Soft or weak ground can cause sinking or shifting.
- Signs of movement: Look for signs of ground movement, such as cracks in the substrate or tilting of the scaffold.
- Caster condition (if applicable): Check casters are secure and in good working order. Damaged casters can cause instability when moving the scaffold.
- Foundation conditions: Ensure the foundation is firm, level, and free of soft soil or debris. An unstable foundation can cause the scaffold to shift.
Quick rule: If ground movement is detected, investigate further and consider additional support.
Environmental and dynamic loading checks
Monitor these factors to maintain stability in changing conditions and prevent accidents.
- Wind speed: Assess wind speed. High winds can cause the scaffold or pump jack to sway or topple.
- Vibration sources: Identify potential vibration sources, such as nearby traffic or heavy equipment. Vibrations can compromise stability.
- Material stacks: Check for overloading due to material stacks. Overloading can cause the scaffold to collapse.
- Weather impacts: Monitor weather conditions. Rain, snow, or ice can make surfaces slippery and reduce friction.
- Surcharge loads: Verify surcharge loads (temporary loads) are within the scaffold’s load rating. Exceeding the load rating can cause collapse.
- Structural movement: Check for signs of structural movement, such as cracks in the building or structure.
Quick rule: If stability is compromised due to environmental factors or dynamic loading, stop work and reassess conditions.
Plank and Platform Setup Basics for Stucco and Masonry Tasks
Plank selection should prioritize exterior-grade, straight, intact boards with adequate load rating. Avoid warped boards and confirm suitability for moisture exposure. Check maximum span between supports to prevent sagging or misalignment.
Platform dimensions should ensure full bearing on supports with safe overhangs. Edges should be flush to prevent snagging or tipping. Secure planks to frames and maintain even, level support across the working area for reliable stability.
Plank Selection and Condition Criteria
Selecting the right planks for your scaffold is crucial for stability and safety. Choose from timber, aluminum, or prefabricated decks based on your specific needs.
Condition checks: Inspect each plank for straightness, undamaged surfaces, and appropriate load rating. Reject any warped or cracked boards to prevent instability and accidents.
Species and moisture exposure: Consider the species of wood (hardwood vs. softwood) and potential moisture exposure. Hardwoods are generally more durable but may be heavier. Ensure planks are dry before use to avoid slippery surfaces.
Maximum span between supports: Confirm the maximum span between supports for your chosen planks, as this varies by material and size. Overloading or over-spanning can lead to collapse.
Layout, Overlaps, and Securing Methods
Arrange planks to cover the work zone with safe overhangs on all sides for stability and prevention of displacement.
End support: Ensure planks bear fully on supports at both ends to distribute weight evenly. Avoid gaps between planks and supports, which can compromise stability.
Overlap/splice practices: Overlap or splice planks as needed to cover the required area. Maintain a minimum overlap of 12 inches (30 cm) for stability. Stagger joints to avoid weak points.
Mechanical securing: Fasten planks securely to scaffold frames or supports using approved screws or nails. Avoid loose debris that could cause tripping hazards. Use non-slip mats or coatings where needed to prevent accidents.
Guardrails, Toe Boards, and Edge Protection for Mortar Work
Ensure proper edge protection when working with mortar and masonry units to prevent falls and accidents.
Guardrails: Install guardrails along open-sided platforms and work areas at risk of falls. Securely fasten them, extending at least 42 inches (107 cm) above the platform surface.
Toe boards: Use toe boards to prevent tools, materials, or debris from falling off the edge. Secure them in place, extending at least 3.5 inches (8.9 cm) above the platform surface.
Additional edge protection: When mixing, applying, or moving mortar and masonry units, consider using additional edge protection such as screens or barriers to prevent accidents involving these materials.
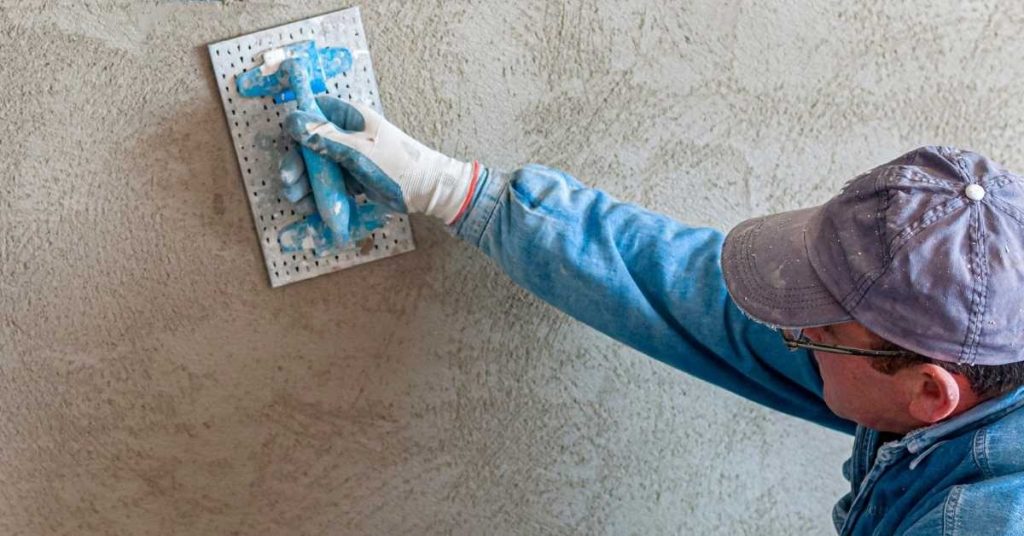
Working Safely on Stucco and Masonry from Scaffolds
Identify task-specific hazards such as fall risks, mortar splatter, and dust generation, then implement controls for each. Plan the sequence to minimize time spent on elevated platforms. Establish clear roles and communication to reduce exposure during plastering and masonry tasks.
Ensure proper access and platform integrity, with guardrails, toe boards, and clean, dry planks. Verify footing and level surfaces and maintain unobstructed egress. Plan for temporary bracing or tie-offs if the structure requires them for stability.
Fall Protection, Access, and Egress
Working at height on scaffolds exposes workers to fall hazards. It’s crucial to understand when active fall protection is required versus relying on passive systems like guardrails.
Active Fall Protection: Use safety harnesses and lanyards where required, typically when working above 6 feet or as per local regulations. Always secure your harness to a stable anchor point before starting work.
Ladder Access: Ensure ladders are secure, level, and extend at least 3 feet above the landing. Face the ladder while climbing, maintain three points of contact, and do not carry objects that may impair your balance.
PPE and Masonry-Specific Hazard Controls
Masonry tasks present unique hazards. Personal Protective Equipment (PPE) is essential to mitigate these risks.
Respiratory Protection: Dust control measures such as damp-sweeping, HEPA vacuums, and containment barriers should be in place. Wear appropriate respiratory protection when exposed to dust or debris.
Eye and Face Protection: Use safety glasses with side shields or goggles to protect against mortar splatter and debris. Hard hats are also necessary to prevent head injuries from falling objects.
Hand Protection: When handling lime, cement, or additives, wear gloves and other protective clothing as required by the material’s safety data sheet. Always follow manufacturer guidelines for safe handling.
Material Handling, Hoisting, and Staging Mortar/Materials
Choosing the right materials and staging them correctly on platforms is vital for worker safety and job quality.
- Mortar: Use mortar that meets local standards or project specifications. Ensure it’s properly mixed and stored to prevent segregation. Avoid overloading platforms with wet mortar, as this can cause instability.
- Blocks/Bricks: Choose blocks or bricks that meet the required strength and size specifications. Stage them evenly on platforms, ensuring no overhanging loads that could tip the scaffold.
- Additives: Use additives as per manufacturer instructions to enhance mortar properties. Store them properly to maintain quality and prevent contamination.
- Tools: Keep tools within easy reach but ensure they do not create tripping hazards or overload platforms. Secure long-handled tools vertically on the platform.
- Hoisting Materials: Use hoists or elevators where available to minimize manual handling. Always maintain three points of contact when carrying materials manually, and never exceed your safe lifting capacity.
Tools, Materials Checklist, and Visual Checkpoints
Tools and equipment should cover frames, braces, planks, lockable casters, base plates, tie-ins, pump jack components, and measurement gear. Include protective items like fall-arrest gear and a compact hand tool kit. Each item supports safe setup and ongoing adjustments on stucco or masonry work.
Materials should be rated for scaffold use and weather exposure, with condition checks on planks and guardrails. Visual checkpoints include base stability, fully seated planks, plumb and square frames, and guardrail integrity. Maintain daily pre-use checks and post-adjustment rechecks to sustain safety throughout the job.
Essential Tools and Fasteners for Setup
Use the following tools to establish your construction site safely and efficiently, ensuring stability, accuracy, and durability in your work.
- Tape Measure: Accurately measures lengths for precise setup. Position the measuring hook correctly for accurate readings. Tip: Always double-check measurements to prevent errors.
- Level: Ensures surfaces are horizontal or vertical, crucial for stable scaffold setup and proper adjustments. Consider a laser level for long distances. Tip: Regularly check your level during setup to maintain accuracy.
- Claw Hammer: Drives nails into place, essential for securing ties and clamps. Choose one with a comfortable handle for better grip. Tip: Use a nail set to countersink nails below the surface for safety.
- Wrenches (Adjustable & Specific Size): Tightens or loosens bolts securely. An adjustable wrench is versatile, while specific size wrenches provide better torque control. Tip: Always use the correct size wrench to prevent stripping bolts; if unsure, check the manufacturer’s instructions.
- Hammer Drill: Drills holes into concrete or masonry for anchor placement. Use a suitable drill bit and maintain a steady speed (around 500-1000 RPM) to avoid overheating. Tip: Wear safety glasses and keep the drill level to prevent injury and ensure accurate drilling.
- Scaffold Ties: Secures scaffold components together, ensuring stability. Choose ties rated for your specific scaffold load capacity. Tip: Regularly inspect ties during use; if they show signs of wear, replace them immediately.
- Clamps: Holds materials in place while drilling or cutting. Consider a bar clamp for larger pieces and a C-clamp for smaller ones. Tip: Ensure clamps are tight enough to hold material securely but not so tight that they damage it.
Pro tip: When selecting tools, consider your specific needs and budget. For occasional use, renting or borrowing tools can be cost-effective. However, for frequent use, investing in quality, professional-grade tools ensures durability and better performance. Always prioritize safety over cost when choosing tools.
Platform and Plank Material Checklist
The choice of platform and plank materials significantly impacts the durability, safety, and appearance of your work surface. Selecting the right materials ensures a stable, safe, and long-lasting workspace.
- Pressure-treated lumber: Used for outdoor platforms due to its resistance to rot and decay. Look for ACQ (Alkaline Copper Quaternary) or CA (Chromated Arsenic) treated lumber. Choose #2 grade or better for a smoother surface.
- Cedar or redwood: Ideal for outdoor platforms as they naturally resist rot and decay. Select heartwood for better durability, and choose clear or select grades for a smooth surface.
- Plywood: Suitable for indoor platforms, especially when finished with paint or laminate. Look for plywood with a minimum of 3/4″ thickness and an A-C grade for a smooth, uniform surface.
- OSB (Oriented Strand Board): An affordable alternative to plywood, OSB is suitable for indoor platforms. Choose a minimum thickness of 7/16″ and look for engineered panels with better strength and stability.
- Plastic or composite decking: Ideal for low-maintenance outdoor platforms. Check the product label for slip resistance ratings (COF) to ensure safety, and choose a color that matches your project’s aesthetic.
Pro tip: When purchasing materials, check for any visible defects such as cracks, knots, or warping. Also, consider renting or borrowing materials if you only need them for a short period to save costs.
Visual checks and quick field tests
Before starting work, conduct these visual inspections to ensure your scaffold’s stability and prevent accidents or poor work quality.
- Plank Levelness: Walk along the planks to check for levelness. Significant tilting may indicate instability.
- Plank Gaps: Ensure there are no wide gaps between adjacent planks that could cause trips or falls.
- Secure Fasteners: Check all bolts, clamps, and other fasteners to ensure they’re tight and secure. Loose fasteners can lead to instability.
- Frame Straightness: Inspect the scaffold frame for any signs of bending or twisting. A crooked frame may indicate damage or improper setup.
- Leg Levelness: Check each leg’s levelness using a level tool. Uneven legs can cause instability and wobbling.
- Base Stability: Ensure the base is stable, with no signs of sinking or shifting. An unstable base can lead to scaffold collapse.
- Guardrail Height: Measure guardrails to ensure they meet local regulations, typically at least 42 inches high. Lower guardrails can allow tools or workers to fall off.
- Toe-board Presence: Check for toe-boards at the bottom of each run of planks. Missing toe-boards can cause tools or debris to fall and injure workers below.
Quick test: If uncertain, perform a gentle shake test on the scaffold. A stable setup should barely move, if at all.
Maintenance, Common Mistakes, and Troubleshooting Instability
Common setup errors include misaligned frames, improper footing, incorrect clamp use, and overloading. These issues lead to reduced stability and increased risk. Recognize signals of instability early to prevent accidents.
Establish a maintenance routine before each job that covers base plates, jack adjustments, and plank condition. Check for damage, warping, and proper tie-ins or guardrails. Use a step-by-step troubleshooting flow for deflection, sway, or plank movement, and stop work if necessary to relevel or reassemble.
Common Setup Mistakes and Prevention
To ensure stability and safety while working on scaffolding, pump jacks, and plank layouts, avoid these common setup errors:
- Insufficient ties: Inadequate tie-ins or guardrails can lead to instability. Always use proper tie-in points and secure guardrails.
- Improper plank selection: Using warped, damaged, or incorrect size planks can cause movement. Inspect each plank before use and select the right size for your needs.
- Uneven bases: An unstable base can result in swaying or deflection. Ensure your base is level and stable before starting work.
- Incorrect clamp usage: Clamps that are too loose or improperly placed can allow planks to move. Tighten clamps securely and place them evenly along the plank length.
- Overloading: Exceeding the load capacity of your scaffolding or pump jacks can cause instability. Always check the load rating before use and distribute weight evenly.
Regularly inspect your setup, checking for proper overlap, secure clamps, temporary bracing, and level/slope to minimize instability risks.
Routine Maintenance and Component Replacement Triggers
Maintaining your scaffolding, pump jacks, and planks in good condition is crucial for safety. Perform the following routine checks before each job:
Base plates: Inspect base plates for wear or damage. If wear exceeds 10% of thickness, replace immediately to prevent instability.
Planks: Check planks for warping, damage, or other defects. Replace or repair as needed if warp exceeds safe limits (refer to your plank’s datasheet).
Screw/jack adjustments and tie-ins/guardrails: Ensure all screws, jacks, ties, and guardrails are properly adjusted and secure before starting work.
Troubleshooting Abnormal Behavior
If you notice any abnormal behavior in your scaffolding or pump jacks, such as deflection, swaying, or plank movement, follow these troubleshooting steps:
Quick visual indicators: Check for visible signs of deflection or sway. If present, take immediate corrective actions like tightening clamps or adding support.
Non-destructive testing: Use vibration or sound testing to identify any severe damage. If results indicate severe damage, stop work immediately and replace components as needed.
Safety suspension: If deflection or sway exceeds safe limits (refer to your equipment’s datasheet), stop work immediately and consult an engineer before proceeding. Document all issues and repairs for future reference.
Regulations, Standards, Cost Factors, and Training
Key regulations cover scaffold use in plaster, stucco, and masonry work, including when permits or inspections are needed and how procurement choices—buying vs. renting—affect quality, maintenance, and total cost. The section also outlines required documentation and training, such as competent-person responsibilities, inspection tags, pre-use checklists, load ratings, and recordkeeping for audits or site inspections.
For DIY readers, understanding these factors helps prevent delays and injuries by guiding practical planning and ongoing oversight. The stability notes emphasize checking surface suitability, base support, plumb and level, tie-ins, and plank span limits, along with fall-arrest or restraint considerations. Stake: skipping stability checks can lead to scaffold collapse, so perform a simple on-site check where each plank feels solid under light pressure; pro checks confirm planks are level, secure, and within span limits before workers access the scaffold. If plaster or stucco surfaces are uneven, use additional support such as leg extensions or shoring to stabilize the scaffold, and watch for common mistakes like overloading planks, correcting by ensuring planks are rated for the load and weight is evenly distributed.
Standards, codes, and who to consult
Scaffold use in stucco and masonry work must comply with relevant regulations. Start by checking national and local codes, such as those enforced by OSHA or regional equivalents.
Always review the manufacturer’s instructions for specific product guidelines. For complex setups or non-standard applications, engage a qualified engineer to assess stability and safety.
Regularly update your knowledge of relevant codes and standards to ensure ongoing compliance with safety requirements.
Cost and logistics: buying, renting, and labor
The cost of scaffolds depends on factors like equipment type, setup complexity, and crew experience. For short-term use or limited budget, consider renting scaffolds to minimize costs.
If you have long-term use needs or available capital, purchasing may be more cost-effective in the long run. Be sure to factor in maintenance and labor costs when comparing total cost of ownership (TCO).
Evaluate each project’s requirements to make an informed decision about scaffold procurement, balancing budget with operational needs.
Documentation, permits, and training requirements
Maintaining necessary records is crucial for safe and compliant scaffold use. Establish a system for recording regular inspections, load plans, and other relevant documentation.
Ensure all workers receive appropriate training on scaffold assembly/disassembly, fall protection, and hazard recognition. Provide refresher training as needed, especially for new workers or significant task changes.
Auditing records regularly helps maintain compliance with safety regulations and ensures worker competency in scaffold use.
Conclusion
A careful, correct setup and ongoing checks protect people, preserve the work, and keep stucco and masonry looking durable and even. Stay methodical about how you assemble, inspect, and use scaffold and pump jack systems, and you reduce the risk of damage to framing, finishes, and your own safety.
Begin by verifying the scaffold type and components, then confirm base supports are solid and level, brace and secure all connections, lay suitable planks with proper overlap, install required guardrails or toe boards, and run a practical load test in a small area before full use. Check planks for knots, cracks, or elongation, ensure fasteners are tight, and rehearse safe access and egress moves. After setup, perform a quick visual check and gentle movement test, then proceed with tasks in a calm, staged sequence, keeping safety first and check and test before every new height or weather change.
Common mistakes to avoid include rushing setup, skipping levels or braces, using damaged or undersized planks, and disregarding weather or surface changes that affect stability. Always treat any wobble, unusual creaking, or shifting as a red flag and stop work to re-check. Never exceed declared weight limits, and keep access clear of debris and loose materials. If you are unsure about a component or the conditions, pause and verify with manufacturer instructions, local regulations, or a qualified professional before continuing.
If the setup or conditions feel uncertain, or you encounter repeated instability, call a professional rather than proceeding. When in doubt, err on the side of caution and schedule a formal check or retrofit. With disciplined steps and consistent practice, you’ll complete the job safely, maintain the appearance and integrity of the masonry or stucco, and avoid costly missteps.
FAQ
Is bamboo scaffolding appropriate for stucco and masonry work, and what should I check?
Bamboo scaffolding can be used in some settings, but it requires careful inspection of the bamboo poles, ties, and load distribution. Check for damaged joints, splits, and signs of wear, and follow local guidance on allowable bamboo use. Always refer to manufacturer instructions or local rules for weight limits and setup requirements.
What stability checks apply to cantilever scaffolding for stucco and masonry tasks?
Ensure the cantilever supports are firmly anchored and capable of handling the anticipated load. Look for secure base, proper extension limits, and intact connections. If anything looks worn or missing, do not proceed until you confirm suitability with the manufacturer instructions or local rules.
How should I evaluate Cuplock and Kwikstage systems for plank setup and safety?
Cuplock and Kwikstage systems require correct interlocking of standards, ledgers, and transoms. Check that all couplers and pins are present, undamaged, and properly seated before placing planks. Always follow the system’s installation guidance and verify any local requirements before use.
When is frame and brace scaffolding or mast climbing a better choice, and what should I verify?
Frame and brace or mast climbing may be chosen for larger heights or higher work safety. Verify that the frame spacing, brace tensions, and mast components are within the system’s guidelines. If in doubt, consult the manufacturer instructions and local practice requirements before assembly.