
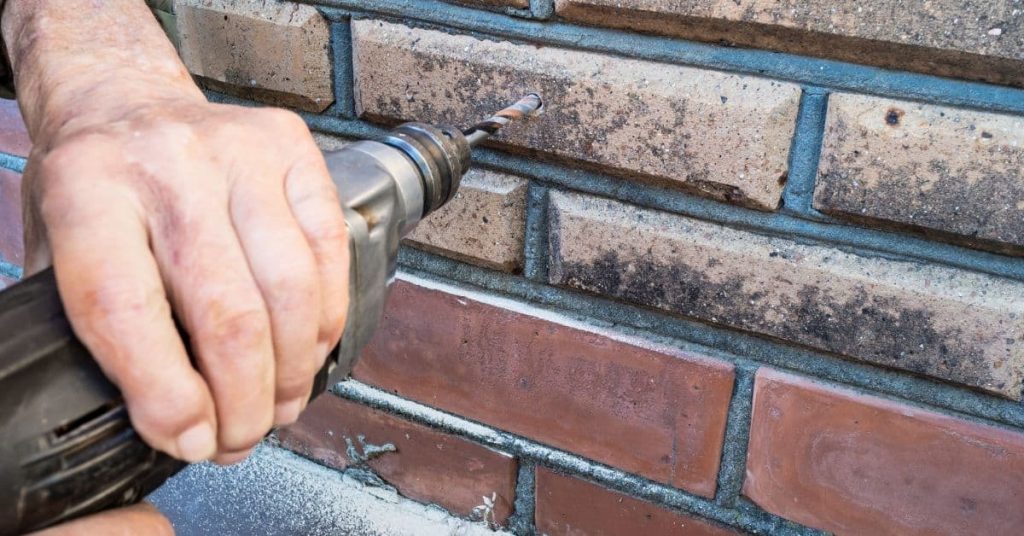
Introduction
Salt damage to brick near sidewalks is deterioration caused by salt exposure that draws moisture and can cause spalling or flaking. This article explains how splashback occurs and what you can do to reduce damage before inspecting or replacing bricks.
To approach the job, start by looking for efflorescence, cracks, or loose units near walkways. You’ll learn how to identify salt-related damage, plan for brick replacement, and maintain exterior walls and foundations. Rely on simple hand tools and check manufacturer instructions or local guidelines for safety and allowances as you proceed.
Key takeaways
- Prevent splashback by directing runoff away from bricks near sidewalks.
- Inspect brick faces for salt stains, efflorescence, and spalling after freezes.
- Replace compromised bricks promptly to maintain structural integrity and prevent moisture.
- Maintain exterior walls and foundations with timely cleaning and sealing schedule.
- Use compatible sealants and remove efflorescence before sealing for best results.
- Document maintenance plan, keep records, and budget for brick replacement if needed.
- Wear eye protection and gloves when cleaning bricks to prevent injuries.
Table of Contents
- Introduction
- Key takeaways
- What Salt Damage Looks Like and Why Sidewalks Cause It
- Inspecting Brick Near Sidewalks — What to Check and When
- Preventing Splashback and Reducing Salt Exposure
- Cleaning Salt Stains, Efflorescence, and Rust from Brick
- Surface Treatments and Sealants — Benefits, Limits, and Selection
- Repairing Versus Replacing Compromised Brick Units
- Tools and Materials Checklist
- Maintenance Plan, Scheduling, and Cost Considerations
- Conclusion
- FAQ
What Salt Damage Looks Like and Why Sidewalks Cause It
Salt damage to brick occurs through several mechanisms. Freeze-thaw cycles, salt crystallization that wedges at the brick, and efflorescence signaling migrating salts all contribute to visible and structural issues. This section explains how these processes show up at the wall near a sidewalk.
Sidewalk splash and runoff concentrate salts at the brick’s lower courses, making this zone especially vulnerable. Common signs include efflorescence, spalling or curling brick edges, deteriorating mortar joints, softened faces, and interior moisture near the base. The goal is to connect the dots between surface stains and possible structural effects for informed decisions.
How Deicing Salts Attack Brick and Mortar
Deicing salts used on sidewalks can infiltrate your brickwork, causing damage over time. Here’s how:
Moisture Attraction: Soluble salts in the deicer attract moisture from the ground, leading to increased water content within the masonry.
Freeze-Thaw Cycles: When temperatures drop below freezing, this trapped moisture expands, putting pressure on the brick and mortar. As temperatures rise again, the ice melts, reducing pressure. This freeze-thaw cycle can cause spalling (flaking) of the brick surface and powdering of the mortar.
Salt Crystallization: Over time, salt crystals form within the pores of the masonry as moisture evaporates. These crystals grow and shrink with temperature changes, further weakening the structure and causing deterioration.
Common Visual and Structural Signs of Salt Exposure
Regularly inspect your brickwork for these telltale signs of salt damage:
Efflorescence: White salts or a powdery residue on the surface indicate soluble salts migrating to the brick’s exterior. This is often the first visible sign of moisture and salt intrusion.
Surface Damage: Look for flaking, chipping, or powdering of the brick face and mortar. Hairline cracks may also appear, especially around joints.
Mortar Loss: Salt damage can cause mortar to crumble or fall out of joints, leaving them weak and vulnerable.
Displaced Units: If bricks are displaced or leaning, it could indicate structural issues caused by salt damage. Address these signs promptly to prevent further progression and costs.
Inspecting Brick Near Sidewalks — What to Check and When
Inspect sidewalk-adjacent brick with a focus on splash zones and the horizontal joints where splashback concentrates, and distinguish walls from low risers. Establish a seasonal routine and plan for checks after freeze/thaw cycles or deicing events, and document changes with dated photos and simple measurements in a living ledger. Keep notes on initial condition, observed issues, and any improvements to track progression over time.
This matters for DIY readers because early signs like cracks, spalling, efflorescence, or salt staining can indicate moisture intrusion or deterioration that worsens with use of the sidewalk. A quick on-site check, clear photos from fixed angles, and attention to weep holes and damaged sealants help prevent hidden failures and inform when to call a mason for deeper repairs or temporary protection measures if deep voids or compromised structural ties are found.
Visual checkpoints and how to record them
Regularly inspect your brickwork near sidewalks using this visual checklist to catch damage early.
- Brick courses: Inspect the first 2-4 courses of brick above grade. Look for cracks, spalling, or salt staining.
- Mortar joints: Check horizontal and vertical mortar joints for deterioration, efflorescence, or missing material.
- Foundation: Examine the adjacent foundation for signs of moisture intrusion, warping, or displacement.
- Weep holes: Inspect weep holes to ensure they are not clogged or damaged.
- Sealants: Check sealants around windows and doors for damage or deterioration.
- Salt staining: Look for white, powdery deposits (efflorescence) on brick surfaces.
- Moisture intrusion: Inspect for signs of water penetration, such as stains or dampness.
- Structural ties: Ensure structural ties are intact and not damaged.
Quick rule: Always document your findings with dated photos from fixed angles to track changes over time.
Simple on-site diagnostics
Use these low-cost diagnostic techniques to assess the condition of your brick and mortar near sidewalks.
- Tap testing: Gently tap bricks with a hammer. A hollow sound indicates potential hollowness or deterioration.
- Moisture check: Use a moisture meter or hygrometer to test for high moisture levels, which can indicate water intrusion or poor drainage.
- Efflorescence wipe test: Rub a damp sponge on the affected area. If the sponge comes away with white residue, it indicates the presence of efflorescence.
- Check for settlement: Look for signs of settling, such as diagonal cracks or uneven brick courses.
- Inspect structural ties: Ensure structural ties are secure and not damaged.
Quick rule: If you find hollow sounds, high moisture levels, positive efflorescence test, or signs of settlement, consider hiring a professional for further assessment.
Preventing Splashback and Reducing Salt Exposure
Identify splashback hotspots and salt exposure pathways near sidewalks, driveways, and wall low points, then place low-profile barriers and deflectors to shield brickwork without impacting curb appeal. Use physical options like splash screens, raised planters, and masonry cap extensions to direct salty runoff away from walls and improve drainage.
This approach reduces ongoing damage and makes maintenance easier, since you’ll target the most exposed areas and schedule inspections and cleaning after storms. Look for visible signs of salt damage and ask neighbors about recurring issues to validate hotspots, and have a qualified installer assess wall surfaces and typical snow/ice patterns for precise placement. Prioritize barriers and drainage improvements where hotspots are identified near sidewalks and driveways, and avoid high-profile barriers that obstruct views or alter curb appeal. Quick checks and a simple monitoring plan help you act promptly, keeping brick surfaces healthier with straightforward, seasonal upkeep.
Site and Grading Adjustments to Limit Splash
Assess your site for areas prone to water splashback from sidewalks. Direct impact can accelerate salt damage to brickwork.
Consider implementing low-profile barriers like:
- Small curbs
- Mulch strips
- Planting beds
- Gravel bands
These features can reduce direct water impact and help protect your brick walls. Before making significant changes, consult local drainage guidance to ensure you’re not exacerbating issues.
Winter Maintenance Best Practices to Minimize Masonry Damage
Protect your brick walls from excessive salt exposure during winter. Heavy rock salt, if not managed properly, can cause significant damage.
Consider the following alternatives and practices:
- Use alternatives to heavy rock salt, such as brine or calcium magnesium acetate. Always follow product labels and manufacturer guidance.
- Apply de-icers targeted to problem areas, rather than broadcasting widely.
- Promptly sweep away any residual salt after it has done its job.
- Manage thaw cycles effectively to prevent ice buildup.
By adopting these practices, you can minimize potential damage to your brick walls during winter.
Cleaning Salt Stains, Efflorescence, and Rust from Brick
Adopt a safe, stepwise cleaning progression: dry brush to remove loose material, then use progressively milder cleaners, testing first on a hidden area and following product instructions. Always rinse thoroughly after cleaning attempts. Keep ventilation and drying times in mind to prevent moisture buildup.
Differentiate efflorescence from rust: efflorescence is a white, powdery deposit from soluble salts, while rust stains come from iron-containing materials. Use cleaners appropriate for each stain, and avoid harsh acids or abrasives that can damage joints. Finish with proper PPE and plan thorough rinsing and drying to prevent re-deposition.
Safe cleaning methods and product types
To preserve your brick’s integrity during cleaning, follow a safe, stepwise approach:
1. Start with dry brushing to remove loose surface material using a soft-bristle brush.
2. For persistent stains, progressively apply cleaning solutions: begin with a mild detergent solution, then use specialized masonry cleaners if needed. Always test on a small hidden area first and follow product instructions.
Common mistake: Avoiding aggressive acids on soft historic brick; always adhere to product instructions for best results.
When cleaning is not enough — signs you need a pro
If stains persist after thorough cleaning attempts, it may be time to hire a masonry specialist:
Check for persistent staining, widespread spalling, mortar collapse, or structural movement. These signs indicate that professional diagnostic testing and treatment are necessary.
Prompt intervention prevents further damage and ensures the longevity of your brickwork. Do not attempt DIY repairs on severely damaged brickwork.
Surface Treatments and Sealants — Benefits, Limits, and Selection
Surface treatments aim to reduce salt ingress and splashback while avoiding moisture entrapment. Understanding the main product classes—silane/siloxane sealers, acrylics, and breathable coatings—helps you choose for brick and climate, and to avoid blocking moisture movement.
Context matters: skip laitance removal can reduce sealer penetration and effectiveness, so surface prep matters. A simple water drop test and occasional moisture-meter check help confirm porosity and readiness before application, and choose cure windows accordingly. If the brick is highly porous and the climate is humid, breathable coatings can help prevent moisture trapping and color changes.
When to use a sealer and when to avoid it
To prevent further damage to your brickwork near sidewalks, it’s crucial to understand when to apply sealers and when to avoid them.
- Avoid non-breathable sealers as they can trap moisture within the masonry, leading to further damage. Always opt for breathable water repellents, especially on historic or permeable brick.
- Test on a small area first before full application to ensure compatibility and avoid any adverse reactions.
- Check product datasheets for br