
Introduction
Running exterior cables on stucco involves securing the cable with appropriate straps or anchors and sealing any penetrations to keep moisture out.
Do it with care, choosing hardware rated for outdoor use and compatible with stucco surfaces. Plan routes and clean the surface before mounting to avoid damage and ensure solid footing.
Types of straps and anchors vary for exterior cables; look for options that grip stucco without cracking it and that are compatible with your cable size. For waterproof penetrations, you need proper seals and flashing methods, and you should check product instructions and local rules. Gather the tools and materials listed in the instructions and follow a step-by-step approach to secure cables and boxes.
Key takeaways
- Verify local codes and permits before any planning or trenching through stucco.
- Choose straps and anchors rated for exterior stucco and cable load.
- Use proper drill bits and masonry bits; avoid overheating and cracking stucco.
- Route conduits and cables through concealed paths, with waterproofed penetrations.
- Seal penetrations with appropriate sealants and flashing to resist water intrusion.
- Secure cables with compatible straps every few feet and at terminations.
- Wear PPE and test waterproof seals; verify continuity and tension during install.
Table of Contents
- Introduction
- Key takeaways
- Planning, Permits, and Code Considerations
- Choosing Straps, Anchors, and Fasteners for Stucco
- Drilling and Routing Through Stucco: Techniques to Avoid Damage
- Waterproof Penetrations, Sealants, and Flashing
- Installing and Securing Conduits and Cable Pathways on Stucco Surfaces
- Safety Practices, PPE, and Testing
- Common Problems, Troubleshooting, and Maintenance
- Cost Estimates, Tools List, and DIY Project Timeline
- Conclusion
- FAQ
Planning, Permits, and Code Considerations
Start by outlining the project scope for exterior cables on stucco, including weatherproof penetrations and the use of straps or anchors. Clarify what is permitted on the home’s exterior and what might affect adjacent systems. Identify items that require review before work begins.
Check whether a permit is needed for exterior electrical work, cable routing, and stucco penetrations, and understand typical AHJ review steps and timelines. Review the applicable code framework, including NEC basics and local amendments, and note how HOA rules can alter permit or method requirements. Begin with contacting the local authority having jurisdiction to verify latest amendments and guidance.
How to determine if a permit or licensed electrician is required
Before you start any exterior cable work on your stucco home, it’s crucial to know when a permit is needed and whether you should hire a licensed electrician. Here’s how to find out:
Check with your local building department: They can tell you if a permit is required for your specific project. Exterior electrical work often needs one, especially if it involves penetrations into the stucco or changes to existing circuits.
When to hire a pro: If your project involves complex routing, high voltage lines, or you’re unsure about any aspect of the work, always err on the side of safety and hire a licensed electrician. They’ll know the codes inside out and can pull permits if needed.
Key code topics to check (grounding, burial depth, conduit, penetration firestop)
Understanding and following the relevant codes is vital for a safe and compliant exterior cable installation. Here are key topics to research:
Grounding: Ensure your system is properly grounded to protect against electrical shocks and equipment damage. Check the NEC and local amendments for grounding requirements.
Burial depth, conduit, and penetration firestop: These aspects affect cable protection and fire safety. Verify burial depths, conduit types, and penetration firestopping methods with your local codes to ensure they meet or exceed standards.
Documenting the plan for inspection
Before you start any exterior cable work on your stucco home, it’s crucial to know when a permit is needed and whether you should hire a licensed electrician. Here’s how to find out:
- Cable routing diagram: Sketch the exact path of your cables, including entry/exit points and any bends or turns.
- Strap/anchor locations: Mark where you’ll install straps or anchors to secure the cable. Ensure they align with your sketch.
- Penetration details: Note how you’ll waterproof penetrations through the stucco and any other materials.
- Conduit types and sizes: List the conduit types, sizes, and quantities needed for your project.
- Grounding plan: Show where your grounding electrode will be placed and how it connects to your system.
- Burial depth markings: Indicate burial depths at various points along the cable route.
- Firestopping details: Describe how you’ll protect penetrations from fire spread, following code requirements.
- Materials list: List all materials needed for the project, including cables, straps, anchors, conduit, and waterproofing products.
Quick rule: Label your plans clearly and use consistent symbols or abbreviations to avoid confusion during inspection.
Choosing Straps, Anchors, and Fasteners for Stucco
Compare strap materials and finishes for exterior exposure, including galvanized, stainless, aluminum, and powder-coated options. Consider how each finish resists corrosion and works with stucco texture and long‑term maintenance. Choose options that won’t clash with the exterior finish.
Outline anchor types suitable for stucco over lath or masonry, such as staples, masonry anchors, through-bolts, corrosion-resistant screws, and specialized conduit straps. Explain how substrate and conduit size influence load capacity and spacing, using manufacturer specs and local code as benchmarks. Include installation practices that protect stucco integrity while ensuring secure attachment.
Strap types, materials, and corrosion resistance
The material of your straps plays a crucial role in their durability and longevity. Choose wisely to prevent cracking, staining, or weak bonding.
- Galvanized Steel: Inexpensive, strong. Look for G90 rating. Avoid direct sunlight to prevent corrosion.
- Stainless Steel: Premium price, excellent corrosion resistance. Ideal for coastal areas or high humidity.
- Aluminum: Lightweight, non-corrosive. Suitable for light-duty applications. Avoid heavy loads.
- Plastic Straps: UV-resistant options available. Cheap but less durable than metals. Not recommended for exterior use without UV protection.
- Powder-Coated Straps: Offers extra corrosion resistance. Choose a color that blends with your stucco texture.
Anchor options for stucco substrate (lath, sheathing, masonry)
Choosing the right anchor depends on your substrate. Here’s what to use:
Stucco over Lath or Sheathing: Use corrosion-resistant screws or through-bolts. Screws are faster but bolts provide better pull-out resistance.
Masonry (Brick, Concrete): Expansion anchors work well. Sleeve anchors can also be used but require a larger hole. Through-bolts are strongest but need more effort to install.
Always match the anchor type to your substrate for best results.
Determining fastener spacing and load considerations
Calculate the total weight of your cables and conduit. Then, determine the load per linear foot.
Check manufacturer specs and local code for recommended support spacing based on this load. Most codes require supports every 4-6 feet but can vary.
Choose anchors rated for at least 1.5 times your calculated load to account for wind and dynamic movement. Always follow manufacturer guidelines for installation.
Drilling and Routing Through Stucco: Techniques to Avoid Damage
Define the scope and risk factors of drilling into stucco over different substrates, and identify conditions that require pausing work. Set expectations for potential cracks or moisture intrusion if a misstep occurs. Plan access and protect underlying materials before drilling begins.
Recommend appropriate drill bits for stucco, including carbide-tipped masonry bits and spear-point bits, and explain when to use hammer drill versus regular drill. Note settings that minimize chipping and dust generation. Follow up with careful steps to avoid hitting wires or pipes behind the surface.
Tools, drill bits, and drill techniques for stucco
The right tools make the job easier. Here’s what you need:
- Masonry/diamond drill bits: For harder substrates like concrete or brick. They’re tougher and last longer.
- Carbide-tipped masonry bit: Great for stucco. It stays sharp and cuts through fast.
- Hammer drill: Use it on hard surfaces. Set it to ‘hammer’ mode for better penetration.
- Regular drill: For softer substrates or smaller holes. Use a masonry bit with low speed.
- Vacuum or dust mask: To keep dust down. Rentable, around $20/day.
- Level and measuring tape: For accurate marking and drilling.
Identifying substrate layers and hidden obstacles
Before you drill, find out what’s behind the stucco. Here’s how:
Tap test: Gently tap the area with a hammer. Hollow sounds indicate voids or conduits.
Stud finder: Use one to locate studs and metal objects like pipes or wires. Some have live-cable mode for safety.
If you’re unsure, use a shallow profile gauge or make a small test hole with a drill bit. Always assume there could be hidden obstacles until proven otherwise.
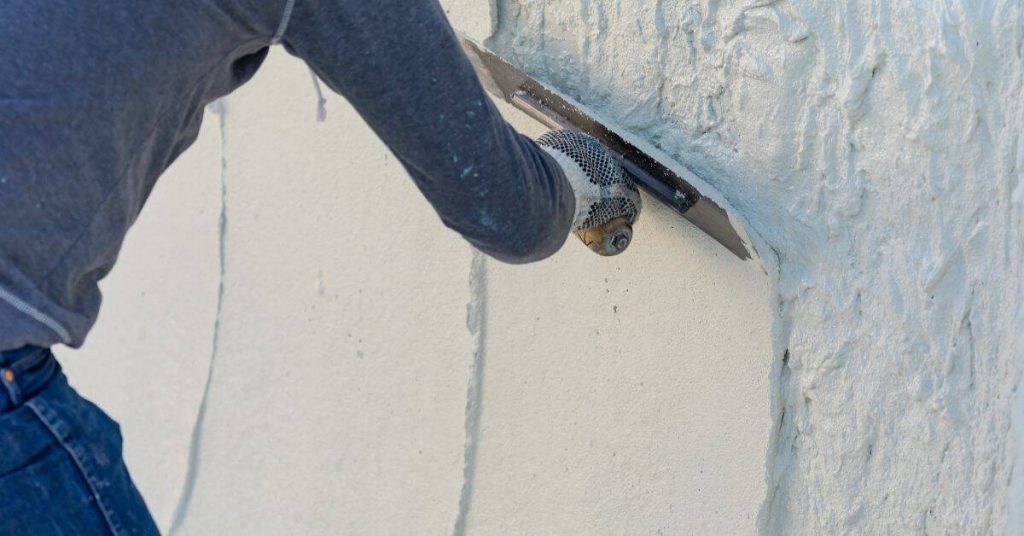
Repairing small stucco damage and aesthetic touch-ups
Small cracks or chips can be easily repaired. Here’s how:
Patching hairline cracks: Use a flexible, paintable caulk or a patching compound that matches your stucco texture. Apply with a putty knife, let dry, then sand and paint.
For larger chips, use a pre-mixed stucco repair kit. Follow the instructions, apply with a trowel, let dry, then sand and paint to match.
Always test your patching material on an inconspicuous area first to ensure it matches your existing stucco.
Waterproof Penetrations, Sealants, and Flashing
Define exterior penetrations for cables on stucco and how to select backboxes, grommets, or conduits based on cable type, size, and exposure. Maintain proper clearances from stucco joints to prevent leakage. Ensure penetrations align with interior routing plans.
Discuss sealant selection and application sequences, focusing on UV resistance, elasticity, and adhesion to stucco and conduit interfaces. Outline flashing strategies and the role of waterproof membranes or backer materials in different stucco systems. Include checks for gasket integrity and sealant coverage after installation.
Penetration methods: boxes, conduit sleeves, and grommets
When running cables through stucco, you’ve got a few options for creating watertight penetrations. Choose based on your cable type, size, and weather exposure.
Exterior-rated electrical boxes are ideal for larger cables or where you need to install switches or outlets. They come with integral gaskets for a tight seal. Use them at the bottom of your run, below any joints in the stucco.
Conduit sleeves are great for smaller cables and provide flexibility if you might add more wires later. They need to be filled with caulk or foam sealant after installation to keep water out.
For single cables, boot grommets can work well. They’re easy to install but may not last as long as other methods under heavy weather exposure. Always choose exterior-rated products designed for your specific cable size and type.
Sealant selection and proper application
Choosing the right sealant is crucial to keep water out. Here are a few types:
Silicone is flexible, UV-resistant, and sticks well to stucco. It’s great for small gaps but may not be suitable for larger ones due to its limited movement accommodation.
Polyurethane has excellent elasticity and adhesion but can yellow over time with UV exposure. It’s good for larger gaps and movements but needs a primer before application.
MS polymer is a hybrid that combines silicone and polyurethane properties. It’s durable, flexible, and UV-resistant. Always choose an exterior-grade product compatible with stucco and your chosen penetration method.
Apply sealant in a smooth, continuous bead, following the manufacturer’s instructions for primer use and curing times. Wipe off any excess with a damp cloth before it cures to avoid a messy finish.
Flashing, drainage planes, and preventing trapped moisture
Proper flashing is key to directing water away from your penetration. Here are a few methods:
Step flashing is used with roof-to-wall intersections. It steps up the wall, lapping shingles and stucco, creating a watertight barrier while allowing for expansion and contraction.
Metal flashing with sealant can be used where walls meet other walls or at the base of a penetration. Apply sealant to the back of the flashing before pressing it into place, then apply more sealant over the top edge.
Fluid-applied membranes are great for sealing around penetrations and integrating with existing wall flashing. They provide a seamless, flexible barrier that adheres directly to the stucco.
Maintain your wall’s drainage plane by ensuring water can run down freely. Keep penetrations clear of debris, and inspect them periodically after heavy rain or wind events. Regular maintenance will help prevent trapped moisture and potential leaks.
Installing and Securing Conduits and Cable Pathways on Stucco Surfaces
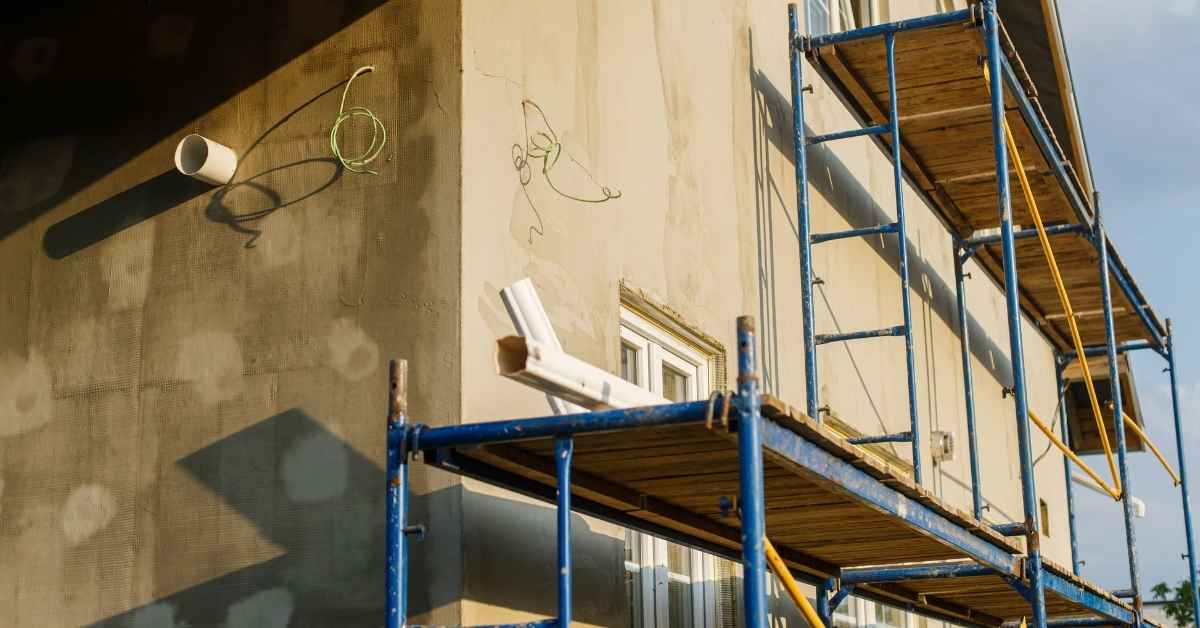
Plan routing to minimize wall damage, avoid high-traffic areas, and reduce moisture risk. Identify entry and exit points that align with interior layouts and future access needs. Keep runs neat and unobtrusive.
Specify conduit types and mounting methods that work with stucco and exterior finishes, including surface straps and protective conduits. Emphasize compatibility, expansion, and movement allowances. Provide guidelines for wall protection and finish to prevent cracking and water intrusion.
Surface routing vs. buried/inside-the-wall options
When running cables on stucco, you’ve got two main options: surface-mounted or buried/inside-the-wall.
Surface-mounted: Exposed conduits and raceways are easier to install but can look unsightly. They’re also more susceptible to damage from weather and physical impact.
Buried/Inside-the-wall: Recessed or inside-wall options require more effort, like chiseling channels or installing backer blocks. But they protect cables better and give a cleaner look. Keep in mind, though, that repairs become trickier if something goes wrong.
Conduit types and compatibility with stucco
Choose the right conduit for your job. Here are some options:
EMT (Electrical Metallic Tubing): Rigid metal conduit, good for exterior use but can rust if not properly protected.
PVC (Polyvinyl Chloride): Plastic conduit that’s lightweight and durable. It’s UV-resistant but can become brittle in extreme cold.
Flexible Conduit: Great for routing around corners or through tight spaces. But it’s not as durable as rigid conduits and can kink if not properly supported.
Aesthetic strategies: color-matching, concealment, and trim
Minimize the visual impact of your conduit runs with these tips:
Color-match: Paint your conduits to match your stucco. This can help them blend in, especially if you’re using a light-colored exterior.
Concealment: Route cables through existing gaps or use backer blocks to hide them within the wall. This requires more effort but gives a neater finish.
Trim and terminations: Use neat, clean terminations at outlets and switches. Consider using trim plates that match your decor.
Safety Practices, PPE, and Testing
Outline a safety framework for exterior stucco electrical work, including lockout/tagout protocols and identifying live components. Develop a project-specific safety plan that fits the homeowner’s schedule and site conditions. Include a pre-work risk assessment.
Detail PPE requirements such as eye protection, gloves, non-conductive footwear, and ladder fall protection. Cover grounding, GFCI protection, weatherproof enclosures, and permit/testing readiness. Include post-work testing and incident readiness steps for documentation.
Electrical safety and working with live circuits
Always remember, electrical work can be dangerous. Before you start, de-energize the circuit.
Verify zero energy: Use a non-contact voltage tester to ensure no power is flowing. It’s your first line of defense against shock.
Know when to call an electrician: If you’re unsure about any part of the process, don’t hesitate to contact a licensed professional. Safety should always be your top priority.
Personal protective equipment and ladder/site safety
Protecting yourself is crucial when working on exterior walls, especially with electrical work. Here’s what you need:
- Eye/face protection: Wear safety glasses or a face shield to protect from debris and potential arc flash.
- Cut-resistant gloves: These will protect your hands from cuts when handling wires and tools.
- Non-conductive footwear: Insulated boots help prevent electrical shock if you accidentally step on a live wire.
- Fall arrest equipment: If you’re working at heights, use a harness with a lanyard and anchor point to prevent falls. Rentals are available for around $20-$30 per day.
- Ladder safety: Ensure your ladder is stable on the stucco surface. Use stabilizers if needed. Maintain three-point contact while climbing.
Testing and commissioning after installation
Before you close up or reapply sealant, perform these electrical checks to ensure everything is secure and functioning properly:
Continuity test: Check that the circuit is complete by measuring resistance between the start and end of your cable run. Resistance should be low (ideally zero).
Insulation resistance test: Ensure there are no short circuits or grounds in your wiring by testing insulation resistance.
Secure terminations: Check all connections to ensure they’re tight and secure, with no exposed wires. Visually inspect all penetrations for any signs of damage or moisture intrusion before sealing.
Common Problems, Troubleshooting, and Maintenance
Identify common failure modes for exterior cable runs on stucco, such as loose supports, leaks at penetrations, and UV degradation of plastics. Provide quick diagnostic cues to help homeowners spot issues early. Note when professional input might be needed.
Establish a practical inspection routine and simple checklists for seasonal checks, after severe weather, and annual reviews. Describe troubleshooting steps for loose supports and degraded waterproofing, including resealing penetrations and testing for moisture migration. Include maintenance tips and documentation practices.
Diagnosing water ingress and seal failures
Water intrusion around cable penetrations can cause significant damage. Here’s how to detect leaks and test seals without major stucco removal.
Visual Inspection: Look for damp spots, stains, or mildew on the stucco surface near penetrations. Check sealant joints for cracks or gaps.
Moisture Test: Use a moisture meter to confirm water presence behind the stucco. Press the probes against the surface around penetrations and check the reading. If it’s high, you’ve found a leak.
Targeted Repairs: Once leaks are located, clean the area, apply new sealant, and ensure proper flashing is in place to prevent future ingress. If damage is extensive, consult a professional.
Addressing loose straps, sagging conduit, and anchor pullout
Loose supports can lead to cable damage or failure. Here’s how to tighten, replace, and reinforce them.
Tightening Straps: If straps are loose, tighten the screws using a screwdriver or drill. If they’re too loose to grip, replace them with longer ones that can be tightened properly.
Replacing Anchors: If anchors have pulled out, remove any damaged material and install new anchors using appropriate hardware and techniques for your stucco substrate. Ensure they’re securely fastened and can bear the load.
Reinforcing Load Points: For recurring issues or heavy loads, consider using heavier-duty straps or anchors, or adding support brackets to distribute the weight more evenly.
Long-term inspection checklist and preventative maintenance
When to use this checklist: Inspect your exterior cable runs annually, or after severe weather events. This will help catch potential issues early.
- Strain Relief: Check that cables are properly supported and not under excessive tension. Tighten or adjust as needed.
- Fastener Security: Ensure all screws and bolts are tight, replacing any stripped or damaged hardware.
- Seal Integrity: Inspect sealant joints around penetrations for cracks or gaps. Reseal if necessary.
- Corrosion/Cracking: Look for signs of corrosion on metal components or cracking in plastic parts. Replace worn components to prevent failure.
- Painted Raceways: Check painted conduit and cable pathways for chipping or peeling. Repaint as needed to protect from UV degradation.
- Drainage Paths: Ensure water can drain away from penetrations and cable runs to prevent pooling and potential leaks.
- Cable Vibration: Check for excessive vibration, which could indicate loose supports or damaged cable. Tighten or replace as needed.
- Document Repairs: Keep a record of all repairs made to your exterior cable runs for future reference.
Quick rule: Regular inspections and proactive maintenance will extend the life of your exterior cable system significantly.
Cost Estimates, Tools List, and DIY Project Timeline
Outline a transparent breakdown of potential costs, including materials, labor quotes, permit or inspection fees, and tool rentals. Emphasize comparing contractor versus DIY expenses and the scope of each option. Provide guidance on budgeting for contingencies.
List essential tools and exterior-rated materials, such as cable, conduit, straps, sealants, and flashing. Include protective gear and items for proper bonding and grounding. Offer a realistic DIY-friendly material guideline and a note on penetrations and membranes.
Typical cost components and money-saving tips
Running exterior cables on stucco involves several cost components. Here’s a breakdown to help you save without compromising safety or code compliance.
Materials: These are your main expenses – cable, conduit/straps, sealants, flashing. Shop around for these, but don’t skimp on quality.
Labor: If hiring, get multiple quotes. Contractors charge differently based on experience and local rates. DIY can save here, but only if you’re confident in your skills.
Permits/Inspection fees & Tools rental: Permits ensure compliance; don’t skip them. Rental tools add to costs, so plan ahead. Contingency (10-15%) covers unexpected expenses.
Tools and materials checklist
Before starting, ensure you have the right tools and materials for a successful job.
- Drill & Masonry bits: For anchoring and creating penetrations. Skip this, risk damaging stucco or not securing anchors properly.
- Caulking gun: Essential for applying sealants to prevent water intrusion. Missing this can lead to leaks.
- Grinder: Needed for cutting conduit and preparing surfaces. Without it, you’ll struggle with cuts and prep work.
- Protective gear: Safety glasses, gloves, ear protection. Don’t skip; safety first!
- Exterior-rated cable & Conduit: Essential for durability and code compliance. Using inferior materials can lead to failures and costly repairs.
- Stucco-accessible anchors/straps: Secure conduit and cable. Without them, your setup could fail or move over time.
- Waterproof sealants: Essential for preventing water intrusion. Missing this can cause leaks and damage.
- Flashing: Protects penetrations from water. Skip it, risk water damage and costly repairs.
- Bonding/Grounding considerations: Ensure safety and code compliance. Overlooking these can lead to electrical hazards.
Quick rule: Always double-check your tools and materials before starting any task.
Project timeline and decision checklist for DIY vs. pro
Follow this timeline to keep your project on track, and know when to hire a professional.
- Planning/Measurement: Measure twice, cut once. Skipping this can lead to mistakes and rework.
- Obtaining multiple quotes: If hiring, get at least three quotes for comparison. Missing this could cost you more.
- Ordering materials: Order early to avoid delays. Waiting too long can push back your project timeline.
- Weather/Dry-in window: Plan installation during dry weather. Rain can cause delays and issues with sealants.
- Actual installation steps: Follow the manufacturer’s instructions for best results. Rushing through this can lead to mistakes and failures.
- Testing for water intrusion: Test after installation to ensure no leaks. Missing this could result in hidden damage over time.
- Cure times: Allow sealants and adhesives to cure fully before final inspection. Rushing this can lead to improper curing and failures.
- Final inspection: Inspect your work or hire a professional to do so. This ensures everything is up to code and functioning properly.
Quick rule: Know when you’re in over your head. If unsure, hire a pro to avoid costly mistakes.
Conclusion
The key is to plan, protect the stucco, and test thoroughly so exterior cables stay safe, durable, and neat. Do not skip steps that guard against water intrusion, damage to the surface, or future repairs.
First, map your route, confirm permits and code basics, select the right straps, anchors, and fasteners, drill with care, route conduits properly, install waterproof penetrations, seal and flash, then test the system and finish with a quick maintenance check. Do this in the shown rough order, and document any deviations for future reference.
Common mistakes to avoid are overdriving fasteners or drilling too deep, skipping proper flashing or sealant, and ignoring testing and maintenance. Safety rules are simple: shut off power when working near existing lines, wear eye and skin protection, work in small sections to catch leaks early, and verify waterproofing in a dry run before energizing anything. If in doubt, pause and recheck the plan rather than forcing a fix.
If the project would require unfamiliar code changes, structural concerns, or significant new penetrations, consider a pro for the permits or flashing work. When you follow the plan, stay cautious, and test as you go, you’ll finish with a clean look and reliable performance. Stay steady, do it right, and you’ll have lasting results.
FAQ
What types of straps and anchors work best for exterior cables on stucco?
Use corrosion‑resistant straps designed for outdoor use. Metal straps with compatible fasteners or heavy‑duty plastic straps are common, but check that they won’t degrade in sun or moisture. Always read the label or manufacturer instructions to confirm suitability for stucco and the load you plan to carry.
How do I waterproof penetrations when running cables through stucco?
Seal any gap around the conduit or cable with a compatible exterior sealant or gasket. Install proper flashing or weatherproof flashing collars at the penetration, then bed the assembly with sealant rated for exterior use. Recheck after drying for any gaps and apply additional sealant if needed.
What tools and materials do I need to install and secure conduits and boxes on stucco?
Have a masonry drill or hammer drill with the correct bit, chisels for any stucco relief, anchors suitable for stucco, screws, and conduit straps. Include exterior-rated conduit or contact boxes, sealant, and flashing materials. Always verify product specs and installation instructions before using anything.
How should I handle local rules and compliance for exterior cable runs on stucco?
Check the label, manufacturer instructions, and any local rules or permits before starting. Follow homeowner guidelines and any restrictions on penetrations or exterior electrical work. If in doubt, contact the manufacturer or local authority to confirm what’s allowed and what documentation is needed.