
Introduction
Rebuilding a loose single-wythe brick wall involves using tying methods to re-secure the masonry and prevent additional movement. Identify the points of looseness and choose appropriate tying or anchoring approaches based on the wall condition. In some cases, that work only stabilizes the wall and a section may still need rebuilding if the bricks or mortar are badly deteriorated.
Before starting, inspect for cracks, bulging, or hollow sounds and plan to reinforce weak points with proper materials per manufacturer instructions and local rules. Gather materials such as compatible mortar, ties, and tools, and follow a practical sequence to tie into adjacent structure or stabilize the wall. If in doubt about wall condition or safety, consult a professional or verify local code requirements.
Key takeaways
- Assess wall movement, cracks, and bulging to determine tying needs and urgency.
- Choose tying method based on wall height, bond pattern, and accessibility.
- Inspect mortar joints for deterioration before selecting reinforcement and tie spacing.
- Gather materials like ties, repointing mortar, bonding agents, and compatible brick.
- Follow step-by-step installation: clean, secure anchors, properly bed and joint.
- Safety first: support adjacent structure, wear eye/hand protection, and verify permits.
Table of Contents
- Introduction
- Key takeaways
- Quick Overview and Scope of This Guide
- Inspecting and Diagnosing a Loose Wall
- Tools and Materials Checklist
- Tying Methods Overview and Selection Criteria
- Detailed Tying Methods and How to Install Them
- When to Rebuild a Section Instead of Tying
- Repair Workflow, Timing, and Seasonal Considerations
- Cost Considerations, Permits, and Legal/Safety Obligations
- Conclusion
- FAQ
Quick Overview and Scope of This Guide
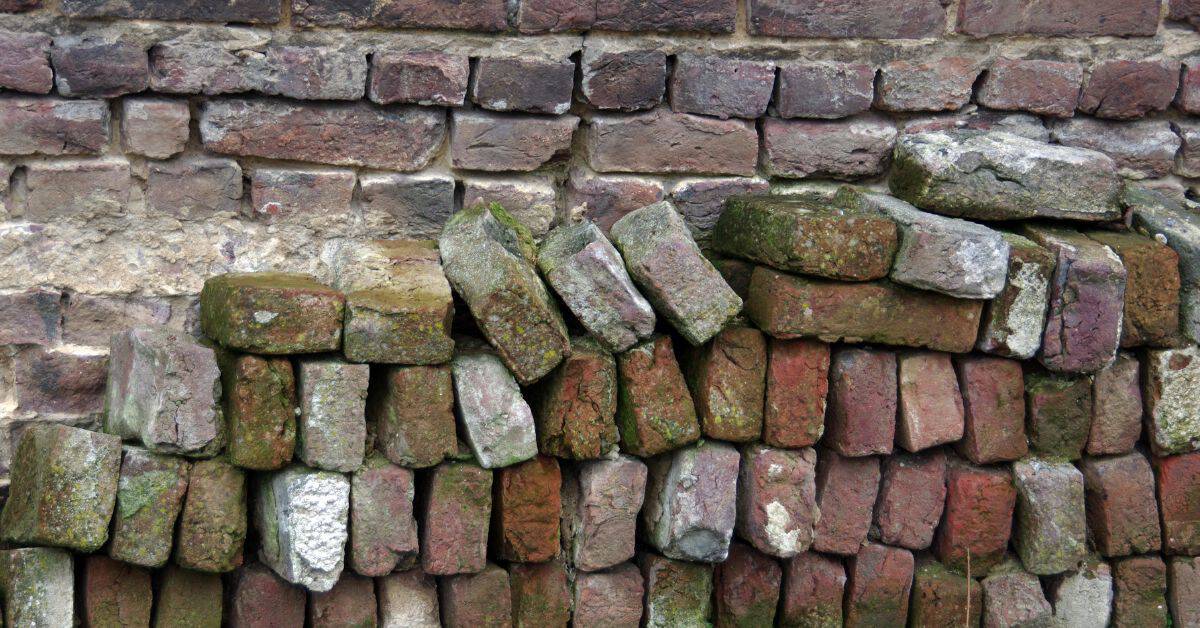
Single-wythe brick walls are built with a single brick-thick wythe and typically differ from thicker, multi-wythe constructions. Common problems include loose bricks, mortar deterioration, bulging, cracking, and moisture intrusion, and this section defines which situations fit this guide. It clarifies what readers should expect in terms of DIY work versus professional assessment and rebuild needs.
The audience and intent are clarified, with clear boundaries that require professional assessment for stability, load concerns, or moisture issues. Skip assessment at your own risk: a simple visual check for loose bricks, cracks, or bulging helps identify areas needing attention, and if significant instability or moisture is present, call a professional. Practical workflow guidance covers assessment, stabilization if needed, tying methods, and when a partial rebuild is warranted, while noting common mistakes such as using incorrect tying materials and the need to verify compatibility with the original wall construction.
Single-Wythe Brick Wall Definition
A single-wythe brick wall consists of a single layer of bricks set in mortar. The thickness typically ranges from 3 to 5 inches, excluding any outer facing or inner lining.
These walls are often used for non-load-bearing partitions indoors or as exterior walls when combined with additional structural elements. However, their thin construction and lack of reinforcement can lead to instability over time.
Consideration: Recognizing the wall’s construction type aids in identifying potential issues and planning repairs accurately.
If your wall is outside the 3 to 5 inch thickness range, this guide may not be suitable; consider multi-wythe wall guides or consult a professional for tailored advice.
Applicable Situations (DIY vs Professional)
This guide is designed for experienced DIYers to address minor issues in single-wythe brick walls. It covers tying methods and when partial rebuilding is warranted.
Initial Inspection: Check for loose bricks, cracks wider than 1/4 inch, or bricks moving under slight pressure. If these signs are present, this guide may assist you in addressing the problem.
Professional Evaluation: Assess structural integrity; look for signs of significant deterioration, chemical damage, or load-bearing issues. If any concerns arise, consult a professional immediately.
If your wall exhibits minor loose bricks or hairline cracks, DIY tying methods may be suitable. However, if there are signs of significant deterioration, structural concerns, or moisture issues, this guide may not cover the needed repairs, and you should consult a professional.
Inspecting and Diagnosing a Loose Wall
Define the inspection scope and safety plan for a loose single-wythe brick wall, including site access and PPE requirements. Identify active movement versus cosmetic issues using objective indicators. Build a systematic checklist: visual survey of cracks, bulges, mortar condition, loose bricks, displacement, and signs of moisture or frost damage.
A clear, documented record supports decisions and permits, including measurements, photos with scales, sketches, dates, and affected surroundings. Use non-destructive tests and practical checks such as plumb/level checks, crack width tracking, tapping sounds, moisture or efflorescence, and bearing at wall ties or headers. Skipping a thorough inspection may lead to misdiagnosis, safety hazards, or an inappropriate repair plan; involve a structural engineer or confirm permit needs when signs of distress are evident.
Visual and Tactile Signs to Inspect For
Inspect your loose single-wythe brick wall visually and by touch to identify instability symptoms. Begin with a thorough walkaround, looking for:
- Cracks: Hairline cracks are common but wider ones (>1mm) may indicate structural issues. Check for patterns like vertical, diagonal, or stepped cracks.
- Bulging and offsets: Bulges or offsets could signify inward movement due to wall settlement or foundation problems. Measure any offset with a level or straight edge.
Gently test the wall by pushing and pulling in various spots to check for give. Use a rubber mallet to gently tap the bricks; a hollow sound may indicate loose fill behind the wall. Ensure you do not apply excessive force.
Urgent Structural Concerns
Certain signs may indicate imminent structural failure and require immediate action:
- Progressive bulging: If bulges are increasing over time, it could suggest accelerating wall movement.
- Large vertical cracks: Cracks wider than 3mm that run vertically or diagonally may signal serious structural issues. Use a scale to measure crack widths and document changes.
- Separation at support points: Check for gaps between the wall and lintels, foundations, or other supports. Separation here could compromise the wall’s stability.
If you find cracks wider than 5mm or increasing in size, consult a structural engineer immediately. Do not ignore signs of progressive deterioration.
When to Consult a Structural Engineer
Certain observations and measurements should prompt you to seek professional assessment:
- Numerous or wide cracks: If there are many cracks, especially if they’re wider than 3mm, consult an engineer for written recommendations.
- Progressive bulging: If bulges are worsening over time, seek immediate professional assessment. This could indicate accelerating wall movement or imminent failure.
Always review your findings with local building codes and standards. Involve professionals when you’re unsure about the safety of your wall.
Common mistakes include relying solely on visual inspection and delaying professional involvement. If in doubt, err on the side of caution and consult an engineer.
Tools and Materials Checklist
Keep the project organized with a tools and materials checklist that covers inspection tools for loose bricks, stabilization and tying tools, repair materials, and required PPE. Note which items are rented versus purchased and include qualitative price ranges to aid planning. This section emphasizes practical tasks for each category so readers can prepare before starting work.
Each tool category maps to concrete tasks: use inspection tools to assess looseness and joint condition, set up stabilization and tying methods to secure the wall, and apply mortar and ties without causing further damage. Safety and planning are built in, with PPE guidance and site cautions, plus notes on rental logistics and quick purchasing shortcuts to help readers procure items efficiently. Stake: skipping pre-work inspection may lead to further wall damage or safety hazards. Quick check/cue: gently push bricks with your hand; if they wobble, the wall needs repair. Pro check: an experienced installer typically checks for loose bricks, crumbling mortar, and unstable sections before starting any work. If Wall is leaning or has large gaps between bricks, then Stabilize wall using temporary braces before proceeding. Common mistake + fix: applying too much mortar can cause bricks to bulge; use a thin, even layer and let it set properly.
Tools for Inspection and Stabilization
The tools listed here are essential for assessing the condition of your masonry structure and stabilizing it before any repairs or rebuilds. Regular inspection helps prevent minor issues from becoming major problems.
- Tape measure: Accurately measures dimensions to ensure proper fitting of replacement bricks and mortar. Essential for all tasks.
- Level: Ensures walls are plumb (vertical) and level (horizontal). Essential for assessing wall stability and checking progress during repairs.
- Hammer: Gently taps bricks to check for instability. Optional, but useful for quick checks on-site.
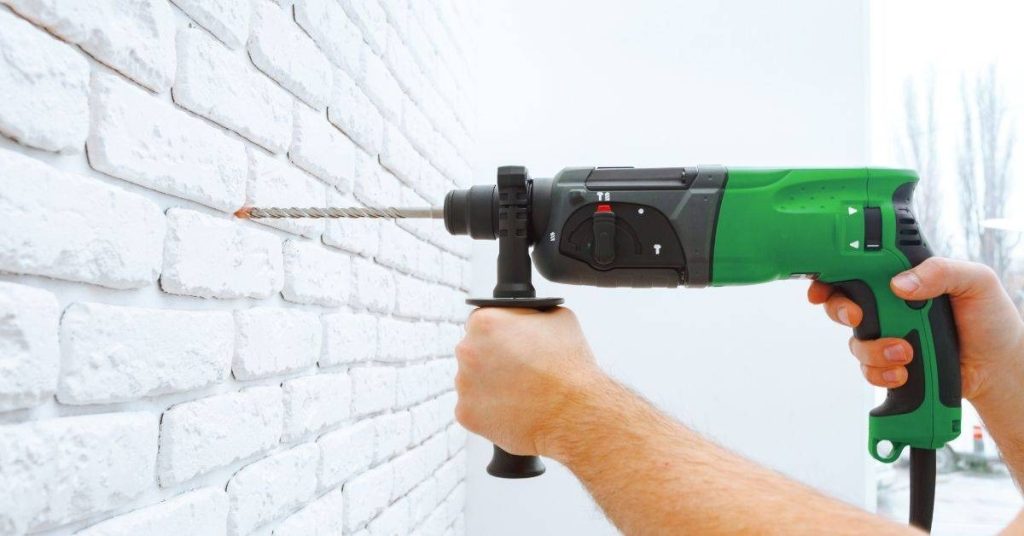
- Masonry drill/driver: Drills into masonry surfaces for anchoring or installing ties. Essential for stabilization tasks.
- Screwdriver: Used with a hammer to check for loose bricks and cracks. Optional, but recommended for thorough inspections.
- Masonry chisel: Removes damaged mortar joints (repointing) or excess mortar. Optional, but useful for preparing surfaces before stabilization.
- Trowel: Applies and spreads mortar during repointing and stabilization tasks. Essential for all masonry work.
- Mortar mixer: Ensures consistent mortar mix for optimal performance. Optional, but recommended for large projects to maintain quality.
Pro tip: When choosing tools, consider the scale of your project and your budget. Homeowner-grade tools are sufficient for small repairs, while professional-grade tools may be necessary for larger projects. Always check local rental options before purchasing expensive equipment.
Materials for Tying and Rebuilding
The right materials ensure your wall ties are durable, compatible, and visually appealing. They also prevent issues like corrosion, cracking, and weak bonds.
- Stainless Steel Wall Ties: Used to secure walls to each other or to a structural element. Look for 304 or 316 grade, offering excellent corrosion resistance. Choose them when tying to steel reinforcement to avoid galvanic corrosion.
- Helical Anchors: Alternative ties, useful where walls are weak or crumbling. Opt for those with a high pull-out strength. Use in freeze-thaw zones for better durability.
- Epoxy/Grout: Bonds ties to the wall and fills voids. Select an epoxy/grout with low permeability and good adhesion for longevity. It’s more expensive but worth it in harsh conditions.
- Replacement Mortar: Matches existing mortar to maintain wall appearance and strength. Check for a matching color, texture, and composition. Using the wrong mix can cause damage over time.
- Matching Bricks: Replace damaged bricks with ones that match in size, shape, and color. Ensure they’re clean, dry, and compatible with existing materials to prevent issues.
Pro tip: Buy materials from reputable sources and store them properly to maintain quality. Follow manufacturer instructions for mixing and application to ensure optimal performance.
Personal protective equipment and site safety gear
Before starting any repair work, ensure you have the necessary personal protective equipment (PPE) and site safety gear to keep yourself safe and secure. This section outlines the essential tools and equipment for a successful and safe job.
- Hard Hat: Protects against falling objects; essential when working above ground level or in areas with potential overhead hazards.
- Safety Glasses: Shields eyes from dust, debris, and other particles; optional but recommended for all tasks.
- Work Gloves: Provides grip and protects hands from cuts, scrapes, and splinters; essential for handling materials and tools.
- Ear Protection: Reduces noise levels when using power tools; optional but recommended for prolonged tool use.
- Safety Harness: Essential for working at heights above 6 feet, providing secure tie-offs to prevent falls. Rent or borrow if not a regular part of your toolkit.
- Stepladder or Scaffold: Allows safe access to higher areas; essential for working at heights. Ensure it’s in good condition and secure before use.
- Temporary Shoring Supplies: Stabilizes walls during repair work, preventing further damage; essential when dealing with unstable structures. Check local building codes for specific requirements.
Pro tip: Always inspect your PPE and safety gear before each use to ensure they’re in good condition. Regularly check and maintain your equipment to prolong its lifespan and effectiveness.
Tying Methods Overview and Selection Criteria
Tying and anchoring approaches for a loose single-wythe brick wall fall into four broad categories: temporary braces, mechanical wall ties, adhesive anchors, and rebar or masonry anchors, each suited to different conditions and access limitations. Selection hinges on wall condition (looseness and mortar or brick integrity), how easily you can reach the joints, material compatibility with brick type and era, and the desired permanence, from temporary stabilization to long-term repair. Pros and cons at a glance include installation effort, cost, need for specialized tools, maintenance needs, and the risk of causing further damage if misapplied, so a clear plan before work matters.
Careful assessment by checking wall condition, access points, and corrosion risk helps determine whether to tie, reinforce with anchors, or proceed to rebuild a section, and it also guides compatibility choices for mortar and brick to avoid hidden failures. The reasoning matters because proper tying choices influence subsequent rebuilding work, create safer load paths, and affect weather exposure and drainage after installation and curing. If the wall shows good brick/mortar integrity and long-term repair is the goal, evaluate adhesive anchors or rebar/masonry anchors with attention to corrosion resistance and compatibility, and note that temporary braces may be appropriate when access is limited and a quick stabilization is needed; otherwise, plan for a formal rebuild where needed.
Key selection criteria
The condition of your brick wall significantly influences the choice of tie. Inspect it visually and tactically for looseness, brick/mortar integrity, and thickness.
Accessibility is another crucial factor. Limited access may restrict the use of certain tying methods.
Material compatibility is vital too. Consider the type of bricks and the era of the mortar. Incompatible materials might not bond well or could corrode over time.
If your wall is loose with intact bricks and mortar, accessible, and has compatible materials, consider temporary braces or mechanical ties. However, if it has damaged bricks/mortar, limited access, or incompatible materials, evaluate the need for adhesive anchors or rebar/masonry anchors.
Strength, durability, and reversibility factors
The long-term performance of your chosen tie is crucial for wall stability. Consider the load capacity it can bear and its corrosion resistance, especially in exposed areas.
Also, check if the tie is removable or invasive. Some ties may require rebuilding sections of the wall upon removal.
If your wall bears significant loads and is exposed to harsh weather, prioritize high-capacity, corrosion-resistant ties like rebar/masonry anchors. For temporary stabilization with minimal load-bearing requirements, consider removable ties with lower capacity such as temporary braces.
Detailed Tying Methods and How to Install Them
Four tying methods are covered—masonry pins and epoxy anchors, grout-in rods, helical wall ties, and stainless steel anchors—and each is categorized by typical scenarios in a loose single-wythe brick wall, including indications for use and when a rebuild might be more appropriate. A high-level installation sequence follows prep, alignment and spacing concepts, installation steps, curing or setting considerations, and post-install inspection, with emphasis on using product data to verify compatibility rather than citing numbers.
Check product data for load capacity, material compatibility, corrosion resistance, and environmental suitability, using labels and manufacturer instructions to confirm details. Common failure modes include poor bond, movement under load, incompatible materials, and corrosion, with mitigations centered on proper prep, correct materials, and attention to spacing. Safety and site practices matter, including dust control, PPE, scaffold access, and quick checks to ensure bricks are level and plumb and mortar joints are sound before proceeding, with rebuilding favored if brickwork is severely damaged or out of alignment.
Masonry Pins and Epoxy Anchors
Masonry pins and epoxy anchors are suitable for minor cracks or where minimal intervention is needed. They provide a quick, easy solution to stabilize loose bricks.
Installation: Drill clean holes into the brick, ensuring proper alignment. Apply appropriate masonry-specific epoxy following manufacturer’s guidelines. Insert the pin, allowing the epoxy to cure according to instructions.
Considerations: Verify load capacity matches wall’s needs; check compatibility with brick and mortar type. Avoid over-tightening pins and ensure proper curing time for epoxy.
Helical Wall Ties and Stainless-Steel Anchors
Helical wall ties and stainless-steel anchors are ideal for tensile and shear resistance in walls with significant movement or historic brickwork. They provide robust reinforcement.
Installation: Drill pilot holes, ensuring proper alignment. Insert helical ties or stainless-steel anchors, using appropriate torque settings for helical ties. Ensure stainless steel is suitable for masonry use.
Considerations: Check load capacity matches wall’s needs; confirm corrosion resistance for long-term durability. Avoid overtightening helical ties and ensure proper embedding depth.
Grout-In Rods and Replacement Tie Systems
Grout-in rods and replacement tie systems are useful when rebuilding sections or reinforcing deteriorated bonds. They provide integral reinforcement.
Installation: Embed grout-in rods in alignment during mortar application, ensuring proper coverage. Follow manufacturer’s guidelines for installing replacement ties, integrating them with new mortar.
Considerations: Verify load capacity matches wall’s needs; check compatibility with new mortar and brick type. Ensure proper grout coverage and follow manufacturer’s guidelines for replacement ties.
When to Rebuild a Section Instead of Tying
Intro
Assess your chimney’s condition to determine when it’s necessary to rebuild sections. Look for extensive mortar loss, brick damage, or delaminated wythes that exceed the capacity of tying to safely address. Preserve sound material where feasible. A practical approach is to perform partial section rebuilds in severely damaged areas, or full segment rebuilds when deterioration spans a larger area.
As a DIY reader, conduct a thorough assessment to understand whether ties can be retained or must be removed. This will guide your planning for a rebuild versus alternative tying strategies. Document damage with photographs, map joints, and note seasonal constraints to support informed decision-making. Quick checks such as tapping bricks can help gauge the soundness of material. For a professional review, consider factors like moisture content, tie condition, and structural integrity to prevent premature failure.
Criteria indicating rebuild is necessary
Rebuilding a section of your brick wall may be the best course of action when certain conditions are met. These criteria ensure that you address significant issues and maintain the longevity of your wall.
Extensive mortar loss, especially if more than 50% is missing, indicates a rebuild is necessary. This loss compromises the bond between bricks and weakens the wall’s structure.
If multiple wythes are delaminated, with more than three layers separating, it’s crucial to rebuild rather than attempt to tie them back together. Delamination signifies severe damage that tying methods cannot effectively repair.
Consult a structural engineer if you notice extensive brick damage, such as spalling or cracking, or if ties are corroded or failed. They can assess the wall’s integrity and advise on whether a rebuild is necessary.
Partial rebuild versus full section replacement
When deciding between a partial rebuild and replacing an entire wall section, consider the extent of damage and its impact on the wall’s stability.
If damage is localized, affecting less than 30% of the wall’s height, and there’s no structural compromise, a partial rebuild may be sufficient. This approach preserves sound material and reduces costs.
However, if damage extends to more than 50% of the wall’s height or compromises its stability, full section replacement is likely necessary. Extensive damage can indicate that the entire affected area needs to be addressed to ensure the wall’s integrity.
Always consult a structural engineer for advice tailored to your specific situation. They can help you make informed decisions about whether to perform a partial rebuild or replace an entire wall section.
Salvaging and matching bricks and mortar
When rebuilding, it’s essential to preserve historic fabric where possible. This includes salvaging and reusing original bricks and matching the mortar for compatibility.
If historic bricks are in good condition, with minimal cracking or delamination, they can be reused. Carefully remove them from the wall, taking note of their layout to aid reinstallation. Store them properly to prevent further damage during the rebuild process.
To match historic mortar, first assess its color and strength. Consult a preservation specialist if needed. You may need to create trial batches or use lab analysis to achieve a compatible match. This ensures that new mortar blends seamlessly with existing work.
Proper matching of bricks and mortar helps maintain the historic character of your wall while ensuring its structural integrity.
Repair Workflow, Timing, and Seasonal Considerations
Plan an end-to-end repair workflow from permits and documentation review through site preparation, tying or rebuilding methods, finishing, and post‑application monitoring. Material choices should be matched to wall condition—mortars or epoxy-based ties—with a clear decision on tying versus section rebuild based on load and damage. Weather and moisture considerations affect curing and epoxy performance, so follow manufacturer guidance for variable temperatures and adjust application windows accordingly.
This sequence helps you avoid avoidable rework and protect wall integrity. Before work, ensure the surface is dry, clean, and free of contaminants, and consult product labels or datasheets for curing temperatures and humidity limits. Skipping proper curing can weaken mortar bonds and compromise wall performance.
Step-by-Step Repair Workflow
The logical sequence of tasks ensures a systematic approach to wall repair, minimizing risks and maximizing efficiency.
- Document and assess: Inspect the wall for signs of damage or instability. Verify all necessary permits and documentation are in order before starting any work.
- Secure the area: If the wall is structurally unsound, rebuild the section instead of tying. Secure the area to prevent further damage or injury.
- Tie or dismantle: Based on your assessment, choose between tying and rebuilding methods. Follow detailed tying methods outlined earlier in this guide.
- Rebuild or repoint: If rebuilding is necessary, follow the guidelines for partial rebuilds or full section replacement. Ensure bricks and mortar match existing ones.
- Cure and finish: Allow proper curing time as per product instructions to ensure optimal bond strength. Apply final finishes such as pointing or rendering.
Seasonal and Weather-Related Guidance
Temperature, humidity, and freeze-thaw cycles significantly impact workability and curing. Monitor local forecasts to plan work around potential rain or extreme temperatures.
Cold temperatures: Below-freezing temperatures can compromise mortar and epoxy performance. Delay work until temperatures rise above the recommended threshold as per product instructions.
Humidity and rain: High humidity and rain exposure during curing can lead to weak bonds and efflorescence. Avoid working in these conditions if possible, or provide temporary protection to maintain optimal curing environment.
Freeze-thaw cycles: These cycles can cause cracking and spalling. Ensure proper curing before exposing the wall to freeze-thaw conditions.
Temporary Protections and Curing Precautions
Protecting freshly tied or rebuilt sections ensures proper set and bond. Assess the need for temporary protections based on weather conditions.
Windbreaks: Use windbreaks to protect against strong winds that can disrupt curing and cause uneven drying.
Heaters: In cold temperatures, use heaters to maintain optimal curing temperature as per product instructions. Ensure safety measures are in place to prevent fire hazards.
Curing blankets: Use these to retain moisture and heat during the curing process, especially in cold or windy conditions. Remove once the initial curing period is over to allow for final drying.
Cost Considerations, Permits, and Legal/Safety Obligations
Rebuilding Loose Single-Wythe Brick Wall: Cost Drivers & Permitting
Major cost drivers for rebuilding a loose single-wythe brick wall include:
- Labor rates
- Material costs (mortar, bricks, ties, and reinforcement)
- Access limitations
- Scaffolding or K-rails
- Site waste disposal
- Potential unforeseen structural work
To obtain accurate contractor estimates:
- Insist on itemized bids with unit prices
- Define the scope of work
- Include contingency allowances
- Request required site visits
Restricted access can significantly impact costs.
Permitting pathways and safety checks vary by locality. Verify with your building department:
- If a permit is required for masonry repair or tying
- What documents are typically needed
Understanding inspection triggers helps plan a realistic schedule and budget, and avoids delays. Always check local rules to avoid potential penalties.
Elements to include in cost estimates
When requesting contractor estimates for rebuilding a loose single-wythe brick wall, ensure their bids cover the following key elements to understand your project’s full scope and potential costs.
Labor: Labor rates vary by region and experience level. Ask for unit prices per hour or per task to compare offers accurately.
Materials: Include mortar, bricks, ties (or other reinforcement), and any additional materials needed for the project. Consider the condition of existing materials and whether they can be reused or if new ones are required.
Access and logistics: Restricted space, neighbor considerations, weather exposure, and the need for temporary containment or protection of adjacent areas can impact labor costs significantly. Expect higher labor costs due to additional time and safety measures in such cases.
Common permits and inspection requirements
Before starting any work, it’s crucial to understand the permitting process and inspection triggers for your specific project. Contact your local building department to confirm which permits are required.
- Structural repair permit: Required when rebuilding or reinforcing a wall due to structural issues. Failure to obtain this permit may result in fines or project stoppages.
- Partial demolition permit (if applicable): Needed if removing sections of the wall for rebuild. Not obtaining this permit can lead to penalties and delays.
- Historic-preservation permit (if applicable): Mandatory for structures in historic districts or with protected architectural features. Neglecting to obtain this permit may cause project delays and additional costs.
- Initial permit inspection: Schedule an inspection after obtaining the permit to ensure all parties are aligned on the project’s scope and requirements.
- Framing/masonry work inspection: Arrange for an inspection during the framing or masonry stage to verify compliance with building codes and standards.
- Final inspection: Coordinate a final inspection upon completion of the project to ensure all work meets local regulations and safety standards.
Quick rule: Always follow up on any non-compliance issues promptly to prevent project stoppages and additional costs.
Site safety, scaffolding, and waste disposal rules
Adhering to site safety regulations is paramount for protecting workers and the environment. Familiarize yourself with the following guidelines before starting any work.
Scaffolding and fall protection: When working at heights, implement appropriate fall protection systems and ensure scaffolding is secure and compliant with local standards. Neglecting these safety measures can result in serious injuries or fatalities.
Utility locate requirements: Before any digging or demolition, contact your local utility companies to mark underground lines. Failing to do so may cause damage to utilities, leading to costly repairs and potential hazards.
Local disposal regulations for demolition waste: Follow local guidelines for proper disposal and recycling of demolition waste. Improper disposal can result in environmental violations and penalties.
Conclusion
A stable, well-tied wall protects both the structure and people nearby, so verify the diagnosis and choose a tying or rebuilding option that preserves safety, appearance, and durability before proceeding.
When moving forward, use a simple sequence: confirm the wall’s movement and extent, select the appropriate tying method, prepare the work area and joints, set the ties in the correct pattern and depth, monitor for movement after installation, and recheck the wall under load or after a seasonal change. Check and recheck the wall section in steps, follow the chosen method’s guidelines, and ensure you work from solid, clean surfaces with proper support and personal protection.
Common mistakes to avoid include rushing a repair without testing in a small area first, over-tightening ties or forcing bricks, and tying into damaged or cracked units without addressing the underlying cause. Always wear appropriate PPE, set up safe access, and avoid working at height or near open edges in poor conditions; never proceed if moisture, frost, or freeze–thaw risk is present.
If movement continues, the section is large, or the wall shows complex or widespread damage, it is wise to call a professional rather than pushing ahead alone. When in doubt, check local rules or manufacturer instructions for tying products and seek a professional assessment if the wall remains loose after an interim repair, then proceed with confidence knowing you’ve minimized risk and preserved the long-term integrity of the structure.
FAQ
What are reliable methods for tying loose single-wythe brick walls?
Several methods can help stabilize a loose wythe, depending on the wall condition. Common approaches include installing wall ties or anchors that connect the damaged wythe to the surrounding structure, and adding mortar joints to reestablish continuity. Always follow manufacturer instructions and local guidance for tie spacing and placement.
How can you identify signs of deterioration in a single-wythe wall?
Look for visible cracking, bulging, or leaning sections. Noticeable efflorescence, moisture staining, or loose, crumbling mortar around the joints can indicate deterioration. If movement is present or hollow sounds when tapping, assess further before proceeding.
What materials and tools are typically used to stabilize a loose wall?
Common materials include compatible mortar, repair mortar or brick ties, and backing reinforcement as needed. Tools often include trowels, pointing tools, levels, chisels, and basic masonry anchors. Check the product labels for compatibility with your brick type and local conditions.
What steps help reinforce weak points while preserving structural integrity?
Identify the worst sections and address them first, using appropriate ties and repointing where mortar has failed. Clean joints, install ties or anchors, and carefully recompact mortar to restore bond. Verify alignment and monitor for movement after work is complete. Ensure work adheres to any applicable safety guidelines and manufacturer instructions.