
Introduction
Wet stucco early can trap moisture and lead to a softer, compromised surface. If rain hits fresh stucco, you should assess the surface for shine, tackiness, or any cracking. Do not rush to finish or apply additional coats until you understand the current condition and what the material needs.
If rain is still possible, shield the area with a breathable barrier and postpone finishing steps until it’s dry. Follow the product label for curing times and check with the supplier or local guidelines if you’re unsure. If the surface shows signs of ongoing moisture or damage, plan to recheck texture and follow the manufacturer’s guidance for next steps.
Key takeaways
- Inspect stucco surface for peeling, cracking, or discoloration after rain exposure.
- Drying should be gradual; avoid direct heat to prevent cracking and spalling.
- Document damage with photos, wear PPE, and note affected areas.
- Use breathable coatings and follow manufacturer instructions for curing and recoat.
- Schedule repairs to align with dry spells; recoat only when surface dry.
- If unsure, consult a licensed pro and verify warranty coverage and rules.
Table of Contents
- Introduction
- Key takeaways
- How Stucco Curing Works and Why Rain Matters
- Immediate Actions to Take After Rain Exposure (First 24 Hours)
- Assessing Damage: Inspection Checklist and Visual Checkpoints
- Controlled Drying and Remediation Techniques
- Repair and Recoat Protocols
- Tools, Materials Checklist and Material Specs Explained
- When to Call a Professional and Insurance/Warranty Considerations
- Preventing Future Rain Damage and Best-Practice Scheduling
- Conclusion
- FAQ
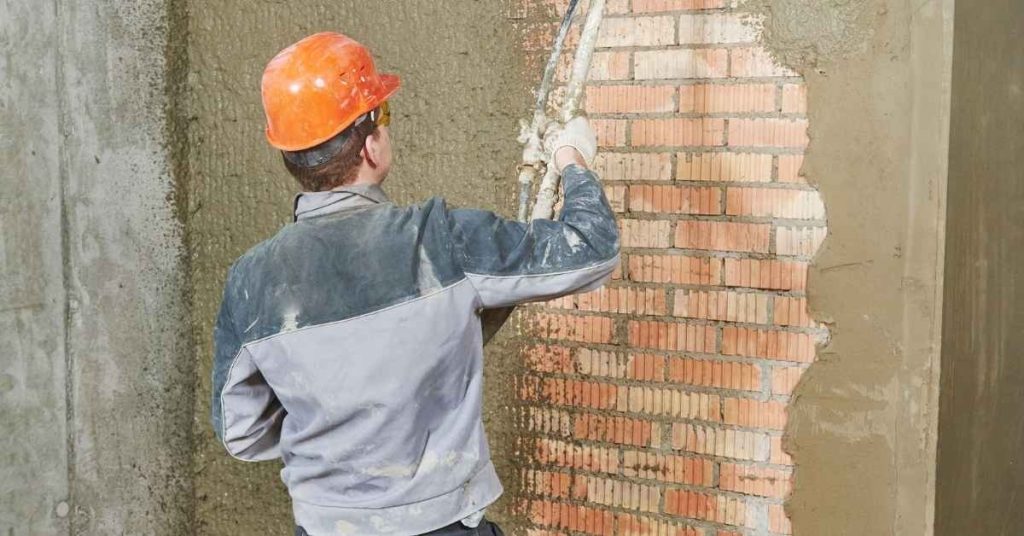
How Stucco Curing Works and Why Rain Matters
Fresh stucco cures through a chemical and physical process that gains strength as moisture is managed and temperature stays within an acceptable range. The initial set is when the mix begins to stiffen, while the full cure develops bond and long-term hardness over time. Rain can rinse out or disturb moisture levels and disrupt the curing balance at both stages.
Explain to readers that checking product labels and manufacturer instructions helps confirm recommended humidity and drying conditions. If you’re unsure, verify with the data sheet or local rules to understand how rain impacts curing and how to protect it during the process.
Stucco Curing Stages
The curing process of cement-based stucco involves three main stages. Understanding these helps you gauge when your stucco is vulnerable to rain.
Initial Set: This happens within the first 24 hours. The stucco starts to harden, but it’s still soft enough that you can leave footprints or indentations.
Hardening: Over the next few days to a week, the stucco continues to firm up and gain strength. It’s like when bread dough rises – it looks solid, but it’s not fully set yet.
Full Cure: This takes about 28 days under ideal conditions (consistent moisture and temperature). At this stage, your stucco has reached its full strength and durability.
Effects of Premature Saturation
Wetting fresh stucco too soon can cause immediate and long-term problems. Here’s what happens:
Softening & Washout: Fresh stucco absorbs water, causing it to soften or even wash away completely if the rain is heavy enough.
Cracking & Efflorescence: As the stucco dries out after getting wet, it can shrink and crack. This also allows moisture to rise to the surface, leading to efflorescence – a white, powdery deposit that’s hard to remove.
Bond Failure: If your stucco is applied over another material (like lath or foam), premature wetting can cause it to lose its bond with that material. This leads to delamination and other serious issues down the line.
Immediate Actions to Take After Rain Exposure (First 24 Hours)
Start with safety in mind and assess any standing water on the surface. Gently remove loose debris without hammering or scraping against fresh stucco. Avoid forcing drying by heat or aggressive methods on day one.
Check product guidance for allowable handling times and moisture limits, and document the affected area. If in doubt, verify instructions on the bag or data sheet and plan steps that minimize further moisture intrusion while you monitor the surface.
Do’s and don’ts right away
First things first, do not panic. Your stucco can still be saved. Here are some immediate do’s and don’ts:
Do: Keep the area dry. Use fans to gently circulate air if possible.
Don’t: Do not try to scrub or power wash the wet stucco. This can damage it further. Avoid using heat sources like space heaters or hair dryers as they can cause rapid drying and cracking.
Temporary protective measures
While you’re waiting for the professionals, here are some quick fixes to protect your stucco from further damage:
Tarping: If the rain has stopped, use tarps to cover any affected areas. Make sure they’re secure but not too tight as this can trap moisture.
Temporary Gutters: If water is dripping off your roof and onto the stucco, create a temporary gutter system using plastic sheeting or even large trash bags to redirect the water flow.
Ventilation: Open windows and doors if possible to promote air circulation. This helps to dry out the stucco gently without causing stress.
Assessing Damage: Inspection Checklist and Visual Checkpoints
Perform a methodical walkaround and note any soft spots, staining, or delamination signs. Use a light touch to check for hollow sounds or spongy textures. Document areas with photos and simple notes for later decisions.
Compare observed conditions against the product label or manufacturer guidance to determine severity. If you’re unsure about thresholds, verify criteria from the data sheet and mark spots that require closer inspection.
Visual and Tactile Checkpoints
Use this checklist immediately after rain exposure to identify any visible or touchable signs of damage.
- Soft spots: Press gently. Fresh stucco should feel firm, not squishy.
- Color changes: Look for discoloration, especially darker patches that could indicate saturation.
- Surface washout: Check for areas where the surface layer has been washed away, exposing aggregates or base coat.
- Blistering: Feel for raised, bubble-like areas. If present, they should feel firm; if not, they may be filled with water.
- Efflorescence: White, powdery deposits can indicate excess moisture.
- Separation: Gently tap the surface. A hollow sound could mean delamination.
Quick rule: If you find any of these signs, document and address them promptly to prevent further damage.
Simple Field Tests and Documenting Findings
After your visual inspection, perform these non-destructive tests to gather more data.
- Tap test: Gently tap the stucco. Freshly cured stucco sounds solid; wet or damaged areas sound hollow.
- Hardness check: Scratch the surface lightly with a coin or nail. Soft spots will be easily marked.
- Moisture readings (if available): Use a moisture meter to measure saturation levels. Readings over 15-20% could indicate issues.
- Photograph findings: Document all visible damage, including date, time, and location for future reference.
Quick rule: The more data you collect now, the better equipped you’ll be to make informed repair decisions later.
Controlled Drying and Remediation Techniques
Favor slow, even drying over rapid evaporation to avoid thermal or moisture shock. Use natural drying when weather allows and limit direct sun exposure or wind that can pull moisture unevenly. Apply protective coverings only if recommended by the product instructions.
When considering assisted drying, confirm with the product data sheet or supplier guidance what methods are acceptable. If you’re uncertain, verify permissible techniques and durations before proceeding.
Natural drying vs assisted drying
When it comes to drying fresh stucco, you’ve got two main methods: natural and assisted. Let’s break down each.
Natural Drying (Ambient): This is the slowest method but often the safest for new stucco. It relies on normal temperature and humidity changes in your environment to dry the stucco evenly. No extra heat or fans needed, just good ventilation.
Assisted Drying: If you’re in a hurry or live in a humid climate, you might need to speed things up with fans, dehumidifiers, or even heat sources like space heaters. But be careful: too much heat can cause moisture shock and damage your stucco.
Here’s how to use them safely:
- Fans: Point them at the wall, not directly onto the stucco. Too much air can cause rapid drying and cracking.
- Dehumidifiers: Place them near the wall but not too close. They’ll help reduce humidity in the room, aiding even drying.
- Heat sources: Use space heaters sparingly and far from the wall. Too much heat can cause thermal shock.
When and how to remove and replace compromised stucco
If your fresh stucco gets rained on too soon, some parts might soften or delaminate. Here’s when and how to remove these compromised sections:
When to Remove: If the stucco feels soft or spongy, or if you see cracks or peeling, it’s time for removal.
How to Remove: First, score a line around the damaged area with a utility knife. Then, use a chisel and hammer to chip away the compromised stucco. Go deep enough to remove all soft material – about 1/4 inch into the solid substrate.
After removal, back-brush the exposed surface with a stiff brush. This opens up the pores, promoting better adhesion for your patching material.
Repair and Recoat Protocols
Plan repairs from small patches up to larger areas once the substrate shows stable moisture levels. Follow a stepwise approach and respect timing guidance from the manufacturer. Avoid overworking the surface while moisture is still present.
Check curing and recoat requirements on the product label or data sheet to align timing with substrate conditions. If you’re unsure, verify recommended surface preparation, curing minimums, and any primer needs before applying new material.
Surface prep and bonding methods
The first step to a successful repair is proper surface preparation. Clean the area thoroughly, removing any loose material, dirt, or contaminants.
Keying the surface helps create better adhesion. Use a wire brush or scarifier to roughen up the existing stucco. Be careful not to damage the substrate.
Apply a bonding agent designed for stucco repairs. This helps create a strong bond between the old and new material. Follow the manufacturer’s instructions for application and drying times.
Before applying the new stucco, apply a primer. This seals the surface, prevents moisture from being absorbed into the existing stucco, and improves adhesion.
Matching texture, finish, and paint compatibility
Replicating the original texture and finish can be challenging. If possible, use a small amount of the original stucco mix to ensure color and texture match.
For texture, you might need to use tools like combs or floats to mimic the existing pattern. Practice on a scrap piece first to get the hang of it.
Wait at least 28 days before painting newly repaired stucco. This allows the material to cure completely and ensures paint adhesion.
Use a latex-based exterior paint designed for use on stucco. These paints are flexible, breathable, and resistant to peeling and cracking.
Tools, Materials Checklist and Material Specs Explained
Prepare a practical kit for inspection, drying, repair, and finishing, focusing on items you can reuse after wet conditions. Keep a log of material specs found on bags or data sheets for quick reference. Use safe ranges only when specs vary by product and you’re documenting choices.
When in doubt, verify labels, datasheets, or manufacturer instructions for allowable mixes, curing aids, and application temperatures. Note where local rules or code references may apply to your project.
Recommended tools and safety gear
Before you start inspecting, drying, or repairing your wet stucco, make sure you have the right tools and safety gear. Here’s a checklist to ensure you’re prepared.
- Moisture meter: To check moisture levels in the stucco (12-15% is ideal).
- Tape measure: For accurate measurement of damaged areas.
- Hammer and chisel: To gently probe compromised stucco.
- Tarps: To protect the area from further rain or debris.
- Fans: For controlled drying, especially in humid conditions.
- Safety glasses: To protect your eyes from debris and dust.
- Gloves: To handle damaged stucco without injury.
- Respirator: When grinding or sanding to avoid inhaling particles.
- Grinder (optional): For smoothing surfaces before recoating. Use only if you’re comfortable with power tools.
Quick rule: Always prioritize safety gear, and use the right tool for the job.
Material specs and standards explained
To ensure you’re using the right materials for repair and recoating, check these key attributes on your product bags or data sheets.
- Cement type: Portland cement is standard; ensure it’s Type I or II for stucco.
- Lime content: 10-20% lime is typical. Too little may cause cracking, too much can lead to efflorescence.
- Sand gradation: Medium sand (No. 2) is best; check for consistent particle size.
- Additives: Some stucco mixes include additives for improved performance; ensure they’re compatible with your existing stucco.
- Curing time: Follow manufacturer’s recommended curing times to allow proper strength development.
Quick rule: Always follow the manufacturer’s guidelines and match materials as closely as possible to your original stucco.
When to Call a Professional and Insurance/Warranty Considerations
Define clear situations where a contractor’s expertise is warranted, such as structural concerns or widespread damage. Document symptoms like cracking, bulging, or persistent moisture indicators to share with a pro. Gather basic information to streamline quotes and decisions.
Check warranty terms and insurance coverage guidance on what constitutes valid claims and required documentation. If you’re unsure, verify thresholds and reporting steps with your insurer or warranty administrator before proceeding.
Signs you need a contractor or inspector
If your stucco has been exposed to rain too soon, keep an eye out for these red flags. They indicate it’s time to call in a professional.
Extensive delamination: If large areas of the stucco are peeling away from the substrate, it’s a sign of serious damage. This could be due to improper installation or excessive water exposure.
Repeated wetting: If your stucco has been repeatedly exposed to rain or other sources of moisture, it may have sustained hidden damage that requires professional assessment.
Structural movement: Any signs of cracking or movement in the walls could indicate a structural issue. This is not something you should attempt to fix on your own.
Persistent moisture readings: If you’ve taken moisture readings and they consistently show high levels, it’s time to call in an inspector. They can use specialized equipment to pinpoint the source of the moisture and assess the damage.
Documenting exposure for warranty and insurance
To maximize your chances of a successful claim or warranty support, it’s crucial to document the extent and duration of the stucco’s exposure to rain.
Take photos: Snap pictures of the affected areas from different angles. Include close-ups of any damage as well as wider shots to show the context.
Record dates: Note down when you first noticed the problem and when you took your photos. Also, keep track of any subsequent inspections or repairs.
Gather weather records: Obtain local weather data for the period in question. This can help prove that the damage was caused by rain exposure.
Keep contractor notes: If you’ve had any conversations with contractors about the issue, make a note of their advice and recommendations. Also, keep records of any estimates or invoices related to the problem.
Preventing Future Rain Damage and Best-Practice Scheduling
Use planning steps to align work with favorable weather windows and protect the site from unexpected showers. Implement temporary coverings, drainage tweaks, and staging that reduce moisture exposure. Coordinate with subs to avoid overlapping tasks that increase risk.
Keep a simple, repeatable site-management routine and verify local weather forecasts and protection requirements. If you’re unsure about best practices, verify recommendations in product docs or with local guidelines before starting the next phase.
Scheduling, Weather Windows, and Buffering
Planning your stucco work around the weather is crucial. Here’s how:
Check local forecasts. Look at least 5-7 days ahead to avoid surprises.
Consider minimum temperatures. Stucco needs warmth to cure properly. Avoid working below 40°F (4°C).
Build in a buffer period after predicted rain. Fresh stucco needs at least 24 hours of dry weather to start curing.
Site Management and Long-Term Safeguards
Keeping new stucco dry until it cures is your top priority. Here’s how:
Maintain good drainage. Ensure water doesn’t pool around the base of your walls.
Use temporary covers during breaks or at night. Tarps or plastic sheeting can protect against dew and light rain.
Protect with proper scaffolding. If you’re working high up, ensure your scaffold has a roof to keep rain off the stucco.
Perform regular maintenance checks. Inspect your safeguards daily. Replace or repair as needed.
Conclusion
Immediate action after rain exposure matters for safety, durability, and how your finish will look long term. Stay disciplined about drying, inspecting, and following the repair sequence so you don’t lock in moisture or cause mold and failed coatings later.
First, check the surface for obvious staining, cracking, or softness; note any damp areas, sagging, or efflorescence, then dry in a controlled way, re-inspect after a short wait, and proceed with the prescribed remediation and recoat steps in the order you outlined earlier, finishing only when the wall feels dry to the touch and looks uniform. Do the work in clean stages, test small areas first, and use the specified materials and cure times as your guide, not guesswork or rush.
Common mistakes to avoid are rushing the drying process, skipping the inspection, and sealing or coating a wet or suspect area. Safety comes first—protect yourself with proper clothing, avoid working in standing water or high winds, and verify moisture levels before proceeding with any repair or recoat. Do not ignore soft spots, cracks that keep opening, or paint that peels easily, as these indicate deeper moisture problems that can worsen with time.
When to call a professional is clear: if you see significant staining, soft or hollow stucco, large or structural damage, persistent moisture after drying, or if the project involves warranty or insurance coverage. If in doubt, bring in a pro rather than risking costly mistakes, and keep the goal in sight: a solid, durable finish that resists rain next season and beyond. Stay focused, follow the plan, and you’ll finish with confidence.
FAQ
Can fresh stucco that got wet be salvaged, or does it need to be redone?
You’ll decide based on how long it stayed wet and how the surface looks. If there’s cracking, soft spots, or the finish looks dull or stained, plan for closer inspection and possible remediation per the manufacturer’s instructions.
What immediate checks should I perform right after rain hits fresh stucco?
Check for sheen loss, runs, or sags on the surface. Look for any damp areas that stay wet after the rain ends and note if the color changes or crust forms different textures.
How can I protect stucco during the rest of the curing process after rain exposure?
Keep the area as dry as possible and avoid heavy traffic on the wall. If rain is forecast, cover with breathable protective material and ensure good drainage away from the wall; follow any product label guidance.
When should I consider repair or recoat after rain exposure?
If there are visible cracks, blisters, or loss of adhesion after the wall dries, plan for targeted repair or recoat per the material’s instructions. Check the manufacturer’s guidance and local rules for curing windows and safe timelines before applying new coats.