

Introduction
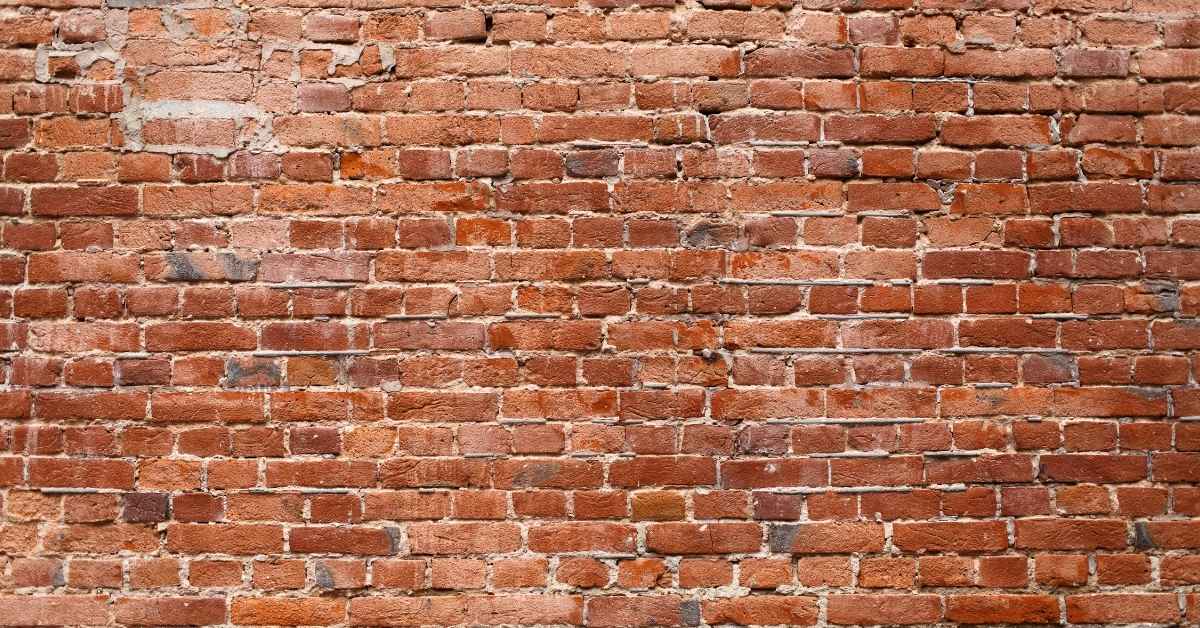
Efflorescence on new brick is the chalky salt bloom that appears when water moves soluble minerals to the surface.
Water sources and timing of curing drive whether the surface shows that bloom. In practice, keep moisture low during cure and protect fresh brick from excessive rain or splash, then allow it to dry out before applying any sealers or finishes.
Key takeaways
- Assess wall moisture and efflorescence sources before applying new brickwork.
- Use proper curing and shaded curing to minimize salt migration.
- Select mortars and blends that suit brick and climate to reduce efflorescence.
- Install flashing and drip edges to keep water out of walls.
- Keep work area dry; cover exposed brick during rain and curing.
- Wear eye protection and gloves; clean salt deposits promptly after setting.
Table of Contents
- Introduction
- Key takeaways
- What Is Efflorescence and Why It Happens
- Sources of Water That Drive Efflorescence
- Materials, Mix Design, and Salt Management
- Proper Curing Practices to Minimize Efflorescence
- Design and Detailing to Keep Water Out of the Wall
- Tools and Materials Checklist for Prevention and Inspection
- On-Site Best Practices and Scheduling to Reduce Risk
- Post-Construction Maintenance, Cleaning, and Long-Term Prevention
- Conclusion
- FAQ
What Is Efflorescence and Why It Happens
Efflorescence is a white or pale bloom that appears on masonry surfaces. It can be mistaken for a structural problem, but it is primarily a surface phenomenon. Understanding the difference helps guide the right mitigation steps.
The basic mechanism involves water moving salts from within the masonry to the surface as it evaporates. When water evaporates, dissolved salts are left behind, forming the visible coating or crystals on brick or mortar faces.
Chemical and Physical Causes
Efflorescence is caused by soluble salts moving through your new brickwork. These salts come from a few places:
- Masonry cement: It contains salt that can leach out.
- Brick and mortar: Some bricks and mortars have naturally occurring salts.
- Groundwater: If your site has high groundwater levels, it might contain salts.
The process goes like this:
- Water moves through tiny capillaries in the brickwork, picking up salts along the way.
- This water then evaporates at the surface, leaving the salts behind.
Visual Signs, Timing, and Severity Assessment
Efflorescence appears as a white, powdery deposit on the surface of your brickwork. Here’s how to tell if it’s fresh or old:
- Fresh efflorescence: It’ll be white and fluffy, like snow.
- Old efflorescence: It’ll be grayish or yellowish, and might be harder to the touch.
It usually appears on:
- The top courses of walls.
- Vertical joints.
- Anywhere water tends to pond or drip.
To assess severity, look for signs of active moisture movement. If the efflorescence is growing or changing color, it’s still active.
Sources of Water That Drive Efflorescence
External sources include rain, runoff, and groundwater that can infiltrate the wall system. Internal sources are moisture produced inside the building structure, such as condensation or plumbing leaks. Construction-related water comes from curing moisture or improper drainage around the wall.
The core strategy is to minimize water entry and accumulation. Identify and address likely water paths and monitor for any ongoing leaks or seepage that could feed salt movement.
External water paths (rain, splash, roof/runoff)
Efflorescence loves to sneak in through gaps and cracks on the outside of your brickwork. Here’s how:
Poor flashing around windows, doors, and chimneys can let rainwater trickle down behind the bricks. Missing or inadequate overhangs above doors and windows don’t protect the walls from direct rain impact. Surface splash from rain hitting the ground below can also send water up into your brickwork.
To keep external water out, ensure proper flashing installation, maintain overhangs, and consider using a liquid membrane on walls that are prone to splash.
Ground and rising moisture, drainage issues
Water from below can cause efflorescence too. Here’s how it happens:
Sub-surface water finds its way up through capillary action, especially if your bricks are porous or there’s no barrier to stop it. Inadequate site drainage means water lingers around the base of your walls, encouraging efflorescence.
To combat this, ensure a proper damp-proof course is installed at the base of your walls. Sloping the ground away from the walls helps too, improving site drainage and reducing moisture buildup.
Construction and material moisture (wet mortar, stored units)
Material choices during construction can also contribute to efflorescence. Here’s what to watch out for:
- Wet mortar: Using too much water in your mortar mix leaves excess moisture that can’t escape, leading to efflorescence.
- Stored units: Storing bricks outside before use exposes them to rain and dew. This extra moisture gets trapped when they’re laid.
- Mixing water: Using impure or salty water in your mortar mix introduces salts that will later appear as efflorescence.
- On-site water handling: Poorly controlled water sources on site can lead to accidental contamination of materials.
- Wrong material choice: Using bricks with high salt content or poor absorption rates can result in cracking, staining, and weak bond due to trapped moisture.
Materials, Mix Design, and Salt Management
Brick quality and the mineral content of the units influence how much salt is available to migrate. Mortar constituents and the moisture handling during mixing also affect salt transport. Use clean water and keep mixing conditions stable to avoid introducing contaminants.
Store materials properly to reduce exposure to rain or damp conditions before installation. Check product labels and manufacturer instructions for guidance on storage and handling related to salts and pozzolanic additives.
Brick selection and on-site storage practices
Choosing the right bricks is crucial to prevent efflorescence. Go for low-salt, well-fired bricks when possible.
Why? High salt content in bricks can lead to efflorescence. Well-fired bricks have less salt and are better quality.
Store your bricks properly on-site too. Keep them off the ground and under cover to limit moisture pickup.
Why bother? Moisture can dissolve salts, leading to efflorescence. Keeping bricks dry reduces this risk.
Mortar selection, water quality, and admixtures
Mortar composition and mixing water quality matter. Low-salt mortar and clean water help prevent efflorescence.
What’s low-salt mortar? It has less salt content than regular mortar. Ask your supplier for options.
Use clean mixing water too. Rainwater or well-water can have high salt content, so avoid them if possible.
Admixtures can help. Check manufacturer guidance to see which ones reduce soluble salts in your specific case.
Testing for soluble salts and reporting needs
Get pre-installation testing done by an accredited lab. Test for soluble salts and moisture profiling.
Why test? It helps you understand the salt content in your materials and if there are any moisture issues.
Request clear test limits from project specifications. This ensures everyone’s on the same page about what’s acceptable and what’s not.
When to test? Do it before installation. That way, you can address any issues before they become problems.
Proper Curing Practices to Minimize Efflorescence
Controlled curing helps keep water within the wall system long enough for proper hydration without promoting excessive salt movement. Curing methods should align with the local conditions and the masonry assembly design. Avoid practices that trap overly moist surfaces during hot, windy, or drying conditions.
Consider how curing choices interact with ambient weather to affect final appearance. When in doubt, verify recommended curing procedures with the product data sheet or manufacturer instructions.
Principles of curing relevant to salt movement
Curing is crucial for minimizing efflorescence. It’s about controlling how moisture leaves the brick.
Slow, even curing lets water escape gradually. This gives salts time to move out with the water, rather than being left behind as the brick dries too fast.
Moisture retention helps keep the brick hydrated uniformly. This ensures a consistent pore structure throughout the brick. Inconsistent pores can trap salts and push them to the surface.
Uniform hydration also prevents stress within the brick. Stress can cause cracks, which become pathways for salt migration.
Practical curing methods and selection criteria
There are several ways to cure your bricks. Each has its pros and cons:
Wet curing involves keeping the brick surface wet for a few days after laying. This is simple but can be messy and time-consuming.
Damp covers, like burlap or plastic sheets, retain moisture but allow air circulation. They’re easy to use but may need frequent wetting.
Membrane curing uses special compounds that form a protective layer on the brick surface. These are convenient but can be more expensive.
Choose based on your job’s needs and manufacturer instructions. Always consider your site conditions – temperature, humidity, wind, etc.
When to use curing compounds or membranes
Curing compounds or membranes can be a good choice when you need more control over the curing process:
They’re great for large projects where consistent, even curing is crucial. They can also help in harsh weather conditions like high winds or extreme temperatures.
However, they may not be necessary for small jobs or mild climates. Wet curing or damp covers might suffice.
Always check if the compound is compatible with your bricks and any coatings you plan to use. Some compounds can react negatively with certain materials.
Design and Detailing to Keep Water Out of the Wall
Passive details like flashing, weeps, and proper drainage planes direct water away from the masonry. Overhangs and coping work with gravity and shading to reduce water infiltration. The goal is to keep the wall dry during normal service conditions.
Think through the path water would take and install details that interrupt that path before it reaches the brick or mortar. Check design notes and local building guidance for any specific detailing requirements for your project.
Flashing, Weep Holes, and Cavity Drainage
Flashing is your first line of defense against water intrusion. It’s a thin sheet of metal or plastic that diverts water away from vulnerable areas like windows, doors, and corners.
Install it at these locations, lapping up and under masonry to create a watertight barrier. Weep holes, tiny openings in the mortar joints near the bottom of walls, let any trapped water escape. Space them evenly, about every 30 inches or so.
Cavity drainage systems are another tool. They’re plastic channels installed behind masonry that collect and direct water to weep holes. Use them in areas with high moisture risk.
Joint Profiles, Pointing and Coping Details
The shape of your mortar joints can make a big difference. Concave joints shed water better than flat or convex ones. They slope slightly inward, encouraging water to run off.
Pointing is the process of filling and finishing mortar joints. A st struck joint, where the mortar is pressed into the joint and then scraped flush with the face of the brick, is best for preventing efflorescence. It leaves no pockets for water to sit in.
Coping details at the top of walls are crucial too. A proper coping overhang keeps rain from splashing back onto the wall. Use a drip edge or a sloped coping piece to direct water away.
Wall Assemblies and Substrate Compatibility
Your wall needs to breathe, so use compatible substrates. Brick on wood studs is a no-no; they expand and contract at different rates. Use concrete or steel backups instead.
Air/moisture barriers like house wrap or fluid-applied membranes stop water from getting in but let moisture out. Install them behind your masonry, but don’t seal the bottom. You need that path for water to escape.
Ties hold the wall together and help it drain. Use expansion ties that allow movement while keeping the wall secure. And make sure they’re properly spaced – usually every 16-24 inches vertically, and every 30-36 inches horizontally.
Tools and Materials Checklist for Prevention and Inspection
Carry a basic set of field tools for moisture checks, inspection, and minor diagnostics. Include simple test materials and reference guides for quick on-site assessments. Have cleaning supplies and protective gear ready for early action if efflorescence is spotted.
Keep labels and data sheets accessible to verify material suitability and handling instructions. Use manufacturer instructions or product labels to confirm any limitations related to salts and moisture control.
On-site tools for protection and temporary weatherproofing
Use this checklist during rain events to protect your brickwork from water absorption, which can lead to efflorescence.
- Tarpaulins: Cover exposed walls with heavy-duty tarps. Secure them well to prevent wind damage.
- Breathable membranes: Apply these to walls before covering with tarps. They allow moisture vapor to escape while keeping rain out.
- Temporary flashings: Install these at wall-to-roof and wall-to-wall intersections to prevent water from seeping in.
- Covers for openings: Protect door and window openings with covers or temporary frames to keep rain out.
- Drip edges: Ensure all horizontal surfaces have drip edges to direct water away from walls.
- Scaffolding or lifts: Use these to access high walls for protection. Safety first!
- Temporary wall covers: For extended periods, use rigid covers that can be secured in place.
- Ground covers: Lay down tarps on the ground around walls to prevent water splashback.
Quick rule: Always prioritize protection during rain. A little extra effort can save you from big problems later.
Inspection aids and simple field tests
Regular inspections help catch efflorescence early. Use these tools and methods to monitor your brickwork.
- Visual checklists: Inspect walls for signs of efflorescence, cracks, or other damage. Check joints, corners, and areas near openings first.
- Moisture meters: Use these to measure moisture content in bricks. Ideal readings are between 12-16%.
- Portable salt test kits: Test for soluble salts on the surface of bricks. High levels may indicate efflorescence risk.
- Thermal imaging cameras: Detect heat loss or gain, which can indicate moisture movement within walls.
- Chloride test strips: Check for chloride ions, a common cause of efflorescence. Follow package instructions.
- pH test kits: Measure pH levels to ensure they’re within the acceptable range (6-8) for masonry.
- Lab tests: For critical decisions, send samples to a lab for detailed analysis and confirmation.
- Record keeping: Keep records of all inspections and test results. This helps track trends over time.
Quick rule: Regular inspections are key. Catching efflorescence early can save you from expensive repairs later.
Cleaning and repair materials to keep on hand
Have these cleaning supplies and repair materials ready for when efflorescence appears or minor repairs are needed.
- Masonry cleaners: Use safe, pH-neutral cleaners designed for masonry. Avoid harsh chemicals that can damage bricks.
- Soft-bristle brushes: These are gentler on brick surfaces than hard-bristle brushes.
- Neutralizing agents: Have these ready to neutralize any alkaline residue left by cleaners. Vinegar or lemon juice can be used in a pinch.
- Repair mortars: Keep matching repair mortars on hand for touch-ups and minor repairs.
- Efflorescence removal products: Have specific efflorescence removers ready. Follow product instructions carefully.
- Personal Protective Equipment (PPE): Always use gloves, safety glasses, and other PPE when cleaning or repairing masonry.
- Drop cloths: Protect surrounding areas with drop cloths during cleaning to prevent staining.
- Safety cones: Cordon off work areas for safety and to prevent damage.
Quick rule: Having the right tools and materials on hand means you can tackle efflorescence or minor repairs as soon as they appear, minimizing damage and costs.
On-Site Best Practices and Scheduling to Reduce Risk
Plan sequencing so that brickwork and mortar are not exposed to rain or high humidity during a critical curing window. Weather planning helps minimize unexpected moisture exposure. Proper material handling reduces accidental moisture uptake by bricks and mortar.
Incorporate regular inspection checkpoints to catch conditions early. If unsure about a procedure, refer to product data sheets or local codes for approved practices.
Handling, staging, and delivery controls
Minimize on-site exposure of bricks by handling them carefully. Use protective wrapping during transport and storage to keep moisture out.
Stage materials: Keep brick pallets off the ground, covered with a tarp or plastic sheeting when not in use. This reduces direct contact with wet surfaces and prevents water absorption.
Coordinate deliveries: Time deliveries so bricks aren’t sitting around on-site for extended periods. The longer they’re exposed to weather, the higher the risk of efflorescence.
Weather-aware scheduling and contingency planning
Plan your masonry work around weather forecasts. Avoid laying bricks when rain is expected within 24 hours of installation.
Prepare protective measures: Have tarps, plastic sheets, or other temporary weatherproofing materials ready to cover laid bricks after installation. This protects them from dew and light rain.
Define hold points: Establish clear hold points in your schedule after rain events. Inspect the work and allow sufficient time for bricks to dry before proceeding with further construction or sealing.
Quality-control checkpoints during construction
Regular inspections help catch efflorescence issues early. Use this checklist at key moments in the construction process.
- Post-installation: Inspect laid bricks for any signs of moisture or dampness. Check joints for proper filling and alignment.
- After prolonged wetting: Inspect after heavy rain or irrigation. Look for water stains, efflorescence, or other signs of excessive water exposure.
- Before sealing: Inspect before applying any sealants or membranes. Ensure bricks are dry and free from contaminants.
- Check joints: Ensure joint profiles are correct and pointing is well-bedded to prevent water ingress.
- Inspect weep holes: Verify they’re clear and unobstructed to allow proper drainage.
- Examine flashing: Check that it’s correctly installed and functioning to divert water away from the wall.
- Check cavity drainage: Ensure it’s properly installed and not blocked to facilitate water movement out of the wall.
- Inspect substrate: Verify it’s compatible with the brick and free from moisture or other contaminants that could cause efflorescence.
Quick rule: If you find issues, address them promptly. Don’t let problems linger as they can worsen over time.
Post-Construction Maintenance, Cleaning, and Long-Term Prevention
Set a routine inspection cadence to catch minor efflorescence before it grows. Document any changes in appearance and soils that affect the brick surface. Safe cleaning strategies should be chosen to avoid damaging the masonry.
Apply maintenance actions that prevent recurrent salt migration, such as addressing moisture sources and keeping drainage functional. When in doubt, consult preventive maintenance guides or manufacturer recommendations before cleaning or sealing.
Visual maintenance checklist and inspection frequency
Use this checklist every few months to catch efflorescence early.
- Check for white deposits: Efflorescence appears as white, powdery deposits on the surface. It’s most visible when it’s wet or in indirect light.
- Inspect joints and corners: Water often collects here first, leading to efflorescence.
- Check weep holes: If they’re clogged, water can’t drain properly. Use a wire or small tool to clean them.
- Look for damp spots: Efflorescence is a sign of moisture. Find the source and fix it.
- Check flashing and caulking: If they’re damaged, water can seep in. Inspect and repair as needed.
- Inspect mortar joints: Cracked or missing mortar allows water to enter. Repoint if necessary.
- Check for water stains: These could indicate a leak that’s causing efflorescence.
- Look for signs of settlement: If the wall is moving, it can trap moisture and cause efflorescence.
Quick rule: Inspect more frequently in humid or wet climates. Address any issues promptly to prevent chronic problems.
Safe cleaning methods and when not to clean
Efflorescence can be cleaned, but it’s important to do it safely and at the right time.
Dry-brushing: Use a soft-bristle brush to gently remove efflorescence. Do this when the wall is dry to avoid spreading the powder.
Controlled rinsing: If dry-brushing doesn’t work, use a low-pressure water spray to rinse off the efflorescence. Be careful not to force water into the wall.
Don’t clean if:
– The moisture source hasn’t been fixed.
– The wall is still wet or damp.
– The weather forecast predicts rain within 24 hours.
Sealers, repellents, and long-term treatments — pros and cons
Coatings can help prevent efflorescence but have their own considerations.
Pros
- Reduce water uptake: Sealers and repellents keep water from being absorbed into the brick.
- Prevent efflorescence: By reducing water absorption, they can prevent efflorescence from forming.
- Improve appearance: Some coatings can enhance the look of the brick.
- Easy application: Many sealers and repellents are simple to apply.
Cons
- Moisture trapping: If water is already in the wall, coatings can trap it, leading to other problems.
- Appearance alteration: Some coatings change the color or texture of the brick.
- Compatibility issues: Not all coatings are compatible with every type of brick. Always test first.
- Warranty effects: Applying a coating may void certain warranties, like those for waterproofing systems.
Use sealers and repellents when:
– The wall is dry and free from moisture.
– You’ve addressed all potential sources of water entry.
– You’re sure the coating is compatible with your brick type.
Conclusion
The key to durable brickwork is controlling moisture from the start and sticking to proven curing, detailing, and maintenance practices. When water is kept out and the wall is allowed to cure properly, efflorescence stays minimal, and the brickwork stays strong and attractive for years.
To move forward, check the wall design and detailing for water control, verify the mix, salt management plans, and curing methods, then schedule cleanings and maintenance in a simple, repeatable routine: inspect after rain or irrigation, confirm appropriate drainage and flashing, seal or coat only where recommended, perform minor repairs promptly, and document your results so you know what works. Do each step in a logical order: assess, fix gaps, monitor, and maintain.
Common missteps to avoid include rushing musty curing goals, using improper mixes or sealers without testing, and neglecting drainage or flashing details that let water seep into the wall. Safety rules are simple: test any new material on a small area first, wear eye and skin protection when cleaning or handling salts, and never force repairs that could trap water inside. If a problem resists basic fixes or you’re unsure about flashing, drainage, or structural risks, call a professional before you push on.
FAQ
What should I look for if water is seeping in during construction?
Watch for damp spots inside and on the brick surface after rain or during wet weather. If you see active dampness, pause work and fix the water source before finishing the wall. Check drainage, flashing, and any openings that let rain in.
How can I protect freshly laid brick from water while it cures?
Keep the wall as dry as possible during the initial curing phase. If rain is forecast, cover with a breathable, temporary shield and remove it when it’s dry. Don’t spray or flood the brick with water to cure it.
What practical steps reduce water entering the wall from the exterior?
Seal or cap joints and clean openings to prevent capillary water. Use proper flashing and weep holes where needed, and confirm the brick veneer course is weathered with clean joints. Don’t leave open gaps that act as water highways.
What maintenance steps help prevent efflorescence after completion?
Inspect after wet seasons and wash efflorescence with appropriate methods when needed. Keep gutters and downspouts clear so roof runoff isn’t dumping onto brick. If you see recurring staining, check for ongoing water sources and address them first.