
Introduction
Extra plaster coats provide additional mass and seal to help reduce sound transmission when the first layer isn’t enough. A second coat can improve sound dampening by filling gaps and smoothing the surface. But it’s not a magic fix for loud environments or structural issues.
Whether to add another coat depends on the room, the existing plaster, and how much sound you’re hoping to cut. Check that the base is clean, dry, and well bonded, and follow manufacturer or local guidance for drying and curing. Be realistic: extra coats add work and weight, and sometimes better results come from treating air gaps or sealing the wall system overall.
Key takeaways
- Extra plaster coats can improve sound blocking, but identify transfer paths first.
- Assess wall assemblies and avoid over-application that can crack or delaminate.
- Use compatible mixes and respect manufacturer guidance to prevent adhesion failures.
- Seal gaps and joints before adding plaster layers to maximize isolation.
- Testing acoustic impact after each coat helps spot diminishing returns early.
- Safety: wear eye protection and respirators when sanding or grinding plaster dust.
Table of Contents
- Introduction
- Key takeaways
- How Plaster Influences Sound Transfer: the Basics
- When an Extra Coat of Plaster Is Likely to Help
- When an Extra Coat Is Mostly Wishful Thinking
- Types of Plasters and Add-on Products for Acoustic Improvement
- Practical Application Techniques and Best Practices
- Tools and Materials Checklist
- Assessing the Job: DIY Vs Professional and Diagnostic Steps
- Expected Outcomes, Common Pitfalls and Maintenance
- Conclusion
- FAQ
How Plaster Influences Sound Transfer: the Basics
Plaster adds mass to a surface, which can slow down some sound waves. It also stiffens the wall and can damp vibrations when installed correctly. Surface absorption depends on texture and thickness, shaping how high-frequency sound is treated.
Understand the difference between airborne sound traveling through walls and structure-borne sound moving through a structure. Plaster alone has limits, so use it with other strategies as needed. Check manufacturer instructions or product labels to confirm any performance claims.
Mass, stiffness and the mass-law concept
Adding mass to your plaster can help reduce airborne sound transmission. This is due to the mass-law concept – more weight means less vibration.
But remember: adding too much mass won’t help further after a certain point. Check manufacturer data for specific material densities and performance claims.
For instance, doubling the thickness of your plaster only reduces sound by about 5-6 dB. So, don’t expect miracles from just adding more plaster.
Damping, absorption and surface treatments
Certain mixes or layered systems can improve damping – reducing resonances that cause sound to bounce around. Think of it like a trampoline with sand on it – less bounce.
A surface treatment might change how loud you perceive noise, but it won’t always reduce measured transmission loss. It’s more about changing the sound’s character than stopping it.
For example, adding a layer of acoustic foam to your plaster can absorb some sound energy, but it won’t block out noise from outside completely.
When an Extra Coat of Plaster Is Likely to Help
An additional plaster coat can seal small gaps and cracks that would otherwise leak sound. It can add mass to very thin partitions to reduce some noise transmission. A damping-rich layer on an existing surface can improve low-frequency performance when done correctly.
When in doubt, verify what the product datasheet or label says about layering, cure times, and compatibility with previous coats. Consider local rules or guidance if you live in a rental or near shared walls. Plan the coat around junctions and edges where sound often sneaks through.
Sealing cracks, gaps and flanking leaks
Plaster can be a great sealant for reducing sound leakage through openings. It fills gaps, improving airtightness and stopping sound from passing through.
Focus on: Cracks in walls or ceilings, gaps around pipes, wires, or windows. Plaster isn’t always the best fix for large gaps – consider foam or caulk there.
Remember, plaster won’t stop flanking leaks (sound traveling through adjacent structures). You’ll need to address those separately.
Adding useful mass to lightweight faces
Lightweight partition faces can benefit from a denser plaster finish. This adds mass, reducing sound transfer and improving soundproofing.
Check: Substrate strength before adding significant mass. A thin-coat or skim coat is usually fine, but heavier applications need proper support.
Adding mass works best on lightweight gypsum board or stud walls. It’s less effective on solid brick or concrete.
Using damping or constrained-layer approaches with plaster
Plaster systems with viscoelastic layers or constrained-layer techniques can improve soundproofing by increasing damping. These outperform simple extra-thickness plaster.
Viscoelastic: Think of it like a gel between two rigid layers, absorbing and dissipating energy as it vibrates.
Constrained-layer: A flexible layer sandwiched between two rigid ones. It works by converting vibrational energy into heat.
These techniques are more complex but can provide better soundproofing in certain cases.
When an Extra Coat Is Mostly Wishful Thinking
Extra plaster often has little impact on impact noise or structure-borne vibration that travels through framing and cavities. In those cases, sound is carried by the structure rather than the surface alone. Expect limited benefit from adding mass in isolation without other changes.
Look to targeted strategies such as decoupling, resilient channels, or dedicated acoustic assemblies instead. Always check building practices, local codes, and product instructions before pursuing a corrective layer.
Impact and structure-borne noise limitations
Adding another coat of plaster won’t do much against impact noises like footsteps, banging on walls, or furniture moving. These sounds travel through the structure itself, not just the air.
The reason? Impact noises create vibrations that pass right through your existing plaster and into the studs, joists, or other structural elements. A thicker layer of plaster won’t stop these vibrations.
What will help is decoupling the new plaster from the existing structure using resilient channels or hat channels. These create a gap that breaks the vibration path, reducing noise transfer.
Flanking paths, cavities and frame-borne transmission
Sound can sneak through gaps in your plaster and travel along studs, joists, or other framing members. This is called flanking transmission.
It’s like having a secret path for noise to bypass your plaster altogether. Even if you add another coat, the sound will just find a new way around it.
The best strategies here are sealing any gaps with acoustic caulk or expanding foam, and using sound insulation in the cavities between studs. You might also need to detail junctions carefully to stop noise leaking through there too.
Types of Plasters and Add-on Products for Acoustic Improvement
Gypsum, lime, and cement-based plasters each behave differently with sound and moisture. Acoustic plasters and dense-mass formulations aim to improve mass and damping. Some products pair with boards or specialty fillings to address specific noise paths.
Weigh trade-offs like breathability, durability, and installation effort. Review the label or manufacturer instructions to understand how a product should perform and what substrates it supports.
Traditional gypsum and lime plasters: pros and cons
Gypsum and lime plasters are common, affordable choices for DIY homeowners. They offer a range of acoustic benefits but have their limits.
Pros
- Cost-effective
- Easy to apply
- Provide some sound absorption
- Can help reduce echo
- Offer good fire resistance (gypsum)
- Flexible and adaptable (lime)
Cons
- Limited mass, so not ideal for blocking structure-borne noise
- Prone to cracking over time, affecting performance
- May require additional coats or additives for significant soundproofing
- Lime plasters can be more challenging to work with and slower to cure
Traditional gypsum and lime plasters are best used when you need basic sound absorption, echo reduction, or fire resistance. For more demanding acoustic needs, consider specialized products.
Acoustic plasters, dense-mass plasters and specialized mixes
Acoustic plasters are designed to provide superior soundproofing compared to traditional plasters. They often contain denser materials like perlite or vermiculite.
Dense-mass plasters offer increased mass, which helps block sound transmission. However, they can be more challenging to apply and may require additional reinforcement.
Specialized mixes, such as those containing recycled glass or other heavy aggregates, can provide even greater mass. These are typically used in new construction but can be applied as a retrofit with careful planning.
Acoustic plasters often outperform simple extra coats of traditional plaster due to their higher density and specialized formulations. However, they may still have limitations in blocking low-frequency noise.
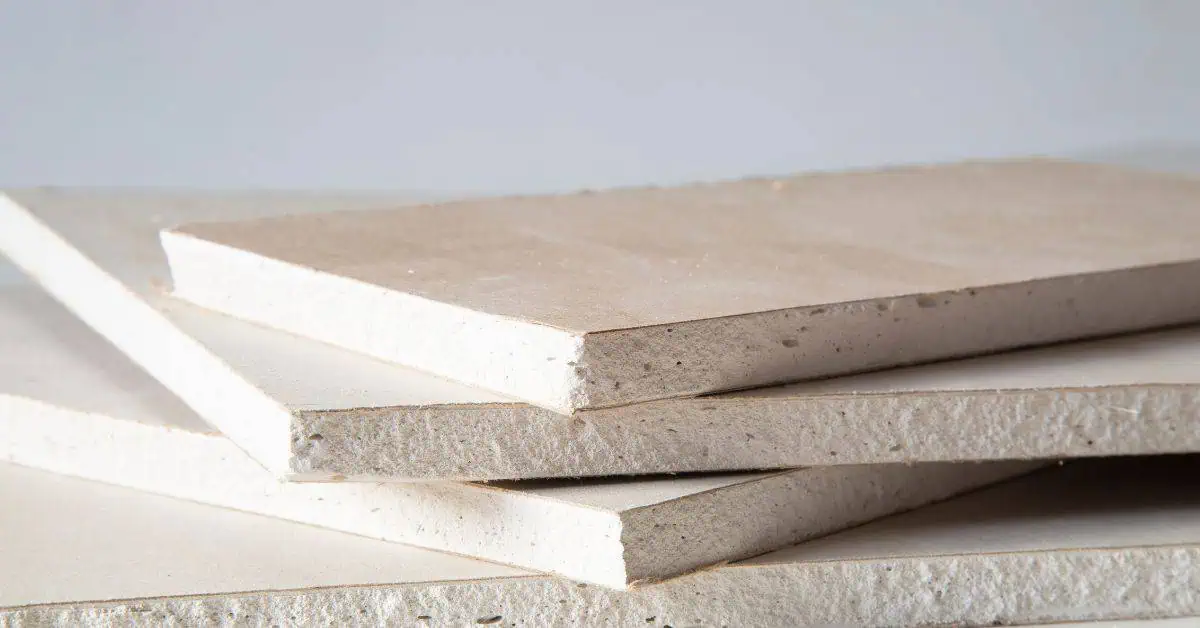
Plasterboard, acoustic boards and constrained-layer membranes
Using heavier plasterboard or acoustic panels under a plaster finish can enhance soundproofing. These products often contain denser materials like mineral wool or recycled glass.
Constrained-layer membranes (CLD) are thin, viscoelastic layers applied between two rigid surfaces to dampen vibrations. They can be used in conjunction with plaster for added noise reduction.
When retrofitting, consider compatibility and installation requirements. Heavier boards may need additional support, while CLDs require careful application to ensure optimal performance. Always follow manufacturer guidelines for best results.
Practical Application Techniques and Best Practices
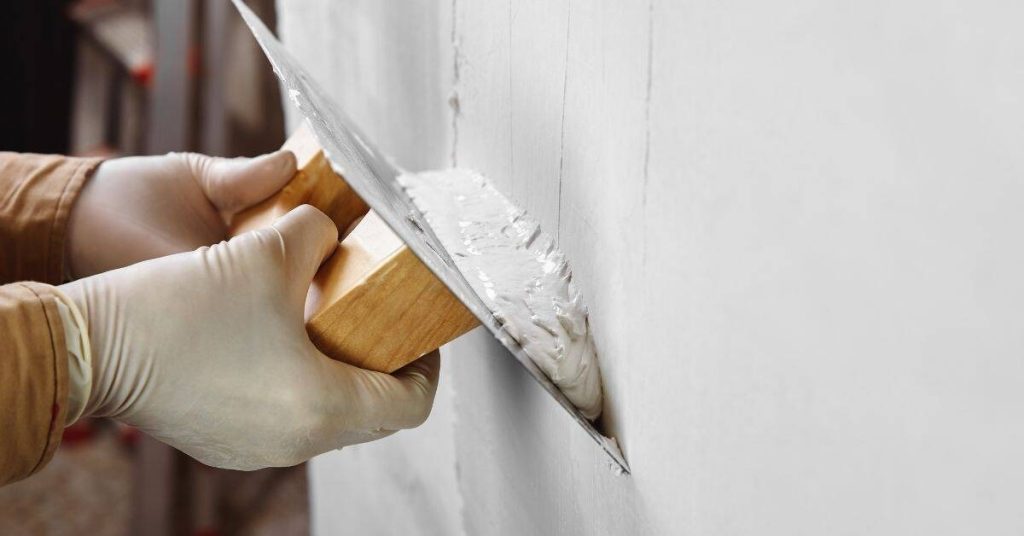
Start with thorough surface preparation and clean joints to maximize adhesion. Plan a layer strategy that builds mass while avoiding new gaps. Pay attention to edges, corners, and ceiling junctions where sound leaks are common.
Follow real-world steps for mixing, troweling, and curing as instructed by the product label or datasheet. Use proper safety gear and work gradually to avoid cracks and debonding at seams.
Surface preparation, priming and adhesion checks
Before applying any acoustic plaster, ensure the existing surface is clean. Remove all dust, dirt, grease, or old paint using a suitable cleaner.
Check for any signs of delamination or instability in the existing finish. If present, these areas must be repaired before proceeding.
Compatibility is key. Ensure the new plaster is compatible with the existing surface to prevent adhesion issues and cracking later on.
Layering strategy, drying and curing considerations
Apply acoustic plasters in thin, even layers. Thicker layers can trap moisture and lead to cracking or delamination.
Follow product guidance for layer thickness and allow each layer to dry completely before applying the next one.
Keep environmental conditions within recommended limits during application and curing. Excessive heat, cold, or humidity can affect adhesion and drying times.
Sealing junctions, penetrations and visual checkpoints
Before applying plaster, use this checklist to ensure a continuous acoustic seal at common sound leak points.
- Skirtings: Check for gaps between skirting boards and walls. Seal with acoustic caulk if necessary.
- Sockets: Apply acoustic gasket around electrical sockets before plastering to prevent flanking transmission.
- Service penetrations: Seal around pipes, cables, or ducts with acoustic foam or caulk to stop sound leakage.
- Abutments: Ensure a tight seal at junctions between walls and ceilings, or walls and floors using acoustic mastic.
- Cracks: Fill any cracks in the existing surface with acoustic filler before plastering.
- Gaps: Seal gaps around windows and doors with acoustic caulk to improve airtightness.
- Service voids: If there are service voids (e.g., behind a wall), ensure they’re filled with acoustic insulation before plastering.
- Visual checkpoints: After application, visually inspect all junctions and penetrations to confirm a continuous seal. Any missed points can compromise the acoustic performance.
Quick rule: If in doubt, seal it out!
Tools and Materials Checklist
Assemble basic tools plus any specialized items called for by the product you choose. Have protective gear, mixing tools, and straightedges on hand. Verify labels for surface prep, application thickness, and cure conditions.
Double-check manufacturer instructions for compatibility with existing plaster or substrates. Keep a copy of the data sheet handy in case you need to confirm performance claims or warranty coverage.
Basic DIY Toolkit Essentials
Before you start, make sure you have these tools and safety items on hand. They’ll help you apply and finish plaster like a pro.
- Trowels (4″ to 12″): Various sizes for different tasks. Skip this, struggle with application.
- Hawk: Holds plaster while you’re working. Don’t have one? Expect mess and waste.
- Scratch tool: Prepares surface for plaster. Miss this step, plaster won’t stick.
- Jointing knife (4″ to 12″): Smooths out joints. No knife? Expect rough surfaces.
- Dust mask and safety glasses: Protects from dust and debris. Skip these, risk health issues.
- Plaster bucket: Mixes and holds plaster. Use a regular bucket, expect spills and mess.
- Measuring tape: Ensures even layer thickness. No tape? Expect inconsistent results.
- Level: Keeps plaster surface even. No level? Expect wavy surfaces.
Quick rule: Always check your tools before starting. Missing something? Head to the store first.
Specialized Acoustic Materials and Safety Considerations
When dealing with acoustic plasters, you’ll need specific materials. Check these before purchasing to ensure they meet your needs.
- Acoustic membranes: Reduce sound transmission. Don’t check compatibility? Expect reduced noise reduction.
- Dense plasters: Absorb and dampen sound. Skip checking density, expect limited noise control.
- Sealants: Prevent sound leakage. Miss this, flanking paths can reduce effectiveness.
- VOC levels (on datasheet): Check for low VOCs to avoid off-gassing issues.
- Fire rating (on datasheet): Ensure it meets local building codes. Skip checking, risk fire safety violations.
- Handling guidance (on datasheet): Follow instructions to prevent damage or injury.
- Manufacturer’s application guidelines: Follow these for best results. Don’t? Expect subpar performance.
- Personal protective equipment (PPE): Check what’s needed for safe handling. Skip this, risk exposure to harmful substances.
Quick rule: Always check product datasheets and follow manufacturer guidelines. Skipping this can lead to poor results or safety hazards.
Assessing the Job: DIY Vs Professional and Diagnostic Steps
Use simple on-site checks to gauge whether a DIY coat makes sense, such as visible gaps or obvious lack of mass. Weigh the potential cost and the expected benefit before starting. If the wall stack shows multiple leakage paths, a pro evaluation may be wise.
Look for clear signs that professional acoustic assessment or contractor work is needed, such as persistent rattles or large shared-wall noise. Document observed issues and compare with what the product documentation suggests you can achieve DIY.
Simple listening tests and visual diagnostics
Before you grab your trowel, do some quick checks to understand the noise issues.
Listening Test: Close all windows and doors. Turn off any appliances that might be running. Then, listen for noises. Tap on walls, ceilings, and floors to pinpoint where sounds are coming from or echoing.
Visual Check: Look for gaps around windows, doors, and electrical outlets. Check for loose or missing insulation in cavities. If you find rattles when you shake walls or hear airflow through gaps, these are surface-level issues that DIY add-on coats can help with.
When to hire a professional or request acoustic testing
While DIY add-on coats can improve soundproofing, they’re not always the solution. Here’s when to call in the pros:
Persistent impact noise, like footsteps or furniture movement, might need more than just a coat of plaster. Complex flanking paths, where noise travels through multiple routes, could also require professional assessment.
If your project involves building regulations or warranties, it’s wise to get an acoustic test done first. This ensures you’re complying with standards and won’t void any warranties. Trust me, it’s better to be safe than sorry.
Expected Outcomes, Common Pitfalls and Maintenance
Expect modest gains from a plaster add-on if the main noise path is through structural elements or through long sound paths. Common mistakes include improper surface prep, poor adhesion, or neglecting junctions that leak sound. Avoid skipping cure times or overworking joints.
Maintain improvements by inspecting joints periodically and addressing cracks early. Verify that there is no moisture intrusion and re-check any seals after seasons or renovations that affect the wall assembly.
Realistic performance expectations and verification
Plaster add-ons can significantly reduce noise, but they’re not magic. Expect a reduction of around 15-25 dB(A) with proper application.
Don’t expect them to block out heavy machinery or loud music entirely. They’re best for reducing everyday noises like conversation, traffic, and appliances.
Before you start, do a simple listening test. Play some noise in the room and listen from another room. Make notes on what you hear. After applying the plaster, repeat the test. You should notice a difference, but it won’t be silent.
Verify improvements by comparing your before-and-after notes or using a sound level meter if you have one. Check product performance data to see how much noise reduction you can realistically expect.
Common mistakes and upkeep tips
Here are some common pitfalls to avoid when using plaster soundproofing add-ons:
- Poor sealing: Inadequate sealing around penetrations lets noise right through. Always seal before applying plaster.
- Incompatible materials: Using the wrong primer or not letting surfaces dry properly can ruin your acoustic treatment. Follow product instructions carefully.
- Overloading partitions: Adding too much weight to walls can cause structural issues. Know your wall’s load-bearing capacity.
- Skipping maintenance: Regular checks and upkeep are crucial to keep your plaster finish and acoustic seals effective over time.
To maintain your soundproofing, inspect your work annually for any cracks or gaps. Re-seal if necessary. Keep the area clean and dry to prevent mold growth. With proper care, your plaster add-ons should provide long-lasting noise reduction.
Conclusion
Adding plaster for sound control pays off when you respect safety, keep the work durable, and watch how the finish looks. Start small, test as you go, and don’t rush through steps that affect structure or sealant integrity.
Assess the job like a pro: check the wall type and existing plaster, gather the right add-ons for your scenario, clean and prep the surface, apply in measured coats, monitor sound and moisture after each pass, and dry thoroughly before sanding or decorating. If you’re unsure, test a patch first, measure temperatures and humidity, and stay within safe weight and thickness limits.
Common mistakes to avoid include overloading the wall with coats you can’t fully cure, skipping proper surface prep or ventilation, and ignoring setup or cleanup that leads to cracking or moisture pockets. Use the right PPE, work in a well-ventilated area, and never force a cure with heat or rapid drying methods that could warp the plaster or backer material.
If the space is large, has complex framing, or you’re dealing with persistent moisture, it makes sense to call a professional rather than push ahead. Stay disciplined, keep safety first, and you’ll finish with a sound, smooth, and lasting result you can be proud of.
FAQ
Is another plaster coat worth it for sound reduction?
Sometimes yes, sometimes no. A fresh coat can seal gaps and improve mass, but it won’t fix flanking sound or structural flaws on its own.
What should I check before adding another coat?
Look at the substrate and the existing plaster stability. Read the product label and follow manufacturer instructions. Check for moisture issues and ensure proper surface prep before applying.
Why might an extra coat not improve sound, even if I apply it carefully?
Because sound travels through framing, studs, and surrounding walls. If leaks or coupling points remain, extra plaster won’t fully block the transfer.
What practical alternatives can work better than an extra coat?
Consider targeted fixes like sealing gaps, addressing flanking paths, or using sound-damping plasters and add-ons per product instructions. Prioritize addressing the path of least resistance for sound and recheck after any change.