

Introduction
When mounting shelves on block walls, use fasteners and anchors designed to grip blocks without damaging their inner web.
Choose from practical options such as masonry screws, toggles, and anchors designed for hollow or solid blocks. Select based on your wall type and the expected weight of your shelves. When installing, consider the drilling method, matching the correct anchor, and managing dust and alignment throughout the process. Always refer to product instructions and local rules for specific installation details and any height or load guidelines.
Key takeaways
- Choose fasteners suitable for hollow block walls and load type.
- Use appropriate drilling methods to avoid crumbling block and spalling.
- Verify wall construction and hollow cores before selecting anchors or screws.
- Distribute load with multiple anchors and proper spacing for stability.
- Follow safety guidelines: wear eye protection and avoid hidden utilities.
- Test pull-out gently after installation and reassess if failures occur.
Table of Contents
- Introduction
- Key takeaways
- Quick Overview and What This Guide Covers
- Understand Your Block Wall: Construction and Failure Modes
- Fastener Options: What Works, Where, and Why
- Tools and Materials Checklist
- Drilling and Hole Prep: Techniques to Avoid Crumbling
- Placement Strategy and Spacing for Reliable Load Distribution
- Step-by-Step Installation for Common Scenarios
- Testing Load-Bearing Capacity and Troubleshooting Pull-Out
- Conclusion
- FAQ
Quick Overview and What This Guide Covers
The guide outlines how to choose anchors suitable for hollow and solid block, plus the correct drilling and installation steps. It covers shelf placement logic, post-install load testing, and long-term maintenance tips. You’ll find practical, safety-first guidance throughout.
Expect an anchor selection matrix based on block type, load, shelf depth, and surface finish. You’ll also get step-by-step drilling and installation instructions aimed at avoiding web crumbling and reducing dust. The section ends with load planning, safety checks, and routine care practices.
Who This Guide Is For
This guide is intended for DIY enthusiasts planning to mount shelves on block walls, supporting loads ranging from light to heavy. Whether you’re a renter exploring options or a homeowner considering a DIY approach, this guide provides practical advice.
Initial Verification: Before proceeding, confirm the type of block wall (hollow or solid) and determine the load requirements for your shelves.
Safety and Skill Assessment: Ensure you possess basic DIY skills and understand safety protocols. If uncertain about any aspect, consult a professional to ensure a safe and secure installation.
Key outcomes and safety emphasis
The primary goal of this guide is to help you achieve a secure, non-crumbling shelf mount on your block wall. We’ll focus on selecting the right anchors, drilling techniques, and installation methods that won’t compromise the web of your blocks.
Safety checks: Regularly inspect your mounted shelves for any signs of anchor failure or movement in the blocks. If you notice any issues, address them promptly to maintain the structural integrity of your wall.
Heavy-duty anchors: When mounting heavy shelves on hollow block walls, use appropriate heavy-duty anchors and consider additional support to ensure a secure installation.
Understand Your Block Wall: Construction and Failure Modes
Different block types change how loads are carried and how anchors fail, with hollow and solid blocks behaving differently under pull-out or spalling stresses. Mortar joints and surface finishes further influence anchor compatibility and embedment depth. Assessing these factors helps decide between masonry screws, sleeves, or chemical anchors.
Inspection should cover cracks, hollow-sounding blocks, moisture stains, and loose mortar. Understanding failure modes like pull-out, grid crush, and web spalling guides fastener choice and load strategy. Use non-destructive checks and simple load tests to inform decisions before mounting.
Identifying Hollow vs Solid Block and Common Diagnostics
To determine if your block wall is hollow or solid, perform the following simple tests:
Visual Inspection: Check for any holes or gaps in the blocks that could indicate a hollow core. Also, look at the block’s cross-section; solid blocks will have a uniform thickness throughout.
Knock Test: Gently knock on the blocks with your knuckles. Hollow blocks will sound duller than solid ones. Be careful not to damage the wall.
Weight Test: Compare the weight of similar-sized hollow and solid blocks. Hollow blocks are lighter due to their empty cores.
Common Failure Modes in Block Wall Anchors
Anchors in block walls may fail due to several reasons:
- Edge Breakout: This occurs when the anchor pulls out from the edge of the block, causing crumbling or spalling. To mitigate this risk, position anchors at least 2 inches away from edges.
- Weak Substrate: If mortar joints are weak or blocks are loose, anchors may not have a solid base to grip onto, leading to pull-out failures. Inspect your wall’s integrity before installing anchors.
- Inappropriate Anchor Selection: Using the wrong type of anchor for your block wall can lead to failure. Always choose anchors that are suitable for your block type and load requirements. Consult manufacturer guidelines or local building codes for specific recommendations.
Fastener Options: What Works, Where, and Why
Hollow-block and solid-block performance varies by anchor type, embedding depth, and expected failure modes. Each anchor family has practical DIY implications, including required tools and typical load suitability. Consider longevity and corrosion when selecting materials and finishes.
Plan load distribution with per-anchor limits and whether multiple anchors or wider plates are needed. Also account for plaster, mortar, air gaps, and block density when choosing washers or backing plates. A quick alignment and test-load checklist helps verify suitability before mounting.
Best choices for hollow block applications
When dealing with hollow block walls, it’s crucial to choose fasteners that can expand behind the face shell or use backing/epoxy to distribute load and avoid crushing thin webs. This ensures long-term stability and prevents web cracking.
Sleeve/wedge anchors, epoxy/chemical anchors, and heavy-duty inserts are ideal for hollow block walls as they can expand within the block’s core dimensions, providing a secure hold without compromising the web.
Before installation, verify that anchor size fits within the block’s core dimensions to avoid crushing. If web cracking occurs, reduce load or use a wider spread of anchors to distribute weight evenly.
Best choices for solid block and concrete
For solid block or concrete walls, opt for fasteners that can bite into the material and offer high shear and tensile resistance. Mechanical anchors often outperform adhesives in these applications.
Masonry screws, through-bolts, and sleeve/wedge anchors are suitable choices as they can grip solid materials effectively, providing excellent shear and tensile strength.
When selecting mechanical anchors, ensure their grip range matches the substrate’s hardness. If anchors pull out, increase embedment depth or use additional anchors to improve holding power.
Pros, cons, and expected longevity
Each anchor type has its trade-offs in terms of ease of installation, load capacity variability, susceptibility to vibration or corrosion, and maintenance expectations. Carefully evaluate these factors when choosing the right fasteners for your project.
For easy installation, consider sleeve/wedge anchors or masonry screws. However, if high load capacity is required, assess through-bolts, heavy-duty inserts, or epoxy/chemical anchors.
Review datasheets for specific anchor performance characteristics and evaluate trade-offs based on your project’s requirements and environment. Regular maintenance or anchor replacement may be necessary to ensure longevity, so plan accordingly.
Tools and Materials Checklist
Use a hammer drill with masonry bits, a depth gauge, and a reliable torque driver for final seating. Include bits sized to the anchor recommendations and dust extraction for clean holes. Have a chase tool or chisels ready for chase work if needed.
Choose anchor options appropriate for hollow or solid block, such as plastic expansion anchors, sleeve anchors, epoxy anchors, stainless bolts, and backing plates. Verify load ratings and embedment depths on labels or manufacturer instructions before purchase.
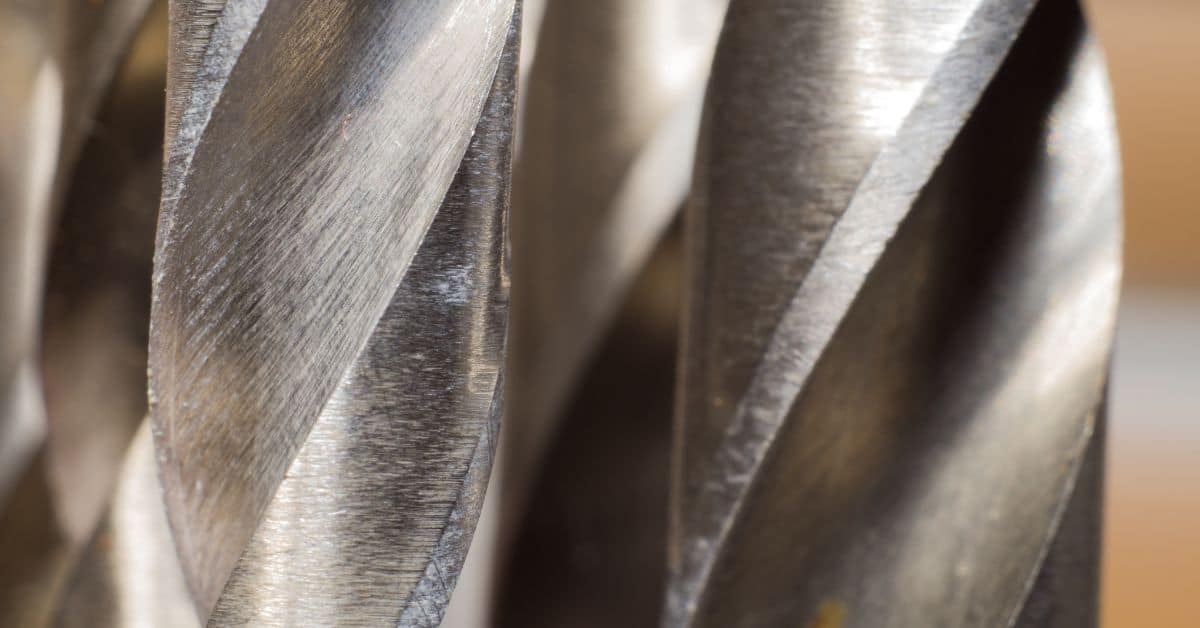
Drill, bits, and driver setup
Before starting any drilling work on block construction, confirm your tools and bits are suitable for the task.
- Cordless drill: Ensure it’s fully charged or has a spare battery. Inspect for any visible damage.
- Drill bit sizes: Determine required hole diameters based on your project needs. Common sizes include 6mm, 8mm, 10mm, and 12mm.
- Masonry bits: Verify you have a set of masonry bits matching the required sizes. Check tips for sharpness and undamaged condition.
- Driver bit set: If your project involves driving screws, ensure you have the correct driver bits (e.g., Phillips, flathead) in necessary sizes.
- Hammer drill (if needed): For drilling into concrete or solid blocks, check if a hammer drill is required. Ensure it’s in good working condition and has appropriate settings for masonry work.
- Safety glasses: Confirm you have a pair of safety glasses to protect your eyes from debris during drilling.
- Ear protection (optional): Consider wearing ear protection when using power tools to reduce noise levels.
- Clamp or drill guide: Ensure you have a way to secure your work piece and maintain a straight drilling angle. A clamp or drill guide helps prevent wobbling and ensures accurate holes.
Quick rule: Always match the bit type (masonry, wood, metal) to the material you’re drilling into for optimal performance and damage prevention.
Anchors, adhesives, and accessories to have on hand
Before you start installing your shelves, use this checklist to ensure you have the right anchors, adhesives, and accessories for a secure and long-lasting installation.
- Anchor types: Bring a variety of anchor types suitable for your wall material (drywall, concrete, brick, etc.). Common types include toggle bolts, sleeve anchors, and expansion anchors. Check the product label to confirm they are rated for your intended use.
- Backing plates or large washers: Have these on hand to distribute the load of heavy shelves evenly across a larger area. Confirm they match the size and type of your anchor.
- Epoxy or mortar repair product: For trials, bring a small amount of the correct grade of epoxy or mortar repair product to ensure it bonds well with your wall material. Check manufacturer instructions for proper mixing and application.
- Drill bit set: Ensure you have drill bits that match the size of your anchors. Double-check they are in good condition before starting.
- Driver bit set: Have the correct driver bit set to match your anchor’s head type (flathead, Phillips, etc.).
- Tape measure: Verify you have a tape measure to accurately mark and space your anchors and shelves.
- Pencil: Use this to mark your drill points and shelf locations.
- Level: Ensure your shelves are straight by using a level to check and adjust as needed during installation.
Quick rule: Always match anchor type, size, and load rating to the weight of your shelf and the material of your wall for a secure installation.
Safety and inspection tools
Before starting any installation, ensure you have the right safety gear and inspection tools. This will help prevent injuries and damage to your property.
- Personal Protective Equipment (PPE): Essential for protecting yourself from potential hazards. Include items like safety glasses, work gloves, and a dust mask or respirator when needed.
- Stud/Utility Detector: A must-have tool to locate studs and avoid hidden electrical lines, water pipes, or gas lines before drilling or cutting. Rent or borrow if you don’t own one.
- Level: Crucial for ensuring your shelf is straight and level. Use a torpedo level for small areas or a laser level for larger spaces.
- Load Tester: Optional but recommended, especially for heavy shelves. Test the load-bearing capacity of your wall and anchors to prevent failures under weight.
- Tape Measure: Essential for accurate measurements. Ensure you have a reliable one with clear markings and a locking mechanism.
Pro tip: Always check local regulations regarding safety equipment and tool usage before starting any project.
Drilling and Hole Prep: Techniques to Avoid Crumbling
Pre-scan for obstructions using a masonry scanner to map block cores and check for rebar or conduits. Plan hole spacing in line with anchor load and avoid joints and voids. Mark safe drilling zones before starting.
Use the correct hammer drill setting and carbide-tipped bits sized to the anchor. Start with a pilot hole, then step up as needed, keeping the bit perpendicular to the wall. Maintain steady pressure and avoid forcing the bit.
Drill technique and bit care
Maintaining a steady pressure while drilling ensures clean holes for secure anchor installation. Periodically withdraw the drill to clear dust from the hole, preventing it from clogging the bit.
Inspect your bits before use. If they show signs of wear or damage, replace them immediately to avoid uneven cutting that can cause shell failure.
Maintain consistent pressure and clear dust regularly to prevent this common mistake.
Hole cleaning and verification
Clean holes ensure proper anchor seating and rated holding strength. Use a brush, vacuum, or compressed air to remove dust and debris from the bore.
Verify hole depth using a depth gauge to match the anchor’s embedment requirements as per the manufacturer’s instructions.
If the hole is not clean, re-clean it before installing the anchor to avoid reduced holding strength due to debris in the bore.
Avoiding damage from vibration and overdriving
Excessive vibration and overdriving can crush the web, leading to structural compromise. Here are some mistakes to avoid:
- Reduced hammering in thin shell areas – Use a lower speed and apply less pressure when drilling in vulnerable areas.
- Use backing or epoxy where necessary – In thin shell areas, consider using backing or epoxy to support the anchor and prevent web crushing.
- Avoid overdriving – Be mindful of the drill’s depth stop or use a tape measure to avoid driving the bit too deep into the block.
- Visual inspection before drilling – Check the area for potential damage before starting to drill.
Maintaining wall integrity is crucial, so use appropriate precautions in vulnerable areas.
Placement Strategy and Spacing for Reliable Load Distribution
Align anchors with block cells, mortar joints, and wall edges to maximize grip. Decide between uniform or staggered spacing based on load and fastener type. Keep edge distances in mind to reduce breakout risk.
Use backing plates, through-bolts, or multiple anchors to spread stress when needed. Take wall conditions, block type, and mortar quality into account, and follow manufacturer guidance while testing on a scrap area first.
Edge distance and mortar joint considerations
When mounting shelves on block walls, it’s crucial to consider the placement of your anchors relative to block edges and mortar joints. Anchors placed too close to these areas risk causing structural damage or failing under load.
Avoid placing anchors:
- Directly over weak mortar joints, as they can crumble under stress.
- Too close to block edges, where the breakout risk is higher.
Instead, locate your anchors in solid block faces whenever possible. If you encounter a weak mortar joint or edge nearby, relocate your anchor or use an alternative anchoring method.
Spacing and pattern for shelf brackets
To ensure even load distribution and stability, it’s essential to space your shelf brackets appropriately. This involves distributing the load across multiple anchors and using continuous supports or rails for heavier or long-span shelves.
Consider the following:
- Using a uniform or staggered spacing pattern based on your chosen fasteners and bracket type.
- Following manufacturer’s guidelines for minimum edge distances to avoid structural damage.
- Incorporating continuous supports or rails for heavier or long-span shelves to prevent sagging or instability.
If you notice your shelf sags or feels unstable, redistribute the load by adding more anchors or using supports.
When to use backing plates or through-bolts
In some cases, you may need to bypass thin face shells or convert a hollow block into a reliable anchor point. This can be achieved by using through-bolting or external plates.
Consider using these methods when:
- Anchoring into hollow blocks with heavy loads, as they may not provide sufficient strength on their own.
- You need to distribute the load evenly across multiple blocks for added stability.
Evaluate your block type and load requirements before making a decision. If an anchor fails under load, reinforce it with the appropriate method (backing plate, through-bolt) and retest.
Step-by-Step Installation for Common Scenarios
Mark a level reference and establish a masonry grid for symmetry and load distribution. Check for utilities with a live detector before you drill. Pause if utilities are detected.
Choose anchors or adhesive based on load and wall type, then insert and align before curing if using adhesive. After curing, torque to spec and verify level, then test the load within rated limits and consider adding anchors if needed.
Step-by-Step Installation Process
The following steps outline a practical sequence for mounting shelves on block walls. This guide ensures safe and effective installation while avoiding common mistakes.
- Preparation: Gather tools, materials, and safety equipment. Review the installation process before starting work.
- Marking and Layout: Establish a level reference line, determine stud or masonry grid, and mark the starting point for your shelves. Consider symmetry and use multiple anchors for heavy shelves.
- Utility Checks: Use a live/inductive detector to verify there are no wires or plumbing in the way. Pause work if utilities are detected.
- Hole Preparation: Choose an appropriate drill bit size for your block type (solid vs hollow), set the drill depth, and clean debris with compressed air or a brush. Pre-clear edges to avoid cracks.
- Anchor/Adhesive Installation: Select anchors or adhesives based on load requirements, block type, and shelf weight. Insert and align them before allowing for curing time.
- Curing and Torque: Follow exact curing times for adhesives or recommended setting times for anchors. After cure, torque each fastener to spec.
- Final Mounting and Verification: Level the shelf, tighten fasteners evenly, check for wobble, and test load within rated limits. If necessary, add additional anchors or reinforcement.
Installing Mechanical Anchors (Sleeve/Wedge/Concrete Screws)
Mechanical anchors provide a secure connection to block walls. Proper insertion and setting techniques ensure optimal performance.
Insertion Order: Insert mechanical anchors one at a time, following your marked layout. Start from the top or bottom and work your way across.
Setting Techniques: Use a hammer or impact driver to set sleeve and wedge anchors. For concrete screws, use a drill with the appropriate torque setting. Ensure each anchor is fully seated and flush with the wall surface.
Verification: Inspect each anchor after installation to ensure it’s securely seated and not protruding from the wall. Remove and reinstall any anchors that are not properly set.
Using Epoxy or Chemical Anchors in Hollow and Solid Block
Epoxy and chemical anchors create a strong bond with blocks, providing excellent load-bearing capacity. Proper mixing, application, and curing are crucial for optimal performance.
Mixing/Dispensing: Follow manufacturer’s instructions for mixing epoxy or chemical anchors. Ensure thorough mixing to avoid voids and maintain anchor strength.
Avoiding Voids: Apply the mixed adhesive evenly around the anchor, ensuring no voids are present. This prevents weak points that could compromise the anchor’s holding power.
Correct Embedment Depth: Insert anchors to the correct embedment depth as specified by the manufacturer. Allow for full cure before load testing or installing shelves.
Mounting Brackets and Final Checks
Before placing items on your newly installed shelves, perform a final check to ensure they are level, secure, and ready for use.
- Level Shelf: Use a level to ensure the shelf is horizontal. Adjust as needed before tightening fasteners.
- Tension Fasteners: Tighten fasteners evenly using a torque wrench, following manufacturer’s recommendations for optimal tension.
- Check for Wobble: Gently push and pull on the shelf to check for any movement or wobble. If present, retighten fasteners or add additional anchors.
- Visual Inspection: Inspect the entire installation for any signs of damage, cracks, or improperly seated anchors.
- Load Test: Apply a light load to the shelf within its rated limits. Monitor for any movement or stress on the wall.
Quick Rule: If at any point during installation or final checks you encounter instability, add additional anchors or reinforcement as needed.
Testing Load-Bearing Capacity and Troubleshooting Pull-Out
Use a safe, incremental load-testing approach with progressive steps and clear stopping criteria to avoid damage. Observe for movement, cracking, or mortar failure as you test. Document measurements for comparison.
Evaluate anchor types and decide whether relocation, stronger fasteners, or reinforcement is required. If pull-out occurs, consider solid masonry, larger sleeves, or backing materials, and always assess hollow versus solid block implications.
How to perform a safe load test
To ensure the safety and structural integrity of your shelves on block walls, it’s crucial to perform a load test incrementally. Start with minimal weight, then gradually increase as no movement is detected.
Quick check: Listen for cracking sounds and observe for any visible movement during testing.
Pro tip: If you notice any signs of stress or failure, such as movement or cracking, stop testing immediately to prevent further damage. Reduce the load, reinforce the area, or relocate anchors if necessary.
Troubleshooting and repair solutions
If you encounter issues with your shelves, it’s important to address them promptly to restore structural integrity and prevent future problems. Begin by checking for loose fasteners, cracks, or mortar failure.
Pro tip: Inspect the anchor type, size, and placement. Evaluate the wall condition and load distribution. If anchors are loose or insufficient, replace them with larger/chemical anchors or install backing plates/through-bolts.
In case of wall damage or inadequate support, repair with structural epoxy/mortar and re-anchor after it cures.
Regular Inspection Schedule for Shelves
Use this checklist: Regularly inspect your shelves to maintain safety and longevity. Check for cracks, powdering, or loose fasteners.
-
- Cracks: Every 3 months or after significant load changes. Inspect for hairline cracks that may indicate stress on the wall.
- Powdering: Quarterly or as needed based on usage. Check for powdery substance around fasteners, which could signal mortar failure.
- Loose fasteners: Bi-annually or after heavy use. Tighten any loose screws or bolts to ensure they remain secure.
Quick rule: Address any issues promptly to prevent progression and potential failure.
Conclusion
Mounting shelves on block walls is doable when you respect the wall construction, choose the right fasteners, and verify the installation with careful testing. The goal is a secure, clean look that stays put and avoids damage or costly fixes.
Verify your approach with a simple, practical check: confirm wall type and failure modes, select fasteners that match your block and hollow cores, mark precise placement with a level, drill clean pilot holes, insert and tighten the fasteners to their recommended depth, attach the brackets and shelves, and finally test with modest loads before fully loading the system. Do these steps in a controlled sequence and stop if anything feels uncertain or noisy.
Common mistakes to avoid include using the wrong anchor for hollow cores, drilling too large or too deep holes, leaving dust in the hole, overtightening fasteners, and not testing load bearing after mounting. Practice good safety by wearing eye protection, supporting heavy shelves during installation, checking alignment with a level, and keeping the area clear of trip hazards. If you encounter crumbling or loose blocks, back off and reassess the anchor choice, hole size, and spacing before continuing.
If the wall shows signs of weakness, or if you need to mount heavy shelves in a high-traffic area, consider consulting a qualified professional. Doing so can prevent damage and ensure a reliable result. With careful planning, precise drilling, and measured testing, you can achieve a strong, durable shelf setup that lasts.
FAQ
What types of fasteners work best for block walls when mounting shelves?
Look for anchors designed for masonry, such as sleeve or expansion anchors, and compatible screws. In some cases, special masonry anchors with a keyed grip improve holding power. Always check the manufacturer instructions for use with concrete or block walls.
How should I anchor shelves to block walls to prevent pull-out?
Choose anchors that spread or bite into the block or mortar. Install per the product guidelines, and set anchors to the recommended depth. Use washers or back-up backing when possible to distribute load more evenly on the wall.
How do I decide between screws and anchors for a shelf install?
Screws alone may not hold securely in hollow or brittle block. Anchors provide reliable grip and transfer load into solid material. If drilling through hollow sections, use appropriate masonry anchors and follow installation depths for the specific product.
What safety steps should I follow during drilling and mounting?
Wear eye protection and use a proper drill bit for masonry. Check for hidden utilities before drilling. Secure the shelf and support hardware firmly, and avoid over-tightening to prevent damage to the block or fasteners.