
Introduction
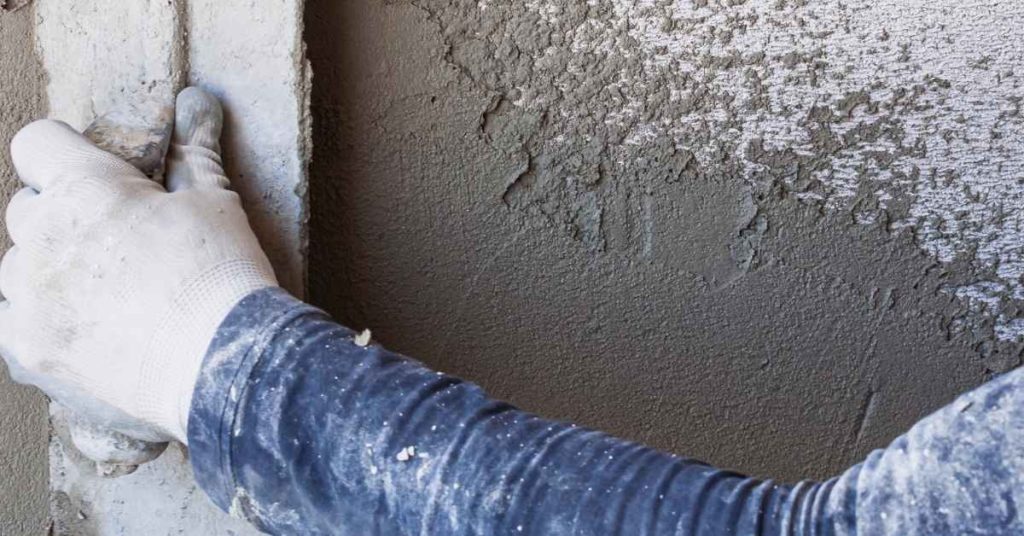
Microcement over old plaster means applying a thin cement-based coating on top of a plaster substrate with careful surface prep. Start by cleaning the surface and repairing obvious flaws to give the new layer something to grip. Roughen or abrade slightly and use an appropriate bonding primer to improve adhesion.
Movement risk comes from cracks or shifts in plaster under a thin finish. Choose a sealer based on moisture exposure and the finish you want, and always follow the product’s instructions. Test a small area first and check label guidance for cure times and compatibility with the plaster and topcoat.
Key takeaways
- Assess substrate: check plaster adhesion, moisture, and soundness before microcement.
- Prepare plaster: remove loose areas, repair cracks, and abrade surface for bonding.
- Bond layers: use primer compatible with microcement and substrate; follow manufacturer.
- Layer build-up: base coat, reinforcement mesh, and finishing coat with light passes.
- Movement risk: address substrate movement; use movement joints and control expansion.
- Sealer choice: penetrating sealers reduce sheen; wear goggles and mask.
- Environmental and application considerations: avoid high humidity; protect from rapid drying and contamination.
Table of Contents
- Introduction
- Key takeaways
- Assessing the Old Plaster Substrate
- Preparing Plaster for Microcement Bonding
- Bond Layers and Primers: What to Use and Why
- Layer Build-Up: Base, Reinforcement, and Finishing Coats
- Movement Risk: Cracks, Substrate Movement, and Mitigation
- Sealer Selection: Penetrating Vs Film-Forming Options
- Environmental and Application Considerations
- Tools and Materials Checklist, Visual Checkpoints, and Troubleshooting
- Conclusion
- FAQ
Assessing the Old Plaster Substrate
Start by checking for loose or hollow spots that indicate poor adhesion. Tap the surface and listen for solid versus dull tones to gauge integrity. Look for cracks, damp patches, and obvious contaminants that could affect bonding.
Document any problem areas and decide if substrate remediation is required before applying microcement. When in doubt, verify guidance on substrate suitability from product labels, manufacturer instructions, or local building rules.
Visual Inspection Checklist
Before you start, grab a torch and get up close. This checklist helps spot issues that could cause trouble later.
- Cracks: Hairline or wider? Cracks can let moisture in, weakening the bond.
- Delamination: Peeling paint or plaster? That’s a sign of weak adhesion.
- Damp staining: Yellow or brown patches? These could hide moisture problems.
- Previous coatings: Old paint, varnish, or sealers? They might not play nice with microcement.
- Uneven surface: Dips or humps? Microcement won’t hide these; it’ll accentuate them.
- Mold or mildew: Green or black spots? These love moisture and can wreck your finish.
- Loose or damaged areas: Crumbling plaster? That needs fixing before you start.
- Incompatible materials: Existing materials that microcement won’t stick to, like existing tiles?
Quick rule: If you spot any of these, don’t ignore them. Fix or remediate before applying microcement.
Adhesion and Pull-Off Tests
To ensure microcement sticks like glue, you need to check the plaster’s bond strength. Here’s how:
First, consult the microcement product data sheet. It’ll tell you the minimum allowable pull-off strength.
Next, use a pull-off tester or a simple DIY alternative – a strong suction cup and a scale. Apply the suction cup to the plaster, mark the area, then pull steadily until it comes off. Weigh the fallen plaster and compare it to the minimum value from the data sheet.
Pro tip: If you’re unsure, do a test patch in an out-of-sight area. Better safe than sorry!
Moisture and Contamination Checks
Moisture and contaminants are microcement’s enemies. Here’s how to find and fix them:
Moisture: Use a moisture meter or a simple calcium carbide test. If it’s damp, dry it out thoroughly before applying microcement.
Salts: Look for white deposits or efflorescence. These can weaken the bond. Remove them with a suitable cleaner and let the surface dry completely.
Contaminants: Old paint, grease, or other substances can stop microcement from sticking. Clean the surface thoroughly before applying any primer or microcement.
Preparing Plaster for Microcement Bonding
Begin with thorough cleaning to remove dust, oils, and efflorescence. Repair where necessary with appropriate patching products and let them cure per label directions. Lightly abrade the surface to create a receptive profile for the bond.
Rinse and dry the substrate, then re-inspect for any remaining defects. If unsure about profile requirements, check the recommended surface preparation instructions from the product data sheet or manufacturer guidelines.
Cleaning and surface profile
Start by removing any loose material with a scraper. Then, dry brush the surface to remove dust and cobwebs.
Degrease the plaster using a suitable cleaner. This removes grease, oils, and other contaminants that could hinder adhesion.
Next, create a light mechanical profile using a wire brush or sandpaper (120-grit). This increases the surface area for better bonding.
Repairing loose or damaged areas
Remove any delaminated plaster using a scraper. If there are voids, re-plaster them using a suitable repair mortar.
For friable areas, consolidate them with a PVA-based consolidant. Apply it using a brush or roller, following the manufacturer’s instructions.
Allow any repairs to dry thoroughly before proceeding. This could take anywhere from 24 to 72 hours, depending on the product used and environmental conditions.
Leveling and feathering
Fill any hollows using a suitable leveling compound. Follow the manufacturer’s guidance for application and drying times.
When filling edges or corners, feather them out to avoid thin spots. This ensures even coverage when applying microcement.
Before proceeding, ensure all filled areas are completely dry. Again, this could take 24 to 72 hours depending on the product and conditions.
Bond Layers and Primers: What to Use and Why
Choose primers or adhesion promoters based on the plaster condition and contaminants found. Use a bond coat compatible with microcement to improve initial tack and interlayer cohesion. Avoid mixing products without confirming compatibility with plaster and existing finishes.
Review application methods and coverage expectations on the label or data sheet. When uncertain, consult manufacturer instructions or local trades guidelines to select the correct combination for your substrate.
Bond Coats and Primer Types
Microcement primers fall into three main categories: cementitious, polymer-modified, and adhesion promoters. Each has its place depending on your substrate’s condition.
Cementitious primers are ideal for porous surfaces like old plaster. They penetrate deep, creating a solid bond. Use them when you’ve got good suction but no previous coatings or contaminants.
Polymer-modified primers are great for non-porous or contaminated surfaces. They create a strong mechanical bond and seal the surface. Use these when your plaster has been painted or is dusty.
Adhesion promoters are liquid glues that create an extra-strong chemical bond. They’re useful when you’ve got a tricky substrate, like a very smooth or non-porous surface. But remember, they won’t penetrate and seal like cementitious primers do.
When to Use Adhesion Promoters or Cementitious Primers
Choosing the right primer depends on your plaster’s condition. Here’s when to pick each:
Use a cementitious primer if your plaster is porous, suction is good, and there are no previous coatings or contaminants. It’ll penetrate deep, creating a solid bond.
Use an adhesion promoter if you’ve got a tricky substrate – very smooth, non-porous, or contaminated. But remember, it won’t seal like a cementitious primer. Always check the technical data sheet for compatibility with your microcement.
If in doubt, test a small area first. It’s better to be sure before you commit to the whole job.
Application Techniques and Product Information to Check
Applying primers correctly is crucial for a strong bond. Here’s how:
First, follow the prep steps we covered earlier – clean, profile, and repair your plaster. Then, apply the primer using a roller or brush, following the manufacturer’s instructions for coverage.
Let it dry as directed. Drying times vary, so check the label. Don’t rush this step; it’s crucial for a good bond.
Before applying microcement, make sure your primer is fully cured and there are no contaminants. Follow the manufacturer’s recoat window to ensure you’re not applying too soon or too late.
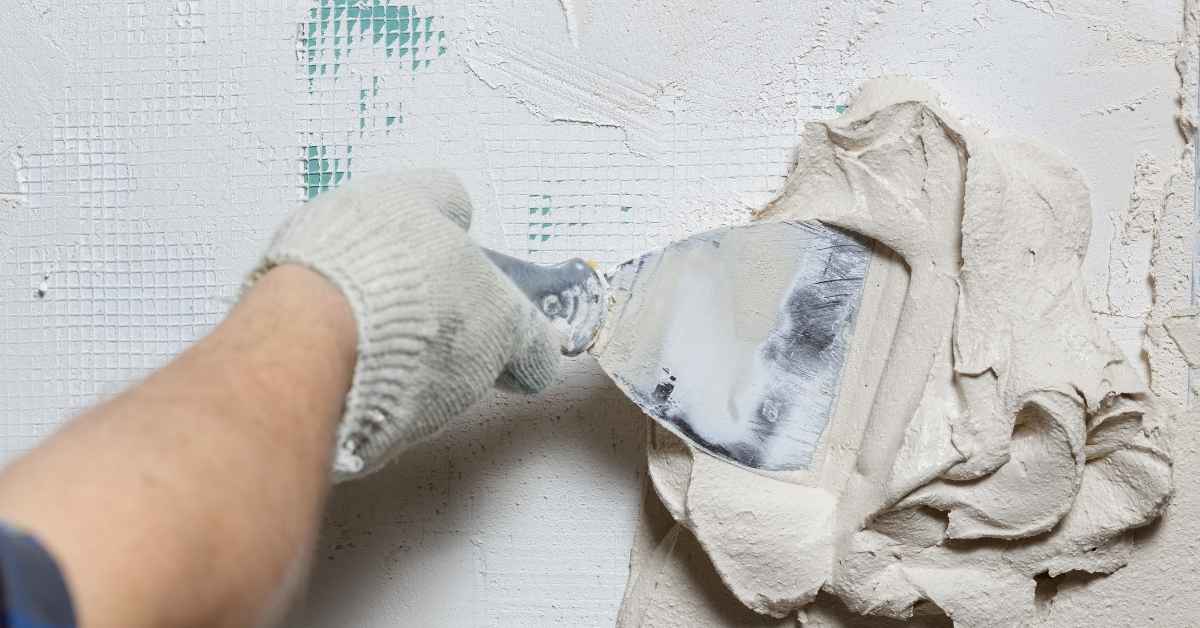
Layer Build-Up: Base, Reinforcement, and Finishing Coats
Plan a logical sequence starting with a solid base coat, followed by reinforcement if needed, then intermediate and finish coats. Each layer serves a role in strength, evenness, and movement tolerance. Ensure adequate curing between layers as advised by the product instructions.
Describe interactions between base, reinforcement, and top coats so you can anticipate how the system behaves. If you need confirmation on layer counts or thickness, verify with product data sheets or manufacturer recommendations.
Base coats and embedding mesh
Start with a base coat to create a solid foundation for your microcement. This layer primes the surface, improving adhesion and evening out any minor imperfections.
Embedding mesh: For old plaster with hairline cracks or movement risk, use a fiberglass mesh or tape embedded in the base coat. Mix the mesh into the wet base coat, pressing it firmly against the wall to bridge cracks and distribute movement.
Apply the base coat evenly using a trowel, following the manufacturer’s guidelines for mixing and application. Allow it to cure according to the product instructions before proceeding with the next layer.
Intermediate sanding and defect correction
After applying each intermediate coat, wait for it to partially cure (usually around 24 hours). Then, lightly sand the surface using a fine-grit sandpaper (120-150 grit) to remove any minor imperfections or high spots.
Sanding technique: Sand in straight lines, following the same direction as your microcement application. This helps maintain a consistent texture and prevents swirl marks.
After sanding, vacuum and wipe down the surface with a damp cloth to remove dust. Inspect for any missed defects or low spots, filling them with more microcement if necessary. Allow the surface to cure before applying the next coat.
Finish coats and texture control
The final finish coat is what gives your microcement its desired appearance. To achieve a smooth, consistent texture, apply multiple thin coats (usually 2-3) with proper curing time in between.
Texture control: For a smoother finish, use a trowel with a wider blade for the final coat. For a more textured look, use a trowel with a narrower blade or apply the microcement using a brush or roller.
The build-up of coats also affects durability. Thicker coats can hide minor substrate imperfections but may be more prone to cracking under movement. Opt for multiple thin coats for better flexibility and longevity. Always follow the manufacturer’s guidelines for finish coat application and curing times.
Movement Risk: Cracks, Substrate Movement, and Mitigation
Identify potential movement sources such as structural shifts, temperature changes, and moisture variation. Plan to minimize crack transfer by using proper substrate prep and controlled curing conditions. Consider expansion joints and proper detailing where needed.
Document mitigation strategies and expected outcomes, then verify that your approach aligns with product instructions or local building rules. If unsure, check the guidance from the sealer and coat manufacturers or local code references.
Types of movement and common crack causes
Before you start applying microcement, understand the types of movement that can affect your plaster substrate. This knowledge helps you identify potential issues early.
Structural cracks are wide, often diagonal or stepped, caused by foundation settlement or structural defects. They’re serious and need professional attention before overlaying with microcement.
Shrinkage cracks are narrow, usually horizontal, resulting from plaster drying too quickly. While not as severe as structural cracks, they can still cause problems if not addressed.
Hairline surface cracks are minor and common in old plaster. They won’t compromise the bond but should be sealed to prevent moisture ingress.
Joint detailing and isolation techniques
Movement joints, perimeter isolation, and transitions help accommodate expected substrate movement. Use them wisely to minimize crack transfer through your microcement layers.
Movement joints should be installed where significant movement is expected – at corners, intersections, and around openings. Fill them with a flexible sealant before applying microcement.
Perimeter isolation involves creating a flexible barrier between the wall and the floor or ceiling using backer rod and caulk. This prevents cracks from forming at the perimeter due to differential movement.
Transitions should be used where two surfaces meet, like walls and floors. They help accommodate minor movements and prevent cracking at these junctions.
Reinforcement strategies and flexible systems
To improve your microcement system’s tolerance to substrate movement, consider using reinforcement strategies and flexible products.
Flexible primers allow for some movement without compromising the bond. They’re ideal for substrates with known movement issues or where expansion/contraction is expected due to temperature changes.
Elastomeric additives can be mixed into your microcement base coats to increase their flexibility. This helps absorb minor substrate movements and reduces the risk of cracking.
Mesh reinforcement, usually fiberglass or plastic, can be embedded in the base coat to provide additional strength and flexibility. It’s particularly useful in areas with high movement potential or where impact resistance is needed.
Sealer Selection: Penetrating Vs Film-Forming Options
Compare penetrating sealers for deep protection with film-forming options for surface durability and stain resistance. Match the sealer type to substrate condition and expected use, noting any required re-application schedules. Read the label for compatibility with plaster and microcement layers.
Evaluate performance claims, maintenance needs, and VOC considerations as part of your choice. When in doubt, rely on manufacturer instructions or local guidance to pick the right sealer for your setup.
Penetrating sealers: pros and cons
Penetrating sealers are a popular choice for microcement due to their breathability. They soak into the surface, providing protection from within.
Pros
- Breathable, allowing moisture to escape
- Natural finish, enhancing the microcement’s texture
- Easy application and touch-up
- Less likely to peel or delaminate compared to film-forming sealers
Cons
- Lower surface protection, more susceptible to scratches and stains
- May not provide adequate protection in high-traffic areas
- Requires regular maintenance and recoating
- Some products may darken or yellow over time with UV exposure
Penetrating sealers are ideal for decorative, low-traffic areas where a natural finish is desired. They require routine maintenance to maintain their protective qualities.
Film-forming sealers: pros and cons
Film-forming sealers create a barrier on the surface, providing superior protection. They are available in various sheens, from matte to high-gloss.
Pros
- Higher surface protection against scratches, stains, and chemicals
- Gloss control for desired finish
- Easier to clean and maintain
- Better resistance to UV degradation compared to some penetrating sealers
Cons
- Less breathable, may trap moisture if not properly primed
- Higher risk of peeling or delaminating if not applied correctly
- May require sanding between coats and final sanding for a smooth finish
- Some products may yellow over time with UV exposure
Film-forming sealers are suitable for high-traffic areas, kitchens, and bathrooms. They offer better protection but require proper application to prevent issues.
Matching sealer to use-case and maintenance
Choosing the right sealer depends on your microcement’s intended use. For high-traffic areas like hallways or kitchens, film-forming sealers are recommended due to their superior surface protection.
For decorative areas with low traffic, such as bedrooms or living rooms, penetrating sealers can be used to enhance the microcement’s natural texture. However, they require more frequent maintenance and recoating.
Maintenance for both sealer types involves regular cleaning with a mild detergent and warm water. Avoid using abrasive materials or harsh chemicals. Recoat every 2-3 years, depending on traffic and wear. Always perform a patch test before recoating to ensure compatibility with the existing sealant.
Environmental and Application Considerations
Monitor site conditions such as temperature, humidity, and air flow during mixing and application. Follow the recommended pot life and working time provided by the product data sheet. Consider ventilation and dust control as part of a clean workflow.
Assess how curing conditions might affect bond quality and final hardness. If any condition is uncertain, verify guidance from the manufacturer instructions or local regulations before proceeding.
Temperature, humidity, and curing conditions
Microcement needs the right environment to bond properly with old plaster. Extreme temperatures and high humidity can cause application issues and slow down curing.
Check your product’s data sheet for ideal working and curing temp ranges before you start. Usually, it’s between 18°C to 25°C (64°F to 77°F).
If it’s too hot or humid, the microcement might dry too fast, leading to a weak bond. Too cold, and it won’t cure properly. Keep the area well-ventilated but avoid drafts.
Workability, pot life and layer sequencing
Mixing microcement right is crucial for a good finish. Follow the manufacturer’s mixing ratios to get the correct consistency.
The ‘pot life’ – how long the mix stays usable – varies by product but it’s usually around 30-60 minutes. Work quickly, and don’t try to stretch this time.
Apply layers in the right order: base coat first, let it cure, then reinforcement (if using), sand lightly, apply finish coats, and finally seal. Don’t rush through steps or you’ll risk failures.
Health, safety, and VOC considerations
Safety first: Wear a respirator when mixing and applying microcement. Ventilate the area well to keep dust levels down.
Primers and sealers can give off strong fumes. Use them in a well-ventilated space, and avoid contact with skin and eyes. Always follow the product’s safety guidelines.
Choose low-VOC products when you can. VOCs are volatile organic compounds that contribute to air pollution and can be harmful to health. They’re usually listed on the product data sheet.
Tools and Materials Checklist, Visual Checkpoints, and Troubleshooting
Prepare a practical list of tools and materials needed for each stage of the process. Establish visual checkpoints to confirm surface cleanliness, profile, and adhesion before moving forward. Keep a troubleshooting plan ready for common issues that may arise.
Refer to stage-by-stage criteria and acceptability standards as you work. If a problem seems persistent, consult product labels, data sheets, or local guidelines to determine the proper remedy.
Tools and materials checklist
Before you start, make sure you have all the necessary tools and materials on site. This checklist will help you stay organized and avoid delays.
- Trowels: You’ll need trowels of different sizes for mixing and applying microcement. Check they’re in good condition before starting.
- Mixing bucket: A sturdy, clean bucket is essential for mixing your microcement. Ensure it’s compatible with the product you’re using.
- Personal protective equipment (PPE): Safety glasses, gloves, and a dust mask are crucial. Check they fit well and are in good condition.
- Microcement: Buy from a reputable supplier and check it’s compatible with your old plaster substrate.
- Primer: A suitable primer is vital for good adhesion. Confirm compatibility with the microcement you’re using.
- Sealer: Choose a sealer that matches your use-case and maintenance requirements (see earlier section).
- Scraper: Useful for removing any excess material or trowel marks.
- Leveling tool: Ensure you have a straight edge to check your work as you go.
- Screed pole: For larger areas, a screed pole will help achieve a consistent finish.
Quick rule: Always double-check compatibility with product data sheets and manufacturer guidelines.
Visual checkpoints during each stage
Throughout the job, use these visual checkpoints to ensure you’re achieving a high-quality finish.
- After preparation: The substrate should be clean, dry, and free from debris. Any cracks or holes should have been filled and sanded smooth.
- After priming: The primer should have dried evenly, leaving no visible residue or streaks.
- After layering (base coat): The base layer should be smooth and even, with no missed spots or trowel marks. Allow it to cure as per manufacturer guidelines before proceeding.
- After layering (top coats): Each top coat should be applied evenly, with no visible ridges or inconsistencies. Allow each coat to cure fully before sanding and sealing.
- After sealing: The sealer should have dried evenly, leaving a consistent sheen across the entire surface.
Quick rule: Regular visual checks help catch any issues early, saving you time and effort in the long run.
Common problems and fixes
Even with careful preparation, issues can arise. Here are some common problems and their solutions.
- Delamination: If the microcement is peeling off, it’s likely due to poor adhesion or moisture beneath the surface. Remove the affected area, address the underlying issue (e.g., seal any leaks), and reapply.
- Discoloration: Uneven color can be caused by inconsistent mixing or application. Ensure you’re using the same batch of microcement throughout and apply it evenly.
- Trowel marks: Visible trowel marks indicate that the material wasn’t allowed to self-level properly. Sand down the marks lightly, then reapply a thin layer of microcement.
- Cracking: Cracks can appear due to substrate movement or inadequate reinforcement. Address any underlying movement issues and consider using a flexible system for future layers.
Quick rule: The sooner you catch an issue, the easier it is to fix.
Conclusion
The key idea is to build a reliable, crack resistant microcement layer that sticks to the old plaster without compromising safety or appearance. Focus on proper substrate evaluation, correct bond primers, a controlled layer system, and a sealing choice that suits the room and movement risks.
Now move step by step: test a small area first, clean and roughen the plaster, repair loose patches, apply the recommended bond primer and base coat in the order you planned, build up the layers with the stated reinforcement and finishing coats, check for movement risk, choose a sealer that fits the environment, and finally protect the work while it cures. Keep ventilation, PPE, and drying times in mind, and document any changes you make so you don’t repeat mistakes later.
Common pitfalls to avoid are skipping the substrate preparation or bond test, applying too thick a layer or too fast, and neglecting movement risk or proper sealing—these invite cracks or delamination. Use the simple safety rules: test first in a discreet spot, follow the product’s directions, work in small sections, keep to recommended dry times, and never mix ingredients that aren’t specified. If you detect persistent movement, excessive cracking, or suspicious adhesion during testing, pause and reassess before proceeding.
If the substrate shows ongoing movement, or you’re unsure about the plaster’s condition, or the space has high humidity or temperature swings that you can’t control, call a professional before you push ahead. Otherwise, with careful prep, measured layering, and honest testing, you can finish a durable, good‑looking surface. Stay disciplined, and you’ll stay ahead of costly mistakes.
FAQ
Can I bond microcement directly over old plaster, or do I need a prep step first?
Check the plaster for loose areas, dust, and dampness. If the surface is stable, use a bonding primer or additive per the manufacturer’s instructions. If the substrate shows weakness, plan to repair or remove those spots before continuing.
How can I reduce the risk of cracks due to movement under the plaster?
Test the substrate for movement and stability before laying. Use the recommended base and reinforcement layer if advised, and ensure there are no ongoing structural issues. If cracking occurs, address the underlying movement first rather than chasing cracks with more layers.
What sealer should I choose after applying microcement on plaster, and why?
Choose between penetrating sealers and film-forming sealers based on usage and look you want. Read the product label for durability, water resistance, and maintenance guidance. Always follow the manufacturer instructions and local considerations for application and cure time.
What signs tell me to stop and re-evaluate the substrate before sealing or finishing?
Look for delamination, soft spots, or new cracking. If moisture is present or the surface feels damp, pause and investigate the source first. When in doubt, consult the product instructions or a professional for guidance before proceeding.