
Introduction
Masonry anchors secure items to brick or concrete by gripping into the material. This guide compares sleeve, wedge, tapcon, and epoxy anchors, focusing on their grip mechanisms, installation methods, and ideal applications.
Each anchor type has a unique setup and installation approach:
- Sleeve and Wedge Anchors: These use expansion grip to secure into place. Follow manufacturer instructions for proper embedment depth, edge distance, and load capacity.
- Tapcon Anchors: These rely on threaded screws driven into drilled holes. Ensure you follow the correct drill bit size and hole depth as per the manufacturer’s guidelines.
- Epoxy Anchors: These create a resin bond with the masonry surface. Always check the manufacturer’s instructions for proper mixing, application, and cure time.
When selecting an anchor type, consider:
- The load requirement of your project.
- The environment where the anchor will be used.
- Local rules or building codes that may apply to your specific situation.
Always follow manufacturer instructions and assess your project’s needs to choose an anchor type that offers safe performance without overdrilling or under-anchoring. If unsure about any aspect, consult the product label or local regulations for clarification.
Key takeaways
- Understand sleeve, wedge, tapcon, and epoxy options for masonry projects.
- Choose by load, material type, and accessibility of installation points.
- Sleeve and wedge anchors provide mechanical hold; epoxy relies on adhesive cure.
- Tapcon screws require compatible drill bits and clean holes for performance.
- Follow safety protocols, wear eye protection, and manage overhead dust during drilling.
- Evaluate long-term durability and cost-effectiveness across materials and maintenance needs.
Table of Contents
- Introduction
- Key takeaways
- Quick Overview and How to Choose
- Sleeve Anchors — Description, Use, and Best Practices
- Wedge Anchors — Description, Use, and Best Practices
- Tapcon (Concrete) Screws — Description, Use, and Best Practices
- Epoxy (Adhesive) Anchors — Description, Use, and Best Practices
- Side-by-Side Performance and Compatibility with Masonry Materials
- Installation Safety, Common Mistakes, and Visual Checkpoints
- Cost-Effectiveness, Maintenance, and Long-Term Durability
- Conclusion
- FAQ
Quick Overview and How to Choose
Four common anchors address different loads, substrates, and environments. Sleeve anchors work well in solid masonry with moderate loads and straightforward installation. Wedge anchors transfer load through a mechanical wedge in solid substrates, while Tapcon screws rely on threading into predrilled holes. Epoxy anchors create a bonded, load-bearing connection in cracked or demanding masonry conditions.
Key decision factors include load type (tension or shear), substrate material (concrete, brick, block, hollow vs solid), permanence, and exposure to moisture or chemicals. Cost and installation practicality also shape choice for each project. Use a simple framework to match scenarios to a recommended type, without relying on proprietary data. For critical structural connections, obtain professional guidance and check local code requirements as needed.
At-a-glance differences
The four main types of masonry anchors – sleeve, wedge, Tapcon, and epoxy – each have distinct functions, strengths, permanence, and installation complexities.
Sleeve Anchors: Versatile for hollow substrates, offering moderate strength. They are permanent but easy to install.
Wedge Anchors: Provide high strength, requiring pre-drilling. They are semi-permanent with a moderate installation complexity.
Tapcon Anchors: Ideal for concrete, offering good strength and easy installation. They are permanent but not suitable for hollow substrates.
Epoxy Anchors: Deliver high strength, perfect for heavy loads and variable substrates. They are permanent with a moderate installation complexity.
Project decision checklist
Use this checklist to determine the best anchor type for your project based on its specific needs.
- Load Needs: Light, medium, or heavy?
- Base Material: Concrete, masonry, hollow, or solid substrate?
- Vibration Isolation: Required or not?
- Environment: Indoor, outdoor, moisture, chemical exposure?
- Removal Needs: Temporary or long-term?
- Substrate Thickness: Uniform or variable?
- Load Type: Tension or shear?
- Local Codes: Check for any specific requirements.
Quick rule: Start with the anchor type that best fits your load needs, base material, and environment. Re-evaluate if conditions change significantly.
Sleeve Anchors — Description, Use, and Best Practices
Sleeve anchors expand within the bore as the nut or bolt is tightened, causing the sleeve to press against the walls of the hole. The sleeve threads engage the bolt and wedge outward to grip the surrounding masonry. These anchors are common for medium loads in concrete, brick, and mortar, with versatility in both structural and non-structural contexts.
Installation revolves around matching bore size, embedment depth, edge distances, and spacing to the substrate. Environmental factors such as moisture and corrosion influence performance. Consider alternatives for high-load or specialized setups, and verify compatibility with the specific masonry before proceeding.
How Sleeve Anchors Work
Sleeve anchors are expansion-type masonry anchors that create a strong bond with the surrounding material by expanding within a drilled hole. The sleeve, which is threaded internally and has external wedges or ribs, bears against the masonry surface as it expands.
The expansion mechanism relies on the anchor’s sleeve being drawn into the borehole by tightening the screw or bolt inserted through it. This action causes the sleeve to expand radially, creating friction and grip with the surrounding masonry material.
Proper embedment is crucial for optimal performance of sleeve anchors. Deeper embedment increases holding power as it allows for more surface area contact between the anchor and the masonry. Always ensure sufficient embedment depth when using expansion sleeve anchors to allow for proper expansion.
Installation Steps and Tools
Proper installation is key to ensuring optimal performance and longevity of sleeve anchors. Follow these steps and use the recommended tools:
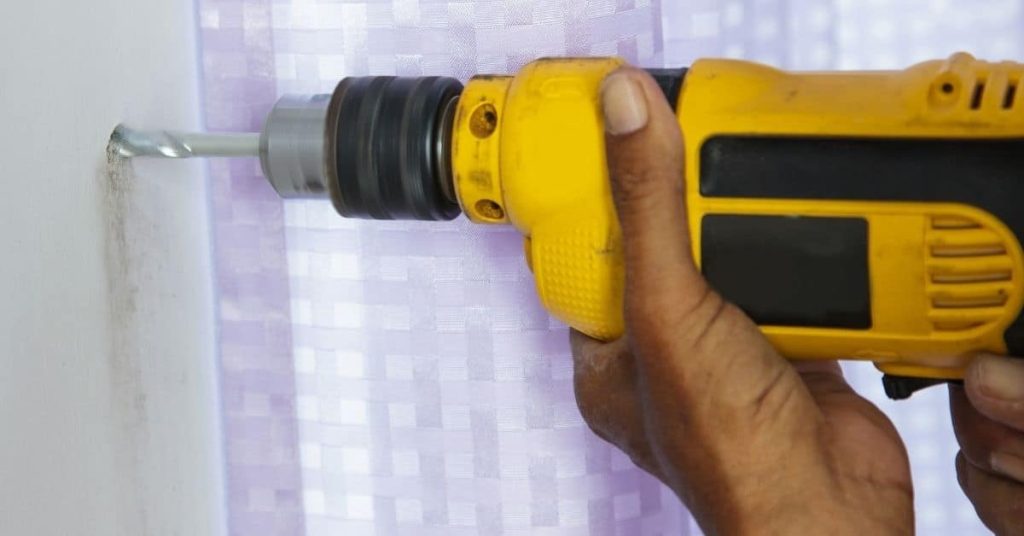
- Drill Hole: Use a masonry drill bit of appropriate size to create a clean, dust-free hole in the masonry surface.
- Clean Hole: Remove any dust or debris from the drilled hole using a wire brush or compressed air. This ensures proper anchor expansion and grip.
- Insert Sleeve Anchor: Insert the sleeve anchor into the drilled hole, ensuring it is fully seated and flush with the surface.
- Apply Torque: Tighten the screw or bolt using a suitable wrench or screwdriver. Apply torque as per manufacturer’s guidelines to ensure proper expansion and grip.
- Optional Tools: Consider renting or borrowing tools like a masonry drill, appropriate bits, and a wrench or screwdriver for easier installation. Costs vary by location, so check local rental prices.
Advantages, Disadvantages, and Use Cases
Sleeve anchors offer several advantages but also have some limitations. Understanding their strengths and weaknesses helps in selecting the right anchor for your project.
Advantages: Sleeve anchors are easy to install, vibration-resistant, and suitable for both structural (concrete) and non-structural loads. They perform well in high-cycle loading scenarios due to their expansion mechanism. Additionally, sleeve anchors are cost-effective compared to other anchor types.
Disadvantages: Sleeve anchors may not be the best choice for high-load or specialized applications. They require proper embedment and hole cleanliness for optimal performance. Over-torquing can lead to anchor failure, so always follow manufacturer guidelines. Corrosion resistance is limited compared to other anchor types, so consider using stainless steel or applying a protective coating in harsh environments.
Common use cases include attaching shelves, brackets, or other light-duty fixtures to masonry surfaces. However, for high load or specialized applications, consider alternatives like wedge anchors, epoxy anchors, or Tapcon screws.
Wedge Anchors — Description, Use, and Best Practices
Wedge anchors rely on a mechanical wedging action, where the expansion of the anchor’s internal components grips the solid masonry. The result is a direct transfer of load through the anchored element to the substrate. They are favored for structural attachments in solid substrates like concrete and solid brick.
Substrate requirements emphasize solid, uncracked material with adequate embedment depth and appropriate edge distance. Follow precise drill sizes, ensure hole cleanliness, and avoid over-torquing to prevent anchor failure. Coatings and grades should be chosen for exterior or corrosive environments, and verify suitability for the specific conditions through manufacturer guidance.
How Wedge Anchors Work
Wedge anchors derive their holding power from a mechanical wedging action in solid masonry. Here’s how they work:
The anchor consists of an expansion sleeve, a threaded rod, and a nut. When the nut is tightened, it pulls the rod into the sleeve, causing the sleeve to expand and grip the surrounding substrate.
This expansion process creates high bearing force against the walls of the drilled hole, transferring load from the anchor to the masonry. The key to this action is having a solid, dense substrate that can withstand the expansive pressure.
Installation Steps and Tools
Proper installation of wedge anchors ensures optimal performance. Here’s a step-by-step guide:
- Drill Hole: Use a suitable drill bit, matching the anchor size, at an appropriate speed to create a clean hole that meets minimum embedment depth requirements.
- Clean Hole: Remove any debris from the drilled hole using compressed air or a brush to ensure proper anchor expansion.
- Insert Anchor: Insert the wedge anchor into the hole without lubricant. Lubrication can prevent the anchor from gripping the substrate properly.
- Apply Torque-Twist Sequence: Tighten the nut using a wrench, applying the torque-twist sequence as per the manufacturer’s data to ensure proper expansion and grip.
- Verify Embedment Depth: Check that the anchor is embedded to the correct depth. Over-embedment can cause anchor failure due to excessive stress on the substrate.
Advantages, Disadvantages, and Use Cases
Wedge anchors offer several advantages but also have some limitations. Here’s what you need to know:
Advantages: Wedge anchors provide high bearing force in solid masonry, making them ideal for structural attachments. They are permanent, reusable, and cost-effective.
Disadvantages: Wedge anchors require a solid, uncracked substrate to function properly. They are not suitable for hollow or deteriorated masonry. Additionally, they may not be the best choice in environments with high shear forces or corrosive conditions without appropriate coatings.
Use Cases: Wedge anchors excel in applications where high bearing force is required in solid concrete or dense masonry, such as attaching structural elements like beams, columns, or cladding. They are commonly used in construction, renovation, and industrial settings.
Tapcon (Concrete) Screws — Description, Use, and Best Practices
Tapcon-style screws rely on mechanical tapping into predrilled holes, with threads cutting into masonry to form a secure grip. They are typically used for medium-duty fastening tasks, such as fixtures and non-structural bracing, while heavier loads may require other anchors. They are not the optimal choice for critical structural connections.
Correct hole size and depth, proper drill bits, and a clean drilling sequence are essential. Consider substrate compatibility and coating options for indoor versus outdoor or moisture-rich environments. Refer to the manufacturer instructions for torque limits and compatibility prior to use.
How Tapcon Screws Work
Tapcon screws, also known as concrete screws, are designed for secure fastening into masonry surfaces. They achieve this through a unique cutting and tapping action.
The process begins with predrilling a hole slightly smaller than the screw’s minor diameter. As you drive the Tapcon screw into the predrilled hole using a drill or screwdriver, its threads cut into the masonry, creating a secure grip.
Unlike wedge anchors that rely on expansion for holding power, Tapcon screws derive their primary holding force from thread engagement with the masonry substrate. This makes them ideal for medium-duty fastenings such as paneling, fixtures, and hardware installation.
Installation Steps and Tools
Proper installation is key to Tapcon screws’ performance. Here are the steps and necessary tools:
- Drill and Drill Bit: Use a drill with appropriate torque settings and a masonry drill bit matching your screw’s size.
- Pilot Hole: Drill to the correct depth, usually 1.5 times the screw’s length, ensuring the hole is clean and free of debris.
- Tapcon Screw: Select a Tapcon screw suitable for your application and substrate type.
- Driver Bit: Use a driver bit matching your screw’s head to avoid stripping or damaging threads.
- Torque Setting: Apply appropriate torque, usually between 10-25 inch-pounds, to prevent overtightening and thread damage. Consider renting or borrowing a torque screwdriver for precise application.
Advantages, Limitations, and Applications
Tapcon screws offer several advantages but also have some limitations. Understanding these helps in appropriate usage:
Advantages: Tapcon screws are quick and easy to install, requiring only a drill and the correct bit. They can also be removed and reused, making them ideal for temporary installations or where future access is needed.
Limitations: While effective in many scenarios, Tapcon screws have lower heavy-load capacity compared to wedge or epoxy anchors. They are not recommended for cracked or hollow masonry substrates as they rely on solid material for thread engagement.
Applications: Tapcon screws are commonly used for medium-duty fastenings such as installing paneling, fixtures, hardware, and non-structural bracing. They are also suitable for light-duty structural connections where the load is not excessive or critical to safety.
Epoxy (Adhesive) Anchors — Description, Use, and Best Practices
Bonded epoxy anchors cure to form a load-bearing bond between the anchor shank and masonry, differing from mechanical anchors in behavior and failure modes. They are widely used where higher capacities or performance in cracked masonry is needed. The resin system transfers load through chemical bonding as well as mechanical grip.
Use cases include high capacity applications and cracked masonry or dynamic loads, with practical limits based on substrate, edge distances, and spacing. Surface prep, hole cleaning, cure times, and environmental conditions affect performance. Check adhesive type, cure requirements, and applicable standards or codes before installation.
How Epoxy Anchors Work
Epoxy anchors create a strong bond with masonry by using a cured resin that adheres to both the anchor shank and the substrate. This bonding mechanism differs from mechanical anchors, which rely on expansion or friction for their holding power.
Annular space is crucial in epoxy anchoring. It allows the epoxy resin to flow around the anchor, ensuring complete embedment and optimal load transfer. Once cured, the resin forms a solid bond with the anchor and masonry, distributing loads evenly across the interface.
In contrast to mechanical expansion anchors, epoxy anchors rely on this chemical bond for their strength. This makes them well-suited for high-capacity applications and scenarios where cracked masonry is present.
Epoxy Anchor Installation Steps
Proper installation is key to achieving optimal performance from your epoxy anchors. Follow these steps:
- Drill the hole: Use a suitable drill bit that’s slightly oversized for the anchor and allows for resin flow. Ensure the hole is clean and free of debris.
- Clean the hole: Brush out any remaining dust, then use compressed air to blow out the hole. This ensures maximum contact between the epoxy and masonry.
- Inject adhesive: Follow manufacturer guidelines for mixing the epoxy resin and hardener. Inject the mixture into the hole using a caulking gun or similar tool.
- Insert the anchor rod/bolt: Immediately after injecting the adhesive, insert the anchor rod or bolt into the hole. Ensure it’s properly aligned and seated.
- Cure the epoxy: Allow the epoxy to cure according to manufacturer guidelines. Temperature and humidity can affect curing times, so follow their recommendations for your specific conditions.
Epoxy Anchor Advantages & Disadvantages
Advantages: Epoxy anchors offer high strength, making them ideal for applications requiring heavy loads. They also perform well in cracked masonry due to their bonding mechanism. Additionally, epoxy anchors can resist corrosion and provide a degree of dampening against dynamic or seismic loads.
Disadvantages: Epoxy anchors require careful surface preparation and precise installation. They are sensitive to temperature changes during curing and may not be suitable for low-temperature applications without a cold-resistant adhesive system. Additionally, epoxy anchors are typically permanent and difficult to remove once set.
Use Cases: Epoxy anchors are commonly used in high-capacity applications such as structural reinforcement, seismic retrofitting, and anchoring heavy equipment to masonry surfaces. They’re also suitable for cracked masonry due to their ability to bridge cracks and distribute loads evenly.
Side-by-Side Performance and Compatibility with Masonry Materials
Side-by-side performance across sleeve, wedge, Tapcon, and epoxy anchors varies by masonry type, with load capacity and failure modes depending on solid concrete, hollow masonry, brick, and concrete block. Expect manufacturer load tables and installation tolerances to guide tension and shear values, and verify them against your substrate conditions. Stake: skipping proper hole cleaning can reduce performance, so plan for clean, straight holes and correct embedment depth.
This matters for a DIYer because installation variables—hole cleanliness, drill bit size, substrate soundness, temperature, humidity, and cure time for epoxy—directly influence results and decisions. Quick check: visually inspect holes for debris and depth with a ruler or depth gauge before installing. Pro check: confirm the masonry substrate is sound and cracks are addressed before anchoring, and choose epoxy for hollow masonry with high loads while solid concrete may favor sleeve or wedge anchors; common mistake is under-embedment, so increase length or diameter if pull-out occurs.
Relative load and performance comparison
The performance of masonry anchors varies depending on the type of anchor and the conditions under which they are used. Generally, sleeve and wedge anchors have higher load capacities in tension and shear compared to Tapcon screws and epoxy anchors.
However, this hierarchy can change based on factors such as embedment depth, edge distance, and whether the masonry is cracked or uncracked. For high load capacity needs, consider sleeve or wedge anchors. If dynamic loads are expected, evaluate epoxy anchors for better substrate compatibility and creep behavior.
It’s crucial to consult ASTM test standards (F1143, F3967) to compare anchor performance under relevant conditions. Always verify manufacturer load tables, design values, and applicable codes (ACI 318/318-19, IBC) for each anchor type.
Compatibility with different masonry types
The suitability of an anchor depends on the type of masonry unit it’s being used with. Solid concrete and dense brick can accommodate sleeve, wedge, or Tapcon anchors effectively due to their high density.
On the other hand, hollow masonry units with voids require a different approach. Epoxy anchors are recommended in these cases as they provide better adhesion and distribute loads more evenly across the substrate.
Before installation, assess substrate density, voids, and soundness. Always consult manufacturer guidelines for suitable anchor types to ensure optimal performance.
Installation Safety, Common Mistakes, and Visual Checkpoints
Wear appropriate PPE, including eye protection, hearing protection, and a dust mask, and use dust control methods during drilling. Follow safe practices to minimize exposure and injury. Keep the work area clear of hazards and utilities.
Check hole preparation, correct embedment, and seating before loading. Use the specified torque or cure parameters for each anchor type and verify no movement or wobble. Inspect for cleanliness, alignment, and proper cure or set times before applying load.
Safety guidelines and PPE
Before starting any masonry anchor installation, ensure you have the right personal protective equipment (PPE) to protect yourself and minimize environmental impact.
- Eye/face protection: Wear safety glasses or goggles to shield your eyes from debris and dust.
- Hearing protection: Use earplugs or earmuffs to safeguard your hearing, especially when using power tools.
- Dust mask/respirator: Protect your lungs by wearing a suitable dust mask or respirator to minimize concrete dust exposure.
- Gloves: Wear work gloves to protect your hands from cuts and abrasions.
- Hard hat: Use a hard hat to shield your head from falling objects, especially in areas with overhead work.
- Local extraction or dust shrouds: Use these tools to control concrete dust exposure and maintain a clean working environment.
- Follow manufacturer’s safety guidelines: Always adhere to the safety instructions provided by the power tool manufacturers for safe operation.
Quick rule: Regularly inspect and maintain your PPE, replacing it as needed to ensure optimal protection.
Common installation mistakes and how to avoid them
To prevent compromised performance and potential failures, be aware of these common masonry anchor installation mistakes and learn how to avoid them.
- Wrong drill size: Using the incorrect drill bit can lead to poor anchor engagement. Always use a drill bit suitable for both the concrete and the chosen anchor type.
- Inadequate hole cleaning: Failing to thoroughly clean the bore can result in weak anchor engagement due to dust and debris. Ensure the hole is clean before installing the anchor.
- Improper torque: Over-torquing or under-torquing anchors can compromise their holding power. Follow manufacturer specifications for correct torque application.
- Wrong anchor type: Using an inappropriate anchor for the given masonry material and load requirements can lead to failures. Choose the right anchor for your specific application.
By being mindful of these common mistakes and adhering to the prevention tips, you can ensure a successful and durable masonry anchor installation.
Visual and physical inspection checkpoints
After installing masonry anchors, perform these quick checks to verify correct installation and identify potential issues early on.
- Embedment depth: Ensure the anchor is embedded at the correct depth as specified by the manufacturer. Visually inspect the embedment to confirm proper installation.
- Flushness: Check that the anchor is seated flush with the masonry surface or protruding correctly, as per the manufacturer’s specifications.
- Wobble/movement: Gently tug on the anchor to ensure there is no wobble or movement, indicating proper engagement and adhesion.
- Grout/epoxy bead: Inspect for a clean grout or epoxy bead around the anchor, ensuring no voids or gaps that could compromise its holding power.
- Cure/setting: Verify that the adhesive (if applicable) has properly cured or set before applying any load to the anchor. Consult manufacturer’s datasheet/instructions for specific checks.
Quick rule: Always perform a simple load-check or pull-out check where practical to confirm the anchor’s holding power and engagement.
Cost-Effectiveness, Maintenance, and Long-Term Durability
Compare initial material costs and installation effort across sleeve, wedge, Tapcon, and epoxy anchors. Consider how labor time, tool requirements, and substrate conditions influence the upfront expense. Balance this with long-term performance expectations.
Assess maintenance needs, corrosion risk, and inspection intervals to detect looseness or degradation. Environmental exposure and substrate type influence durability and potential rehabilitation needs. Use a risk-based approach to budgeting for replacement or rehabilitation over the project lifecycle.
Initial vs Lifecycle Costs
The cost-effectiveness of masonry anchors should be evaluated based on both initial material and installation expenses, as well as long-term lifecycle costs. Consider the following factors:
Initial Material Costs: Compare anchor prices per unit, fasteners, and epoxy mix if applicable for sleeve, wedge, tapcon, and epoxy anchors.
Labor/Installation Time: Assess labor costs and time required for installation of each anchor type. Some may require specialized tools or adhesives that add to the initial investment.
Likelihood of Future Replacement or Upgrades: Estimate the expected service life of each anchor type and consider potential major replacement triggers, such as renovations or changes in load requirements. Total cost of ownership should include re-installation or replacement during these events.
Maintenance, Inspection Intervals, and Longevity
Regular maintenance and inspections are crucial to extend the service life of masonry anchors and prevent failures. Use this checklist to assess the condition of your anchors:
- Corrosion Risk Assessment: Check exposure to moisture, salt, chemicals, and other corrosive agents.
- Grout/Patina Degradation Checks: Inspect grout or patina for cracks, crumbling, or discoloration that could indicate anchor degradation.
- Bolt Tightening Checks (Wedge Anchors): Ensure bolts remain tight and secure to maintain the anchor’s grip on the masonry.
- Signs of Looseness or Breakout: Check for movement, play, or other signs that an anchor may be failing.
- Load Changes: Monitor changes in load requirements and adjust anchors as needed to maintain their integrity.
- Substrate Conditions: Assess the type of masonry and presence of efflorescence, which can affect anchor performance.
- Moisture, Freeze-Thaw Cycles, Salt Exposure: Evaluate these environmental factors that can impact anchor durability.
- Chemical Exposure: Check for exposure to chemicals that could degrade the anchors or their surrounding materials.
Quick Rule: Establish inspection intervals based on environmental factors and substrate conditions. Increase frequency in high-risk situations to catch issues early and extend anchor service life.
Conclusion
Choosing the right masonry anchor matters for safety, durability, and appearance, and the decision should balance the material, load, and environment you’re working in. When in doubt, prioritize a conservative fit and follow the specific product instructions to avoid hidden failures that can show up only after installation.
To apply this guidance, verify the substrate and load requirements, select the appropriate anchor type (sleeve, wedge, Tapcon screw, or epoxy) based on the material and expected forces, prepare the hole or anchor site correctly, clean and inspect the hole or surface, install with the recommended torque or cure time, and test the weakest point before putting the system into service; document the types and sizes used for future maintenance, and always wear proper PPE and comply with local codes. Safety first and a cautious, stepwise approach reduce the risk of damage and costly fixes.
Common mistakes to avoid include overdriving fasteners, neglecting surface or hole cleanliness, and choosing an anchor with insufficient shear or pull-out capacity for the actual load; keep the work area clear, follow the manufacturer’s cleanout and curing guidance, and never use damaged components, mixed products, or makeshift substitutes. Use simple safety rules: test a small installation first, verify withdrawal and shear loads in a noncritical spot, and keep a backup plan if conditions change mid-project.
If the job involves high loads, unusual masonry, or uncertain conditions, consider hiring a professional to confirm substrate suitability and to perform critical installations; otherwise, proceed methodically with a clear plan, document each step, and review results against expectations to stay confident and avoid costly mistakes.
FAQ
What are the main types of masonry anchors and how do they differ?
Sleeve anchors, wedge anchors, Tapcon screws, and epoxy anchors are used to attach items to masonry. Sleeve and wedge anchors rely on expansion within a hole, while Tapcon screws thread directly into the masonry, and epoxy anchors use adhesive to bond a stud or fastener. Each type has different install methods and applications based on load needs and material compatibility.
How do the installation methods vary by anchor type?
Sleeve and wedge anchors require drilling a hole, inserting the anchor, and expanding it with a nut or setting tool. Tapcon screws combine drilling and threading in one step, driven with a compatible drill and bit. Epoxy anchors involve cleaning the hole, injecting adhesive, and inserting a vessel or stud before the epoxy cures.
What should I consider about load-bearing capacity and best uses?
Load capacity depends on the anchor type, hole size, and masonry material. Epoxy anchors are often used for higher or more precise loads, while mechanical anchors (sleeve, wedge, Tapcon) suit typical fixed connections. Check manufacturer guidance and the installation surface to determine suitability for your load.
What are the common failure points to watch for?
Common issues include improper hole preparation, under- or over-torquing, and selecting an anchor with insufficient compatibility for the masonry type. Insufficient cure or adhesive bonding can also cause failure in epoxy anchors. Always verify surface condition, installation torque, and adhesive cure instructions per the product label.