
Introduction
Clay plaster in wet rooms is a breathable natural coating that helps manage moisture while providing a warm, tactile surface. In daily use, expect a soft, matte finish that can tolerate routine cleaning and occasional splashes. The material relies on proper backing and sealing in splash zones to perform well over time.
Long-term upkeep means watching for wear near sinks and showers and carrying out small touch-ups as needed. Careful application in splash zones, plus regular maintenance, helps the plaster stay sound and minimizes staining. Check the product label and manufacturer guidance for compatible finishes, cleaners, and any local rules before treatment.
Key takeaways
- Clay plaster offers breathable, self-regulating moisture behavior suitable for wet zones.
- Prepare splash zones with watertight backing and plaster skim for durable interfaces.
- Apply in thin, even passes and protect edges with detail bands and seals.
- Daily use involves light cleaning, wipe spills promptly, and allow natural drying.
- Maintenance includes gentle brushing; wear mask and ventilate to avoid dust.
- Plan long-term touch-ups around high-wear areas with matching finishes to maintain uniform appearance over years.
Table of Contents
- Introduction
- Key takeaways
- Why Choose Clay Plaster for Wet Rooms (Properties and Benefits)
- Planning and Preparation for Installation in Wet Rooms
- Application Process for Wet Rooms — Step-by-Step
- Splash Zones: Protection, Detailing, and Interfaces
- Daily Use and Simple Maintenance Routines
- Cleaning, Stain Removal, and Periodic Upkeep
- Long-Term Touch-Ups, Repairs, and Durability Planning
- Safety, Costs, Sustainability, and Common Pitfalls
- Conclusion
- FAQ
Why Choose Clay Plaster for Wet Rooms (Properties and Benefits)
Clay plaster in wet rooms offers breathable, moisture-regulating performance and a soft, matte finish that pairs with tile or stone. It allows vapor diffusion and manages hygroscopic moisture with limited water absorption, influencing mold risk and substrate prep. Check manufacturer specs for moisture resistance ratings and recommended uses.
Substrate preparation is essential; skipping it can lead to delamination and moisture issues. A quick on-site check is to ensure the surface feels dry to touch before the first coat. If a room has frequent water exposure, use a sealant or lime wash for added protection and easier maintenance; an experienced installer will verify cleanliness, dryness, and priming.
Material properties and performance in wet environments
Choosing the right material for your wet room’s walls is crucial to ensure durability, aesthetics, and functionality. Understanding how different materials interact with humidity and water exposure can help guide your decision.
- Clay Plaster: Composed of natural, breathable materials like clay, sand, and aggregates, it offers excellent vapor permeability and hygroscopic moisture handling. Look for datasheets showing high moisture resistance ratings and recommended humidity ranges between 30-70%. To prevent cracking or staining, ensure proper substrate preparation and consider using a lime wash or sealant in splash zones.
- Cement Plaster: While durable, cement plasters have lower breathability and can trap moisture, leading to mold growth. They may require additional waterproofing membranes for use in wet rooms.
Advantages and trade-offs versus tile, cement, and waterproof membranes
Clay plaster offers several advantages in wet rooms but also has its trade-offs compared to other materials.
Durability: Clay plaster is durable but may require occasional touch-ups due to its porous nature. Tiles are highly durable, while cement plasters and waterproof membranes offer low maintenance with no touch-ups needed.
Cost: Initial costs for clay plaster can be lower than tiles or waterproof membranes, but long-term maintenance costs should be considered. Cement plasters may have higher upfront costs due to additional waterproofing requirements.
Aesthetics: Clay plaster provides a soft, matte finish that complements textured surfaces like tile or stone. Tiles offer a wide range of styles and colors, while cement plasters and membranes provide a uniform, smooth appearance.
Planning and Preparation for Installation in Wet Rooms
Planning and preparation for clay plaster in wet rooms starts with mapping splash zones and high‑moisture areas, identifying where plaster will meet tile, acrylic sealants, or waterproof membranes. It also requires inspecting the substrate for stability, porosity, and any signs of cracks or moisture damage, and planning moisture management and transitions. Check local rules and know when to involve licensed pros or building inspectors before starting.
This upfront work helps prevent delamination and moisture issues after installation and supports long‑term durability. A careful pre‑check guides surface preparation, moisture testing, and the sealing or edging details that will keep transitions reliable. If efflorescence appears, address the moisture source first, and be prepared to re‑evaluate substrate and moisture plans before proceeding.
Assessing Room Conditions and Substrate Compatibility
Before installing clay plaster in your wet room, it’s crucial to assess the condition of your room and ensure the substrate is compatible. This step helps prevent issues like moisture problems or plaster delamination.
Structural Soundness: Check for any signs of instability such as cracks, bulges, or hollow spots in walls. A simple way to check is by knocking on walls to listen for hollowness. If found, consult a professional before proceeding.
Existing Waterproofing: Inspect the current waterproofing system. Look for efflorescence (white salt deposits) or cracks, which may indicate damage. If the existing waterproofing is compromised or incompatible with clay plaster, replace or repair it before application.
Suitable Backing Surfaces: Clay plaster requires a stable, solid surface to adhere to. Check your substrate for suitable backing surfaces like concrete, plywood, or existing plaster. If the surface is not smooth or stable, prepare it accordingly (e.g., sanding, priming) before applying clay plaster.
Tools and Materials Checklist
Before starting your wet room installation, gather the necessary tools and materials for a smooth process. This list covers essentials; consult product datasheets for specific material ratios and accessory recommendations.
- Trowel (6″ – 12″): Used for applying and spreading wet room membrane and plaster. Choose size based on comfort and job requirements. Consider renting or borrowing if infrequent use.
- Notched trowel (3/8″ – 1/2″): Essential for applying thin-set mortar when installing tiles. Notch size affects mortar application; choose based on tile type and manufacturer’s recommendations.
- Hammer drill (14.4V – 18V): Drills holes into walls and floors for fixing anchors and installing accessories. Opt for a cordless model with adjustable torque settings to prevent over-tightening.
- Oscillating multi-tool: Cuts backer board, trim pieces, and other materials. While not essential, it speeds up the process and reduces manual effort. Consider renting or borrowing if infrequent use.
- Safety glasses: Protects eyes from debris and potential hazards during cutting, drilling, and sanding. Always wear when using power tools.
- Work gloves: Provides grip and protection for hands while handling materials and tools. Choose a pair that fits well to prevent discomfort or accidents.
- Knee pads: Optional but recommended for prolonged periods of kneeling during tiling and grouting. They protect your knees and reduce fatigue.
- Dust mask/respirator: Essential when cutting, sanding, or mixing materials to protect against harmful particles and dust. Choose a model that fits well and provides adequate protection based on the task at hand.
Pro tip: When choosing tools, consider their versatility for other home improvement tasks. Borrowing or renting can be cost-effective if infrequent use is expected. Always prioritize safety by wearing appropriate protective gear and following manufacturer guidelines.
Application Process for Wet Rooms — Step-by-Step
The sequence matters because clay plaster relies on breathability and controlled drying to prevent failures; stake: skipping moisture management can lead to water intrusion and plaster delamination. Reinforce joints with mesh, apply a bonding coat, and maintain a controlled drying schedule to minimize water intrusion and maximize adhesion in humid rooms. Quality checkpoints include surface key and an adhesion test, and a quick check: ensure the surface is clean, damp-tack, and free of debris before application.
The second paragraph should provide useful context, benefit, or “why it matters” for a DIY reader. For porous masonry, apply a breathable, open-pored primer to aid adhesion without blocking capillary action, and in high-humidity zones consider a lime-clay mix. If cracking occurs during curing, reduce humidity and slow the drying schedule; a pro check suggests confirming substrate compatibility, primer suitability, and correct mix design.
Step-by-Step Process
The following sequence guides you through applying clay plaster in wet rooms, ensuring optimal results.
- Preparation: Ensure the room is clean, dry, and well-ventilated. Gather all tools and materials as per your checklist.
- Surface Preparation: Repair cracks, remove any loose material, and clean the surface to create a damp-tack finish.
- Moisture Barrier Application: Apply a breathable moisture barrier, following manufacturer instructions for compatibility with clay plaster.
- Plaster Mixing: Prepare your clay plaster or lime-clay mix according to the product guidelines. Ensure consistency before application.
- Application Sequence: Begin with the scratch coat, followed by the brown/setting coat if needed, and finish with a final skim coat. Reinforce joints and corners as required.
- Bonding Coat Application: Apply a bonding agent or primer to key the plaster, enhancing adhesion without sealing moisture entirely.
- Mesh Reinforcement: Install mesh or fibrous reinforcement at joints and corners for added strength.
- Finishing Touches: Use trowel techniques for a uniform finish. Apply a breathable sealant or limewash for micro-sealing without blocking capillary action.
- Cleanup and Final Checks: Clean tools, remove any protective covering, and perform final checks to ensure the surface is ready for use.
Surface Preparation and Moisture-Management Layers
Proper surface preparation is crucial to prevent water intrusion and ensure adhesion in wet rooms. Begin by cleaning the substrate thoroughly, removing any dirt, grease, or loose material.
Mechanically key the surface using a brush or comb to create a rough texture that enhances plaster adhesion. Ensure the surface is clean and damp-tack before proceeding.
Apply a breathable moisture barrier compatible with clay plaster in humid zones. This layer helps manage moisture without sealing the substrate entirely, allowing it to breathe. Consult product guidelines for compatibility and application instructions.
Mixing, Troweling, and Building Up Plaster Layers
Proper mixing ensures a uniform, durable surface. Follow product guidelines for the correct water-to-plaster ratio. Mix until you achieve a smooth, lump-free consistency.
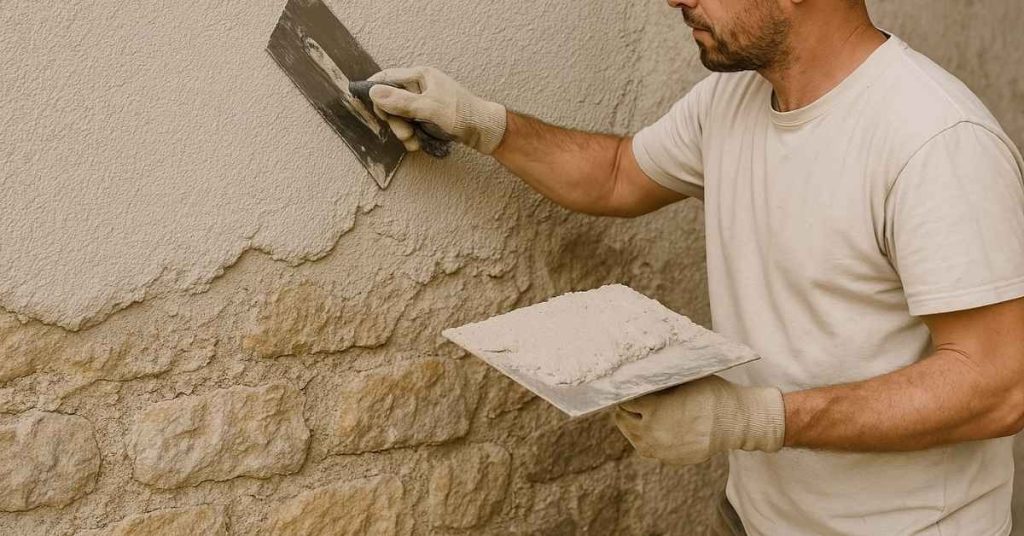
Use trowel techniques to apply plaster layers evenly. Begin with a scratch coat, using a hawk and trowel to spread the plaster onto the wall in thin, even layers. Work from the bottom up, ensuring full coverage.
Apply subsequent coats as per your planned sequence, allowing each layer to dry according to manufacturer recommendations before proceeding. Reinforce joints and corners with fibrous material or mesh during application to prevent cracking and enhance durability.
Curing, Drying, and Environmental Controls
Controlled drying is essential to avoid cracking and ensure stable adhesion. Maintain ideal humidity and temperature ranges during curing, as recommended by the product manufacturer.
Keep the room well-ventilated but avoid direct sunlight or drafts, which can cause uneven drying and stress on the plaster surface. Monitor humidity levels, aiming for 40-60% relative humidity during the initial curing phase.
If humidity or temperature exceeds ideal ranges, adjust the environment or extend drying time to prevent issues. If cracks appear during initial drying, re-wet and re-cure the affected areas as needed. Regularly inspect the surface for any signs of stress or cracking during the drying process.
Splash Zones: Protection, Detailing, and Interfaces
Inside shower enclosures, around taps, and sink basins require edge detailing, trim profiles, and corner beads that resist moisture while matching clay plaster. Use metal or PVC profiles and silicone-adhesion friendly finishes, and pair them with compatible sealants or barriers to protect joints and interfaces. Include careful seam sealing and alignment with fixtures, ensuring expansion gaps for movement.
This approach reduces the risk of cracking, delamination, and mold, and it helps you integrate with hardware, tiles, glass, or stone smoothly. A careful sequence—surface prep, priming, trim installation, seam sealing, and a final protection layer—supports long-term performance. Check for cracks or gaps with a simple finger