

Introduction
Lime plaster in basements is a breathable plaster finish that helps manage moisture.
It relies on lime’s chemistry to let vapor pass while providing a durable coat. This DIY approach requires careful moisture testing and proper surface prep.
Moisture testing, understanding vapor drive, and choosing compatible paints matter for long-term performance. Check product labels, follow manufacturer instructions, and align with local rules to keep the plaster from failing. If unsure, start with modest expectations and verify with simple, safe checks.
Key takeaways
- Lime plaster breathes; ensure basement moisture is controlled before application, wear PPE.
- Test moisture: identify continuous vapor drive paths and repair leaks first.
- Prepare surfaces: remove loose paint, dust, and create a clean, sound base.
- Use lime-compatible primers and sealers per manufacturer instructions and local code guidance.
- Apply in thin lifts; protect curing plaster from rapid moisture loss or drafts.
- Choose vapor-permeable paints; avoid film-forming coatings that trap moisture.
Table of Contents
- Introduction
- Key takeaways
- Why Choose Lime Plaster for Basements: Benefits and Limitations
- Moisture Basics: Sources, Vapor Drive, and Risks in Basements
- Moisture Testing Methods and When to Test
- Preparing Basement Surfaces for Lime Plaster
- Application Best Practices and Curing/Drying Considerations
- Paints and Finishes Compatible with Lime Plaster (Vapor-Permeable Options)
- Maintenance, Monitoring, and Troubleshooting Common Problems
- Tools, Materials Checklist and Material Specs/Standards Explained
- Conclusion
- FAQ
Why Choose Lime Plaster for Basements: Benefits and Limitations
Lime plaster lets walls breathe and helps manage moisture. It’s a good match for masonry and can balance damp conditions without sealing the wall shut.
For basements, that breathability helps with humidity, but it won’t stop active leaks or strong hydrostatic pressure. Use it as part of a broader plan, and check the label or manufacturer instructions for proper application details.
Breathability and moisture buffering explained
Lime plaster’s real strength lies in its breathability. It allows moisture vapor to pass through, unlike traditional paints or plasters.
Here’s how it works: when your basement gets humid, lime plaster soaks up the excess moisture like a sponge. This is thanks to its hygroscopic nature – it attracts and holds water vapor.
Once the humidity drops, lime plaster releases that moisture back into the air. It’s like having a built-in moisture buffer for your basement.
No more trapped condensation. Unlike impermeable coatings, lime plaster doesn’t trap moisture behind it, preventing mold and mildew growth.
Limitations and when lime plaster is not appropriate
Lime plaster’s not a cure-all. It won’t fix active leaks or severe hydrostatic pressure.
Active leaks. If water’s actively seeping through your basement walls, you need to address that first. Lime plaster can’t stop water flow; it just handles the moisture that gets in.
Same goes for high ground-water pressure. You might need an impermeable membrane or other professional solutions before applying lime plaster.
Remember, lime plaster’s about managing moisture once it’s already in your basement. It’s not a substitute for proper waterproofing and leak repair.
Compatibility with common basement substrates
Lime plaster works well with most basement surfaces, but you might need some prep work.
Concrete block and poured concrete are great for lime plaster. They’re porous enough to let moisture move through. You might just need a substrate primer to improve adhesion.
For stone or brick, you’ll likely need a keying agent. These surfaces can be too smooth, so you need something to help lime plaster grip.
If there are any damaged areas, do tie-in repairs first. Lime plaster won’t fix cracks or holes; it just covers them up.
Moisture Basics: Sources, Vapor Drive, and Risks in Basements
Key moisture drivers include ground moisture, possible bulk water intrusion, vapor drive from the earth, and condensation within cool spaces. These factors interact in below grade spaces and influence wall and floor conditions. Understanding how they connect helps plan work and avoid surprises.
In basements, moisture can move through materials and condense on cooler surfaces. This creates a cycle that can affect plaster adhesion and finish quality. Consider all sources and routes when evaluating a project site.
What is vapor drive and why it matters
Vapor drive is the force that pushes moisture through walls. It’s all about pressure differences.
In summer, warm air holds more water vapor. When it hits cooler basement walls, vapor condenses, turning into liquid water. This drives moisture into the wall.
In winter, the process reverses. Cold walls push moisture outwards. Seasonal changes invert or amplify this flow.
Typical moisture sources in basements
Basement moisture comes from many places:
Capillary rise: Moisture wicks up from the ground through porous materials.
Leaking drains or pipes, poor exterior drainage, and humidity from inside activities also contribute. Condensation on cold surfaces is another common source.
Risks to plaster, finishes, and indoor air quality
Persistent moisture in basements brings serious risks:
Salts and efflorescence can damage plaster and finishes. Moisture can cause plaster detachment.
Mold growth thrives in damp conditions, degrading indoor air quality. It can trigger allergies and respiratory issues.
Moisture Testing Methods and When to Test
Start with visual inspection to spot staining, cracking, or salt deposits. This guides where to focus further testing. Document any obvious trouble spots before proceeding.
Next, use spot tests and meter readings as instructed by the label or manufacturer. Longer term logging can reveal seasonal patterns that influence your timing for plaster work. Plan tests for pre-application and after repairs, and review results according to product guidance.
Rapid spot checks: visual, touch, and surface hygroscopic indicators
Before you grab your moisture meter, do some quick, free checks. These won’t replace instrument testing but they’ll give you a heads-up.
Salt crusts on walls or floors – that’s trapped moisture. Damp patches or musty odor? You’ve got active moisture. Cold spots? That could be condensation, another sign of excess moisture.
If you find any of these, don’t stop. They’re signs to dig deeper with your instruments.
Moisture meters: pin vs pinless and interpreting readings
Pin meters stick into the surface. They’re great for hard surfaces like concrete but can damage walls.
Pinless meters don’t poke holes. They’re better for soft surfaces like drywall. But they only measure the top inch or so.
Both give you a surface reading, not bulk moisture. Calibrate before use and consider substrate – wood shows high even when dry!
Long-term monitoring: RH probes, data logging, and condensation mapping
Relative humidity (RH) probes measure moisture in the air. Log readings over days to catch seasonal vapor drive.
Map surface temperatures too. Cold spots indicate condensation – excess moisture condensing out of the air.
Check manufacturer specs for test duration. Local standards might say 72 hours, but you might need more to capture seasonal changes.
Preparing Basement Surfaces for Lime Plaster
Clean surfaces thoroughly and address salt and efflorescence as needed, following the product label or manufacturer instructions. Remove loose material and ensure a dry, stable substrate. Make minor structural repairs if required so the wall is solid and sound.
Develop a mechanical key without sealing the surface too much or blocking breathability. Avoid overly dense coatings and use compatible tools and techniques that suit lime plaster. Check local guidance on preparing masonry for plastering if available.
Cleaning, salt extraction, and efflorescence management
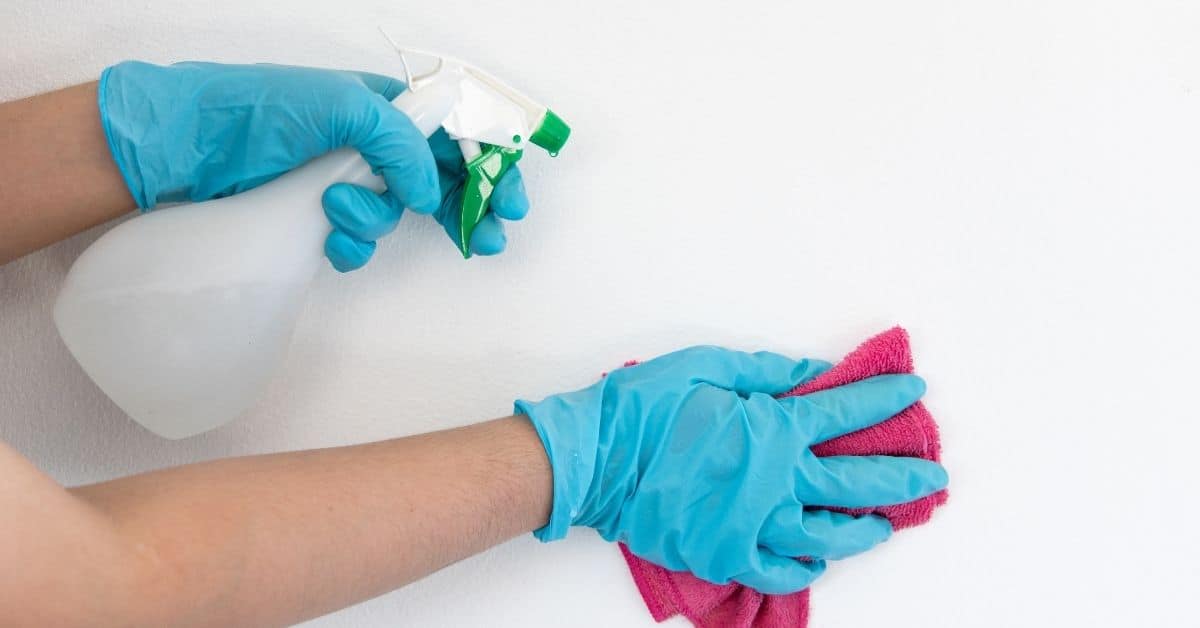
Start by gently cleaning your basement surfaces. Use a soft brush or cloth with water to remove dust and loose material.
Efflorescence, those white salt deposits, need attention. If it’s light, you can use a poultice – mix up some muriatic acid (1 part) with water (4 parts), apply, let it sit, then scrub off. Rinse well.
If salts are heavy or keep returning, full remediation might be needed. This could involve removing and replacing affected substrate. Consult a pro if you’re unsure.
Repairing cracks, voids, and making mechanical keys
First, stabilize loose masonry. Use a trowel to apply some lime putty into the voids, pushing it in with your finger.
Rake out wide cracks (at least 1/4 inch) using a cold chisel or masonry blade. Clean them well. Fill with lime-based grout or mortar, pressing it in firmly.
For mechanical keys, you can use lath or add key coats. Lath goes on before plastering; key coats are thin layers of lime putty applied during the plastering process. Both help bond to the substrate without blocking breathability.
Damp-proofing vs breathable approaches: decision guidance
External drainage and breathable internal finishes are best when moisture is occasional. This combo lets walls dry out naturally.
If you’ve got active leaks, consider installing impermeable barriers. But remember, these can trap moisture inside if not done right. Consult a waterproofing pro before proceeding.
Always test for moisture first. Remember the risks of trapped moisture from earlier in this guide. Make an informed choice based on your specific situation.
Application Best Practices and Curing/Drying Considerations
Mix lime plaster according to the manufacturer instructions and apply in an appropriate layer sequence. Maintain workable conditions that support capillary action and proper setting. Monitor surface temperature and humidity where the work is performed.
Perform quality checks for proper set, adhesion, and finish quality as you go. Plan for gradual drying and avoid rapid changes that can cause cracking or delamination. Verify guidance from suppliers or coating manufacturers if in doubt.
Mixing, slaking, and following product specifications
First things first, don’t skimp on time or ignore the manufacturer’s instructions. They know their stuff better than anyone.
Slaking: This is where you mix your lime with water to start the hydration process. Check the product label for the right water-to-lime ratio and slaking time. It’s usually around 10-20 minutes, but don’t rush it. You want a smooth, lump-free mixture.
Mixing: Once your lime is well-slaked, you can mix in the aggregate. Again, check the product specs for the right ratio of lime to aggregate. It’s typically around 1:3 or 1:4 by volume. Mix it well and make sure there are no dry spots.
Layering: scratch coat, brown coat, and finish coat
Concrete work is a layered process. Each layer serves a purpose and needs careful attention.
Scratch Coat: This is the first layer, laid over a well-compacted base. It’s usually around 1-2 inches thick. Its purpose is to provide a rough surface for the next coat to bond with. Don’t skimp on this; it’s your foundation.
Brown Coat: This middle layer, typically 2-3 inches thick, provides bulk and strength. It’s laid after the scratch coat has cured enough to lose its surface moisture but is still slightly damp (check product labels for exact timing). This helps prevent delamination.
Finish Coat: The final layer, around 1/4 to 3/8 inch thick, gives your concrete its final appearance. It’s applied when the brown coat is still slightly damp (again, check labels) for a strong bond. Don’t rush this; take your time and get it right.
Curing, drying times, and environmental control
After applying your final coat, the concrete needs gentle, controlled drying to reach its full strength. Don’t rush this process by forcing rapid drying or exposing it to freezing temperatures.
Check your product’s curing instructions. They’ll tell you the ideal temperature and humidity range for drying. Typically, it’s between 50-80°F (10-27°C) with a relative humidity of 40-60%.
Monitor these conditions closely until the concrete reaches stable conditions as per your product’s guidance. Use a thermometer and hygrometer for accurate readings. Keep the area protected from wind, rain, and extreme temperatures.
Be patient. Drying times vary based on concrete mix, thickness of application, and environmental conditions. It can take anywhere from 28 to 60 days for your concrete to reach its full strength.
Paints and Finishes Compatible with Lime Plaster (Vapor-Permeable Options)
Compare traditional limewash and mineral paints with modern breathable coatings to find a finish that preserves vapor permeability. Consider appearance, durability, and compatibility with lime plaster in basements. Base your choice on testing and field experience where possible.
Use selection criteria that emphasize vapor permeability and compatibility with masonry. Check product data sheets, labels, and manufacturer instructions to confirm suitability. When in doubt, ask for guidance from the supplier or a knowledgeable tradesperson.
Traditional limewash and mineral paint options
Limewash and mineral silicate paints are excellent choices for your lime plaster basement. They’re breathable, allowing moisture to escape while protecting the surface.
Limewash is a thin, semi-transparent coating made from slaked lime and water. It provides a soft, natural look and feel, letting the beauty of the lime plaster shine through. It’s highly permeable but offers minimal stain resistance.
Mineral silicate paints are similar to limewash but contain mineral pigments for color. They chemically bond with the lime plaster, enhancing its durability. They’re also breathable and offer better stain resistance than limewash.
Modern breathable paints and primers
Today’s water-based mineral/acrylic blends are marketed as ‘breathable’ for use on lime plaster. These combine the benefits of natural minerals with acrylic resins for durability.
When choosing, ask manufacturers for their permeability ratings (often expressed in grams per square meter per 24 hours). Aim for at least 500 g/m²/24h to ensure good vapor drive.
Before committing, test patches are crucial. Apply them in various areas with different light exposure and moisture levels. Monitor them over time to check for any issues like blistering or discoloration.
Finishing considerations: color, sheen, stain resistance, and cleaning
When selecting a paint, consider the color. Lighter shades reflect more light, making your basement feel brighter. Darker colors absorb more moisture, which could potentially affect vapor drive.
Choose a sheen that suits your needs. Flatter sheens hide imperfections better but show dirt more easily. Higher sheens are easier to clean but can highlight surface defects.
Stain resistance is important in basements prone to moisture or dampness. Opt for paints with built-in mildew inhibitors if mold is a concern.
For cleaning, use mild detergents and avoid harsh chemicals that could damage the paint or affect its breathability. Recoat every 5-7 years, depending on usage and conditions, to maintain protection and appearance.
Maintenance, Monitoring, and Troubleshooting Common Problems
Set up a routine inspection plan to monitor for salt growth, mold, and detachment issues. Note changes in texture, color, or moisture behavior as clues to trouble. Keep records to track patterns over time.
Diagnose issues with a staged repair approach to avoid repeating failures. Prioritize root causes such as moisture, substrate preparation, or incompatibility. Follow established repair sequences and verify remedies with product guidance when possible.
Detecting and treating salts, efflorescence, and staining
Salts and efflorescence can appear as white or colored deposits on your lime plaster. Staining might look like water marks or discoloration. First, dampen a cloth with water and wipe the area. If it’s just dirt, it’ll come off. If not, you’ve got salts or efflorescence.
To treat, use a poultice made from diatomaceous earth and water. Apply, let dry, then brush off. For staining, try a mild acid like lemon juice diluted with water. Re-plaster if the problem’s severe or persistent. Improve drainage to prevent recurrence.
Remember, efflorescence is often a sign of moisture issues. Fix those first before re-plastering.
Addressing mold, biological growth, and persistent damp spots
Mold appears as black or green patches. If you see it, act fast. Start by improving ventilation. Use fans, open windows, or install vents.
If that doesn’t work, check for moisture sources. It could be a leaky pipe, poor drainage, or high humidity. Document the conditions before remediation. Clean mold with a solution of water and bleach (1 cup per gallon). Wear protective gear.
If mold keeps coming back, you’ve got a bigger problem. You might need to fix structural moisture issues or consult a specialist.
Plaster delamination, cracking, and repair strategies
Delamination is when plaster peels off. Cracking can be due to shrinkage or movement. First, assess the cause. Check for moisture issues, substrate problems, or settlement.
For small cracks, use a crack filler. For delamination, you might need to re-plaster the affected area. If it’s extensive, consider full re-plastering. But first, fix the underlying issue. That could mean fixing moisture problems or addressing substrate issues.
If you’re unsure, don’t hesitate to call in a specialist. They can help diagnose and fix the problem right at the source.
Tools, Materials Checklist and Material Specs/Standards Explained
Assemble essential tools, personal protective equipment, and test instruments before starting. Include items that help with cleaning, mixing, applying, and testing plaster and coatings. Have a plan for safe handling and storage of materials on site.
Know the key material properties and standards to request from suppliers. Rely on product labels, data sheets, and manufacturer instructions to confirm suitability for lime plaster and breathable finishes. If in doubt, verify with local code references or the supplier’s technical staff.
Essential tools, safety gear, and test equipment
Before you start your lime plaster project in the basement, make sure you have all these essentials on hand.
- Mixing tools: Drill with paddle mixer, bucket, and mixing stick. Skip this, and you’ll struggle to mix a consistent batch.
- Trowels & brushes: Trowel set (3″ – 12″), hawk, jointing trowel, and paintbrush for applying limewash. Can’t apply coats or finish without them.
- Masks & goggles: Dust mask, safety glasses, and gloves. Protect yourself from lime dust and splashes.
- Moisture meter: Pinless moisture meter for checking substrate and RH probes for monitoring humidity. Skip this, risk applying plaster to damp surfaces or curing in wrong conditions.
- Level & straight edge: Level (4′ – 6′) and straight edge (10′ – 12′). Ensure coats are even and walls are plumb.
- Tape measure & pencil: Measure twice, cut once. Mark out areas for easy application.
- Ladders & scaffolding: Access equipment for high ceilings or hard-to-reach areas. Skip this, risk injury or poor workmanship.
- Plastic sheeting: Cover floors and furniture to protect from lime dust and splashes.
Quick rule: Rent specialized instruments like moisture meters if you don’t use them often. Safety first, always wear PPE.
Material types, lime classifications, and what to request from suppliers
Knowing your materials is key to a successful lime plaster job. Here’s what to look for when ordering.
- Lime type: Non-hydraulic (air-setting) or hydraulic (cement-based). Non-hydraulic is traditional, but hydraulic sets faster and is more durable.
- Permeability: Request datasheets with permeability info. High permeability means better breathability to control moisture.
- Setting time: Ask for setting times. Faster set means quicker progress, but slower set allows more working time.
- Additives: Sand, aggregates, or fibers. Common additives improve strength, workability, or crack resistance.
- Color & finish: Choose lime with the desired color or ask about adding pigments. Consider the final look you want.
- Brand reputation: Research brands. Reputable suppliers offer quality products and good support.
Quick rule: Always request datasheets from suppliers. Don’t rely on general labels; know your materials’ specifics.
Visual checkpoints and job-site quality control
Regular inspections ensure your lime plaster job stays on track. Here’s what to check at each stage.
- Substrate dryness: Before applying, check substrate is dry (moisture content <16%). Skip this, risk delamination or mold growth.
- Keying: Inspect keyed surface after priming. Good keying ensures coats adhere properly.
- Coat thickness: Measure coat thickness (1/8″ – 3/16″ per coat). Too thin, it cracks; too thick, it takes too long to dry.
- Uniform curing: Check for even curing. Uneven curing can cause cracking or delamination.
- Acceptance test: Before painting, perform a simple acceptance test: Gently press on the surface. If it feels solid and doesn’t leave an indentation, it’s ready for paint.
Quick rule: Regular inspections save time and money in the long run. Catch issues early, fix them quickly.
Conclusion
Moisture control and proper lime plastering in a basement pay off with durable walls and a better finish that won’t trap moisture. Start with solid moisture testing and surface prep, then follow proven lime plaster steps and compatible finishes to avoid costly surprises.
When you proceed, walk through a simple, natural check sequence: confirm sources of moisture and vapor drive, test in a small area first, let any test results guide your timing, seal or prepare the surface as needed, apply a thin, even plaster coat with adequate humidity and airflow, and use only vapor‑permeable paints or finishes. Do this in the order that reflects your readings and the room conditions, and document what you see as you go so you don’t guess later.
Common mistakes to avoid include rushing curing in a damp basement, applying plaster to a surface with hidden moisture or in a sealed room, and choosing paints that block vapor or trap damp air. Safety rules to follow are simple: test first, work in a well-ventilated area, wear eye and skin protection when mixing or sanding, and never skip the small-area test before a full coat. If something looks off—persistent damp spots, blistering, or musty odors stop and reassess before continuing.
If moisture seems persistent, or you’re unsure about the vapor drive, surface compatibility, or paint choices, calling a professional is smart. A trained contractor can verify moisture risk, recommend approved lime plaster mixes and finishes, and prevent irreversible damage. Stay deliberate, protect your investment, and you’ll achieve a solid, lasting basement plaster that behaves the right way with moisture.
FAQ
How do I read a moisture test result for basement walls before lime plaster?
Read the report and the test type. Compare the results to the plasterer’s or manufacturer’s guidance. If in doubt, ask to see the label or datasheet for acceptable ranges.
What causes vapor drive in basements and how do I address it?
Moisture moves from damp soil or higher indoor humidity into cooler basement walls. Improve drainage around the foundation and ensure proper grading away from the wall. Use breathable finishes and avoid sealants that trap moisture unless you have a proven plan.
What paints are safe to use over lime plaster, and what should I avoid?
Choose paints that are breathable and labeled for lime plaster or lime-based finishes. Avoid thick latex or acrylic coatings that block moisture. Always check the paint label and test a small area first.
How long should I wait after moisture testing before finishing with lime plaster?
Follow the test results and the manufacturer’s instructions. Ensure the area is free of active damp sources and that readings are stable as advised by the product you’re using. If unsure, pause and verify with the product label or instructions.