

Introduction
Keeping brick sealant lines clean means masking, tooling, and cleanup practices that prevent smear. Masking the surround surface with tight edges helps you control where the sealant goes. Work in small sections and wipe excess before it skins.
Keep a damp rag handy to clean up as you go and protect the brick face. A steady hand and the right tooling angle matter for a clean line. If you see smear, stop and rework the edge before it hardens.
Key takeaways
- Why neat sealant lines matter for brickwork Precision improves aesthetics and reduces water intrusion risks.
- Tools and materials checklist Use masking tape, sealant compatible nozzle, plus a putty knife and damp cloth.
- Choosing the right sealant and compatibility Check manufacturer instructions and local rules before application.
- Surface prep and masking best practices Clean surfaces, prime if required, protect adjacent brick with tape.
- Application methods for sharp beads Maintain steady motion, tool immediately for clean, square edges.
- Smear-free tooling and cleanup Wear gloves and eye protection; use safe cleaners and ventilation during cleanup.
- Troubleshooting and corrective actions If smear appears, tool with consistent pressure and reframe cleanup plan.
Table of Contents
- Introduction
- Key takeaways
- Why Neat Sealant Lines Matter for Brickwork
- Tools and Materials Checklist
- Choosing the Right Sealant and Understanding Compatibility
- Surface Preparation and Masking Best Practices
- Application Methods for Sharp, Uniform Beads
- Smear-Free Tooling and Cleanup Methods
- Troubleshooting Common Issues and Corrective Actions
- Maintenance, Inspection, and Visual Checkpoints
- Conclusion
- FAQ
Why Neat Sealant Lines Matter for Brickwork
Clean sealant lines protect the brick from water intrusion and freeze-thaw damage by keeping joints properly sealed. They also help the joints move and sealants perform as intended under daily weather cycles. Good edge work adds curb appeal by giving brickwork a sharp, deliberate finish.
When detailing looks uneven or smeared, water can creep into joints and degrade performance over time. A sloppy line can distract from the overall brick pattern and make maintenance harder to gauge. Poorly detailed joints often lead to touch-ups or rework later on.
Functional roles of sealant in masonry joints
Sealant plays a crucial role in protecting your brickwork. It keeps water out, preventing dampness and potential damage to the structure.
Air can’t pass through either, which helps maintain indoor temperatures by keeping heat inside during winter and outside during summer.
Most importantly, sealant accommodates movement. Bricks expand and contract with temperature changes. Without sealant, this would cause cracks in the mortar joints.
Visual impact and long-term costs of sloppy work
Sloppy sealant application leaves visible smears. These not only look unprofessional but also trap dirt, making them harder to clean.
Uneven joints can lead to water penetration over time. This accelerates mortar deterioration, leading to costly repairs or even replacement of bricks.
Moreover, sloppy work can void warranties and decrease your home’s curb appeal, affecting its value.
Tools and Materials Checklist
Gather the basics: masking tape, applicator tips or concrete gun, tooling sticks, and a clean supply of rags. Include a scraper or putty knife and a stable workstation for masking and cleanup. Have cleaning solvents and water-ready options on hand for quick wipe-downs.
Always check product labels for compatibility with brick and mortar surfaces. Refer to manufacturer instructions for any tolerances or surface prep notes, and verify that each item is suitable for your joint type before use.
Masking supplies and selection criteria
Use this checklist before applying sealant to keep lines clean.
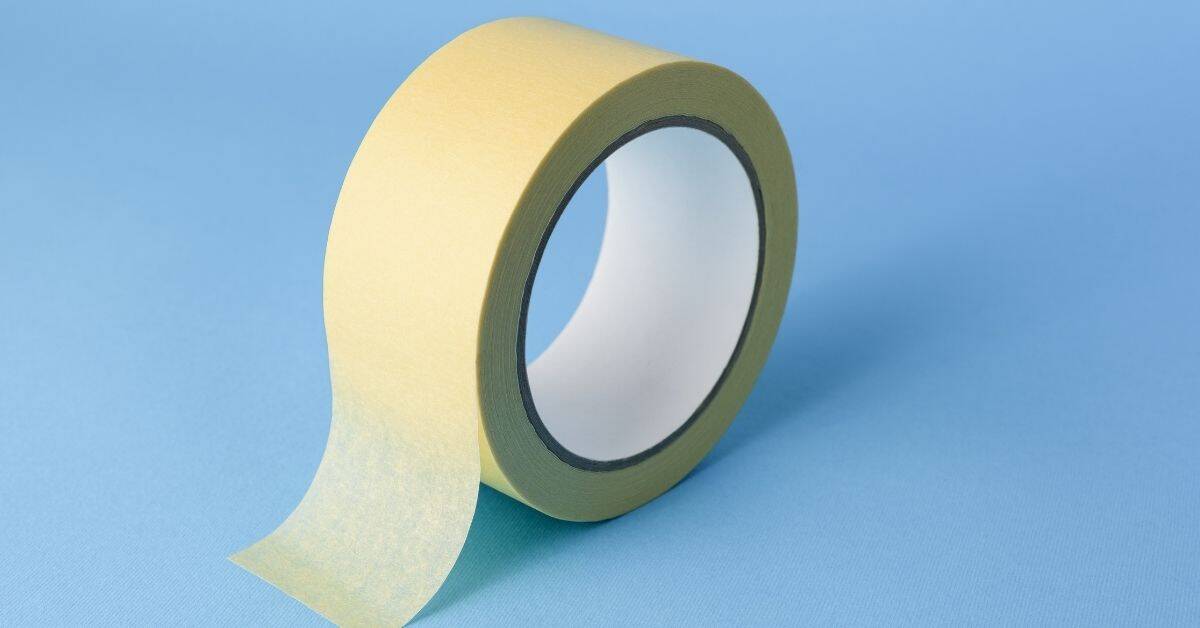
- Painter’s tape: Choose a low-tack, outdoor-rated type. Avoid regular household tape that can pull off paint or damage surfaces.
- Backer rods: Select foam or rubber rods based on joint width. Ensure they’re compatible with your sealant to prevent adhesion issues.
- Release films: Use plastic sheets for smooth, flat surfaces. Avoid on textured surfaces where tape is better.
- Masking paper: For large areas or edges, use paper with a medium-tack adhesive.
- Scissors or utility knife: To cut masking supplies to size.
- Measuring tape: Ensure accurate cutting and placement of masking materials.
- Masking liquid (optional): For extra protection on delicate surfaces, use a liquid mask that dries quickly.
- Protective gloves: To keep hands clean while handling sealant and masking supplies.
Quick rule: Always test masking materials on a small, hidden area first to ensure they won’t damage your surfaces or react with the sealant.
Application and tooling tools
Use this checklist when selecting applicators and tooling implements for a neat finish.
- Caulking gun: Choose one with an adjustable squeeze rate to control sealant flow. Avoid cheap guns that can leak or break.
- Bulk pumps (optional): For large projects, use pumps designed for your specific sealant type and viscosity.
- Cartridges: Pre-filled with sealant, they’re convenient but more expensive. Ensure they match your gun’s size.
- Sealant spatulas (tooling sticks): Select widths that fit your joint sizes. Stainless steel is durable and easy to clean.
- Dental or grout tools: For narrow, detailed work, use these small, flexible tools.
- Sealant smoother (optional): A flexible blade on a handle helps smooth sealant lines for a professional finish.
- Gloves: Wear gloves to protect hands from sealant and keep them clean while tooling.
- Safety glasses: Protect eyes from debris and drips during application and tooling.
Quick rule: Always match your tools to the sealant’s viscosity. Thick sealants need wider spatulas, while thin ones require narrower tools.
Cleanup and solvent options
Use this checklist for effective cleanup after applying sealant.
- Lint-free wipes: Use these to clean hands, tools, and surfaces. Avoid regular paper towels that can leave lint behind.
- Recommended solvents: Check your sealant’s data sheet for compatible solvents. Common ones include denatured alcohol, acetone, or mineral spirits.
- Disposable tools (optional): Use throw-away spatulas and wipes for easy cleanup and to avoid cross-contamination.
- Scrub brushes: For tough cleaning jobs on surfaces like masonry or metal.
- Protective gloves: Wear gloves when using solvents to protect hands from chemicals.
- Eye protection: Use safety glasses or goggles when handling solvents to prevent eye irritation.
- Ventilation (optional): If working indoors, ensure proper ventilation to avoid solvent fumes.
- Trash bag: Have one nearby for easy disposal of used wipes and tools.
Quick rule: Always test solvents on a small, hidden area first to ensure they won’t damage your surfaces or react with the sealant.
Choosing the Right Sealant and Understanding Compatibility
Look for sealants formulated for masonry and brick, with performance attributes that suit joint width, movement, and weather exposure. Consider how the adhesive will interact with brick, mortar, and backing materials. Compatibility is key to a lasting seal and clean results.
Always verify cure time, temperature range, and surface prep requirements on the manufacturer data sheet. If in doubt, contact the manufacturer or check local code guidance to confirm suitability for exterior brickwork.
Sealant types and when to use each
Choosing the right sealant for your brickwork depends on understanding its chemistry. Here are three common types:
Silicone: Flexible, good for wide joints (6mm+), resistant to mold. Urethane: Elastic, ideal for narrow joints (3-6mm), great adhesion but can stain if not fully cured.
Acrylic: Rigid, suitable for very narrow joints (1-3mm), water-based so easier cleanup but less flexible. Use silicone or urethane for wider joints to prevent cracking under movement.
Substrate and mortar compatibility checks
Before applying, check your sealant’s compatibility with your brick and mortar. Here’s how:
1. Adhesion test: Apply a small amount to a hidden area. Let it cure as per manufacturer’s instructions. Try to remove – if it peels off easily, it’s not compatible.
2. Staining check: Look at the technical data sheet for staining potential. Some sealants can stain mortar or bricks if not fully cured. If unsure, test on a small area.
Color, finish, and aging considerations
Pigment and finish choices impact your sealant’s lifespan and appearance:
Color: Match the joint color to your mortar for a seamless look. Dark colors can fade faster under sunlight.
Finish: Smooth or textured? Smooth is easier to clean but may stand out on rough surfaces. Textured blends better but can trap dirt.
Aging: Check UV stability. Prolonged sun exposure can cause fading and cracking. Opt for sealants with good UV resistance, especially for south-facing walls.
Surface Preparation and Masking Best Practices
Start with a clean brick face and dry joints, removing dust, efflorescence, and old residue as needed. Allow surfaces to dry before applying new sealant to ensure proper adhesion. Install backer rod where appropriate to control depth and shape the bead.
Mask the edges to prevent smeared excess and ensure straight, even lines. Use masking tape to define corners and butt joints, and remove it before the sealant skins over to avoid tearing fresh edges.
Cleaning and inspection before masking
Before you start masking, it’s crucial to clean and inspect your brickwork. This ensures the sealant adheres properly and gives a neat finish.
- Remove loose mortar: Tap joints with a handle or tool to dislodge any loose material. Ignoring this can lead to sealant failure.
- Efflorescence removal: Brush off white powdery deposits using a stiff brush. Sealant won’t stick to efflorescence.
- Contaminants check: Ensure no dirt, grease, or other contaminants remain. They can prevent sealant adhesion.
- Joint depth inspection: Check joints are deep enough (at least 1/4 inch) for proper sealant fill.
- Joint geometry check: Ensure joints are consistent and straight. Irregularities make masking difficult.
- Crack assessment: Inspect for cracks that need repair before sealing.
- Moisture check: Ensure bricks and mortar are dry. Wet surfaces prevent sealant from curing properly.
- Backer rod installation: Insert backer rod into wider joints (over 1/2 inch) to control bead size and shape.
Quick rule: Always clean and inspect before masking. It saves time and ensures a professional finish.
Tape selection and placement strategies
Choosing the right tape and applying it correctly is key to preventing smears and uneven edges. Here’s how:
First, select a tape with strong adhesion suited to your surface. Low-tack tapes are for smooth surfaces; high-tack for textured or porous.
Apply tape in the direction of the joint. This helps prevent it from peeling off during sealant application.
For textured brick, use a straight edge like a trowel or level to create consistent mask lines. Press firmly along the entire length to ensure good adhesion and prevent sealant bleed.
Protecting adjacent surfaces and staging work
Protecting nearby surfaces and working in stages prevents cured-smear interactions, keeping your job site clean.
Use protective films: Apply painter’s tape and plastic sheeting to protect windows, siding, or other sensitive areas from sealant splatter. Remove once sealant is fully cured.
Work in logical sections. Seal one section at a time, allowing the sealant to cure before moving on. This prevents uncured sealant from smearing onto freshly masked areas.
Staging tip: Start from the top and work your way down. This ensures you don’t drip sealant onto areas you’ve already finished.
Application Methods for Sharp, Uniform Beads
Load the caulking gun or nozzle correctly and keep a steady hand as you move along the joint. Maintain consistent contact with the joint profile to produce a uniform bead without gaps. Practice on a mock section to nail the rhythm before working the real joints.
Work in a logical sequence to prevent dragging wet sealant into completed areas. Keep a damp finger or smoothing tool ready to shape the bead cleanly as you go, and pause if you need to rework a section to avoid ridges.
Proper bead size and deposition technique
First off, you gotta match your bead size to your joint width. A good rule of thumb is: joint width equals bead diameter. So if your joint’s 1/2″, use a 1/2″ bead.
Now, depth’s another story. You want your bead to be about half the joint depth. If you’re using a standard 3/4″ joint, go for a 3/8″ bead. But remember, check your local codes and manufacturer’s recommendations, as they can vary.
Feeling that right pressure is key. You want it firm but not too hard. Imagine squeezing a stress ball – you don’t wanna squish it flat, just give it a good, steady squeeze. That’s the feel you’re going for here.
Movement’s crucial too. Your bead should move smoothly along the joint with even pressure. If it’s sticking or breaking up, something’s not right. Check your mix design and make sure you’ve got proper base compaction. Don’t be afraid to adjust your technique if needed.
Gun handling and hand positioning tips
You’ve got your concrete mix right (check earlier section) and you’re ready to start shooting those beads. Here’s how to handle the gun for smooth, steady results:
First off, keep your wrist straight. Bending it can cause wobbles in your bead line. Hold the gun like a pen, not a hammer.
Now, position your hand close to the nozzle. This gives you better control over the flow and helps minimize start/stop blemishes. Remember, less is more here – a light touch goes a long way.
Lastly, move at a steady pace. Don’t rush or jerk the gun around. Smooth, even movements create sharp, uniform beads. And don’t forget to check your application method before you start.
Working in sections and managing open time
To keep your beads sharp and uniform, work in small sections. This way, you won’t waste sealant or lose that professional look.
First, check the product label. It’ll tell you how long you’ve got to tool the bead before it sets – that’s your open time. It varies, so don’t guess.
Now, plan your work area. You want a space small enough that you can tool all the beads within their open time. A good rule of thumb is about 3-4 square feet at a time.
Once you’ve got your section ready, apply your bead. Remember, keep your gun steady and move slow for a sharp line. Then, while the sealant’s still workable, tool that bead. After that, move on to the next section. Rinse and repeat until you’re done.
Smear-Free Tooling and Cleanup Methods
Tooling should follow a clean, deliberate pattern to compress and shape the bead without pulling excess sealant into the brick face. Use the right tooling blade or finger method to sweep the bead to a crisp edge. Wipe away excess promptly to prevent smears from setting.
Plan the sequence of wiping and taping to avoid dragging uncured sealant across finished edges. Always verify that the chosen solvent is compatible with the sealant on the label or data sheet before using it.
Tooling motions and pressure control
The key to a smear-free joint lies in your tooling technique. Here’s how to do it right:
- Use the right tool: A rubber squeegee or jointer is best for brickwork. Rentals start at around $20/day.
- Angle it right: Hold your tool at a 45° angle to the joint. This lets you control the sealant and avoid pushing it onto the faces.
- Stroke gently but firmly: Pull your tool along the joint in one smooth motion, applying even pressure. Don’t rush; take your time for a neat finish.
- Keep it clean: Wipe your tool on a damp cloth between strokes to remove any excess sealant. This prevents smears and keeps your joints looking sharp.
- Avoid overfilling: Too much sealant makes tooling harder and increases the risk of smears. Keep your beads thin and uniform.
Wiping and solvent use without staining
Solvent wiping helps remove excess sealant and prevents stains. Here’s how to do it right:
Always test first: Before you start, wipe a small, inconspicuous area with your chosen solvent to ensure it doesn’t stain or damage the brickwork.
Use a lint-free cloth dampened with solvent. Wipe along the joint, not across it, to avoid smearing. Start at one end of the joint and work your way towards the other, applying even pressure.
Let it dry: After wiping, let the area dry completely before inspecting or touching it. This prevents residue from transferring onto your hands or clothes.
Tape removal timing and technique
Removing masking tape at the right time is crucial for a clean edge. Here’s when and how to do it:
Wait until dry: Leave the tape on until the sealant has fully cured. This usually takes 24-48 hours, depending on the sealant type and weather conditions.
Pull at a 45° angle: When ready, pull the tape off at a 45° angle to the surface. This helps prevent lifting the bead and leaves a clean edge.
Go slow: Pull the tape slowly and steadily to avoid snagging or tearing it. If you feel resistance, stop and check if there’s any remaining adhesive. Use a razor blade to score and remove it if necessary.
Troubleshooting Common Issues and Corrective Actions
Common problems include smeared edges, ridges, poor adhesion, and surface contamination. Identify the symptom and choose a safe rework plan that fits the sealant’s cure state. When reapplying, follow the product instructions for surface prep and timing.
Consult the product cure data and manufacturer guidance before attempting repairs or resealing. If needed, adjust the technique or rework area in small sections to avoid repeating the issue across the full joint.
Fixing smears, ridges, and uneven beads
If you notice any imperfections like smears, ridges, or uneven beads after applying the sealant, don’t panic. You can still correct these issues within the working window.
For smears: Use a clean, damp cloth to gently wipe away the excess sealant before it cures. If it’s already cured, you might need to use a sharp tool to carefully scrape it off.
For ridges and uneven beads: Re-tool the affected area using your trowel or float, ensuring even pressure and smooth motions. If the bead is too large, remove excess sealant with a damp cloth before re-tooling.
If these corrections can’t be made within the working window, allow the sealant to cure fully, then carefully remove and redo the affected sections following your initial application methods.
Addressing adhesion failures and staining
Adhesion failures and staining can occur due to improper surface preparation or contamination. Here’s how to diagnose and fix these issues:
For adhesion loss: Inspect the affected area for any signs of moisture, efflorescence, or other contaminants. Clean the surface thoroughly using a suitable cleaner, then allow it to dry completely. If necessary, apply a primer designed for your sealant type before reapplying.
For staining: Identify the source of the stain – it could be from dirt, grease, or even incompatible materials. Clean the surface using an appropriate cleaner and, if needed, use a mild abrasive to remove any stubborn stains. Allow the surface to dry completely before reapplying sealant.
If adhesion loss or staining persists after these steps, consider replacing the entire joint as it might be compromised.
When to call a professional
While DIY projects can save you money, there are times when it’s best to call in a professional. Here are some scenarios where you should consider seeking expert help:
Structural movement: If your brickwork is showing signs of structural movement or instability, do not attempt to seal it yourself. This could indicate a serious underlying issue that requires professional assessment and repair.
Extensive failure: If a large section of your sealant has failed, it might be more cost-effective and time-saving to hire a professional. They have the tools and experience to handle extensive repairs efficiently.
Uncertain compatibility: If you’re unsure about the compatibility of your chosen sealant with your brick type or existing sealants, consult a professional before proceeding. Incorrect application can lead to further damage and costly rework.
Maintenance, Inspection, and Visual Checkpoints
Establish a simple visual routine to inspect joints for cracks, gaps, or edge degradation. Note any staining or edge wear that could indicate sealant deterioration. Track areas that see heavy weather exposure for closer monitoring.
Plan resealing around observed wear and performance, not on a fixed calendar. Use your checks to decide when to re-clean, re-mask, and reseal to maintain a consistent appearance and protection.
Visual checkpoints for seal integrity
Regularly inspect your brickwork to ensure the sealant is performing as expected. Here’s a simple checklist to follow.
- Cracking: Look for any cracks in the sealant bead. Cracks can let water in, leading to further damage.
- Loss of adhesion: Check if the sealant is peeling or lifting from the bricks. This could indicate a poor initial application or aging sealant.
- Discoloration: Inspect for any changes in color, which may suggest UV degradation or contamination.
- Mold or mildew: Look for signs of mold or mildew growth. This indicates water intrusion and could lead to health issues.
- Efflorescence: Check for white, powdery deposits on the bricks. These can indicate moisture behind the sealant.
- Bubbling or blistering: Inspect for any bubbles or blisters in the sealant. This could signal trapped moisture or a poor application.
- Uneven wear: Check if some areas of the sealant are wearing faster than others. This might indicate varying exposure to elements.
- Document issues: Keep records of any problems found, including photos and notes on location and severity.
Quick rule: Inspect annually, or after severe weather events, and address any issues promptly to prevent minor problems from becoming major ones.
Seasonal and movement-joint considerations
Temperature changes and building movement can affect your sealant’s performance. Here’s what to monitor seasonally.
- Freeze-thaw cycles: Inspect for any damage after freeze-thaw periods. These cycles can cause cracking or delamination.
- Expansion and contraction: Check for signs of stress due to building movement, such as cracks at corners or near openings.
- High heat and UV exposure: Inspect for discoloration or degradation after prolonged sun exposure. This is especially important in areas with high UV index.
- Rain and moisture intrusion: Check for water stains, mold, or mildew growth after rainy seasons. These can indicate sealant failure.
- Movement joints: Ensure movement joints remain clear of debris and are functioning properly to accommodate building expansion and contraction.
- Snow and ice accumulation: Inspect for any damage caused by snow or ice buildup, especially in areas prone to these conditions.
- Sealant flexibility: Check that the sealant remains flexible enough to accommodate building movement. This is crucial for preventing cracking due to stress.
Quick rule: Inspect your brickwork at least twice a year – once before winter and again in spring – to ensure it’s ready for changing weather conditions.
Safety, disposal, and environmental precautions
Proper handling of sealant materials is crucial for your safety and the environment. Here’s a checklist to follow.
- Personal Protective Equipment (PPE): Always use appropriate PPE when working with sealants, including gloves, goggles, and a respirator if needed.
- Ventilation: Ensure adequate ventilation in the work area to minimize solvent fumes. If possible, use fans to blow fumes away from you.
- Disposal of used materials: Follow local regulations for disposal of sealant tubes and other packaging. Do not dispose of them with regular trash.
- Solvent recycling: If possible, recycle or reuse solvents instead of disposing of them. This helps reduce environmental impact.
- Wash hands thoroughly: After handling sealants, wash your hands thoroughly to remove any residue.
- Avoid contact with skin and eyes: Be careful not to get sealant on your skin or in your eyes. If contact occurs, rinse immediately with water.
- Store materials properly: Store sealants and solvents in a cool, dry place away from heat sources and direct sunlight.
Quick rule: Always prioritize safety first. Follow these guidelines to protect yourself and the environment while working with sealants.
Conclusion
Clean, neat brick sealant lines protect your work from leaks, avoid costly repairs, and look pro. Put safety first, test in a hidden spot, and proceed only after you’ve confirmed the right sealant and compatibility for your brick and mortar.
For the actual work, follow this practical checklist in order: verify masking is in place and set up before you open a cartridge; apply consistent beads with the recommended tool and method; smooth or tooling to achieve a smear-free surface; clean any excess while it’s still workable; and perform a quick inspection after curing to catch issues early and fix them before moving on.
Common mistakes to avoid are rushing the masking or skipping surface prep, choosing the wrong sealant for your brick or moisture conditions, and letting excess sealant smear into joints or onto faces. Always double-check compatibility, work in a clean, dry area, test your technique on a small section, and keep safety gear on hand to prevent slips, skin contact, or fumes from getting out of control.
If the project knocks up against stubborn issues or structural concerns, don’t force it. When you see persistent leaks, cracking, or poor adhesion after basic fixes, call a professional. Stay deliberate, stay safe, and finish with confidence—you’ve got this, and the brick will reward the care with durable, clean lines that last.
FAQ
How do I protect brick while masking to keep the sealant lines clean?
Use painter’s tape or masking film along the edge of the brick to protect the face. Press the tape firmly so no sealant seeps under. Remove tape while the sealant is still tacky to avoid pulling it.
What’s the best way to tool for a sharp bead and prevent smear on brick?
Work with a steady, even pass and keep a consistent angle. Don’t drag the tool across the brick face; keep it close to the bead and roll it along the line to seal the edge cleanly. If you get smear, wipe with a damp rag while the sealant is tacky.
How should I clean up squeeze-out without staining brick or mortar?
Wipe excess with a damp cloth or sponge before the sealant skins over. For stubborn smear, use the appropriate cleaner recommended by the sealant manufacturer and follow the label directions. Never use harsh solvents without checking the product instructions.
How can I tell if the sealant has cured enough for touch-up or final cleaning?
Check the manufacturer’s cure guidance on the product label and datasheet. Do not disturb the bead until it reaches the stated handling time. If in doubt, wait a bit longer and test a small spot before touching the entire line.