
Introduction
Keep sealant joints clean by masking, tooling, and cleanup without smearing. This intro covers how to prep surfaces, mask off areas, and finish joints so you don’t drag old sealant or create ridges. It’s a practical, hands-on guide you can follow on a DIY project from masking to cleanup.
We’ll walk through masking off the edges, cleaning the surface, and tooling the bead for a smooth finish. Focus on keeping the surrounding surface clean and dry, and check the manufacturer instructions for curing times or tooling tips. If unsure, check the product label or local rules to stay within guidance.
Key takeaways
- Surface cleaning before sealant helps adhesion and prevents smeared edges.
- Masking tape width and placement should frame clean, crisp bead lines.
- Choose compatible sealant and backer rod; prepare materials with dry hands.
- Tooling with steady pressure and a moist finger aids smooth bead.
- Immediate cleanup with compatible solvents; wear gloves and ventilation to stay safe.
- Weather, timing, and storage influence cure quality; plan accordingly and monitor.
Table of Contents
- Introduction
- Key takeaways
- Why Clean Sealant Joints Matter
- Choose the Right Sealant, Backer Rod, and Prepare Materials
- Surface and Joint Cleaning Before Sealing
- Masking Strategies to Prevent Smearing and Ensure Crisp Lines
- Tooling Techniques for a Smooth Bead Without Smears
- Immediate and Post-Cure Cleanup Best Practices
- Weather, Timing, Storage, and Conditioning
- Troubleshooting, Maintenance, and Cost-Effective Practices
- Conclusion
- FAQ
Why Clean Sealant Joints Matter
Clean joints directly influence how well the sealant sticks and how well weather is kept out. Contaminants can weaken adhesion and create micro-leaks that shorten joint life. The goal is to avoid smearing while delivering a clean, professional bead.
Common contaminants include dust, oils, curing compounds, efflorescence, and old residue from prior sealants. Simple pre-cleaning tests, such as a tub test or a wipe with isopropyl alcohol, help decide if re-cleaning is needed. Cleanliness also communicates reliability to clients and supports precise masking and tooling later.
Performance and longevity reasons
Clean joints ensure better adhesion of sealant, preventing it from peeling or delaminating over time. Contaminants like dust, grease, or old sealant residues reduce bond strength, leading to premature failure.
Proper tooling is crucial for a neat bead that doesn’t trap dirt or moisture. Irregular beads can hold water, promoting mold growth and further damaging the joint. This shortens service life and increases maintenance costs.
Clean joints allow sealant to cure properly, maintaining flexibility under movement and temperature swings, extending joint life.
Visual and code/inspection considerations
Neat joints not only look better but also help maintain warranties and meet project specifications or inspection standards. Here’s a quick checklist to ensure you’re on track:
- Check for clean, dry surfaces: Sealants won’t stick well to dirty or wet surfaces.
- Inspect joint width and depth: Incorrect dimensions can lead to improper sealant application and potential leaks.
- Verify masking is secure: Loose masking allows smearing, ruining the bead’s appearance.
- Check tooling for correct size and shape: Wrong tools create irregular beads that trap dirt or moisture.
- Ensure sealant type matches joint requirements: Using the wrong sealant can cause premature failure and aesthetic issues.
- Confirm application temperature is within range: Applying sealant outside recommended temperatures can affect cure time and performance.
- Check for proper tooling after application: Irregular beads or gaps indicate problems during tooling.
- Inspect cured joint for any defects: Cracks, bubbles, or other issues may require rework.
Quick rule: Neat joints not only look better but also help maintain warranties and meet project specifications or inspection standards. Keep them clean to avoid call-backs and rework.
Choose the Right Sealant, Backer Rod, and Prepare Materials
Sealant chemistry options include silicone, polyurethane, and acrylic or MS polymer. Each works best with certain substrates and environmental exposure, and movement needs should guide the choice. Check the product data sheet for compatibility and limits before proceeding.
Backer rod size and type help control depth and shape of the joint and improve sealant performance. Prepare a materials kit with compatible primers, sealant cartridges, backer rods, masking supplies, and any required treatments. Use the data sheet to confirm substrate compatibility, joint dimensions, movement expectations, and cure conditions before masking and tooling.
Selecting sealant type and compatibility
First off, you gotta understand that not all sealants are created equal. They differ in what they’re made of and how they stick to surfaces.
Silicone is your best bet for bathrooms and kitchens ’cause it’s waterproof and flexible. But it doesn’t like paint, so avoid using it on surfaces you plan to paint later.
Polyurethane, on the other hand, sticks well to painted surfaces but isn’t as good with water. It’s great for outdoor use where water exposure is minimal.
Then there’s acrylic. It’s cheap and easy to paint over, but it ain’t got the staying power of silicone or polyurethane. And it doesn’t like water much either.
Hybrid sealants are a mix of two types. They can give you the best of both worlds, but they’re usually pricier.
Now, before you buy, check the product data sheet to make sure it’s compatible with your surfaces. Some sealants don’t play nice with certain materials like metal or marble.
Also, look for how much movement the sealant can handle. If your joint’s gonna move a lot, you need a sealant that can stretch and shrink with it. Most product sheets will tell you this in millimeters of movement.
Backer rod selection and correct placement
First off, you gotta choose the right backer rod for your joint. It’s your bond-breaker, so it needs to be compressible but not too soft.
Check your sealant’s label. It’ll tell you what size and material to use. Common sizes are 1/4″, 3/8″, or 1/2″. Foam is usually the go-to, but some jobs need rubber.
Now, place that backer rod right in the center of your joint. It should fit snug, not too tight, not too loose. You want it to compress evenly when you apply the sealant.
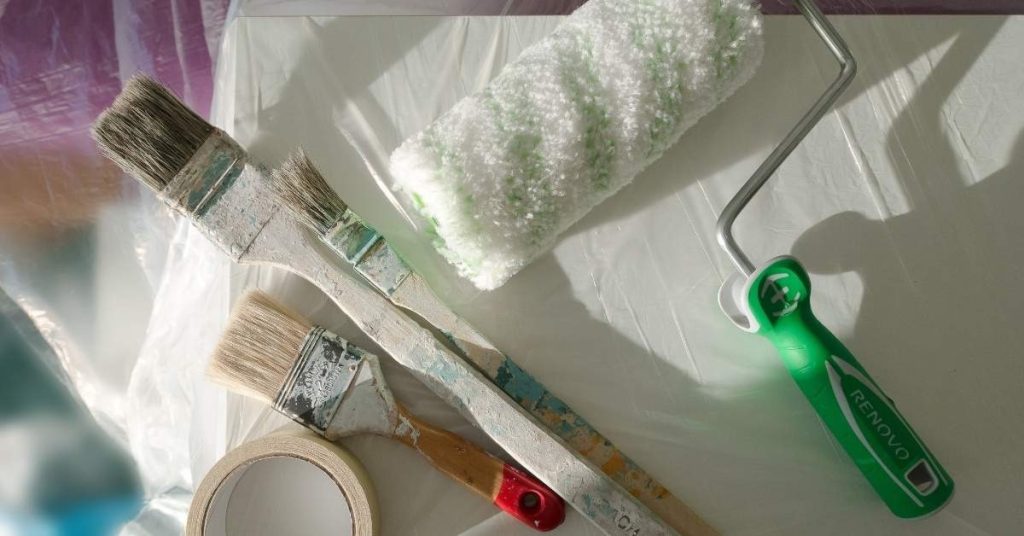
Tools and materials checklist
Before you start your sealing project, use this checklist to ensure everything is staged and ready. This will help prevent costly mistakes and rework.
- Sealant: Check label for compatibility with substrate and joint movement. Ensure it’s within its usable life (check manufacture date).
- Backer rod: Confirm size matches your joint width (check earlier section on backer rod selection).
- Sealant gun: Inspect for cleanliness and proper functioning. Check nozzle for correct size.
- Tapes: Ensure they’re the right type for your substrate (e.g., foil-faced insulation, metal, etc.).
- Tooling tools: Have a putty knife or trowel ready for smoothing and shaping sealant.
- Cleaners: Check you have appropriate cleaner for the substrate (e.g., acetone for paint, detergent for concrete).
- Rags: Ensure they’re clean and suitable for the job. Old t-shirts or shop rags work well.
- PPE: Check you have safety glasses, gloves, and any other required personal protective equipment.
Quick rule: Always check your materials against the job at hand. What works on one project might not work on another. Better to double-check now than face costly rework later.
Surface and Joint Cleaning Before Sealing
Define the substrates and contaminants you will encounter, such as concrete, masonry, tile, metal, or wood, and pair them with recommended cleaning methods. Detergent washes, degreasers, acid-etching where appropriate, and mechanical scrubbing or pressure washing are typical options. Address old sealants and residues during cleaning.
Establish a decision flow for cleaners and understand how dwell times, rinsing, and drying influence adhesion. Ensure the surface is moisture-free and dust-free before masking. Test porosity and readiness to seal to avoid surprises at the bead.
Identifying contaminants and the right cleaners
Before you start cleaning, identify what’s on your surface. Here’s how:
- Oil or grease: Looks shiny, feels slick.
- Old sealant residue: Often cloudy, may be tough to remove.
- Dirt: Visible particles, can be wiped off easily.
- Efflorescence: White powdery substance on concrete or masonry.
Now match the cleaner:
- Oil/grease: Use a degreaser. Follow product guidance for dwell time and rinse off.
- Dirt: A detergent wash should do it. Rinse well.
- Efflorescence: Muriatic or acid-etch may be needed. Be careful, follow safety guidelines.
When and how to prime
Priming helps adhesion and seals porous surfaces. Here’s when:
- Concrete or masonry: To seal pores, improve adhesion.
- Metal: To prevent rust, enhance paint/primer bond.
- Wood: To seal grain, improve stain/paint adhesion.
Test for adhesion if unsure. Follow these steps:
- Scrape a small area.
- Apply primer, let it dry as per instructions.
- Check for any peeling or flaking.
Apply primer following manufacturer’s instructions. Let it flash off before sealing.
Masking Strategies to Prevent Smearing and Ensure Crisp Lines
Choose masking tapes that are compatible with adjacent surfaces and come off cleanly without residue. Low-tack painter’s tape or specialty masking tapes are common choices to prevent edge lifting. Plan for clean, sharp edges with appropriate tape placement.
Map masking geometry and edge stops, and consider transitions where joints meet other surfaces. Note whether priming affects tape adhesion or cure times, and plan masking around primed versus unprimed areas. Remove tape at the right moment to avoid peel-back or smearing.
Tape types and placement technique
Choosing the right tape is crucial for clean lines. Go for low-tack painter’s tape or specialty masking tapes that won’t leave residue on surfaces like glass, metal, or wood.
For different finishes, consider:
- Satin or semi-gloss: Use blue painters’ tape. It’s affordable and works well on most surfaces.
- High-gloss or delicate surfaces: Opt for specialty tapes like FrogTape or Green Frog Tape. They have stronger adhesion and can handle high heat, but cost more.
Placing tape:
- Align edges precisely to create crisp lines.
- Stagger overlaps to prevent bleed-through at seams.
- Press down firmly with a squeegee or your fingers to ensure good adhesion and no gaps.
Timing for mask removal
Removing tape at the right time prevents smearing and ensures clean lines. Here’s how:
Before removing, ensure the sealant is tack-free but not fully cured. This usually takes 24-72 hours, depending on the product and conditions.
Check the manufacturer’s guidelines for your specific sealant. Then, follow these steps:
- Gently pull the tape at a 45-degree angle to minimize residue.
- Inspect edges for tight lines and re-tape if minor bleed occurs.
- Allow the sealant to cure completely before exposing it to moisture or heavy traffic.

Tooling Techniques for a Smooth Bead Without Smears
Set a realistic bead size and joint profile for the project, based on interior or exterior use and joint shape. Use a clean nozzle cut and an angle that promotes controlled flow. Proper nozzle prep helps avoid gaps and sags.
Practice steady gun handling and consistent tooling motion with the correct technique. Tooling angles and the sequence, including extrude, tool, and pause, produce a uniform surface. Use smoothing methods that minimize contact with adjacent surfaces to prevent smearing.
Nozzle, bead sizing, and gun technique
Choosing the right nozzle is crucial for a smooth sealant joint. For common DIY applications, use a 1/4″ or 3/8″ nozzle for interior jobs and up to 1/2″ for exterior work.
The nozzle’s cut should match your joint width. A clean, full cut controls bead flow, preventing gaps. Cut at a 45° angle for rectangular joints, 90° for round ones.
Steady trigger pressure is key to consistent bead width. Hold the gun perpendicular to the joint, applying even pressure. Move at a steady pace to avoid drips or sags.
Tool selection and tooling motions
Selecting the right tools ensures a smooth, smear-free finish. Here are your options:
- Smoothers (e.g., 6″ or 12″): These wide-bladed tools create an even surface. Use at a 45° angle to the bead for best results.
- Spatulas (e.g., 3″ or 4″): Narrower than smoothers, spatulas are great for tight spaces and detailed work. Use at a 60°-70° angle.
- Solvent-dipped wipes: These help clean up excess sealant without smearing. Wipe along the bead’s length after tooling.
Immediate and Post-Cure Cleanup Best Practices
Separate uncured versus cured sealant scenarios and gather the correct tools and solvents for each. Wet-cleanup should occur promptly to prevent smearing, while cured material requires careful mechanical or solvent-based removal.
Outline masking removal timing and surface protection during cleanup. Include PPE, ventilation, and proper disposal guidelines to minimize exposure and environmental impact. After cleanup, inspect edges and store tools and materials for next use.
Wet Cleanup and Solvent Use
When it comes to uncured sealant, time is of the essence. You’ve got a small window to clean up before the bead cures and becomes difficult to remove.
Choose your solvent wisely. Most common sealants like silicone or acrylic can be cleaned with isopropyl alcohol or acetone. But check your specific sealant’s label first. Some may require special solvents.
Dab, don’t wipe. Use clean rags or cartridges to apply the solvent. Wiping can spread the uncured bead and cause smearing. Work quickly but carefully to avoid this.
Removing Cured Sealant and Surface Touch-ups
Cured sealant is a different beast. It’s tougher, but it can still be removed safely with the right tools and methods.
Start with plastic scrapers or gentle hand tools like razor blades. Work carefully to avoid damaging the joint or surrounding surfaces. For stubborn residue, use solvents compatible with your sealant type. Acetone works on many cured sealants, but always check first.
If you’ve got smear marks or need to repaint, now’s the time. Lightly sand any affected areas, wipe clean with a suitable solvent, then prime and paint as needed. Be patient; this process takes time and care.
Weather, Timing, Storage, and Conditioning
Substrate and ambient temperatures, humidity, and surface condition influence adhesion and cure. Check the product data for suitable ranges and how deviations affect performance. Document any conditions that could impact the joint later.
Store and condition cartridges properly before use and acclimate them to workspace temperature. Avoid freezing and follow any warming or cooling steps recommended by the manufacturer. Rely on the data sheet for open time and cure guidance and note site conditions for traceability.
Planning work around weather and cure times
Timing your sealant job right is crucial. Here’s what to consider:
Ambient Temperature: Ideal range is 50-90°F (10-32°C). Below 50°F, cure time increases and adhesion may suffer. Above 90°F, sealant can skin over too quickly, leading to imperfections.
Relative Humidity: Keep it between 40-70%. Too low, and the joint might shrink; too high, and moisture could compromise adhesion. Check product specs for exact ranges.
Weather Window: Apply sealant in dry, non-windy conditions with minimal direct sun exposure. Rain, dew, or rapid temperature swings can ruin your work. If rain’s expected, postpone the job until it passes and allow extra cure time if temps drop significantly.
Storage and pre-use conditioning of sealant
Proper storage and conditioning ensure your sealant performs as expected:
Temperature: Store cartridges between 40-85°F (4-29°C). Avoid freezing. Acclimate them to the job site temperature, usually 24 hours before use.
Humidity: Keep cartridges dry during storage and transport. High humidity can cause moisture migration, ruining the sealant.
Pre-use Conditioning: Check the product data sheet for any specific warming or cooling procedures. Ensure the nozzle and seal are intact before use. Perform a simple test bead to confirm the sealant’s consistency and workability.
Troubleshooting, Maintenance, and Cost-Effective Practices
Identify common failure modes like bleed, gaps, or poor adhesion with quick tests and visual checks. Use corrective steps that align with the substrate and sealant type, including resealing or re-profiling as needed. Document failures to guide future work.
Establish a routine for maintenance checks and simple inspections after weather events. Consider cost-saving strategies such as material selection, reusing masking where feasible, and batching labor tasks. Track outcomes to improve future maintenance decisions.
Common problems and how to fix them
Sealant joints can face various issues over time. Here are some common ones:
Adhesion failure: If the sealant isn’t sticking, it’s likely due to a dirty or incompatible surface. Solution: Re-clean the area and ensure you’re using a compatible primer.
Sinkage or sagging: This happens when too much sealant is applied or the backer rod is missing. Solution: Remove excess sealant, replace the backer rod if necessary, and re-profile the joint.
Smear marks: These occur due to improper tooling or mask removal. Solution: Re-clean the area, apply proper masking technique, and optimize your tooling.
Long-term inspection and maintenance tips
Regular checks help extend sealant life. Use this checklist after extreme weather or every six months:
- Visual check: Look for cracks, gaps, or discoloration.
- Joint flexibility: Gently press the joint to ensure it’s still flexible.
- Sealant depth: Ensure the sealant is still at the right level in the joint.
- Surface staining: Check for any signs of staining or dirt buildup.
- Joint movement: Verify that the joint can still move freely with the substrate.
- Backer rod: Ensure it’s still in place and hasn’t shifted.
- Sealant edges: Check for any signs of lifting or peeling.
- Mold or mildew: Look for any signs of growth, which can indicate a moisture issue.
Quick rule: If you notice anything amiss, address it promptly to prevent small issues from escalating.
Balancing cost and performance
When choosing a sealant, consider both initial cost and long-term performance:
Higher-performance sealants: These often have better adhesion, durability, and resistance to extreme weather. They’re usually more expensive but can save you money in the long run by reducing rework costs.
Proper technique: No matter what sealant you choose, proper application is key. This includes using compatible primers, applying the right amount of sealant, and allowing adequate cure time.
Cheaper products: While they may seem like a bargain upfront, cheaper sealants often don’t perform as well or last as long. They can end up costing more in the long run due to rework or replacement.
Conclusion
The main takeaway is simple: clean joints start with the right materials and proper prep, and a clean, well-formed bead protects the space, looks professional, and lasts longer. Safety and durability go hand in hand—don’t rush, don’t skip steps, and verify you’re ready before you seal.
Checklist: choose the right sealant and backer rod for the joint, confirm surface prep and dry conditions, mask the edges to protect surrounding areas, apply a consistent bead, tool for a smooth finish without dragging or gaps, wipe away excess before it skins, and monitor cure conditions and storage after you’re done—test a small area first and work in a controlled sequence.
Common mistakes to avoid include skipping surface prep or masking, using the wrong sealant for the joint, and rushing tooling or cleanup. Always follow recommended cure times, work in proper weather windows, and wear eye protection and gloves when handling sealants and solvents. Keep a clean, organized work area and never mix products unless the manufacturer says it’s okay.
If you’re facing big joints, complex angles, high movement, or extreme weather, consider bringing in a pro instead of forcing a DIY fix. Stay methodical, follow the rules above, and you’ll finish with a durable, crisp seal that looks right and lasts. You’ve got this—seal it right and protect the space.
FAQ
How do I keep surface cleaning from burning me or ruining the bead?
Wear gloves and eye protection. Clean surfaces quickly with the right cleaner and a stiff brush, then wipe with a damp cloth before the sealant skin forms.
What masking techniques actually prevent smeared edges?
Use painter’s tape with a fresh edge, apply it before cleaning, and press down firmly along the joint line. Remove tape while the sealant is still smooth and fresh to avoid pull-back.
How should I apply sealant for a clean joint without extra tooling mistakes?
Load the caulk gun properly, cut the tip to expose the right bead size, and apply in a steady, continuous bead. Tool soon after to shape, keeping a consistent cross-section and avoiding gaps.
What cleanup methods save time and reduce smears after the job?
Wipe excess sealant with a damp cloth or a manufacturer-approved cleaner before it skins. Clean tools immediately after use to prevent hard-to-remove residue and keep edges sharp.