
Introduction
A gas leak can be detected by noticing strong odors, unusual hissing sounds, and by performing simple, safe inspection checks.
You’ll learn how to conduct basic at-home checks, recognize common signs, and respond promptly to a suspected leak.
The guide walks through practical steps, general safety precautions, and everyday tips to help you act calmly and effectively.
Key takeaways
- Recognize odors, symptoms, and visual signs; evacuate and avoid ignition sources immediately.
- Do not operate electrical switches; leave area, call emergency gas line.
- Have a maintained gas detector and fire extinguisher accessible for quick response.
- Use approved leak testing methods and document results for future reference.
- Know shut-off procedures for appliances, meters, and tanks before testing.
- After detection, contact utility or inspector; do not re-enter until cleared.
Table of Contents
- Introduction
- Key takeaways
- Quick overview: is gas in your home safe and when leaks happen
- Recognizing signs and symptoms of a gas leak
- Immediate safety stops: do’s and don’ts if you suspect a leak
- DIY detection methods and step-by-step testing
- Tools and materials checklist (what to have on hand)
- How to shut off gas safely (appliances, meter, tank)
- Preventive maintenance to reduce future leaks
- Common repair costs, insurance & next steps after detection
- Conclusion
- FAQ
Quick overview: is gas in your home safe and when leaks happen
Natural gas and propane are the two most common household fuels, and leaks typically reach you through gas lines, tanks, or appliances. Leaks can cause fire or health problems if left unchecked, so watch for smell, hissing sounds, changing bills, or pilot-light issues. DIY detection is fine for non-emergency checks and basic ventilation or portable detectors, but call your utility or 911 for a real leak or when in doubt.
Odorants help many people notice leaks, but some folks may not detect the odor, so extra alert systems are important for at-risk groups like the elderly, disabled, pregnant people, or those with respiratory conditions. If you smell gas or hear a strong hiss, evacuate, avoid open flames and electrical switches, and call the utility or emergency services from a safe location. If you’re trained and it’s safe, you can shut off the gas at the service valve; otherwise wait for professionals to handle it.
Types of household gas and typical uses
Natural gas is the most common type used for heating, cooking, and water heating. It enters your home through underground pipelines connected to appliances like furnaces, stoves, and hot water heaters.
Propane is another option often found in rural areas or where natural gas isn’t available. Propane comes in tanks and is commonly used for grills, portable heaters, and sometimes as a backup fuel source for home heating systems.
The key difference lies in how they’re detected. Both have an odorant added to help you smell them, but propane can be stored outside your home while natural gas runs through underground pipes directly into your house.
Why leaks are dangerous — health, fire, and migration risks
A leak can cause serious issues like explosions or fires if the gas mixes with air in your home. The smell of rotten eggs is a clear sign something’s wrong.
If you notice hissing sounds near appliances or rising utility bills without increased usage, it could indicate a hidden leak that needs immediate attention to prevent health risks such as headaches, dizziness, and nausea.
Gas can also migrate into walls, attics, or basements through small cracks or openings. This migration increases the risk of an explosion if ignited by a spark from electrical switches or pilot lights.
When to DIY and when to evacuate/call emergency services
If you suspect a minor issue, like an appliance not working properly, it’s okay to check for leaks using soap bubbles or portable detectors. But if there’s a strong smell of gas, visible signs of leakage, or physical symptoms like dizziness, get out immediately.
Once outside, call your utility company or 911 right away and don’t re-enter until they say it’s safe. If you’re trained to shut off the main valve and have access to it, do so before evacuating if possible.
Remember, safety first. Don’t use any electrical devices inside a suspected gas leak area as sparks can ignite an explosion. Stick to cell phones outside or from a distance.

Recognizing signs and symptoms of a gas leak
Gas leaks show up as sensory, visual, and environmental clues: a rotten-egg odor and unusual hissing near fuel lines or appliances, patchy dead vegetation, or rising bubbles in standing water. If any sign is detected, evacuate immediately and contact the gas company or emergency services; avoid switches, flames, or phones in the area until it’s safe.
These indicators matter because they signal a dangerous situation that can worsen quickly. Understanding them helps you act fast, protect others, and know what to check or report if you’re unsure about a source. If in doubt, rely on official instructions and the product labels for your equipment.
Sensory and environmental signs to watch for
If you smell a strong, rotten egg odor around your home, it’s likely the scent of natural gas. This is how suppliers make leaks easier to detect. Pay attention if you hear hissing or whistling sounds coming from pipes or appliances, especially near fuel lines and meters.
Outside, look for unusual patches where vegetation appears dead or stunted compared to surrounding areas. These can indicate a potential leak underground. Also, check standing water for persistent bubbles rising to the surface; this could be gas escaping into the air.
Pilot lights going out frequently or appliances not working properly are also signs of low gas pressure, which might mean there’s a leak somewhere in your system. Keep an eye on these clues and act quickly if you notice them.
Health symptoms for people and pets
If anyone starts feeling dizzy, nauseous, or has headaches while indoors, it could be a sign of gas exposure. Difficulty breathing is another serious symptom that shouldn’t be ignored.
Pets can also show distress if there’s a leak nearby. Look out for coughing, vomiting, or lethargy in your animals. They often react to harmful gases before humans do.
Anytime you suspect a gas leak based on these symptoms, evacuate the area immediately and call emergency services from outside. Don’t wait around; safety comes first.
Common false positives and odor fade issues
The smell of natural gas can sometimes be mistaken for other odors like sewage or musty air, leading to confusion. Also, some people might not detect the scent due to anosmia (loss of sense of smell) or medications that affect it.
Another issue is odor fade, where prolonged exposure reduces your ability to notice the gas smell over time. This can be dangerous as you may overlook a leak if you’ve been around it for too long.
To stay safe, always rely on multiple signs like visual and environmental clues alongside sensory ones. If in doubt, err on the side of caution and contact professionals right away.
Immediate safety stops: do’s and don’ts if you suspect a leak
Immediate safety stops: do’s and don’ts if you suspect a leak. This quick guide helps you identify a leak and take immediate action to reduce ignition risk and protect occupants until professionals arrive. You’ll focus on getting everyone out, avoiding sparks, and getting verified information to responders.
Start by recognizing the signs: gas odor, hissing, dying plants, or inconsistent pilot flame, then carry out a rapid threat assessment to decide if you can safely move to fresh air. Do evacuate all people and pets, leave the building, and call the gas utility or emergency services from outside. Do not operate electrical switches, appliances, or use phones inside the structure, and never light matches or candles; avoid anything that could spark. If you know the shutoff procedure and can reach the meter or valve without entering danger, consider turning off the gas supply and then evacuating immediately, but only if it’s safe to do so.
Do — immediate safety steps (evacuate, ventilate, call)
When you suspect a gas leak, your first priority is to get everyone out of the building. Move quickly but calmly. Grab any necessary medications or documents if they’re easily accessible.
Once outside, move upwind and away from the structure. Call 911 immediately and inform them about the suspected gas leak. Also contact your local gas utility company with your address and a brief description of what you observed. Stay on the phone until help arrives.
If anyone shows signs of carbon monoxide poisoning—dizziness, nausea, or confusion—seek medical attention right away. Keep pets outside as well; they can be affected by gas just like humans.
Don’t — ignition sources and common dangerous mistakes
Avoiding certain actions is crucial to prevent a potential explosion. Here are some key things not to do:
- Use phones indoors. This includes cell phones, landlines, or any other electronic devices that could spark an ignition.
- Turn on lights. Switching electrical appliances can create sparks and ignite the gas. Keep all switches off until professionals arrive.
- Open windows if unsafe. While ventilation is important, only open windows from a safe distance to avoid entering danger zones.
- Attempt repairs yourself. Leave any fixing of pipes or tanks to trained professionals who can handle the situation safely and effectively.
Making these mistakes could escalate the situation. Follow safety guidelines strictly until help arrives.
Special provisions for children, elderly, and pets
Vulnerable individuals like children, the elderly, and pets need extra care during a gas leak evacuation. Ensure they are aware of the exit plan and can follow it quickly.
If you have young kids or seniors who may struggle to evacuate on their own, make sure someone is assigned to help them out first. Keep pets in carriers if possible to avoid confusion during an emergency.
Check for any signs of carbon monoxide poisoning such as headaches, dizziness, or nausea. If symptoms are present, seek medical attention immediately after evacuation.
DIY detection methods and step-by-step testing
This section covers safe, do‑it‑yourself tests you can perform to confirm or rule out a small gas leak. Use non‑sparking methods, soap bubbles on joints, portable gas detectors, and a clear plan to evacuate and call the utility or emergency services if needed. Know when to stop and call a pro—strong odor, hissing sounds, pilot lights out, or alarms are red flags.
These steps give you a practical flow: baseline odor check, exterior joint bubble test, appliance connections, and checking the meter area while avoiding ignition sources. You’ll learn how to apply bubble solution, read bubbles or no changes, and recheck after any adjustment, plus what to do after testing and when to shut off the supply if it’s safe to do so. This matters because quick, calm actions protect your family and property and help you know when to escalate to a professional.
Step-by-Step Process
This sequence helps you methodically check for gas leaks safely and effectively.
- Prepare your tools: Have soapy water, a bucket, and a portable gas detector ready. Check that all are in good working order.
- Turn off ignition sources: Ensure no open flames or sparks near the testing area to prevent accidents.
- Start with an odor check: Sniff around for any unusual smells of gas. If you smell it strongly, evacuate immediately and call emergency services.
- Test joints and connections: Apply soapy water to all visible joints and connections. Look for bubbles that indicate a leak.
- Check appliance connections: Inspect each connection point on your appliances carefully for leaks using the same method as step 4.
- Inspect the meter area: Check around your gas meter for any signs of leakage, especially near valves and pipes.
- Document findings: Take notes or photos to track what you find. If a leak is confirmed, shut off the main valve if it’s safe to do so.
- Contact professionals: If you suspect a significant leak or cannot isolate the source yourself, call in experts immediately.
Visual and Auditory Inspection Checklist
Use this checklist to systematically inspect your home for gas leaks when you notice potential signs of a leak.
- Appliance connections: Check all joints and valves. Look for soapy water bubbles or loose fittings.
- Pilot lights: Ensure they are lit and steady. A flickering pilot light can indicate a draft or blockage.
- Meter area: Inspect around the meter for any signs of moisture, rust, or unusual wear on pipes.
- Hoses: Check hoses for cracks, kinks, or bulges. Replace if damaged to prevent leaks.
- Listen for hissing: Place your ear near suspected areas and listen carefully for any hissing sounds.
- Check valves: Ensure all valves are fully open or closed as needed. A partially opened valve can cause pressure issues.
- Look for stains: Check walls, floors, and ceilings around pipes and connections for signs of moisture or rust.
- Inspect vents: Make sure vent lines are clear and not blocked by debris or snow.
Quick rule: Always prioritize safety over thoroughness. Evacuate immediately if you smell gas strongly.
Sock-and-Water Bubble Test and How to Perform It Safely
Mix a solution of one part dish soap to ten parts water in a bucket. Use this mixture to check for leaks around joints, connections, and valves.
Apply the soapy water liberally to suspected areas without over-saturating them. Watch closely for bubbles forming or growing larger, which indicates gas escaping from that spot.
If you find a leak, mark it with tape or a marker for later repair. If unsure about your ability to fix it safely, call in professionals immediately and do not attempt further testing until they arrive.
Using a Handheld Gas Detector or Combustible Gas Leak Detector
Select a reliable detector with sensitivity to natural gas (methane) and propane. Ensure it has an audible alarm and visual display.
Place the detector near suspected areas, such as around appliances, pipes, and valves. Move slowly and methodically across your home’s interior spaces.
Check battery levels before each use and replace batteries regularly to maintain functionality. Follow manufacturer instructions for calibration and maintenance.

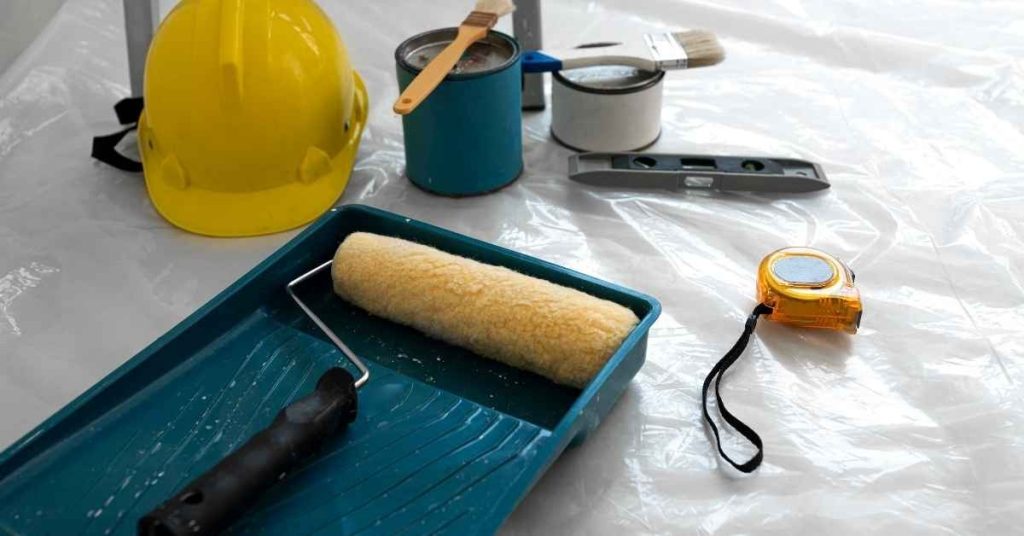
Tools and materials checklist (what to have on hand)
Having a compact on-hand toolkit is the backbone of safe DIY gas work. You want a portable gas or multi-gas detector, a soap solution or spray bottle for leak tests, a bright flashlight, and a properly calibrated device that needs batteries, all rated for potentially explosive atmospheres if you might be near fuel lines. Pair these with PPE like nitrile gloves, safety goggles, and a respirator or mask if odors or vapors are present, and remember: no oil or grease on anything that could contact oxygen or gas valves.
Learn to rely on quick checks and visual cues—smell, look, hissing sounds, frost on lines—and use the soap method for joints to confirm leaks. Know where the main shutoff is and who to call, and never seal or block access to that valve. Store and maintain gear in cool, dry, ventilated spaces, replace batteries on a regular cadence, and avoid flammable cleaners or oily items near fuel systems to reduce ignition risk.
Recommended detection tools and where they’re used
Have these tools on hand before you start checking for gas leaks.
- Scent detector: Use to smell for sulfur or rotten eggs. Confirm by comparing with a known safe area; skipping can miss silent leaks.
- Combustible gas detector: For measuring methane and propane levels. Check battery status before use; dead batteries mean no detection.
- Spray bottle: Fill with soapy water for leak testing joints. Confirm by looking for bubbles; skipping can lead to undetected leaks.
- Adjustable wrench: For turning off valves if needed. Check tightness and fit before use; wrong size means no shut-off.
- Bright flashlight: To inspect dark areas visually. Confirm by checking for hissing or frost; skipping can miss visual clues.
- Nitrile gloves: For handling tools safely. Confirm by wearing them properly; bare hands risk cuts and contamination.
Quick rule: Always have your detection kit ready before starting any checks.
Personal protective equipment and ventilation aids
Wear PPE when handling gas lines or detectors to protect yourself from potential hazards.
- Nitrile gloves: Protect hands from cuts, chemicals. Confirm fit before use; bare hands risk contamination.
- Safety goggles: Prevent eye irritation from vapors. Confirm proper fit and coverage; skipping can cause injury.
- Respirator mask: For breathing protection if needed. Check filter compatibility with gas type; wrong filters mean no protection.
- Portable fan: Use only after evacuation for ventilation. Ensure it’s placed outside to avoid ignition risks; inside use can cause explosions.
Quick rule: Always wear PPE before handling any gas-related equipment or entering suspect areas.
When to call for professional testing equipment
Contact professionals if you encounter complex issues that require specialized tools and expertise.
- No detection: If your detector doesn’t find a leak but you suspect one. Confirm by calling utility company; ignoring can lead to undetected leaks.
- Complex systems: For intricate setups like commercial kitchens or industrial plants. Professionals have calibrated sensors for accuracy; DIY tools may miss issues.
- Tracer gas tests: Required for pinpointing exact leak locations in hard-to-reach areas. Professional equipment can detect small leaks missed by standard detectors.
Quick rule: Always consult a professional if you’re unsure or dealing with complex systems.
How to shut off gas safely (appliances, meter, tank)
Know your gas type and where to shut it off: the main service valve, meter shutoffs, and appliance valves, with different hints for natural gas and propane. Learn how to shut off the main valve smoothly when pressure or smelling gas suggests a risk, and what to do if the handle won’t turn. Then locate appliance-level shutoffs on furnaces, water heaters, stoves, and fireplaces, and shut them off in a quick, controlled sequence.
Propane users should shut at the tank valve first, then the regulator connection, and beware portable cylinders. After any shutoff, evacuate the area, avoid flames and electricity, ventilate if safe, and call emergency services or your utility if you suspect a leak. This matters because a wrong move can flood the area with gas or damage equipment, and a professional should inspect before re-energizing.
Step-by-Step Process
This sequence ensures you can safely shut off gas at the main valve, appliances, and propane tanks during an emergency.
- Check your tools are ready. Have a wrench or adjustable pliers handy for valves that need it.
- Turn off appliance-specific shutoffs first: stoves, water heaters, furnaces. This isolates each unit quickly.
- Locate the main gas service valve outside near the meter or inside your home if no exterior access. Turn clockwise to shut off.
- If the main valve is hard to turn, use a wrench to apply more torque gently without damaging it. Avoid over-tightening.
- For propane tanks, close the tank valve first then disconnect the regulator. Secure connections tightly but don’t overtighten.
Finding the Main Service Shutoff and Operating It
The main gas service valve is usually located outside near your meter or inside your home if no exterior access. Look for a large handle that can be turned to shut off.
Turn the valve clockwise slowly until it stops. If the valve is stuck, use a wrench to apply gentle torque without damaging it. Avoid over-tightening as this could break the valve.
If you encounter corrosion or rust on the valve, do not force it. Call your utility company for assistance immediately to avoid further damage or injury.
Appliance-Level Shutoffs and Pilot Lights
For each appliance, locate the specific valve near its gas inlet. Turn clockwise until it stops to shut off the flow of gas.
When relighting pilots after a suspected leak, follow manufacturer instructions carefully or wait for your utility company’s guidance. Never attempt to light a pilot if you suspect a larger issue with the system.
Water heaters and furnaces often have their own shutoff valves near the bottom where the gas line enters. Stoves typically have individual burners that can be turned off separately.
What to Do If You Cannot Shut the Gas Off
If you find yourself unable to turn off the main valve or any appliance-specific shutoffs, evacuate immediately. Move everyone outside and away from the building.
Contact emergency services and your utility company right away. Explain that you suspect a gas leak but cannot shut it off safely. They will send professionals who can handle it properly.
Mark your property clearly to alert responders of potential danger. Use caution tape or signs if available, so they know what’s going on before entering the premises.
Preventive maintenance to reduce future leaks
Preventive maintenance reduces future leaks by catching small issues early. A practical plan covers regular checks of exterior piping, meters, vents, and connected appliances, plus timely service by a licensed pro.
This matters because addressing wear and corrosion now saves headaches later and keeps your gas system dependable. A documented log and reminders help you stay consistent, and knowing what to monitor helps you act quickly. Always coordinate digging with utility services and follow safety steps if you suspect a leak.
Routine checks homeowners can do
Monthly visual checks of your gas lines and connections are a must. Look for any signs of wear, like cracks or corrosion on pipes and hoses. Check the rubber hoses that connect to appliances; if they’re cracked, frayed, or more than five years old, replace them right away.
Annual tune-ups for your gas appliances help catch small issues before they become big problems. This includes checking pilot lights, flame sensors, and venting systems. If you notice any unusual smells or sounds, like a hissing noise near the meter or appliance, address it immediately to prevent bigger headaches down the road.
Keeping detailed records of your maintenance activities is key. Write down when you did checks, what parts were replaced, and any issues found. This log helps track the health of your system over time and reminds you of upcoming service needs.
Professional inspections and when to schedule them
Schedule a professional inspection after buying a new home, before major renovations start, or if you notice any unusual issues with your gas appliances.
- New home: Have the system checked by a licensed HVAC technician. Confirm all connections are tight and there’s no damage from previous owners.
- Before renovation: Coordinate with utility companies to ensure underground lines aren’t disturbed during construction. Verify that all gas appliances meet current safety standards.
- After issues: If you smell gas or see signs of corrosion, call a professional immediately. Confirm the issue is resolved and no leaks remain.
- Annual check: Schedule an annual inspection to catch small problems early. Check for blockages in vent pipes and ensure proper airflow around appliances.
Quick rule: Always get a licensed professional involved if you suspect any major issues with your gas system.
Safe digging, excavation, and meter-area precautions
Before starting any digging or landscaping work around your home, call 811 to have underground utilities marked. This free service helps prevent accidental damage to gas lines and other critical infrastructure.
When working near the gas meter or buried pipes, take extra care. Use hand tools instead of power equipment within two feet of the meter. Avoid driving over utility lines with heavy machinery.
If you need to dig in areas where gas lines are present, mark out a safe work zone and use non-invasive methods like air excavation to avoid damaging underground utilities. Always follow local regulations on utility protection zones.
Common repair costs, insurance & next steps after detection
After you detect a gas issue, expect a clear, stepwise workflow: a careful assessment to identify what must be repaired, followed by necessary fixes, re-testing to confirm safety, and finally securing official utility clearance before you resume normal use. You’ll want to know what the tests indicate and what repairs they demand, since that drives the next steps and any follow-up checks. Keep insurance in mind and check what they expect in terms of documentation and timelines so the repair path stays aligned with your coverage.
Why this matters: it helps you avoid costly back-and-forth and ensures you’re not skipping critical checks or approvals. When you talk to contractors and insurers, ask for clear estimates, document everything from test results to receipts, and confirm any permits or inspections tied to gas work. Have a simple checklist ready for local providers and utility communications so you know who signs off and when you’re truly finished.
Typical process after a confirmed leak (who responds and what happens)
Once you confirm a gas leak, the first step is to contact your local utility company. They’ll send out a technician to assess the situation and determine if it’s safe to proceed with repairs or if an emergency shutoff is necessary.
The utility tech will identify the source of the leak and recommend immediate actions like turning off the main gas valve, which you should have already done as part of your safety protocol. After that, they’ll coordinate with a licensed contractor who specializes in gas line repair to fix the issue.
Once repairs are completed, another inspection is required before service can be restored. This ensures everything is sealed properly and there’s no risk of further leaks. The utility company will send someone out for this final checkup.
This process might seem lengthy, but it’s crucial to ensure everyone’s safety and prevent future issues.
Insurance considerations and documentation tips
After detecting a gas leak, document everything thoroughly. Take photos of the damage and any visible signs of leakage. Keep all receipts for repairs and services performed by professionals.
Contact your insurance provider as soon as possible to report the incident. They’ll guide you through filing a claim and may require specific documentation or reports from licensed contractors involved in the repair work.
It’s important to understand what your policy covers regarding gas leaks. Some policies might have deductibles that apply, so be prepared for out-of-pocket expenses before insurance kicks in.
Maintaining clear records will help streamline the claims process and ensure you receive full coverage for necessary repairs.
Avoiding recurring leaks — follow-up testing and warranties
To prevent future gas leaks, it’s essential to take proactive steps after repair work is completed. Here are some key actions:
- Post-repair tests: Ensure the contractor performs a thorough leak test before leaving your property.
- Warranty requests: Ask for a warranty on the repairs, covering both materials and labor.
- Schedule rechecks: Plan periodic inspections to catch any new issues early.
- Maintain records: Keep all documentation of repair work and tests done.
By following these steps, you can minimize the risk of recurring leaks and ensure your home remains safe for years to come.

Conclusion
Gas leaks are serious and acting fast protects people, property, and the system’s integrity. Stay focused on safety, follow the steps you’ve learned, and you’ll avoid costly mistakes and framing problems you can’t fix.
First, have your simple, practical checklist in mind and run through it in order: confirm you’re in a safe area, apply the DIY tests or detection method you used, note any signs like smell, heat, or hissing, shut off gas only if you are sure you can do it safely, ventilate the area, and then call for professional help if the leak is confirmed or you’re unsure. Keep a flashlight, soap solution or detector, a shut-off tool, and access to fresh air ready so you can move quickly without wasting steps.
Two common mistakes to avoid are ignoring faint clues, or pushing on with work when there’s any sign of a leak; never light flames or create sparks near suspect areas; don’t test a bad joint under pressure or on an appliance you don’t know how to shut off. Always keep the area clear, follow the rules for safe shut-off locations (appliance, meter, or tank) and don’t over-tighten connections or improvise repairs you were not trained to do.
Call a professional whenever the leak is real, you can’t locate it confidently, or you’ve shut off gas and still smell gas or hear a hiss. If you’re unsure at any step, pause, evacuate, and contact the utility or a licensed technician. Stay calm, act decisively, and you’ll keep your home durable and safe.
FAQ
What are warning signs of a gas leak?
Smell of rotten eggs, a hissing or blew-out sound near a pipe, or dead plants in the outdoor area can mean a leak. If you notice any of these, leave the area immediately and stay outside.
What should I do first if I suspect a leak?
Get everyone outside to fresh air right away. Do not use electrical switches, toys, phones, or open flames near the area; call the gas utility or emergency services from a safe location.
Can I check for leaks myself?
Only if you have proper training and the right equipment. For everyone else, stay away from the suspect area and call a professional; leaks can hide in walls and fittings.
After it’s addressed, what’s next?
Do not re-enter until the utility or fire department gives the all-clear. Have a licensed professional inspect and repair the system, and ventilate the space as advised by the responders.