
Introduction
Hollow-Sounding stucco occurs when tapping the surface reveals a hollow or loose layer beneath the finish. It’s a signal that the underlying material or lath may be compromised. Listen and feel for soft spots, and note where the sound changes as you tap around the area.
Start with surface preparation by removing loose material and cleaning the area so patches can grab well. Choose repair materials that are suitable for exterior stucco and follow the label directions and any local requirements. Use the tap test to gauge repairs as you go, and know when to stop spot-patching and address larger areas or seek professional help.
Key takeaways
- Identify hollow-sounding areas by tapping gently and noting dull, echoing responses.
- Prepare surface by removing dust, loose material, and moisture-prone debris before repairs.
- Choose repair materials compatible with existing stucco to avoid debonding.
- Follow a safe tap testing process with eye protection and proper footwear.
- Open cut windows only when necessary; inspect underlying conditions and moisture.
- Stop spot-patching when patches exhibit mismatch, cracking, or repeated failures; plan larger repairs.
Table of Contents
- Introduction
- Key takeaways
- Why a Hollow Sound in Stucco Matters
- Tap Testing — a Systematic Inspection Method
- Cut Windows: When to Open the Stucco and What to Expect
- When to Stop Spot-Patching and Choose Larger Repairs
- Preparing the Area for Reliable Repairs (Including Water Remediation)
- Tools, Materials, and Bonding Strategies
- Application, Layering, and Texturing Techniques That Blend Repairs
- Curing, Painting, Sealing, Maintenance, Costs, and When to Hire a Pro
- Conclusion
- FAQ
Why a Hollow Sound in Stucco Matters
A hollow sound when you tap on stucco is more than a dull note. It often signals bond failure or hidden problems underneath the surface. Understanding what that hollow space means helps you gauge risk to the exterior cladding and the structure behind it.
Common culprits include bond breakdown, substrate cracks, improper lath installation, and moisture intrusion that worsens over time. Early detection matters for managing moisture risk and avoiding larger, costlier damage. A proper diagnostic path starts with documenting the area, then deciding between temporary stabilization or full repair, and knowing when to bring in a pro.
What a hollow sound usually means
A hollow sound when tapping your stucco typically indicates that the exterior cladding has lost its bond with the underlying substrate. This could be due to several reasons:
Delamination: The stucco has separated from the lath or the substrate. This is often caused by improper application, age, or moisture intrusion.
Failed bond coats: The layer that binds the stucco to the lath may have failed, leading to a hollow sound and potential detachment of the stucco.
Detached lath: If the metal lath used for reinforcement has come loose or rusted away, it can cause a hollow sound and compromise the structural integrity of your stucco.
Consequences of ignoring hollow areas
Ignoring hollow areas in your stucco can lead to progressive damage that’s expensive to fix and harmful to your home’s structure. Here’s what you’re risking:
Progressive water infiltration: Hollow areas allow water to penetrate behind the stucco, leading to further damage over time.
Mold growth: Moisture trapped behind the stucco can foster mold and mildew growth, which can cause health issues and further damage your home.
Accelerated deterioration: The hollow areas will continue to grow and spread, leading to more extensive repairs down the line. Ignoring them can also lead to structural concerns if left unchecked.
Higher future repair costs: Small problems become big ones when ignored. What starts as a simple spot patch could turn into a full wall replacement if not addressed promptly.
Tap Testing — a Systematic Inspection Method
The tap test helps identify hollow areas, delamination, and signs of moisture or backing problems. It guides repair priority so you don’t chase small fixes that won’t hold. Use it to map risk across the wall sections you’re inspecting.
Follow a consistent procedure: prepare the area, wear PPE, and choose tools like a hammer, rubber mallet, or chisel. Scan elevations, corners, openings, and transitions in a repeatable pattern. Record your findings with a simple labeling system and keep photos and notes for a contractor-ready report.
Tools and patterns for repeatable testing
Before you start, make sure you have the right tools and a consistent pattern to ensure no areas are missed.
- Hammer or rubber mallet: For tapping. A rubber mallet is gentler on the surface but might not provide as clear a sound.
- Chisel: To mark suspicious areas for further inspection.
- Screwdriver: To probe small cracks or holes.
- Chalk marker: To mark locations of hollow sounds.
- Moisture meter (optional): For immediate moisture checks at suspicious areas.
- Grid or sweep pattern: Start from one corner, tap in a consistent grid or sweeping pattern across the elevation, then move to the next section. This ensures you cover every inch.
- Avoid windows and doors initially: These are common problem areas but should be checked last due to safety concerns.
- Check transitions carefully: Where different materials meet (like stucco to brick), tap gently to avoid damage.
Quick rule: Always start from the same corner and work in a consistent pattern. This helps you keep track of where you’ve been and ensures no areas are missed.
Interpreting and recording test results
Once you’ve completed the tap test, it’s time to interpret your findings and record them for further action.
- Sound/feel: Describe the sound as solid, dull, or hollow. A hollow sound indicates a potential problem.
- Density of hollowness: Light, medium, or heavy hollowness can help determine the severity of the issue.
- Approximate depth: Estimate how deep the hollowness goes. This helps prioritize repairs.
- Visible defects: Note any cracks, holes, or other visible signs of damage.
- Coordinate points: Use a measuring tape to mark down the exact location of hollow areas in relation to a known point (like a corner).
- Elevation: Note which elevation you’re testing – front, side, back.
- Photos: Take pictures of marked locations for reference and to share with contractors.
- Timestamped notes: Record your findings along with the date and time. This can help track progress over time.
Quick rule: Be consistent in your labeling and recording. This helps ensure everyone is on the same page when it comes to repairs.
Safety and access precautions during testing
Your safety and that of your home should always be a priority. Here are some precautions to take while performing the tap test.
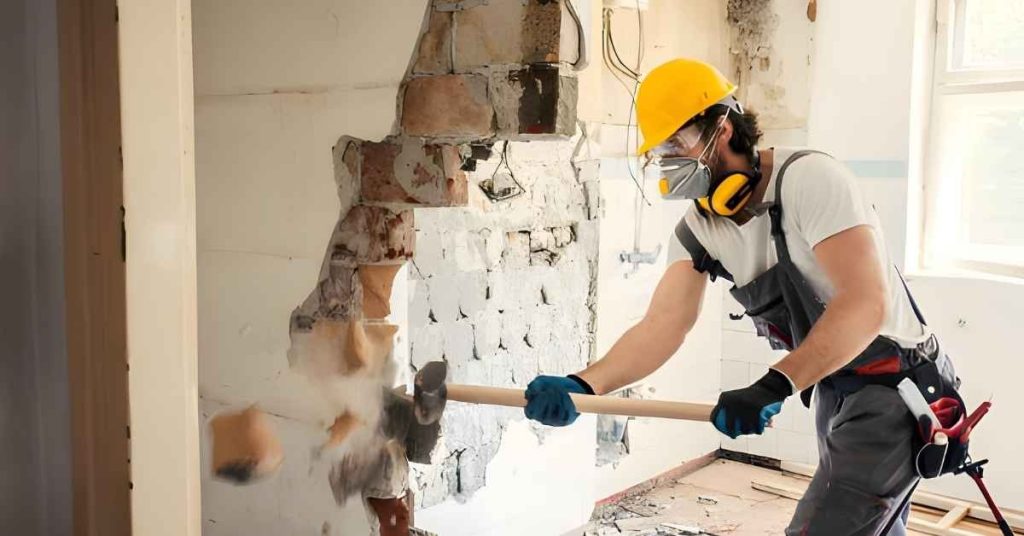
- Personal protective equipment (PPE): Wear sturdy shoes, gloves, and eye protection. A hard hat is recommended for two-story homes.
- Ladder/staging safety: Use a stable ladder or staging platform to reach higher elevations. Ensure it’s secure before climbing.
- Fragile trim and windows: Be gentle around fragile trim, windows, and electrical fixtures. Avoid tapping these areas initially to prevent damage.
- Electrical safety: Turn off power at the main panel before testing near electrical fixtures. Use a non-contact voltage tester to ensure they’re safe to touch.
- Structural movement or large-scale cracking: If you notice signs of structural movement or large-scale cracking, stop immediately and consult a professional.
- Persistent moisture: If you find extensive moisture, pause testing until the area is dry. Excessive moisture can be dangerous.
Quick rule: Always put safety first. If something feels unsafe, stop and reassess before proceeding.
Cut Windows: When to Open the Stucco and What to Expect
A cut window is a targeted opening to inspect the subsurface where clues about moisture, lath, or WRB conditions live. It’s justified when cracking patterns, delamination, or hollow sounds suggest deeper issues. The goal is to see substrates and assess what needs repair beyond the surface.
Proceed only after weighing criteria like moisture readings, system age, and prior repairs, plus safety and warranty considerations. Plan locations, size, shape, and containment to minimize dust. The cut should expose substrate, lath, and WRB, and samples or measurements may guide moisture or rot assessments.
Triggers that justify cut windows
Opening up your stucco wall isn’t something to take lightly. But sometimes, it’s necessary to get to the root of a problem. Here are clear signs that make cutting a window into your stucco a justifiable action:
Widespread hollowness. If tapping your wall reveals large areas that sound hollow, it’s time to open up and see what’s going on inside.
Repeated patch failures. If you’ve patched an area before and it keeps coming back, there might be a bigger issue at play. A cut window can help you find out.
Visible staining or suspected water intrusion. Stains on your stucco could indicate moisture behind the wall. Opening up can confirm if there’s a leak and where it’s coming from.
How to lay out and execute a safe cut window
Once you’ve decided to open up your stucco, do it safely and smartly. Here’s how:
First, mark out your cutting lines. Make them straight and level. You want a clean edge to work with.
Use a stucco or masonry blade in your saw. They’re designed to cut through stucco and other tough materials without binding up.
Go slow and steady. Cut about halfway through the stucco on the first pass, then finish the rest by hand with a utility knife. This preserves the surrounding finishes and helps you reveal transitions to the weather-resistive barrier for proper diagnosis.
What to inspect behind the stucco
Now that you’ve opened up your wall, it’s time to take a good look at what’s behind the stucco. Here’s what to check:
Lath condition. Look for any damage or corrosion on the metal lath. If it’s rusted through or broken, it needs replacing.
Weather-resistive barrier (WRB). Check your WRB for tears, holes, or other compromises. This is your wall’s first line of defense against moisture.
Signs of rot or corrosion. If you see any wood rot or further signs of corrosion, note it down. These issues need to be addressed in your repair plan.
Ongoing moisture. Look for water stains, mold, or other signs that moisture is still getting in. This will help you determine the best repair strategy.
When to Stop Spot-Patching and Choose Larger Repairs
Spot patches should be reassessed when they no longer appear practical or reliable. Consider the area size, patch frequency, and signs of hidden damage such as moisture or rot. Set a clear boundary between patchwork and a full replacement plan.
Use a workflow that weighs damage scope, moisture, and adhesion. If cracks recur, moisture stains spread, or structural cues show movement, larger repairs may be warranted. Document patch history with photos and measurements to support a pro-led plan if needed.
Practical criteria for escalation
The decision to stop spot-patching and choose larger repairs isn’t just about aesthetics. It’s about structural integrity and long-term costs.
Delamination covering more than 10% of the wall, or recurring patches within a year, are clear signs that bigger action is needed.
Water damage, moisture intrusion, or structural movement – like warped windows or doors – also call for larger repairs. Aesthetics play a part too; if the patches make your home look like a patchwork quilt, it might be time to re-stucco.
Weighing short-term fixes vs long-term repairs
Spot patches are tempting because they’re quick and cheap. But remember, you get what you pay for. If the underlying issue isn’t fixed, you’ll be back to square one in no time.
Consider this: a spot patch might cost $50 now, but if it needs replacing every year, that’s $500 in five years. A larger repair could cost $1,000 upfront, but it might last 20 years. That’s a better investment.
Think about disruption too. Smaller repairs are less intrusive, but if you keep having to do them, that adds up. A larger repair might be more disruptive now, but it could save you hassle in the long run.

Preparing the Area for Reliable Repairs (Including Water Remediation)
Stopping water intrusion is the first step to durable repairs. Fix leaks, improve drainage, and ensure flashing directs moisture away from patches. This foundational work reduces the chance of patch failure.
Next, assess the substrate and backing, remove loose material, and check for mold or rot. Create a plan to dry and treat the area so patches can bond properly. Contain the work zone and control contamination before patching begins.
Removing loose stucco and contaminant cleaning
Start by removing any loose or crumbling stucco using a chisel, scraper, or even your hands. Be thorough but careful not to damage the underlying lath.
Once you’ve exposed sound material, use a stiff-bristled brush to clean off dust and debris. For areas with visible contaminants like mold or mildew, use a solution of water and bleach (about 1 part bleach to 3 parts water), applying it liberally and scrubbing well.
Rinse the area thoroughly with clean water after cleaning, ensuring no residual cleaner remains that could interfere with adhesion. Allow the surface to dry completely before proceeding.
Addressing water-damaged substrate and mold
First, determine if moisture intrusion is active by checking for dampness or musty odors. If present, identify the source and fix it – this could be a leaky pipe, poor drainage, or inadequate flashing.
Use a moisture meter to confirm that the substrate has dried out before proceeding. If mold is present, treat it with a fungicidal wash, following the manufacturer’s instructions carefully. Ensure the area is completely dry before applying any repairs.
If wood, sheathing, or the weather-resistive barrier (WRB) is damaged due to water intrusion, repair or replace these materials as necessary. This might involve cutting out and replacing rotten wood, or patching holes in the WRB.
Repairing lath, fasteners, and WRB details
Inspect the underlying lath for any damage or corrosion. If found, replace these sections with new pieces, ensuring they are securely fastened to the studs using appropriate fasteners.
Check that the weather-resistive barrier (WRB) is intact and properly installed. If it’s damaged, repair or replace it according to the manufacturer’s instructions. Ensure all seams are taped and flashed correctly to prevent future water intrusion.
Before reinstalling stucco, ensure all surfaces are clean, dry, and free of any contaminants that could compromise adhesion. This includes removing any old fasteners that might be rusted or damaged.
Tools, Materials, and Bonding Strategies
The goal here is to match damage type to the right tools, materials, and bonding approach while considering the substrate. Start with a practical set of hand and power tools for cleaning, roughening, and placing patches. This keeps repairs solid and durable.
Choose materials by damage type and backing: patching compounds, bonding agents, and sealants vary with hollow depth, moisture, and substrate. Plan priming or direct patching, and consider curing and compatibility to prevent future cracking.
Tools and PPE checklist
Before you start any repair work, make sure you have the right tools and safety gear. Here’s a quick checklist to ensure you’re prepared.
- Safety glasses: Protect your eyes from debris and chemicals.
- Work gloves: Essential for handling rough materials and sharp tools.
- Dust mask/respirator: Safeguard against inhaling dust and particles.
- Ear protection: Reduce noise from power tools.
- Long-sleeved shirt and long pants: Protect your skin from cuts, scrapes, and chemicals.
- Steel-toed boots: Guard against falling objects and provide traction on uneven surfaces.
- Trowels (3-4 sizes): For mixing, applying, and finishing repairs. Check they’re in good condition to avoid damaging the surface.
- Margin trowel: Useful for feathering edges of patches to blend with existing stucco.
- Chisel/hammer: For removing loose stucco and roughening surfaces. Ensure the chisel’s edge is sharp.
- Caulk gun: Apply sealants and bonding agents neatly and efficiently.
- Mixer or drill with paddle attachment: Mix repair mortars thoroughly to avoid weak patches. Check the mixer’s condition to prevent clogging or damage.
- Utility knife: Cut materials cleanly and safely. Keep blades sharp for easy cutting.
- Sponge: Clean surfaces, remove dust, and dampen areas as needed.
- Bucket: Essential for mixing, cleaning, and carrying materials.
Quick rule: Always double-check your tools before starting work to avoid delays and rework.
Choosing patch materials and bonding agents
The right material choice is crucial for a durable, long-lasting repair. Consider these options based on the damage type and substrate.
- Cement-based patches: Ideal for small cracks and hairline fissures. Look for high cement content (40% or more) to ensure strength. Avoid using in areas with frequent freeze-thaw cycles as they can crack over time.
- Polymer-modified products: Great for larger cracks, delaminations, and areas with movement. Check the polymer type (acrylic, vinyl, etc.) for compatibility with your substrate. These products are more flexible but may stain if not sealed properly.
- Epoxy or polyurethane bonding agents: Use these when repairing over concrete, masonry, or existing stucco. They create a strong bond and can be used as primers before applying repair mortars. Follow manufacturer guidelines for mixing ratios and application times to avoid weak bonds.
- Waterproof sealants: Apply after patching to protect against moisture intrusion. Choose silicone-based sealants for flexibility and durability. Avoid using in areas with high UV exposure, as they can degrade over time.
Mesh, lath, and fastening guidance
Reinforcing patches with mesh or new lath helps prevent future cracking and delamination. Here’s how to do it right.
When to use: Apply reinforcing materials when patching large areas (more than 1 square foot), deep cracks, or areas subject to movement due to settling or temperature changes.
Mesh/lath installation: Overlap mesh or lath at least 2 inches on all sides of the patch. Secure with fasteners spaced no more than 6-8 inches apart along the edges and 12 inches apart in the field. Use corrosion-resistant fasteners to prevent rust stains.
Fastening methods: Use appropriate fasteners based on your substrate: screws for concrete or masonry, nails with washers for existing stucco. Ensure fasteners are driven flush or slightly below the surface to avoid interference with the patch material.
Application, Layering, and Texturing Techniques That Blend Repairs
Decide if a true multi-coat system is needed and align the layers with the existing stucco to avoid delamination. Clear sequencing helps you build a repair that looks consistent and lasts. Plan texture compatibility from the start.
Prep each surface well and maintain proper bonding between coats. Control suction by dampening and feather edges for seamless transitions. Practice texture methods that blend with the surrounding finish and allow curing before painting or sealing.
Layering approach and key application tips
Start by applying the scratch coat. Its purpose is to bond with the substrate and provide a base for the next layers. Use a hawk and trowel, apply evenly, and maintain a consistent thickness of around 1/4″ to 3/8″.
Tip: Work in small sections to prevent the material from drying out.
The brown coat follows, building upon the scratch coat. This layer adds depth and helps achieve the final texture. Apply it at a thickness of about 1/4″ to 3/8″, using a similar technique as the scratch coat.
Tip: Use a straight edge to strike off any excess material and ensure a smooth surface.
Texture-matching strategies for a discreet patch
Before you start, sample the existing texture. Use a putty knife or trowel to scrape off a small amount from an inconspicuous area.
Tip: Store these samples in a sealed container to keep them fresh.
Practice your texturing technique on a spare piece of board or wall section. This helps you get the feel and ensures consistency with the existing texture.
Tip: Use the same tools and materials as you will on the actual repair.
Common application mistakes and how to avoid them
Here are some common mistakes to avoid when applying stucco patches:
- Poor bonding: Ensure the surface is clean, dry (if not dampening), and free of contaminants. Use a bonding agent if needed.
- Overworking the finish: Avoid excessive troweling or brushing as it can cause the finish to lose its texture and become too smooth.
- Inadequate backing: Make sure your patch has sufficient support behind it. Repair any damaged lath or fasteners before applying new stucco.
- Applying in extreme temperatures: Avoid working in very hot or cold conditions as this can affect the curing process and the final outcome.
Remember: Prevention is key. Take your time, prepare well, and follow these tips to avoid common mistakes.
Curing, Painting, Sealing, Maintenance, Costs, and When to Hire a Pro
Address curing conditions like humidity and temperature and follow any guidance on fan use or protective covers. Proper curing affects strength and crack resistance. Plan timing so patches cure without disturbance.
Choose paints and sealers that breathe and pair with the stucco system. Establish a maintenance routine to spot issues early and plan budget considerations without guessing at costs. When symptoms point to moisture intrusion, complex movement, or failed patches, know when to hire a pro and how to evaluate contractor options.
Curing, Paint, and Sealant Best Practices
Proper curing is crucial for your stucco patch to gain strength and resist cracks. Maintain a humidity level of 40-75% and temperature between 50-80°F (10-27°C) during the first two weeks.
Use fans to circulate air, but avoid direct drafts on the patch. Misting can help maintain humidity, but be careful not to oversaturate. Keep newly patched areas covered at night or when rain is expected.
For painting, use acrylic or latex paints compatible with stucco. Apply a moisture barrier primer first to prevent moisture buildup. Seal the patch after curing for 28 days with a high-quality sealant. Remember, stucco needs breathability; don’t over-seal.
Maintenance Checklist and Monitoring Schedule
Inspect your stucco patch regularly to catch issues early. Use this checklist:
- Spring: Inspect for cracks – Check for hairline cracks, especially around edges and corners.
- Summer: Monitor moisture – Look for signs of water damage or efflorescence (white powdery deposits).
- Fall: Prepare for winter – Ensure the patch is sealed properly to prevent water intrusion during cold months.
- Winter: Check for freeze-thaw damage – Inspect for cracks that may have widened due to temperature changes.
- Annually: Document recurring problems – Keep records of persistent issues to help decide when larger repairs are needed.
Quick rule: Inspect your patch at least once every season. Catching minor issues early prevents major repairs later.
Cost Drivers, Budgeting Tips, and Contractor Selection
Repair costs depend on material quality, surface area, edge detailing, and recoat frequency. Expect to spend $0.50-$2 per sq ft, plus materials.
Budget tips: Account for all supplies, including tools you may need to buy. Consider recoating every 5-10 years; factor this into your long-term budget.
When hiring a pro: Check references and ensure they’re licensed and insured. Get a detailed scope of work with clear pricing. Look for warranties covering both labor and materials.
Conclusion
Keep it simple and safe. Nail the plan, protect the structure, and you’ll get a durable, good‑looking repair without making the problem worse.
First, assess and act in a controlled sequence: test a small area first to verify material response, identify any moisture issues, cut open only where necessary, dry/repair the area, rebond and patch in layers, then cure, paint, and seal before you count the costs. Work methodically, document what you find, and stop if the repair would require larger replacement than you can handle in one shot.
Common mistakes to avoid are patching without drying or addressing water intrusion, over‑patching or under‑estimating the work, and skipping proper bonding or cure times. Always follow proper safety rules: wear eye and skin protection, keep the area ventilated, check for active leaks before closing a window, and never rush curing or sealing. If the damage looks extensive, or you’re unsure about structural impact, get a pro if in doubt—a smart call now saves costly repairs later, and you’ll finish with a solid, lasting result.
FAQ
How do I identify hollow-sounding stucco without guessing the knock?
Tap test along a controlled pattern. Listen for dull, hollow, or hollow-reverberating sounds as you move across seams and patches. Mark suspect areas and verify with a second test before opening anything.
What surface prep is essential before repairing stucco?
Clean loose material and dust from the area. Remove chalk, oil, or grease with a stiff brush and a mild cleaner, then rinse and let it dry. Dailing down high spots and feathering the edges helps the patch bond better.
How should I choose repair materials for hollow or damaged spots?
Use products that match the repair needs: a bonding primer or bonding agent on sound but porous edges, a base coat appropriate for exterior stucco, and a finish coat that can be textured to blend. Always check the manufacturer’s instructions and local recommendations for exterior use and compatibility.
What’s the proper approach to cutting windows in damaged areas?
Cut only the damaged stucco to remove hollow sections, exposing solid edges for patching. Keep the cut square, so new material has a clean, firm surface to grip. Protect surrounding areas and follow safety practices when removing material.