
Introduction
Hairline crazing in hardwall plaster is fine cracks that form on the surface when the plaster dries and the finish isn’t keyed well enough for the next coat. It happens when the surface isn’t gripping the base layer, or small movements stress the top layers. The fix starts with proper surface keying and choosing a breathable topcoat that can accommodate moisture as it moves.
For a hands-on approach, roughen the existing surface to create a good key, remove dust, and patch any obvious defects before applying another coat. Then select a breathable topcoat and apply it with even pressure, letting the coating breathe to prevent future blistering or new craze lines. If you’re unsure about compatibility or drying behavior, check the product label and manufacturer instructions or ask a local pro for guidance before continuing.
Key takeaways
- Assess hairline patterns early to distinguish hairline crazing from structural cracking.
- Key surfaces: roughen and key plaster with appropriate substrate preparation before topcoat.
- Choose breathable topcoats and let substrate dry and vapor flow freely.
- Verify compatibility through manufacturer instructions and local code guidance before coating.
- Follow a stepwise repair workflow: clean, key, patch, prime, and recoat.
- Safety: wear eye protection, dust mask, and ensure ventilation during repairs.
Table of Contents
- Introduction
- Key takeaways
- What Is Hairline Crazing and Why It Matters
- Common Causes Specific to Hardwall Plaster
- Diagnosing Severity and Scope: Visual Checkpoints and Testing
- Surface Keying Strategies for Reliable Adhesion
- Choosing Breathable Topcoats and Finishes
- Product Compatibility and Sequencing Best Practices
- Step-by-Step Repair and Recoat Workflow
- Tools, Materials Checklist and Visual Checkpoints for Diyers
- Conclusion
- FAQ
What Is Hairline Crazing and Why It Matters
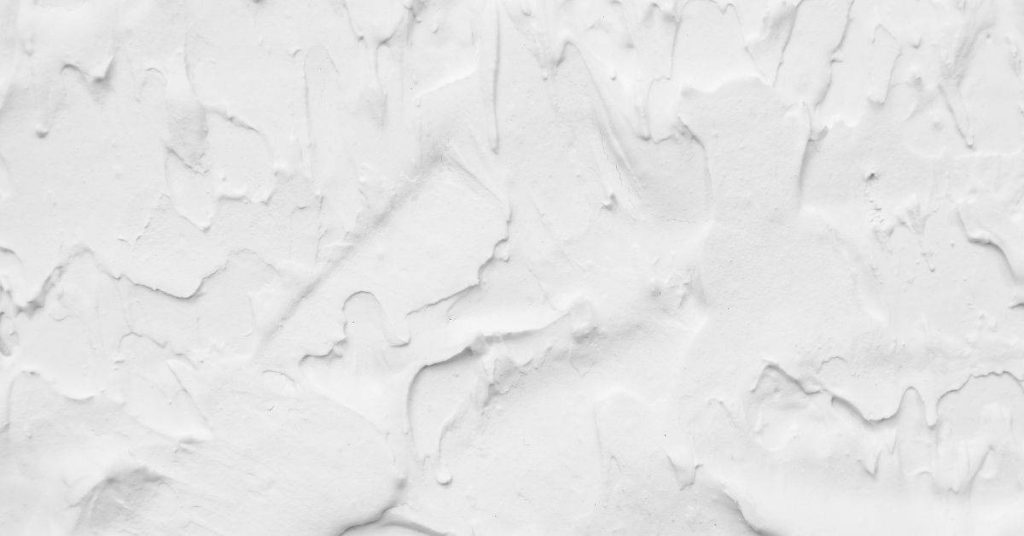
Hairline crazing on hardwall plaster shows as fine, spiderweb-like lines that rarely cut through the full thickness of the surface. It often appears across large areas or along edges where movement or stress has occurred. It differs from typical cracking in scale and often from efflorescence, which is a surface salt bloom rather than a shell-like network of fractures. This pattern can shorten finish life and mar the look of a smooth plaster job if left unaddressed.
Understanding how crazing forms helps you plan appropriate repairs and coatings. It signals movement in the wall or poor bonding conditions beneath the surface. Correctly diagnosing the type of defect guides you to the right prep, primer, and breathable topcoat choices to protect longevity and appearance.
Definition and visual characteristics
Hairline crazing on hardwall plaster is a fine, irregular network of surface lines. They’re shallow, usually less than 1mm deep, and don’t penetrate the entire wall thickness.
Unlike deeper structural cracks, crazing doesn’t compromise your wall’s integrity. But they’re distinct from efflorescence, a white, powdery deposit that appears on walls due to moisture movement.
To spot crazing, look for fine lines that seem to ‘crawl’ across the surface. They often form patterns or webs, and may be barely visible until you run your hand over them.
Why crazing indicates coating or substrate issues
Crazing isn’t just a cosmetic issue. It signals underlying problems with your plaster or paint.
Poor adhesion between coats can cause crazing. If your topcoat doesn’t stick properly to the layer beneath, it can’t flex with the wall and will crack instead.
Incompatible coatings can also lead to crazing. Using a water-based paint over an oil-based primer, for instance, can cause the two to repel each other, leading to surface lines.
Moisture movement is another common culprit. If your wall’s absorbing and releasing moisture, it expands and contracts, causing stress that shows up as crazing.
Common Causes Specific to Hardwall Plaster
Improper surface preparation is a leading cause, leaving dust, oils, or loose material that prevents a solid key. This shortfall shows up quickly as a network of fine lines after the first coat cures. Non-breathable coatings trap moisture and force movement at the surface, promoting crazing under temperature and humidity changes.
Moisture movement through the wall, whether from interior humidity, leaks, or vapor drive, is another major contributor. Substrate contamination, including cured paint residues or incompatible plasters, can also undermine adhesion and encourage hairline patterns. Each factor shifts how you approach prep, primers, and topcoats.
Coating and compatibility failures
Using the wrong type of paint or sealant on your hardwall plaster can trap moisture, leading to hairline crazing. This happens when the coating is non-breathable, meaning it doesn’t allow water vapor to escape.
Incompatible coatings can also cause issues. Even if a product claims to be suitable for plaster, it might not play nice with your specific surface. This can result in poor adhesion and eventually, crazing.
Solution: Always use breathable paints and sealants designed for plaster. Test compatibility by applying a small patch first.
Substrate and moisture-related causes
High residual moisture in your plaster can lead to crazing over time. This is because water vapor needs to escape, and if it can’t, it’ll find a way out – often by cracking the surface.
Dissolved salts in the substrate can also cause problems. When these come to the surface as the plaster dries, they can crystallize and push against the coating, causing crazing.
Solution: Ensure your plaster has dried thoroughly before applying any coatings. If you suspect salt contamination, consider a salt barrier primer.
Application and curing errors
Mistakes during application and curing can lead to crazing. Here are some common pitfalls to avoid:
- Rapid drying: This prevents the plaster from curing evenly, leading to stress on the surface.
- Thick film builds: Applying paint or sealant too thickly can trap moisture and prevent proper adhesion.
- Inadequate keying: Without a good ‘key’ – tiny pits or grooves that help coatings adhere – your topcoat won’t bond well, leading to crazing.
- Skipping primer: Primer helps seal the surface and improve adhesion. Skipping it can lead to crazing over time.
To avoid these issues, follow manufacturer guidelines for application rates and drying times. Use a suitable primer and ensure your surface is properly prepared before applying any coatings.
Diagnosing Severity and Scope: Visual Checkpoints and Testing
Start with a visual survey to map where crazing is most dense, where it runs in lines, and whether patterns follow joints or edges. Note whether damage is superficial or appears to penetrate multiple layers. Look for changes in color, sheen, or texture that suggest moisture or bonding problems.
Use practical checks to gauge depth: gently probe with a blunt tool to feel for softness or hollow spots, and perform simple adhesion tests on inconspicuous patches. If issues extend behind the surface or show signs of moisture, plan deeper investigation or professional evaluation before proceeding with coatings.
Visual checkpoints to document
Before you start any repairs, use this checklist to document the crazing. This helps assess the scope of work and track progress.
- Crazing pattern: Photograph and map the distribution and direction of cracks. Skipping this might lead to underestimating the repair area.
- Staining or discoloration: Check for associated staining or discoloration. This could indicate underlying moisture issues if skipped.
- Wall-floor junction: Inspect where walls meet floors. Crazing here might suggest structural movement.
- Window and door junctions: Check around openings. Crazing here can indicate settlement or movement.
- Ceiling-wall junctions: Inspect where ceilings meet walls. Crazing here could signal structural issues if not addressed.
- Wall-wall junctions: Check corners and joints between walls. Skipping this might miss localized problems.
- Coatings condition: Assess the overall condition of the coatings. This helps determine if repairs are surface-focused or structural.
- Age of crazing: Estimate when the crazing first appeared, if possible. This can help pinpoint the cause and required repair method.
Quick rule: The more you document now, the better informed your repair decisions will be later on.
Moisture and substrate testing guidance
Before diving into repairs, use these tests to ensure the problem isn’t deeper than it seems. Skipping these might lead to recurring issues.
- Non-destructive moisture check: Use a moisture meter to test walls for excess moisture. This helps rule out hidden moisture problems if ignored.
- Core testing: If non-destructive tests suggest moisture, consider core testing to confirm and locate the source. Skipping this might miss the root cause.
- Manufacturer guidelines: Check manufacturer references for acceptable moisture ranges in your specific plaster system. Ignoring these might lead to improper repairs.
- Building codes: Consult local building codes and standards for acceptable moisture content in walls. Disregarding these could result in non-compliant repairs.
Quick rule: Always test before you treat. It’s cheaper to find out what’s really wrong now than to fix the wrong problem later.
When crazing is cosmetic vs. structural
Use this checklist to decide if repairs can be surface-focused or if deeper issues require attention. Skipping these checks might result in inadequate repairs.
- Crack width: Measure crack widths. Cracks wider than 0.2mm usually indicate structural issues that need addressing.
- Crack depth: If possible, estimate the depth of cracks. Deep cracks might suggest structural problems if ignored.
- Crack pattern: Assess the overall crack pattern. Random, widespread crazing could indicate structural issues requiring remediation.
- Crack movement: Check if cracks are active or moving. Movement might suggest ongoing structural problems that need addressing.
- Associated damage: Inspect for other signs of damage, like nail pops or drywall tape seams lifting. These could indicate wider structural issues if missed.
Quick rule: When in doubt, err on the side of caution and consider deeper issues. It’s better to find out now than after a failed repair attempt.
Surface Keying Strategies for Reliable Adhesion
Mechanical keying involves removing loose material and creating a roughened surface that the next layer can grab onto. Use controlled abrasion to expose sound plaster without damaging the substrate. Follow with a clean, thorough wipe to remove dust before applying primer.
Chemical prep can include using a compatible bonding agent or pore-filling primer designed for hardwall. Select primers that are breathable and compatible with your topcoat system, and apply as specified by the manufacturer. Always test a small patch first to confirm adhesion and cure behavior.
Mechanical keying methods
For hardwall plaster, mechanical keying is the first step to create a dependable bond. The goal is to increase surface profile and remove weak material.
Start with light abrasion using sandpaper or a scouring pad. Be gentle – you don’t want to damage the substrate.
For deeper profiles, use a controlled scratch-coat technique. Apply a thin layer of fresh mortar, let it stiffen slightly, then drag a comb or brush across the surface to create grooves. Remove excess material with a damp sponge.
Chemical keying and primers
Sometimes, mechanical methods aren’t enough. That’s where chemicals come in – but be careful, they can damage if misused.
Alkaline rinses remove dirt and contaminants. Use them sparingly to avoid dissolving the plaster.
Bonding primers or re-emulsifying agents help new coatings adhere better. Always follow product instructions and perform compatibility tests first.
Repairing and consolidating friable plaster before keying
Before you start keying, fix any loose or powdery areas. This is crucial for a reliable bond.
Use bonding agents or patching mortars to stabilize these areas. Apply them according to the manufacturer’s instructions, then let them cure fully before proceeding with mechanical keying.
For severe cases, you might need to repoint entire joints or replace damaged sections entirely.

Choosing Breathable Topcoats and Finishes
Breathability means the coating allows vapor to pass through rather than trapping moisture inside the plaster. This attribute helps prevent recurring crazing after repair. When selecting finishes, favor products labeled as breathable and compatible with hardwall substrates.
Mineral-based finishes and modern breathable systems each have pros and cons; evaluate their compatibility with the substrate, drying behavior, and maintenance needs. Use the manufacturer guidance to determine if a product is suitable for interior hardwall plaster and what to expect during curing and aging.
Types of breathable coatings to consider
When it comes to breathable topcoats for your hardwall plaster, you’ve got a few options. Each has its own strengths and typical use cases.
Silicate paints are popular. They penetrate deep into the substrate, forming a strong bond while allowing moisture vapor to escape. Great for new plasters or when you want extra durability.
Mineral-based coatings, like limewash or casein paints, are more traditional. They’re often used in historic restorations due to their breathability and ability to regulate humidity. Keep in mind, they may not be as durable as other options.
Then there are specially formulated breathable paints. These are designed to mimic the properties of natural materials. They’re versatile, suitable for new plasters or existing walls with crazing issues. Always check the manufacturer’s recommendations for best results.
How to read technical data for breathability
To ensure your topcoat is truly breathable, dig into its technical data. Here’s what you’re looking for:
The permeance or vapor transmission rate tells you how much moisture vapor can pass through the coating in a given time. Higher numbers mean better breathability. Look for values above 5 mg/m2·h (or 10 perm).
Check the ISO 7783 Class. This is a European standard that rates coatings based on their breathability. Lower classes (I, II) are more breathable.
Lastly, follow manufacturer guidance. They often provide clear instructions on when and how to use their products for best results.
Environmental and indoor-air considerations
When choosing a topcoat, especially for occupied spaces, consider the environmental impact and indoor air quality:
VOC content is crucial. Volatile organic compounds can off-gas, affecting indoor air quality. Opt for low or zero-VOC products to minimize this risk.
Think about indoor-air comfort. Breathable coatings help regulate humidity, preventing mold and mildew growth. This is especially important in high-humidity areas like kitchens or bathrooms.
Lastly, consider the product’s lifecycle. Some breathable coatings are made from natural materials, reducing their environmental impact compared to synthetic alternatives.
Product Compatibility and Sequencing Best Practices
Match primers, fillers, and topcoats to create a continuous system that remains breathable and flexible. Use a test patch to verify that each layer adheres well before committing to a full area. Document any deviations from recommended sequences and adapt accordingly.
Avoid incompatible sequences that trap moisture or induce delamination, such as applying a non-breathable finish over a breathable primer without a suitable intermediary. Always check product labels, data sheets, and local rules to confirm compatibility and sequencing requirements.
Primer-to-topcoat matching protocol
Matching primers, fillers, and topcoats is crucial for a successful finish. Start by checking the supplier’s compatibility charts. These outline which products work best together.
Next, conduct small-area adhesion tests. Apply the primer, let it dry as per instructions, then apply a small patch of the intended topcoat. Let that dry too. Gently scratch at the surface with a nail or coin to check for any signs of delamination.
Remember: Incompatibility can lead to poor adhesion and eventual failure of your finish.
Coatings and barrier avoidance
Certain coatings can create barriers that trap moisture, leading to problems down the line. Here are some mistakes to avoid:
- Oil-based paints: These can seal the plaster too tightly, preventing it from breathing.
- Impermeable acrylic systems: These also create a barrier that traps moisture.
- Latex paints with high vinyl content: While breathable, they can still trap moisture if applied too thickly or without proper preparation.
- Sealers and primers not designed for porous surfaces: These can also create barriers.
To avoid these issues, stick to breathable coatings as recommended earlier. Always follow the manufacturer’s guidelines for application and priming.
Recoat timing and environmental controls
Proper recoating timing is vital. Wait until repairs are fully cured before applying topcoats. This usually takes around 28 days, but check your product instructions for specifics.
Temperature and humidity: Maintain the recommended temperature and humidity levels during recoating. Too much variation can affect drying times and adhesion.
For instance, if it’s too cold or humid, the topcoat might not dry properly, leading to issues later on. Always follow the manufacturer’s guidelines for application conditions.
Step-by-Step Repair and Recoat Workflow
Begin with a calm assessment of damage and a plan for surface preparation, keying, and drying conditions. Move through mechanical prep, chemical prep if needed, and primer application in a controlled sequence. Conclude with a breathable finish and a verification step to confirm adhesion and cure.
Document the workflow as you progress, including patch tests and observations about moisture behavior. Verification steps should include checking that the surface remains stable and that the finish dries evenly before any final coating passes are completed.
Step-by-Step Repair Process
This sequence guides you through preparing, repairing, and finishing your hardwall plaster to prevent hairline crazing.
- Inspect the area. Identify all cracks and damaged spots.
- Safety first! Clear the work area, put down drop cloths, and wear appropriate PPE.
- Main repair: Follow the steps below for prep, keying, consolidation, filling, and topcoating.
- Cleanup: Wipe off excess material, remove drop cloths, and dispose of waste properly.
- Final check: Inspect your work. If you’re unsure about any step, don’t hesitate to consult a pro.
Prep, Keying and Consolidation Steps
Start by cleaning the surface. Use a damp cloth with mild detergent to remove dirt and grease.
For friable plaster: Apply a consolidating primer to stabilize loose material before keying.
Next, choose your keying method – mechanical (sanding) or chemical (primer). Apply the chosen method evenly across the surface. Let it dry as per manufacturer’s instructions.
Finally, apply a breathable primer to improve adhesion of fillers and topcoats.
Filling Hairlines and Feathered Repairs
Select a compatible, breathable filler. Read the technical data to ensure it matches your topcoat.
For hairline cracks, use a small spatula or putty knife to apply the filler. Work in thin layers, allowing each to dry before sanding lightly with fine-grit sandpaper.
For larger repairs, feather the edges of the filler into the surrounding plaster using a damp sponge or cloth. This ensures invisible transitions.
Applying Breathable Topcoats Correctly
Choose a breathable topcoat that matches your primer and filler. Read the technical data to ensure compatibility.
Apply thin, even coats using a high-quality paintbrush or roller. Allow each coat to dry as per manufacturer’s instructions before lightly sanding with fine-grit sandpaper.
Verification: Before applying the final finish, check for any signs of poor adhesion. Gently pull on the coating – it should not peel off.
Tools, Materials Checklist and Visual Checkpoints for Diyers
Assemble a concise set of essential tools for mechanical keying, cleaning, and inspection, plus breathable material options for primers and finishes. Include PPE and a method to verify surface readiness before coating begins. Use visual checkpoints to track progress from prep to finish.
Keep a simple reference list of critical checks: surface cleanliness, keying depth, primer adhesion, and final finish uniformity. Regularly compare the surface against a defined visual standard to catch issues early and prevent recurrence.
Tools for preparation and keying
Before you start, make sure you have the right tools to prep your plaster surface and create a good key for your topcoat.
- Abrasive pad or sandpaper (120-grit): To lightly abrade the surface. Skip this and adhesion will suffer.
- Vacuum: To clean dust after sanding. Miss this, dust can cause pinholing.
- Tack cloth: For final wipe-down to remove any remaining dust.
- Scrub brush (stiff): To agitate and clean the surface before priming.
- Putty knife (6-inch): For applying filler. Don’t skip, it helps feather out repairs.
- Joint compound or spackling paste: For filling hairline cracks. Skip this and they’ll reappear under topcoat.
- Hole saw or drill bit (for larger holes): To prep for patching. Neglect this, patches won’t bond well.
- Paintbrush (1-2 inches): For applying primer. Don’t skip, it helps seal the surface and improves topcoat adhesion.
Quick rule: Always have your tools ready before you start to avoid delays and ensure a smooth workflow.
Materials: primers, fillers, and breathable finishes
Choose the right materials for your job to ensure breathability and good adhesion.
- Breathable primer: Look for one that’s compatible with your topcoat. Skip this, you might end up with poor adhesion or yellowing.
- Breathable filler (lightweight): For filling hairline cracks. Non-breathable fillers can trap moisture and cause issues later on.
- Breathable topcoat (paint, varnish, or wallpaper paste): Choose one that’s compatible with your primer. Don’t skip, it ensures good adhesion and breathability.
- Sanding sealer (optional): For sealing sanded areas before topcoating. Skip this, you might get uneven absorption of the topcoat.
- PPE (gloves, goggles, mask): To protect yourself during prep and application. Don’t skip, safety first!
- Drop cloths or plastic sheets: For protecting floors and furniture. Skip this, you’ll end up with extra cleaning work.
- Tape (painter’s or masking): For protecting edges and creating clean lines. Don’t skip, it helps maintain a neat finish.
Quick rule: Always check product labels for compatibility and breathability ratings before you buy.
Visual checkpoints during each stage
Inspect your work at each step to ensure everything is ready for the next. This helps catch issues early and saves time in the long run.
- After sanding: Surface should be uniformly dull, no shiny spots or dust remaining. Miss this, you might get poor adhesion or pinholing.
- After cleaning: Surface should be clean and dry with no visible dirt or residue. Skip this, contaminants can affect adhesion.
- After priming: Primer should have dried evenly without any missed spots or runs. Don’t skip, it ensures good topcoat adhesion.
- After filling (if applicable): Filler should be flush with the surface and completely dry. Skip this, wet filler can cause issues under topcoat.
- Before topcoating: Surface should be clean, dry, and free of any contaminants or dust. Miss this, you might get poor adhesion or an uneven finish.
Quick rule: Always inspect your work under good lighting to ensure nothing is missed.
Conclusion
Fixing hairline crazing on hardwall plaster is about safety, solid adhesion, and a finish that breathes. Do the prep, key the surface, seal with a breathable topcoat, and test as you go to prevent costly mistakes or repeat repairs.
Assess the area first, then work in clear steps: check the extent of crazing and moisture, pick the right breathable topcoat and compatible finishes, key the surface for adhesion, follow the correct product order, run a small test patch, then repair and recoat in calm, dry conditions and cure fully while protecting the work zone. Tick off each step as you go, and don’t hurry.
Common mistakes to avoid are skipping surface keying, choosing non-breathable or incompatible coatings, and not testing in a discreet area before a full recoat. Safety rules: wear eye and skin protection, keep the site dry and ventilated, and follow product labels for mixing and application temperatures. If you’re unsure about substrate movement, moisture history, or cracks wider than a hairline, pause and reassess before continuing.
If the issues show structural movement, persistent damp, or you’re unsure about the plaster condition, it’s wise to call a professional. When you can proceed confidently, you’ll gain a durable, even finish that lasts. Stay steady, follow the workflow, and you’ll finish strong.
FAQ
Should I re-key the surface after hairline crazing before applying a topcoat?
Yes. If you see craze lines, keying helps fresh material grip the surface. Use a clean, medium-grit abrasive to feather the edges, then wipe away dust before applying primer or topcoat. Check the product instructions for suitable keying methods.
How do I choose a breathable topcoat after repairing hairline cracks?
Look for topcoats labeled breathable and compatible with hardwall plaster. Read the label to confirm it suits repaired surfaces and interior use. If in doubt, ask the manufacturer or check the datasheet for breathability and film-forming properties.
What should I check for compatibility between primer, keying method, and topcoat?
Match the primer to the topcoat and the repaired surface. Verify that all products list each other as compatible on their labels or datasheets. If you’re unsure, contact the manufacturer or consult the product instructions before starting.
What safety steps help prevent further flaking or damage during repair?
Protect adjacent areas, work in good ventilation, and wear eye protection and a dust mask when sanding or abrading. Clean the work area thoroughly and follow all product label warnings and local rules for application and curing. If something isn’t clear, pause and verify instructions before proceeding.