
Introduction
Gypsum over lime plaster is when you apply gypsum-based finish over a lime plaster substrate, which calls for checking compatibility first. Lime and gypsum cure differently, so mismatches can cause peeling or cracking, and a proper primer or bond coat helps. Plan your prep and follow manufacturer or product guidance for the exact steps.
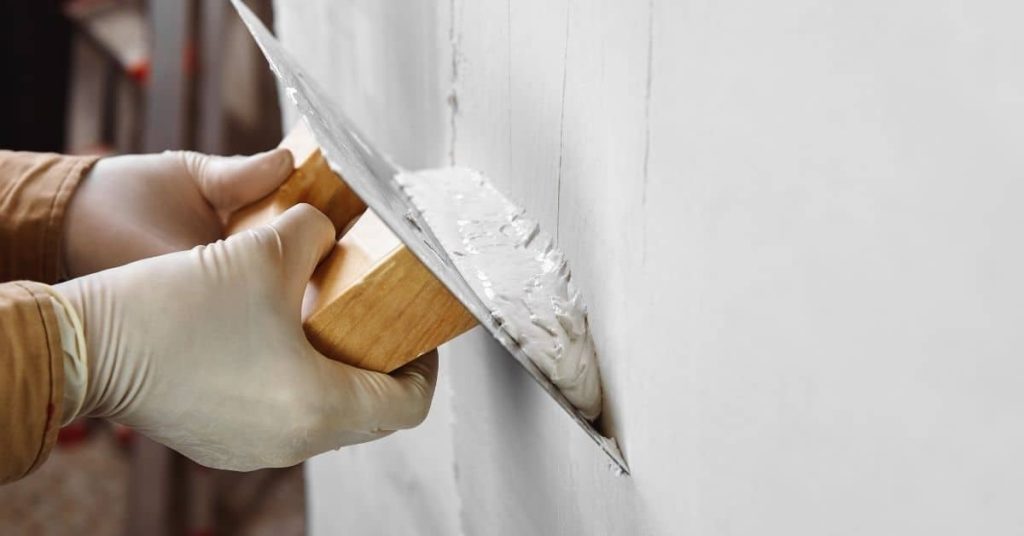
Before painting, prepare the lime plaster by cleaning, smoothing rough spots, and sealing dusty surfaces. Choose a paint or primer that is compatible with lime plaster and follow the label for surface prep and cure times. Use light, even coats and watch for pinholes or peeling, which are common traps if the plaster is too damp or the wrong primer is used.
Key takeaways
- Assess lime plaster porosity and bond roughness before applying gypsum.
- Choose breathable primers designed for lime plaster to promote gypsum adhesion.
- Avoid impermeable coatings; maintain breathability to prevent moisture trapping and cracking.
- Prepare lime surface by gentle cleaning and dust removal before overlay.
- Use proper gypsum mixing and application methods as per manufacturer guidance.
- Document safety: wear PPE and work in ventilated area when sanding or mixing.
Table of Contents
- Introduction
- Key takeaways
- Quick Answer: Is It Safe to Put Gypsum over Lime Plaster?
- How Lime Plaster Differs from Gypsum: Why Compatibility Matters
- Assessing the Existing Lime Plaster Before Overlay
- Preparing Lime Plaster for a Gypsum Overlay
- Primers and “Smart Primers” for Gypsum on Lime Plaster
- Application Methods: Best Practices for Gypsum over Lime
- Troubleshooting Common Compatibility Traps and Repairs
- Tools, Materials Checklist Plus Cost and Safety Considerations
- Conclusion
- FAQ
Quick Answer: Is It Safe to Put Gypsum over Lime Plaster?
The quick verdict depends on substrate condition and moisture. If the lime is fully cured, stable, and the wall isn’t damp, gypsum can overlay with proper prep. If active moisture, friable finish, or widespread chalking exist, overlaying is high risk and should be avoided until addressed.
On-site checks set the boundary conditions: test for adhesion, moisture, and the presence of breathable coatings. If you find loose plaster, damp patches, or limewash that blocks breathability, reassess before moving forward. Use a clear if-then framework to decide whether to proceed or revert to lime-based steps.
When gypsum over lime is typically acceptable
The best case for applying gypsum skim coat over lime plaster is when the existing substrate is sound, dry, and fully cured. This usually means:
Fully Cured Lime Render: Wait at least 28 days after application before considering an overlay.
Stable Substrate: The lime render should not show signs of cracking or delamination. Tap it gently; if it feels solid, it’s likely stable.
Low Damp Conditions: Ensure the area is dry and free from active moisture. Check for any signs of dampness before proceeding.
When you should avoid gypsum overlays
There are certain scenarios where attempting to apply a gypsum skim coat over lime plaster is likely to fail. Avoid these common mistakes:
- Active Moisture: Trapped moisture can cause the overlay to fail, leading to bubbling, peeling, or cracking.
- Friable Lime Plaster: If the existing lime plaster is crumbly or flaky, it won’t provide a stable base for the gypsum skim coat. Repair or replace before proceeding.
- Cracking: Active cracks in the substrate will likely transfer to the overlay, causing it to fail.
- Widespread Chalking: If the lime plaster has extensive chalking, it may not provide a suitable base for adhesion.
- Active Salts: The presence of soluble salts can lead to efflorescence, which will disrupt the bond between the old and new plasters.
Always ensure the substrate is sound, dry, and free from these issues before applying a gypsum skim coat.
Key risks and performance trade-offs
While gypsum overlays can work on lime plaster under the right conditions, there are several potential compatibility traps to be aware of:
Trapped Moisture: If moisture becomes trapped between the old and new plasters, it can lead to mold growth, bubbling, or delamination.
Poor Adhesion: Gypsum and lime have different properties. If not properly prepared, the gypsum overlay may not adhere well to the lime substrate, leading to peeling or cracking.
Differing Vapor Permeability: Lime plaster is more breathable than gypsum. Applying a gypsum skim coat can trap moisture within the wall, potentially causing dampness issues or damaging the underlying structure.
How Lime Plaster Differs from Gypsum: Why Compatibility Matters
The differences start with porosity and breathability. Lime plaster is highly breathable and moves with moisture; gypsum is denser and less forgiving to moisture swings. That mismatch drives most compatibility issues you’ll encounter on the job.
Chemically, lime plaster carbonates and slowly shifts pH over time, while gypsum hydrates in the presence of water. This affects how primers, paints, and finishes stick and how moisture travels through the wall. Plan for those realities when selecting primers and topcoats.
Breathability and moisture movement
Lime plaster is breathable, meaning it allows water vapor to pass through. This is due to its porous nature and high permeability. Gypsum, on the other hand, has lower permeability and can trap moisture if not properly prepared.
Trapped moisture in gypsum over lime can lead to issues like efflorescence, blistering paint, or even delamination of the finish. To avoid this, ensure your lime plaster is dry before applying gypsum.
Use a moisture meter to check for excess moisture. If present, allow the surface to dry naturally or use fans and dehumidifiers to speed up the process.
Alkalinity, carbonation and chemical interactions
Lime plaster is alkaline due to its calcium hydroxide content. Over time, it undergoes a process called carbonation where it reacts with carbon dioxide in the air to form calcium carbonate, making it less alkaline.
High alkalinity can affect primers and finishes designed for gypsum, which are typically not alkaline-resistant. This can lead to poor adhesion or even damage to these products.
To mitigate this, use alkaline-resistant primers specifically designed for lime plaster before applying gypsum. These primers create a barrier that prevents chemical reactions between the lime and your finish.
Surface texture and suction (porosity)
Old lime plaster surfaces can have varying degrees of suction or porosity. This means some areas may absorb liquids more than others, affecting how well gypsum adheres and how primers perform.
High suction areas can cause gypsum to dry too quickly, leading to poor adhesion and a weak bond. Conversely, low suction areas might not allow primers or gypsum to penetrate properly, resulting in poor adhesion as well.
To address this, lightly sand the surface to even out its texture. Then, apply a primer designed for both lime and gypsum plasters. This will help create a consistent surface for your gypsum overlay.
Assessing the Existing Lime Plaster Before Overlay
Begin with a visual and tactile survey for dryness, soundness, and contamination. Look for damp patches, salt efflorescence, and flaky areas that suggest moisture movement. Tap tests can reveal hollow or weak zones you must address.
Test porosity and moisture with simple on-site checks, then note any non-breathable coatings. Scrutinize for oils, waxes, or laitance that would impede adhesion. Plan primer and removal steps based on what you find and record the results for reference.
Soundness checks and knock tests
Before you start, check your lime plaster‘s soundness. This helps find loose or delaminated areas that need fixing.
Use a wooden or plastic tool – not metal, to avoid damage. Gently tap the surface in different spots. Listen for:
- Hollow sounds: Indicate loose plaster or voids. Mark these areas and remove them before overlaying.
- Solid thuds: Show good adhesion. These areas are safe to proceed with.
Tip: Work methodically, grid-like, to cover the entire surface.
Moisture and salt indicators
Check for dampness and salts. These can cause problems if not addressed first.
Look out for:
- Damp patches: Darker, wetter spots that feel cool to touch. Moisture here could compromise your overlay.
- Efflorescence: White, powdery deposits on the surface. These are salts brought up by moisture. Remove them gently with a brush or scraper.
Why it matters: Moisture and salts can weaken adhesion, cause delamination, and lead to overlay failure.
Visual checkpoints for surface condition
Inspect your lime plaster’s surface visually. This helps choose the right prep and primer.
- Powdering: Fine, white dust on the surface. It indicates a weak, porous layer that needs gentle abrasion before overlaying.
- Flaking: Small pieces of plaster coming off. Remove these areas carefully to prevent them from affecting your new overlay.
- Heavy texture: Uneven, rough surfaces. You might need to level this out or choose a primer that can handle heavy texture.
- Non-breathable coatings: Paint, sealers, or other non-permeable finishes. These must be removed as they trap moisture and prevent proper adhesion.
- Efflorescence salts: White, crystalline deposits. Remove these gently to avoid compromising your overlay.
- Laitance: A weak, chalky layer often left by improper mixing or curing of the original plaster. Remove this before overlaying.
Quick rule: If in doubt, take a small test patch to see how your chosen primer and overlay react with the surface condition.
Preparing Lime Plaster for a Gypsum Overlay
Ensure the lime plaster is sound, dry, and free of active dampness before any overlay work. Check for efflorescence and salt issues that could compromise bonding. If present, address them per local guidelines before continuing.
Clean thoroughly and stabilize weak areas with breathable repairs. Lightly key the surface and restore porosity where needed, avoiding dense sealers that trap moisture. Document every step to guide the gypsum overlay.
Cleaning, contaminant removal and degreasing
Start by removing loose render with a stiff brush. This helps create a stable surface for bonding.
Dirt and grease can hinder adhesion. Use a suitable degreaser to clean the wall, following manufacturer’s instructions. Rinse thoroughly afterwards.
Salt efflorescence may indicate rising damp or other moisture issues. If present, remove it with a wire brush or scraper, then rinse. Ensure no salts remain as they can compromise gypsum adhesion.
Vacuum the wall to remove systemic dust. This helps prevent trapped air pockets that could weaken your overlay.
Stabilising and repairing weak or powdery areas
Friable lime needs consolidating. Use a breathable consolidant, applied with a brush, to strengthen the surface. Follow manufacturer’s instructions for application and drying times.
For larger weak areas, consider reapplying compatible lime-putty repairs. Rake or pin-in these repairs as needed to create mechanical keying.
If sections are too damaged, they may need replacing entirely. Remove the affected area back to solid substrate, then repair using compatible materials and techniques.
Allow consolidants and repairs to cure fully before proceeding with your gypsum overlay.
Curing and drying guidance before starting work
The lime plaster must be fully cured and dry before applying the gypsum overlay. Curing time varies, but it’s typically around 28 days.
Check for dryness using moisture probes or a humidity sponge test. The wall should read below the recommended threshold (usually 16% relative humidity) before proceeding.
Feel the surface – it should be cool to touch, not warm or damp. If unsure, wait a few more days and retest.
Once dry, allow the wall to ‘rest’ for at least 24 hours before starting work. This helps ensure your gypsum overlay bonds well with the lime substrate.

Primers and “Smart Primers” for Gypsum on Lime Plaster
The substrate challenge centers on moisture management, breathability, and bond between lime and gypsum finishes. Choose primers that respect both systems and don’t seal in movement. Start with a plan that keeps the wall breathable while promoting adhesion.
Compare breathable silicate primers, consolidating primers, and adhesion-promoting primers. Use them in sequence or combination as dictated by surface condition and topcoat choice. Always verify compatibility with your selected finishes before applying.
Breathable and silicate-based primers
Silicate primers are your best bet when working with lime plaster. They bond chemically with the mineral surface, creating a strong, breathable base for your gypsum overlay.
Why breathability matters: Lime plaster needs to breathe. It absorbs and releases moisture naturally. A non-breathable primer can trap moisture, leading to issues like efflorescence or even delamination of your finish.
Silicate primers preserve this vapor permeability. They allow moisture to move freely through the substrate while providing a solid bond for your gypsum overlay.
Consolidators and adhesion promoters
If your lime plaster is powdery or crumbly, you’ll want to use a consolidating primer first. These products stabilize the surface, preventing further deterioration and improving adhesion for subsequent coats.
Adhesion promoters: After consolidation, apply an adhesion-promoting primer designed for gypsum-to-lime bonds. These primers create microscopic mechanical interlocks, enhancing bond strength without forming a vapor barrier that could trap moisture.
Remember, the goal is to maintain breathability while improving adhesion. Avoid sealers that form a complete barrier; they can cause more harm than good on lime plaster.
Choosing the right primer for the condition
Primer choice depends on your substrate’s condition. Here are some guidelines:
Sound plaster with no efflorescence: Start with a breathable silicate primer to create a strong, mineral-compatible base.
Powdery or crumbly plaster: Begin with a consolidating primer to stabilize the surface. Follow up with an adhesion-promoting primer for gypsum.
Efflorescence present: Clean and remove efflorescence before priming. Then, choose based on the above conditions. Always test for porosity and reactivity before applying any primer.
Application Methods: Best Practices for Gypsum over Lime
Follow a disciplined layering sequence and keep moisture in check. Start with proper surface preparation, then choose a compatible bonding agent and plan a conservative layer buildup. Avoid over-wetting and rapid drying that can cause cracks.
Test spot adhesion first and verify substrate moisture before each coat. Record layer thickness and drying times, and adapt tooling and technique to preserve porosity. Use finishing methods that suit a lime-to-gypsum transition and align with the topcoat you plan to apply.
Bond coat and skim-coat technique
The bond coat is your key to a strong gypsum over lime plaster system. It bridges the gap between the two surfaces, promoting adhesion.
First, apply a thin layer of gypsum base (around 2-3mm thick). This is your bond coat. Use a hawk and trowel, working it into the surface to ensure good contact with the lime plaster.
Next, once the bond coat has started to set but is still workable (not fully dry), apply your finish coat. This should be around 3-5mm thick. Use a wide-bladed trowel to spread it evenly and smoothly.
The skim-coat technique helps achieve a smooth, even surface. Work from the top of the wall downwards, using long, sweeping strokes with your trowel.
Working with mist coats and intermediate coats
Mist coats and intermediate coats are diluted gypsum layers that help improve adhesion and even suction. They’re particularly useful when applying gypsum over lime.
A mist coat is a very thin, watered-down layer (about 1:4 or 1:5 gypsum to water). Apply it with a sprayer or a soft-bristled brush for even coverage. This helps the final coat adhere better and reduces suction.
An intermediate coat is slightly thicker, around 2-3mm. It’s applied after the mist coat has started to set but before it’s fully dry. This helps level out any imperfections in the surface and provides a good base for your final coat.
Remember, these coats are about evening out suction and providing a better base for your final layer. They’re not meant to be thick or heavy applications.
Jointing, sanding and final finish considerations
After applying your gypsum over lime system, it’s important to joint, sand, and finish correctly to avoid stress points and overworking the gypsum.
Use a joint compound to fill any gaps or cracks. Apply it with a joint knife, working it into the surface. Let it set, then sand it smooth using a drywall sanding screen or fine-grit sandpaper.
Once your joints are filled and sanded, apply a skim coat. This is a thin layer of gypsum that helps even out any remaining imperfections. Apply it with a wide-bladed trowel, working from the top of the wall downwards.
After your skim coat has dried, lightly sand the surface to remove any raised grain or imperfections. Vacuum off any dust, then apply your final paint or sealer. This will help protect your gypsum over lime plaster system and keep it looking good for years to come.
Troubleshooting Common Compatibility Traps and Repairs
Common failures include blisters, flaking, delamination, and efflorescence. Map each failure type to a plausible cause such as moisture intrusion or primer mismatch. Use that mapping to guide targeted fixes rather than broad, guesswork repairs.
Develop a diagnostic workflow: moisture checks, bond tests, and substrate assessment come first. Then choose compatible primers and perform targeted re-prep or re-plaster as needed, with moisture management in mind for future projects.
Adhesion failure: causes and remediation
Poor bonding between your gypsum overlay and lime plaster can lead to delamination, flaking, or even total loss of the new finish. Let’s diagnose and fix this common issue.
Causes: Inadequate surface preparation, incompatible primers, or applying over a non-cured substrate are usual culprits.
Remediation: Start by cleaning and abrading the affected area. If delamination is extensive, remove the gypsum overlay entirely. Choose a compatible primer this time, like a breathable or silicate-based one, and follow up with a proper bond coat application.
Moisture-related failures and salt migration
Efflorescence, blisters, or white deposits appearing on your gypsum overlay? You’re likely dealing with moisture intrusion or salt migration.
Causes: Trapped moisture in the substrate or salts rising to the surface due to capillary action can wreak havoc on your finish.
Remediation and prevention: Address any water sources, apply a compatible primer with good moisture resistance, and consider using a salt-inhibiting sealer. After repairs, monitor the area for recurring issues and address promptly.
Common mistakes to avoid
Steer clear of these common pitfalls when applying gypsum over lime plaster to save time, money, and frustration.
- Applying over damp plaster: Gypsum needs a dry substrate. Wait until the lime plaster is fully cured and dried before overlaying.
- Using non-breathable primers: These can trap moisture, leading to failures. Stick with breathable or silicate-based primers for gypsum over lime systems.
- Skipping tests: Always perform small test patches to ensure compatibility and check for any adverse reactions before full application.
- Ignoring substrate movement: Cracks in the substrate can transfer to your overlay. Repair these before applying gypsum.
Learning from others’ mistakes is half the battle. Keep these in mind, and you’ll be well on your way to a successful gypsum over lime plaster project.
Tools, Materials Checklist Plus Cost and Safety Considerations
Assemble a core kit of versatile tools and smart substitutes to avoid frequent trips to the supply yard. Prioritize reliable trowels, mixing tools, and protective gear you won’t skimp on. Have containment and dust control ready for cleanups.
Check material specs carefully: plaster types, primers, bonding agents, sealants, and protective coatings suitable for lime-to-gypsum transitions. Note any mixing ratios and substrate prep steps, plus PPE and ventilation needs to stay compliant and safe on site.
Tools and materials checklist
Before you start, use this checklist to ensure you’ve got the right tools and materials for the job.
- Trowels (3-4 sizes): For applying and spreading plaster. Skip buying all sizes; rent or borrow as needed.
- Hawk: Holds plaster while troweling. One size fits most jobs.
- Mixing paddle: Attaches to drill for mixing plaster. Essential for consistency.
- Bucket (5-10 gallons): For mixing and carrying plaster. Larger buckets save trips but can be heavy when full.
- Damp proof cloths: Protect floors from drips and splashes. Skip, and you’ll regret it.
- Dust mask (N95 or P100): Protects against plaster dust. Don’t skimp; get the right one.
- Containment sheet: Covers floors to prevent damage. Reusable, so worth buying.
- Gypsum vs lime plaster: Check labels for type and compatibility with your existing substrate.
- Primer (breathable, silicate-based): Essential for adhesion and preventing moisture issues. Skip, and you’ll have adhesion problems later.
- Bonding agent or sealant: Optional but helpful for better adhesion and preventing cracks.
- Water glaze or protective coating: Not always needed, but protects against water damage if exposed to moisture.
Quick rule: Check labels and ask sales staff for help if unsure. Better safe than sorry.
Cost comparison and what to budget or check
Budgeting for your project? Here’s what to consider when comparing costs.
- Tools: Rent expensive tools like mixers and trowels. Buy cheaper, multi-use items like buckets and cloths.
- Primer: Breathable primers cost more but offer better performance. Compare coverage rates, not just price.
- Plaster: Bulk saves money but requires more upfront investment. Consider seasonal discounts too.
- PPE and safety gear: Don’t skimp on respirators, goggles, or gloves. Your health is worth the extra cost.
- Sealants and coatings: Optional extras can add to costs but protect your work long-term.
- Labor: If hiring help, factor in their rates too.
Quick rule: Compare value, not just price. Cheaper isn’t always better.
Safety, ventilation and PPE
Your safety is paramount. Here’s what you need to protect yourself and your workspace.
- Respirator (N95 or P100): Protects against plaster dust. Essential for long-term health.
- Goggles: Shields eyes from dust and splashes. Don’t forget to protect your eyes.
- Gloves: Protect hands from cuts, scrapes, and chemicals. Choose a pair that fits well.
- Ventilation: Open windows or use fans to keep workspace clear of dust. Poor ventilation leads to health issues.
- Dampening lime surfaces: Before applying gypsum, dampen lime surfaces to prevent over-wetting and adhesion failure.
- Containment: Use containment sheets to control dust spread. Keep your workspace clean.
- Disposal: Follow local guidelines for disposing of plaster waste. Don’t let it build up in your workspace.
Quick rule: Safety first. Always wear PPE and maintain good ventilation.
Conclusion
When done right, a gypsum overlay on lime plaster gives a smooth, durable surface without trapping damp or peeling later. The key is treating compatibility as a failure prevention measure, not an afterthought, and keeping safety and reversible work in mind at every step.
Check the wall like you would a small project: confirm the lime plaster is sound, test for moisture and softness in a hidden area, choose a compatible primer, roughen and clean the surface, apply the primer and gypsum in the recommended order, work in workable batches, and inspect as you go. Start small, follow the product directions, and allow proper curing time. If in doubt, test a patch first and document the results before committing to the full area.
Common mistakes to avoid are skipping surface prep, using the wrong primer or ignoring ventilation and curing conditions. Don’t rush or over-apply; keep coats thin and even, and never skip moisture checks or safety gear. A clear rule of thumb: if the plaster shows active cracking, damp, or delamination, pause and reassess before continuing.
If the project surface is large, the plaster is damaged, or you see persistent moisture issues, consider calling a professional. A measured approach keeps costs down and avoids costly fixes down the line. With careful prep, testing, and smart priming, you can finish confidently and protect the wall for years to come.
FAQ
What paints are best for lime plaster and why?
Look for breathable coatings that suit lime plaster. Check the product label for compatibility with lime, Portland cement, or gypsum-containing substrates. If unsure, read manufacturer instructions or ask the local paint shop for guidance.
How should I prep lime plaster before painting?
Clean dust and loose material from the surface. Fill obvious chips or irregularities to a smooth tint. Get surface dry to the touch; if moisture is a concern, follow the product’s instructions or wait until conditions are right.
What painting techniques work best on lime plaster?
Use thin, even coats and allow adequate drying between passes as per the product label. Apply with steady strokes to avoid lap marks. Avoid heavy, saturated coats that risk peeling or slow drying.
What are common pitfalls and ongoing maintenance after painting lime plaster?
Pitfalls include peeling, cracking, or moisture staining. Address issues early by inspecting and touching up with compatible products. For repairs, match the primer and paint type and follow the label directions; for any doubt, consult the manufacturer or local rules.