
Introduction
Freeze-thaw on brick patios is how water trapped in bedding, joints, and brick itself can thaw and refreeze, driving cracking and loosening. This article explains practical signs and approaches for bedding, drainage, and joint fill that can survive freeze-thaw cycles. It is written in a hands-on, plain-language style to help you plan and execute with durability in mind.
Key ideas include how brick performs under freeze-thaw compared with other hardscaping options, and how installation choices influence long-term maintenance and lifespan. It also covers drainage setup, bedding quality, and joint fill considerations, with guidance on what to check on labels, manufacturer instructions, and local rules. Follow practical steps and verify details before you start to help create a patio that lasts through cold seasons.
Key takeaways
- Freeze-thaw cycles stress brick patios, emphasize bedding, joints, and drainage interplay.
- Choose bedding systems guiding long-lasting patios with proper compaction and slope.
- Effective drainage protects against standing water, soil movement, and frost heave.
- Select joint-fill materials resilient to freezing, moisture, and chemical exposure.
- Sealer choices can help or harm; use breathable products and follow manufacturer guidelines.
- Regular inspection, safe handling, timely repair, and seasonal maintenance reduce long-term costly failures.
Table of Contents
- Introduction
- Key takeaways
- How Freeze-Thaw Cycles Actually Damage Brick Patios
- Proper Bedding Systems for Long-Lasting Brick Patios
- Drainage Strategies That Keep Patios Dry and Stable
- Choosing Joint-Fill Materials That Resist Freeze-Thaw Cycles
- Sealers, Coatings, and Protective Treatments: What Helps and What Harms
- Preventing, Diagnosing, and Repairing Freeze-Thaw Damage
- Seasonal and Emergency DIY Steps During Extreme Weather
- Case Studies and Cost-Benefit Framework for Prevention Vs Repair
- Conclusion
- FAQ
How Freeze-Thaw Cycles Actually Damage Brick Patios
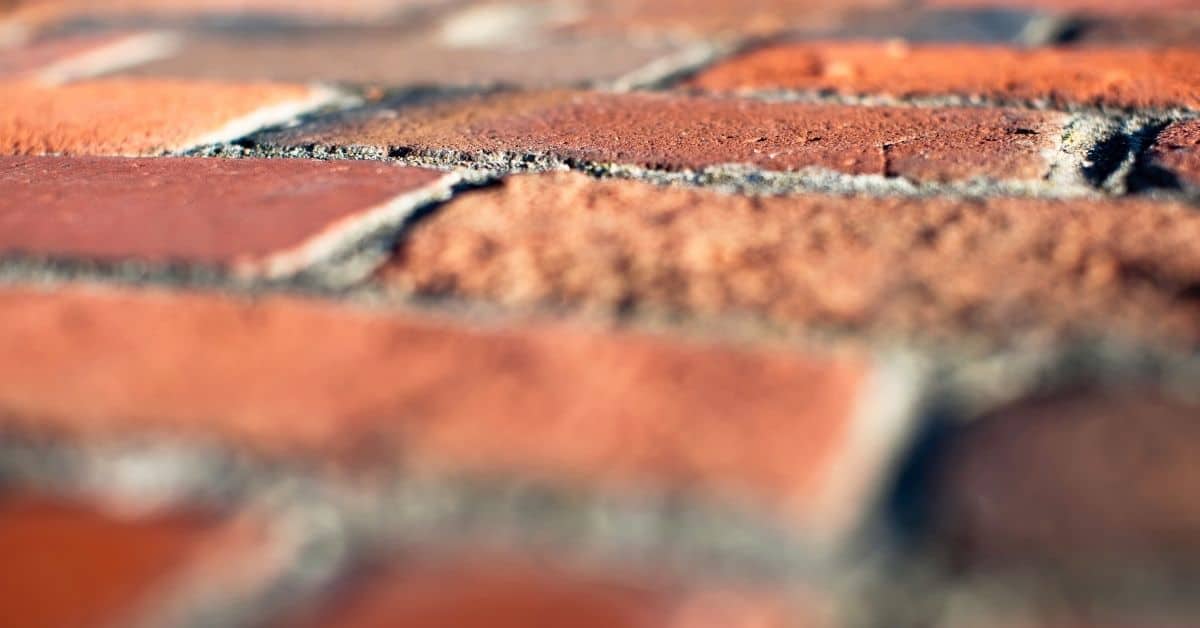
Water infiltrates brick, mortar joints, and the base, then freezes and expands. This expansion creates microcracks and spalling in bricks and accelerates mortar degradation.
Repeated cycles matter more than a single freeze. Each cycle adds more moisture and pressure, driving progressive damage through the system and undermining bedding and drainage. Water sources include interior bricks, joint migration, surface pooling, and saturated soil, often driven by capillary action.
The Science Behind Freeze-Thaw and Masonry
Freeze-thaw damage in brick patios occurs due to the physical mechanism of water absorption, expansion, and contraction within the materials. Here’s how it works:
Water infiltrates porous bricks and mortar joints, then freezes and expands during cold temperatures. This process creates microcracks, spalling (flaking), and mortar degradation over time.
Understanding this mechanism is crucial for effective prevention. Inspect materials for signs of water absorption and expansion, such as microcracks or spalling. Verify material datasheets for frost resistance ratings (e.g., ASTM C672). Consider using alternative materials with better freeze-thaw resistance if current ones show signs of water damage or have low frost resistance ratings.
Common Failure Modes Caused by Freeze-Thaw
Repeated freeze-thaw cycles can manifest in various ways, damaging your brick patio’s longevity and appearance. Here are some common failure modes:
1. Spalling: Flaking or chipping of the outer layer of bricks due to water expansion within the pores.
2. Joint Loss: Cracking and erosion of mortar joints, allowing more water ingress and accelerating damage.
3. Heaving and Settling: Frost heave occurs when water-saturated soil freezes and expands, pushing up on the patio. Settlement happens as the ice melts, leaving voids that collapse under weight.
Identifying these failure modes helps target maintenance efforts and prevent further damage. Regularly inspect patios for signs of deterioration, such as efflorescence (indicating moisture movement), spalling bricks, or cracked joints. Address issues promptly to prevent progressive deterioration.
Climate and Site Factors That Increase Risk
The frequency of freezes, temperature swings, soil type, and proximity to water sources significantly impact your patio’s vulnerability to freeze-thaw damage. Here’s what you should consider:
Freeze Frequency and Temperature Swings: Areas with frequent freezes and large temperature swings experience more severe damage.
Soil Type: Expansive soils, such as those high in clay or silt, can cause additional heaving and settling issues when they absorb water and freeze.
Proximity to Water Sources: Patios near bodies of water may be more susceptible to moisture ingress and subsequent freeze-thaw damage.
Acknowledging these local climate and site conditions helps tailor preventative measures effectively. Assess your property’s soil type and proximity to water sources, and review local climate data for freeze frequency and temperature swings. If your area experiences frequent freezes, large temperature swings, or has expansive soils, implement additional moisture management strategies.
Proper Bedding Systems for Long-Lasting Brick Patios
Flexible bedding (sand-based) and rigid bedding (concrete or mortar-set) serve different conditions. Flexible bedding tolerates minor moves but can wash away with heavy traffic; rigid bedding resists movement but transfers stresses differently.
A well-planned multi-layer base reduces water retention and frost movement. This typically includes subgrade prep, granular sub-base, a compacted bedding layer, and the brick course above. Proper layering helps moisture drain away and limits lateral frost action.
Flexible Bedding (Sand-on-Aggregate) vs Rigid Bedding (Mortar/Bed)
When preparing your brick patio’s bedding layer, you have two main options: flexible or rigid. Each has its own advantages and best use cases.
Flexible bedding, typically a sand-on-aggregate mix, allows for some movement of the units (bricks or pavers). This is beneficial when using large format pavers as it accommodates minor shifts due to temperature changes or slight settling. To ensure proper flexibility:
- Use clean, coarse sand.
- Check base compaction before adding the bedding layer.
Rigid bedding, usually a mortar or concrete mix, provides no movement and holds units firmly in place. This is ideal for small format bricks where any shift could cause instability. However, it’s crucial to ensure your base is well-compacted to prevent cracking:
- Use a proper mix of cement, sand, and water.
- Check base compaction before applying the rigid bedding.
Skipping proper bedding can lead to patio heaving or settling during freeze-thaw cycles. If your patio shows signs of heaving, re-compact the base and ensure proper drainage.
Base Layer Composition and Compaction Principles
The base layer is crucial for your brick patio’s longevity and stability. It consists of a well-draining aggregate to prevent water buildup and promote proper drainage.
Staged compaction ensures a solid base. Compact the aggregate in layers, typically no more than 3 inches deep at a time. Thoroughly compact each layer before adding the next for maximum density and stability.
Indicators of an insufficient base include patio instability, cracking under freeze-thaw cycles, or standing water after rain. To check your base compaction:
- Inspect the aggregate’s particle size distribution visually.
- Feel its moisture level; it should be slightly moist but not wet.
Common issues include using poorly graded or excessively moist aggregate. Ensure your aggregate meets local standards for particle size and moisture content. If the aggregate appears too fine or wet, consider adding larger particles or reducing moisture to enhance drainage.
Geotextiles, Edge Restraints, and Frost Protection
Geotextiles prevent base loss by filtering water while retaining bedding material. Install them on top of a well-compacted aggregate base, following the manufacturer’s instructions.
Rigid edge restraints maintain tolerances and prevent lateral movement. Secure them along the perimeter, ensuring they’re level with the final patio surface to stabilize the base and prevent brick shifting over time.
Frost protection is crucial in colder climates to prevent heaving and cracking. Check local standards for specific requirements. Generally:
- Deepen your base: Ensure it’s at least 4-6 inches deep for adequate frost protection.
- Consider insulation: Incorporate insulation into your base design if severe freeze-thaw cycles are common in your area.
Drainage Strategies That Keep Patios Dry and Stable
Surface drainage should slope the patio away from the home toward approved outlets to prevent pooling. Proper grading is essential to minimize standing water on the surface.
Subsurface drainage, including a gravel base with perforated pipes or a French drain, helps move water away. Use filter fabric and cleanouts, and ensure the system ties into the property drainage plan.
Surface grading and runoff management
Ensure your patio has a consistent slope away from structures to prevent water pooling. This helps manage surface runoff effectively and reduces the risk of freeze-thaw damage.
Check for effective runoff by observing how water flows after rainfall or when you simulate conditions with a garden hose. Water should flow consistently towards approved outlets, such as yard grading, trench drains, or swales.
Key: Regularly inspect and maintain the patio’s surface to ensure it remains free of debris that could impede runoff.
Subsurface Drainage Options
Install a subsurface drainage system at the base of your patio to redirect water. This helps prevent hydrostatic pressure and reduces the risk of perched water.
Use perforated pipes or a French drain with proper filter fabric and cleanout access. Gravel trenches can also be effective, provided they are properly sloped and connected to an outlet.
Note: Check local building codes and manufacturer instructions for specific product requirements and installation guidelines.
Tying patio drainage into roof and lot drainage
Coordinate your patio’s drainage with the rest of your property to avoid concentrated water near the patio. This helps maintain a comprehensive water-management plan.
Extend downspouts away from the patio, ensure yard grading directs water away from the structure, and consider using permeable hardscapes to help absorb and redirect water.
Tip: Regularly inspect and maintain your property’s drainage systems to ensure they continue to function effectively over time.
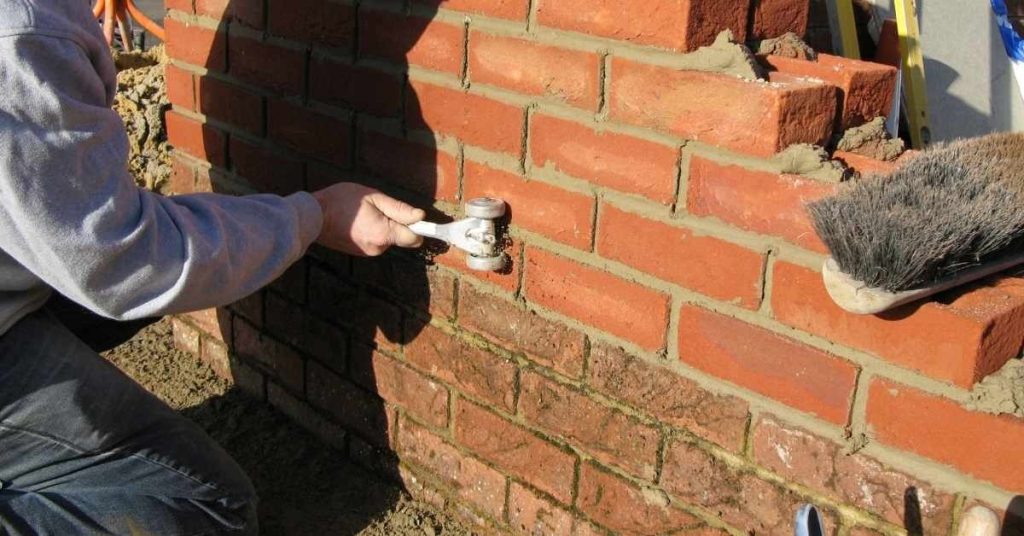
Choosing Joint-Fill Materials That Resist Freeze-Thaw Cycles
Loose sand, polymeric sand, mortar, and specialty joint compounds each handle moisture differently. Saturation, cracking risk, and spalling depend on material properties.
Look for explicit freeze-thaw resistance ratings and compatibility with bedding materials. Installation affects performance: joint width, depth, compaction, and drainage integration matter for long-term durability.
Loose Sand and Its Maintenance Profile
Loose sand is a common choice for brick patio joints due to its forgiving nature. It allows for natural movement of the patio, accommodating expansion and contraction caused by temperature changes.
However, loose sand requires regular maintenance. Poor drainage can cause washout, leading to joint instability and requiring annual refills. Weed growth is also a common issue with loose sand joints, necessitating regular weed control measures.
To mitigate these issues, ensure your patio has proper drainage integration, install edge restraints to prevent sand from washing out, and schedule regular refills to maintain joint depth. If your patio is subject to significant movement or has poor drainage, consider alternative joint-fill materials.
Polymeric Sand and Stabilized Jointing Products
Polymeric sands and other stabilized jointing products offer improved stability compared to loose sand. They bind particles together, resisting washout and inhibiting weed growth.
Proper installation and drying conditions are crucial for these products to perform effectively. Improper application can lead to joint failure or discoloration. Always follow the manufacturer’s instructions for correct installation, drying times, and maintenance.
These products allow for some patio movement while providing better stability than loose sand. If your patio is in a high-traffic area or has poor drainage, consider using polymeric sand or other stabilized jointing products to enhance joint durability.
Mortar, Mortared Joints, and Rigid Joint Systems
Mortar or cementitious jointing is preferred for patios in freezing climates with minimal movement. It provides a strong bond with bricks, resists weed growth, and maintains joint integrity.
However, it’s essential to verify compatibility with your brick mortar or bedding materials. Improper bonding can lead to joint failure, so always check manufacturer guidelines for compatibility.
While mortar offers excellent stability, it is less forgiving to patio movement compared to other options. If your patio experiences significant expansion and contraction, consider using a flexible jointing material to accommodate this movement.
Sealers, Coatings, and Protective Treatments: What Helps and What Harms
Penetrating sealers versus film-forming sealers change how water moves through brick and joints. Each type has different implications for porosity and moisture behavior.
Testing and guidelines matter: patch tests, baseline moisture readings, and adherence to manufacturer instructions are essential. Signs of harm include trapped moisture, efflorescence, and surface hazing.
Penetrating vs Film-Forming Sealers: Pros and Cons
Sealers for brick patios can be categorized into two main types: penetrating and film-forming. Each has its own advantages and disadvantages, affecting water behavior, traction, and maintenance.
Pros of Penetrating Sealers
- Reduce water absorption without significantly altering the surface appearance.
- Allow for better breathability, preventing moisture entrapment.
- Provide a more natural look and feel to the patio.
- Generally require less maintenance than film-forming sealers.
Cons of Penetrating Sealers
- Do not provide complete waterproofing, which may be necessary in some areas.
- May not offer sufficient protection against freeze-thaw cycles in colder regions.
- Can still allow for some moisture penetration, potentially leading to efflorescence or staining.
- May not be suitable for high-porosity bricks or joints.
Penetrating sealers are typically the better choice when reduced water absorption with minimal surface change is desired. However, if complete waterproofing and traction are critical, consider a film-forming sealer after testing both types on small areas to observe performance.
Sealer Compatibility with Joint Fills and Bedding
Ensuring compatibility between sealers, joint fills, and bedding materials is crucial for maintaining patio integrity and preventing moisture trapping. Some sealers can interfere with the bond of joint fill materials or trap moisture in polymeric sands, leading to performance issues.
Always review manufacturer instructions for compatibility with specific joint fills and bedding materials before application. If using polymeric sand or other specialized joint fills, perform patch tests on a small area to ensure no adverse reactions occur between the sealer, joint fill, and bedding materials.
Incompatibility can lead to issues such as reduced bond strength, moisture trapping, efflorescence, or even patio failure. If compatibility issues arise, consider alternative sealing methods or adjust your patio design to accommodate suitable materials.
Application Timing and Seasonal Considerations
Timing sealer application is crucial for best results and longevity. Apply when materials and weather meet the product’s requirements, as specified by the manufacturer.
Check product label for optimal temperature and humidity ranges. Generally, sealers perform well in mild, dry conditions with temperatures between 50°F (10°C) and 90°F (32°C).
Maintain your patio by reapplying sealers as needed, following manufacturer instructions. After severe freeze-thaw events or extreme temperatures, allow the patio to stabilize before reapplication. Regularly monitor performance for signs of wear.
Preventing, Diagnosing, and Repairing Freeze-Thaw Damage
A quick diagnostic checklist helps identify symptoms like sinking bedding, cracking, or water pooling. Look for efflorescence and misaligned joints indicating moisture movement.
A tiered approach guides actions: routine inspections and small DIY fixes first; reserve structural repairs for professional assessment. Proper sequencing avoids repeating problems.
Routine Inspection Checklist and Visual Checkpoints
Inspect your brick patio regularly to catch freeze-thaw damage early. Use this checklist as a guide.
- Spring: Check for any settling or heaving that may have occurred over winter, and inspect joints for signs of mortar loss.
- Summer: Look for efflorescence (white powdery deposits) on the bricks, which can indicate moisture issues. Inspect drainage to ensure water is exiting properly.
- Fall: Before cold weather sets in, check joints for any gaps or squeezing that could allow water penetration during freeze-thaw cycles.
- Winter (after thaw): Inspect the patio surface for any cracks or signs of spalling (flaking) after winter’s freeze-thaw cycles.
Quick rule: Document changes and note when repairs are needed to maintain your patio’s longevity.
Common DIY Repairs: Joint Refilling, Brick Replacement, Repointing
For minor damage, homeowners can perform these simple repairs to maintain their patio’s integrity.
Joint Refilling: Remove old joint material, clean the joints, and refill with appropriate joint filler. Ensure it matches the existing joint fill for long-term success.
Brick Replacement: If a brick is damaged or loose, remove it carefully, ensuring not to damage surrounding bricks. Replace with a matching brick, using fresh mortar if necessary.
Repointing: For mortared joints, if mortar is cracked or missing, repoint the joint by removing old mortar, cleaning the joint, and refilling with new mortar that matches the existing color and type.
Structural or Persistent Issues That Require Pros
Some patio damage may indicate underlying structural problems that need professional evaluation.
Ongoing Heave: If your patio continues to heave (rise and fall) despite repairs, it could indicate a more serious problem with the base or foundation. Consult a professional.
Broad Settlement: Widespread settling can lead to structural instability. If large areas of your patio are sinking, call in an expert.
Foundation-Adjacent Water Problems: Water issues near your home’s foundation can compromise its integrity. If you notice persistent water problems around your patio, consult a professional immediately.
Seasonal and Emergency DIY Steps During Extreme Weather
During freeze-thaw, remove debris from joints, protect exposed bedding, and shield vulnerable edges to limit water intrusion. Protecting edges reduces frost heave risk.
Seasonal steps include checking drainage, clearing weep holes, and directing surface water away from joints. For temporary repairs, use compatible patch materials and breathable sealants as appropriate.
Short-term actions for freeze-thaw events and ice management
When faced with freeze-thaw cycles, take immediate steps to minimize damage from standing water and ice.
Remove standing water and ice safely: Use appropriate tools like ice chisels or snow shovels. Be cautious not to damage bricks or joints.
Use de-icing products carefully: Only use products labeled safe for masonry. Avoid hard scraping, which can cause damage. If you notice any cracks or joint issues after removal, repair them promptly.
Pre-winter and spring checklists
Prepare your brick patio for seasonal changes with these checklists, timed according to your local climate patterns.
- Before winter: Clear drains of debris. Check joints for any cracks or damage. Protect vulnerable edges with temporary barriers.
- After winter: Schedule repairs for any damage found during inspection. Clear debris from joints and bedding surfaces.
- Spring thaw: Re-inspect your patio for signs of frost heave or other damage. Address any issues promptly to prevent further problems.
Quick rule: Inspect your patio regularly during transition periods to catch and address any issues early.
Tools and materials checklist for DIY maintenance
Equip yourself with these essential tools and materials for regular inspections and repairs on your brick patio.
- Inspection tools: Trowels, chisels, levels. Check regularly to ensure they’re in good working condition.
- Jointing materials: Polymeric sand, stabilized jointing products, or mortared joint systems. Choose based on your patio’s existing fill.
- Hand tools: Trowels, brushes, gloves. Rent or borrow if needed for occasional use.
- Personal Protective Equipment (PPE): Safety glasses, work gloves, knee pads. Ensure they fit well and are in good condition.
Case Studies and Cost-Benefit Framework for Prevention Vs Repair
Illustrative archetypes compare a well-executed bedding and drainage installation with failures from poor joint fill or slope. Observables include cracking, weed growth, and water pooling over time.
A simple framework weighs preventive investments against projected repair costs and downtime. Use climate, material choice, and maintenance burden as key factors in decisions.
Two Case Studies: Successful vs Unsuccessful Patio Installations
Examine two patio installations to understand the importance of proper base preparation, drainage, and joint fill.
Case Study 1: Successful Installation
Adequate base slope for drainage, polymeric joints, and permeable bedding material were used. The result was minimal cracking, no weed growth, and efficient water drainage. Long-term maintenance needs are low.
Case Study 2: Unsuccessful Installation
Inadequate base slope led to water pooling. Incompatible joint fill allowed weeds to grow, and cracking appeared due to improper bedding material. Regular repairs are now necessary.
Cost-Benefit Evaluation Approach for Homeowners
Deciding between preventive upgrades and repairs involves weighing several factors:
1. Upfront Investment vs Repair Costs
Compare the initial cost of preventive upgrades with projected repair costs over time.
2. Downtime and Disruption
Consider how long repairs or preventive work will take, and how that affects your use of the patio.
3. Expected Service Life and Maintenance Frequency
Evaluate how often you expect to need repairs or maintenance with each option, and how that impacts your budget and time.
Warranty, Installer Qualifications, and Documenting Work
Protect your investment by ensuring quality installation and understanding warranty terms:
1. Warranty Terms
Check that the warranty covers freeze-thaw damage and installation defects to ensure protection for your investment.
2. Installer Qualifications
Verify installers are licensed, experienced, and have positive reviews to increase the likelihood of a successful installation.
3. Documenting Installation Details
Photograph key aspects of the installation process to support future warranty claims or maintenance needs.
Conclusion
A well-executed bedding, effective drainage, and appropriate joint-fill choices are the core safeguards that keep brick patios safe to use and looking good through freeze-thaw cycles. Taking these steps now reduces the risk of heaving, spalling, and costly repairs later.
Start by inspecting the bedding for level and compaction, then verify drainage slopes and unobstructed outlets, assess joint-fill material suitability and bulk-fill options, review any coatings for compatibility with climate and brick, and plan measured tests in a small area before full-scale work. If you approach it in that order and document results, you can build a durable, low-maintenance patio over time.
Common mistakes to avoid include sealing over damp or dirty joints, choosing a joint-fill material that isn’t rated for freeze-thaw, and neglecting drainage or skipping small-area testing before wider work. Always work in a dry, ventilated area, wear appropriate PPE, and conduct a test patch to confirm performance before committing to a full repair or retrofit.
If the project involves significant movement, major cracking, or persistent water pooling that you cannot address safely, consider bringing in a qualified professional. When in doubt, prioritize safety, follow manufacturer instructions and local rules, and proceed with measured steps. With careful planning and steady, cautious work, you can protect the patio and enjoy durable service for many seasons.
FAQ
How do brick patios compare to other materials for freeze-thaw performance?
Brick is porous and can absorb moisture, which can expand as temperatures fluctuate. Look at manufacturer guidance for each material to understand porosity, absorption, and recommended joint design. Check installation details that address drainage and proper bedding, as these affect freeze-thaw resistance.
Compared options—such as concrete pavers or natural stone—vary in how they handle water and temperature changes. Consider the material’s compressive strength, thickness, and whether it has a built-in moisture barrier or requires sealing. Always confirm guidance from the product label or supplier instructions.
Where possible, compare test data or performance claims with independent reviews. Assess how each option handles surface water, salt exposure, and potential cracking. Use this to inform your choice based on climate and site conditions.
What are the typical installation costs and timelines when choosing brick patios versus alternatives?
Costs and timelines depend on site preparation, drainage work, and the bedding system. Get itemized quotes that separate materials, subsurface work, and labor. Do not rely on broad estimates; ask for a breakdown based on your patio size and design.
Brick patios often require careful jointing and edging, which can add time and steps to installation. Compare the labor intensity of each option and how that influences project duration. Review the contractor’s schedule and milestones in writing.
Factor in site access, weather windows, and any required permits or inspections per local guidance. Use these factors to estimate overall timeline and budget more accurately.
What long-term maintenance should I plan for with brick patios versus alternatives?
Brick patios typically need periodic cleaning, joint maintenance, and occasional repointing or resealing if used. Establish a maintenance calendar that fits your climate and usage so problems are addressed early. Always follow the product and installer recommendations for maintenance intervals.
Alternatives may have different needs; for example, some surfaces resist staining better or tolerate sealers differently. Keep records of product choices, application dates, and weather conditions during maintenance to track performance. Avoid abrupt or improper sealing that can trap moisture.
Regular inspections are important for all hardscapes. Check for loose bricks or pavers, cracking, and drainage issues after heavy rains or freeze-thaw periods. Plan proactive maintenance rather than reactive repairs.
How should I assess durability, expected lifespan, and design flexibility when choosing materials?
Durability depends on material density, installation quality, and climate exposure. Consider whether the material handles traffic, salt use, and settlement without costly repairs. Compare warranties and what they cover to gauge long-term value.
Design flexibility matters for aesthetics and future changes. Some materials offer varied colors, patterns, and edging options that suit different landscapes. Ensure your choice aligns with maintenance capability and potential future upgrades.
Evaluate overall value by combining initial cost, expected lifespan, maintenance needs, and repair ease. Use this to balance upfront expense with long-term performance. Always verify specifics with manufacturer instructions and local guidance before proceeding.