
Introduction
Freeze-thaw damage occurs when trapped moisture in stucco base coats freezes and expands, causing cracking and delamination. It can weaken the surface and open pathways for water to enter surrounding layers. Damage often starts on the exterior and can spread if not addressed with proper repairs.
Common signs include hairline cracks, chipped or powdery areas, and small spalls that reveal underlying layers. Inspect after winter or any time you notice moisture issues, and perform seasonal checks to catch early problems. When rebuilding, follow manufacturer instructions, local rules, and consult general guidelines to plan a proper, durable repair approach.
Key takeaways
- Understand that base coats resist moisture but are vulnerable to repeated freeze-thaw cycles.
- Look for hairline cracks, delamination, or spongy feel in stucco base coats.
- Schedule regular visual checks and professional testing to detect hidden damage safely.
- Seasonal maintenance should include sealing cracks and ensuring proper drainage away.
- Decide between repair and rebuild by evaluating moisture history and extent.
- When rebuilding, prioritize breathable coatings, proper detailing, and quality workmanship for durability.
Table of Contents
- Introduction
- Key takeaways
- What Is Stucco and How Base Coats Function
- How Freeze-Thaw Cycles Damage Stucco Base Coats
- Early Signs and Visual Checkpoints for Freeze-Thaw Damage
- Inspection Routines — DIY Timing and Professional Testing
- Seasonal Maintenance and Winter Prep to Minimize Freeze-Thaw Harm
- Assessing Repair Vs. Rebuild: Decision Guide
- Rebuilding the Right Way — Materials, Detailing, and Workmanship Priorities
- Conclusion
- FAQ
What Is Stucco and How Base Coats Function
Traditional cementitious stucco uses a cement-based mix applied over a lath or substrate, forming a rigid protective layer. Synthetic stucco, or EIFS, relies on polymer-enhanced systems with different backing and drainage characteristics. Each type has distinct durability and installation contexts that affect how the base coat performs.
The base coats, scratch and float, provide bonding, levelness, and load distribution across the wall. They help establish a continuous plane for the finish and support the overall system. The lath or substrate system matters for moisture management and structural support, whether metal lath, wire mesh, or adhered backing.
Traditional Stucco Base Coat Composition and Layers
The traditional stucco system consists of a three-coat application process. The base coat, also known as the brown or scratch coat, is the foundation of this system.
The base coat is typically composed of a mix of Portland cement, sand, and water. The exact proportions can vary depending on the specific product used and local conditions, so always check the manufacturer’s instructions. A common mix is one part cement to three parts sand by volume.
The base coat is applied in two layers. The first layer is spread over the lath or sheathing, ensuring full coverage and proper bonding. After this layer has begun to set but is still workable, it is scratched with a comb-like tool to create grooves. This increases the surface area for better adhesion of the next coat. The second layer is then applied, filling in these grooves and creating a solid bond.
Proper base coat application is crucial as it affects the performance and longevity of the entire stucco system. Always ensure that the substrate is clean, dry, and properly prepared before applying any coats. If cracks appear or worsen after application, re-evaluate your substrate preparation and consider using a reinforcing additive in the next base coat.
EIFS/synthetic stucco differences that affect freeze-thaw behavior
While traditional stucco systems rely on heavy, cement-based layers to protect against moisture, EIFS (Exterior Insulation and Finish Systems) or synthetic stucco offers a different approach. These systems use lightweight layers of insulation and a durable finish coat.
Insulation Layer: Unlike traditional stucco, EIFS includes an insulation layer that provides thermal resistance. This can help prevent moisture from condensing within the wall assembly during cold weather. However, it’s crucial to ensure this layer is properly installed and secured to avoid air gaps.
Drainage Feature: Many EIFS systems incorporate a drainage plane behind the finish coat. This allows any trapped moisture to escape rather than being held within the wall assembly. To function effectively, this drainage feature must be maintained clear of obstructions and properly integrated with flashing at openings.
Understanding these differences can help you maintain your EIFS system’s performance during freeze-thaw cycles. Regular inspections for cracks or signs of moisture entrapment are essential to prevent potential damage. Always follow manufacturer guidelines for proper application, thickness, and curing times to ensure optimal results.
How Freeze-Thaw Cycles Damage Stucco Base Coats
The base coat is the first line of defense against moisture, so its porosity, bond to the substrate, and curing influence freeze-thaw resilience. A porous, well-bonded coat can shed or tolerate some moisture movement. Poor bonding or improper curing reduces its ability to handle cycles of moisture.
Water absorption and capillary rise transport moisture into pores, and freezing expands this water, creating microcracks and spalling. Over time, adhesion weakens and cracks widen with repeated cycles. Chemical processes like salt crystallization and cement hydration by‑products can accelerate cracking and bond loss.
Mechanical effects: cracking, delamination, and spalling
Freeze-thaw cycles physically degrade stucco base coats through a combination of ice expansion and repeated stress. During cold temperatures, water absorbed by the porous base coat freezes and expands, opening tiny cracks.
Cracking is often the first visible sign of freeze-thaw damage. These initial microcracks can widen over time, allowing more water to penetrate and further weakening the base coat.
The repeated expansion and contraction also puts stress on the bond between the base coat and its lath backing. This delamination can cause the base coat to pull away from the substrate, leading to a loss of adhesion and support.
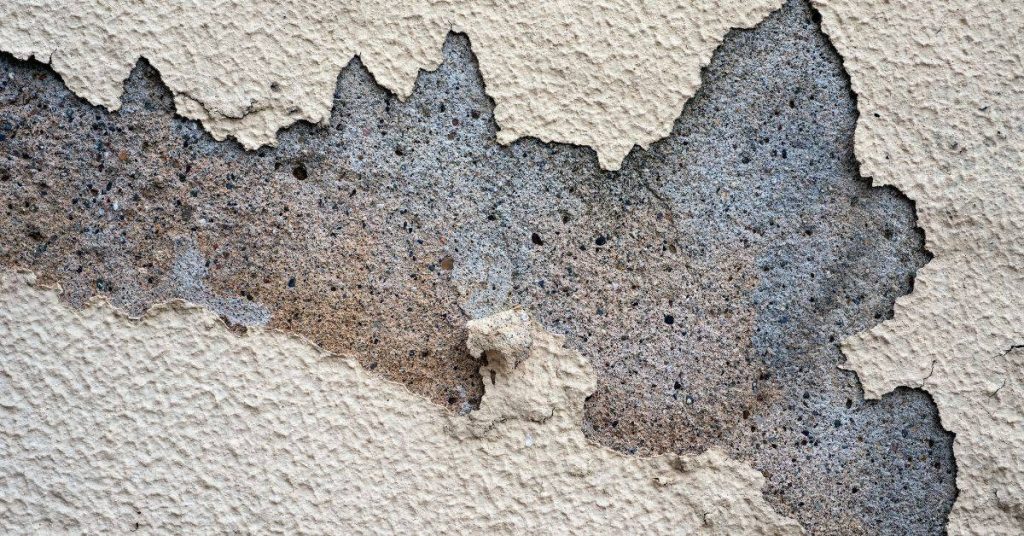
Severe freeze-thaw cycles can even cause surface loss, or spalling, as chunks of the base coat break off. Promptly repair any damaged areas to prevent further deterioration.
Moisture-driven chemical and substrate issues
Moisture-related processes can accelerate the failure of stucco base coats. When water penetrates the base coat, it can carry dissolved salts and minerals that, upon evaporation, leave behind deposits known as efflorescence. These deposits can further degrade the base coat by causing it to crack and crumble.
Salt migration can also occur within the base coat itself. As water moves through the porous material, it can deposit salts in tiny cracks and crevices. When these salts freeze and expand, they can cause additional cracking and delamination.
The presence of moisture can also weaken the underlying substrate. Oriented strand board (OSB) and plywood can swell and warp when exposed to repeated wetting and drying cycles. Metal lath or other metal components may corrode, further compromising the integrity of the stucco system.
If you notice efflorescence or salt deposits, investigate the source and extent of moisture intrusion promptly to prevent further damage.
Early Signs and Visual Checkpoints for Freeze-Thaw Damage
Prioritized surface indicators include cracking patterns and delamination where the outer layer pulls away from the base coat due to moisture expansion. Hairline cracks may widen after cold spells. Look for areas where the finish seems uneven or detached from the base.
Near-surface moisture cues include damp patches, efflorescence near fasteners or corners, and any chalky residue indicating moisture movement. Spalling or hollow sounds when tapping can signal compromised base coats. Document cracks and moisture signs that recur with temperature changes.
Visual checkpoints (exterior)
Regularly inspect your stucco exterior for signs of freeze-thaw damage. Use this checklist to guide your inspection.
- Cracks: Look for hairline to stepped cracks, spidering, or rim cracks near windows and parapets. These can widen due to moisture expansion during freeze-thaw cycles, leading to further damage if ignored.
- Powdery surfaces: Check for powdery residue or chalky deposits. This indicates moisture movement within the stucco, which can cause delamination and other issues.
- Localized flaking or bulges: Inspect for areas where the stucco is flaking off or has formed small bulges. These are signs of moisture-driven damage that requires immediate attention.
- Darkened patches: Look for damp or darkened patches, especially near fasteners or corners. These can indicate water intrusion and potential freeze-thaw damage.
- Efflorescence (salt stains): Check for white, powdery deposits near fasteners, corners, or other vulnerable areas. Efflorescence is a sign of moisture movement and can lead to further damage if left unchecked.
- Moisture wicking: Inspect along foundation skirts where moisture tends to wick up into the stucco. This can cause damage over time, especially during freeze-thaw cycles.
- Flashing joints: Check flashing around windows, doors, and other openings for signs of damage or improper installation. Faulty flashing can allow water intrusion, leading to freeze-thaw damage.
- Termite/foam setbacks: Inspect areas where foam insulation meets the stucco. These areas are vulnerable to moisture intrusion and subsequent freeze-thaw damage.
Quick rule: If you notice any of these signs, document them, prioritize based on severity, and address immediately to prevent further damage.
Non-visual and interior indicators
While exterior inspection is crucial, some signs of freeze-thaw damage may only be apparent from the inside. Use this checklist to identify potential internal symptoms.
- New interior stains: Check for new or unexplained stains on interior walls and ceilings. These can indicate water intrusion due to freeze-thaw damage, especially if they appear after cold snaps.
- Musty odors: Smell for musty or moldy odors, which can indicate moisture sources and potential mold growth behind the stucco. This is a serious issue that requires immediate attention.
- Soft plaster: Gently press on interior walls to check for soft or spongy areas. These can indicate water damage and subsequent freeze-thaw issues.
- Moisture meter readings: Use a moisture meter to check for higher-than-normal readings in the stucco. This can indicate moisture intrusion and potential freeze-thaw damage.
Quick rule: If you notice any of these non-visual indicators, address them promptly to prevent further damage and potential health issues related to mold growth.
Inspection Routines — DIY Timing and Professional Testing
Schedule regular visual checks by season and based on the wall age, with more frequent reviews after severe weather. Plan a full exterior assessment annually or after harsh winter or heavy rain periods. Use these checks to establish a baseline for future comparisons.
During a DIY walkthrough, inspect from ground level, use safe ladder practices, and note visible moisture, mold, or paint delamination. When damage is evident or interior moisture is present, call a professional for a deeper assessment and tests as needed.
DIY Inspection Checklist and Seasonal Timing
Regularly inspect your stucco exterior to catch freeze-thaw damage early. Use this checklist for a thorough DIY walkthrough.
- Monthly Visual Checks: Look for cracks, bulging, or staining from ground level and at eye level using a safe ladder.
- Gently Probe Suspect Areas: Use a screwdriver to probe gently around windows, doors, and corners. If it goes in too easily, there may be damage.
- Check for Moisture: Look for water stains, efflorescence (white powdery deposits), or mold growth.
- Document Findings: Photograph any visible issues and note the weather exposure at the time of inspection.
- Annual/Biannual Full-Structure Review: After harsh winters or heavy rain periods, perform a comprehensive walkaround to catch any new damage.
- Tapping Test: Gently tap the stucco with a hammer. A hollow sound may indicate delamination.
- Paint Delamination Check: Inspect paint for signs of peeling or bubbling, which could indicate underlying damage.
- Check Interior Walls: Look for signs of moisture intrusion from the inside, such as water stains on ceilings or walls.
Quick rule: Inspect more frequently in areas with harsh winters and heavy rain to catch damage early.
Professional Inspection Methods and What They Reveal
When DIY checks indicate serious damage, call a professional for advanced testing. Here’s what they do:
- Moisture Meters: These devices measure the moisture content in stucco, helping to identify areas where water has penetrated.
- Infrared Thermography: This non-