
Introduction
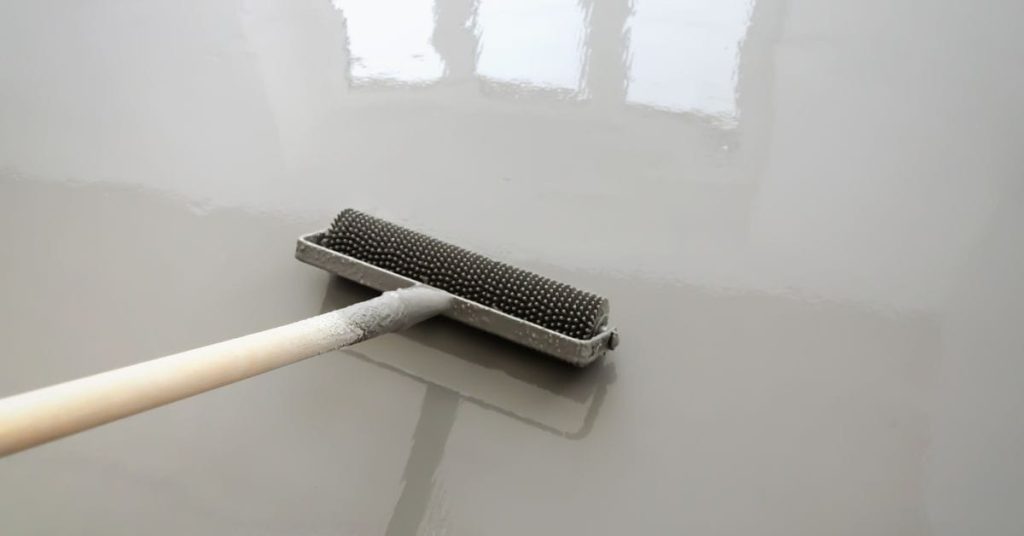
Flake Floor Topcoat Orange Peel is a textured coating finish created by rolling to leave small pits in the surface. Choose a roller with a short nap and a smooth frame, and test small areas to see how the texture lands. Apply in even coats and follow the manufacturer’s guidance for drying and cure time.
Pot life and working time depend on temperature, mixing, and product type, so check the label for your batch. Work in a breathable window and keep the surface within a workable temperature range; extreme heat or cold will change how the coat tacks and dries. Always verify the working time, ventilation, and any recoating intervals with the product instructions before starting.
Key takeaways
- Select roller nap length and material suited for flake topcoat, minimize roller marks.
- Work pot life by planning patches and batching finish coats to avoid crossover dry.
- Temperature and humidity impact orange peel; maintain consistent conditions during application.
- Use even, cross-hatch rolling technique to reduce texture and improve flattening.
- Surface prep: clean, dust-free substrate and broadcast flakes evenly before topcoat.
- Safety: wear respirator and eye protection; ensure proper ventilation and spill containment.
Table of Contents
- Introduction
- Key takeaways
- What Is Orange Peel on Flake Floor Topcoats and Why It Matters
- Roller Choice: Nap Length, Material, and Diameter
- Pot Life, Induction, and Working Time Considerations
- Temperature and Humidity Effects on Orange Peel Development
- Application Techniques to Minimize Orange Peel
- Surface Prep and Flake Broadcast Specifics
- Tools and Materials Checklist for Smooth Topcoat Application
- Visual Checkpoints, Test Patches, and Troubleshooting
- Conclusion
- FAQ
What Is Orange Peel on Flake Floor Topcoats and Why It Matters
Orange peel refers to a bumpy, dimpled surface texture that shows up after the topcoat cures. In a flake broadcast system, texture changes can alter gloss and how light reflects off the floor. The goal is a smooth, even topcoat that keeps the flakes visually balanced and protected against wear.
Understanding how texture forms helps you target a consistent surface, resist uneven blotches, and improve durability over time. Focus on achieving a uniform finish across the entire broadcast area, not just in one spot. Your aim is a seamless, durable surface that showcases the flakes rather than shouting with texture.
Visual characteristics and how to identify orange peel
Orange peel on flake floor topcoats appears as a dimpled texture, much like the skin of an orange. It’s not the smooth, even surface you’re aiming for.
The dimples catch light differently, so reflections off the surface are irregular. This is most noticeable in bright, direct lighting.
To check for orange peel, turn off any ambient lights and shine a flashlight or your phone’s torch at an angle across the floor. If you see lots of tiny shadows and reflections, that’s orange peel.
Common causes specific to flake floors
Flake embedment is a common cause. If the flakes aren’t fully embedded in the base coat, they can disrupt the topcoat’s surface, causing orange peel.
Uneven coat thickness also contributes. If you apply too much or too little topcoat, it won’t level out properly and will form dimples instead.
High film build – applying coats that are too thick – can trap air bubbles under the surface, leading to orange peel.
Surface contamination, like dust or dirt, and material incompatibility, such as using products not designed for flake floors, can also cause orange peel. Always ensure your surface is clean and use compatible materials.
Roller Choice: Nap Length, Material, and Diameter
Roller nap length determines how much coating is loaded and how aggressive the brushing action is. A longer nap can pull more material into the nap and disturb the flakes, while a shorter nap helps keep the flakes in place. The right diameter influences reach and coverage without creating heavy roller marks.
Roller cover material affects how the topcoat lays down and how much shed or lint might transfer. In practice, choose a material that holds and deposits enough film without disturbing the broadcast. Verify with the product label or manufacturer instructions to match roller features to your coating system.
Nap length tradeoffs for smoothness vs. coverage
The nap length on your roller is crucial for achieving the right finish and flake pickup.
Longer naps (3/4″ to 1″) hold more material, providing better coverage but can leave visible texture or lines in the orange peel effect. They’re great for first coats or when you need to cover a large area quickly.
Shorter naps (1/2″ to 3/8″), on the other hand, offer smoother results with less texture. They’re ideal for final coats and achieving that smooth, uniform orange peel look. However, they may require more coats to achieve full coverage.
Pro tip: Always check product recommendations and test patches before choosing a nap length. What works for one topcoat might not for another.
Cover materials (microfiber, woven, knit) and solvent compatibility
The material of your roller cover can significantly impact the final result. Here’s what you need to know:
- Microfiber: Resistant to most solvents including epoxy and polyaspartic. Provides a smooth finish with minimal shedding. Look for high-quality, solvent-resistant microfiber.
- Woven (cotton or synthetic): Generally not recommended for solvent-based coatings due to potential breakdown and cracking. Avoid using with epoxy or polyaspartic topcoats.
- Knit (polyester or nylon): Can be used with some solvents but may shed fibers into the coating, causing imperfections. Check manufacturer’s recommendations before use.
Frame and core considerations: hold, flex, and puddling control
The roller frame and core play a significant role in achieving an even, orange peel effect.
Diameter: Larger frames (9″ to 18″) hold more material but can create lines or puddles that worsen orange peel. Smaller frames (6″ to 9″) provide better control and are ideal for achieving a smooth, consistent finish.
Cage rigidity: A rigid cage provides better control over the roller cover, reducing flex and improving laydown consistency. This helps minimize lines or puddles that can ruin the orange peel effect.
Core quality: High-quality cores (like aluminum) provide better balance and control compared to cheaper plastic cores. They’re worth the extra investment for a professional finish.
Pot Life, Induction, and Working Time Considerations
Pot life is the total time the mixed product stays usable before it begins to gel. Working time is the portion you can actually apply before the coating starts to lose flow. Activation and mixing ratios can shorten both, which raises the risk of orange peel if you work too slowly.
Keep in mind that as pot life winds down, viscosity increases and the coating won’t level as well. Plan your sequence, keep materials at a workable temperature, and be ready to proceed without delays. Check the product data sheet or manufacturer instructions for specifics before you start.
How pot life affects application technique
The pot life of your Flake Floor Topcoat is the time it takes for the material to change from a liquid to a solid state once mixed. Understanding how this affects your application technique is crucial.
As pot life shortens, you’ll notice:
- Faster tack-up: The topcoat will start to stick or ‘tack’ to the surface quicker than usual. This means you need to work faster to avoid leaving visible texture.
- Thicker passes: To maintain even coverage, you might find yourself applying thicker coats. However, this can lead to increased orange peel risk.
- More visible texture: As the topcoat starts to set quicker, any imperfections in your application will become more apparent.
To manage these changes, plan for smaller batches and stagger your mixing. This way, you can maintain a consistent working time and reduce the risk of orange peel.
Managing short pot life: batching, induction, and equipment
When dealing with a short pot life, efficient batching and proper equipment can help you maintain consistent open time.
- Batching: Mix only what you can apply within the working time. For example, if your working time is 15 minutes, mix no more than 2-3 square feet at a time for an average-sized room.
- Induction (if required): Some topcoats require induction to activate the chemicals. Follow the manufacturer’s guidelines closely. Pre-warm your roller in hot water (not boiling) to help maintain consistent temperature during application.
- Measuring tools: Use accurate measuring cups or scales to ensure you’re mixing the correct ratio every time. This can be rented from most hardware stores for around $10-$20 per day.
- Pre-warmed rollers: As mentioned, pre-warming your roller can help maintain consistent application temperature. This is especially important with short pot life topcoats.
- Consistent environment: Keep your working area warm and draft-free to prevent temperature fluctuations that could affect the topcoat’s setting time.
- Confirm specifics on TDS: Always check the Technical Data Sheet (TDS) for specific batching, induction, and application guidelines. These can vary between products.
Temperature and Humidity Effects on Orange Peel Development
Ambient temperature affects how fast the topcoat thins and dries, which in turn changes flow and leveling. Substrate temperature also matters because it influences how the coating cures at the surface. Relative humidity can alter evaporation rates and surface tension during application and cure.
Control what you can by planning around the conditions and using appropriate tools to monitor environment. When in doubt, verify the recommended ranges from the product label or instructions before proceeding.
Low temperature risks and mitigation
Working in cool conditions slows down the flow of your topcoat. This can lead to increased orange peel tendency.
To mitigate this, pre-warm your materials and substrate within the manufacturer’s guidelines. Aim for a surface temperature around 70°F (21°C).
Never apply in temperatures below 50°F (10°C). It’s just asking for trouble.
High temperature and high humidity issues
Work in high heat or humidity can cause problems like too-rapid cure, shortened pot life, solvent pop, or blush from condensation.
If it’s too hot (above 90°F/32°C) or humid (>70%), postpone your work until conditions improve. Your topcoat will thank you.
If you must work in these conditions, use environmental controls like fans to keep air moving and prevent heat buildup.

Application Techniques to Minimize Orange Peel
Use a deliberate sequence: pour, spread, then backroll to even out the film after it lands. Flatten passes help smooth out minor ridges and reduce surface tension. Avoid long, single passes that pull the mixture too thin or lift flakes.
Coordinate timing between steps to keep the surface wet enough to level without creating sags. If you notice rapid skinning, adjust your pace or environment and consult the product instructions for hints on working time. Practice on a small area if you’re unsure.
Backrolling and cross-rolling strategies
After spreading your topcoat, backrolling helps even out the film thickness. It’s crucial to avoid disturbing the flakes while doing this.
When to backroll: Start backrolling as soon as you’ve spread the material evenly. This helps prevent orange peel by evening out any high spots or small bubbles.
Cross-rolling comes next. It’s done at a 90-degree angle to your initial roll direction. This ensures an even film thickness and helps eliminate any remaining imperfections.
Why cross-roll: Cross-rolling helps break up any directional flow patterns, ensuring a smooth, consistent finish.
Thinning and additive considerations
Sometimes, you might need to thin your topcoat or use additives to improve its flow. Always follow the manufacturer’s instructions for best results.
Thinning: If your topcoat is too thick, it can lead to orange peel. Thinning it with approved solvents can help, but be careful not to over-thin and compromise coverage.
Leveling additives can also improve flow and reduce surface tension issues. They’re designed to spread the material more evenly, reducing the risk of orange peel.
Testing: Before using any thinning agents or additives, test them on a small, hidden area first. This ensures they won’t negatively affect your topcoat’s performance or appearance.
Speed and motion: stroke length, overlap, and direction
Consistent stroke technique is key to avoiding lap lines and texture variation. Here’s how:
Stroke length: Keep your strokes consistent in length. This helps maintain an even film thickness across the entire surface.
Overlap each stroke by about 50%. This ensures full coverage and prevents lap marks, which can look like orange peel.
Direction: Start rolling in one corner of your area and work your way out. This helps maintain a consistent direction and prevents you from rolling over wet areas too many times.
Practice runs: Before starting on your final coat, practice on a small, hidden area or a mock panel. This lets you get the feel for the material and adjust your technique as needed.
Surface Prep and Flake Broadcast Specifics
A clean, profile-consistent substrate improves how the topcoat flows over and around flakes. Any dust, oil, or residue can trap air and encourage orange peel. Plan your prep to maintain a dry, uniformly textured surface before broadcast begins.
Broadcast density and even coverage influence how the topcoat lays down. Ensure the flakes are distributed to your target density and level during the final coat. Always cross-check prep steps with the manufacturer guidance for your system.
Profile, shot blast vs. Diamond Grind, and Adhesion
The first step to a smooth topcoat is the right surface profile. You want tiny peaks and valleys for good adhesion.
Shot blasting or diamond grinding creates this profile. Shot blasting uses steel shots, while diamond grinding uses diamond-impregnated discs. Both remove contaminants like old paint, grease, and rust.
Check industry standards, like SSPC-SP 10/NACE No. 6 for shot blast or ASTM D7075 for diamond grind, to ensure you’re prepping right.
Flake Embedment and Sweep-Off Timing
The key to preventing orange peel is getting flakes embedded at the right time. Too early, they float; too late, they interfere with topcoat leveling.
Here’s a simple rule: embed when the flakes are still tacky but not wet. This usually takes 10-20 minutes after broadcasting.
Sweep off excess flakes promptly to avoid dust buildup. Dust magnifies orange peel by creating tiny bumps under your topcoat.
Tools and Materials Checklist for Smooth Topcoat Application
Assemble a DIY-friendly set of rollers, trays, squeegees, and a compatible respirator. Have a temperature and humidity meter, a heater or dehumidifier if needed, and measuring tools on hand. A small cleanup kit helps you manage drips and minor mistakes quickly.
Keep references handy for verifying specs and instructions, such as labels, data sheets, or manufacturer guidance. Use those checks to confirm that your tools and consumables match the coating system you’re applying.
Recommended Ancillary Equipment for Environment Control
Use this checklist before and during application to maintain optimal temperature and humidity.
- Portable Heater: For low temperatures. Check manufacturer’s recommended range (usually 50-80°F).
- Dehumidifier: For high humidity. Maintain relative humidity below 70%.
- Box Fans: For air circulation. Place them to blow across the floor, not directly at it.
- Thermometer/Hygrometer Combo: To monitor temperature and humidity.
- Thermal Gun: To spot-check surface temperatures.
- Heated Squeegees (optional): For extreme conditions. Follow manufacturer’s guidelines for use.
- Portable Heat Source for Roller Trays: Keep material warm during application (65-80°F).
- Safety Equipment: Include a fire extinguisher and safety glasses.
Quick rule: Always follow manufacturer’s guidelines for safe operation of equipment.
Consumables and Testing Supplies
Before you start, gather these items to test your technique and ensure a smooth finish.
- Test Panels: Small pieces of the same substrate as your floor. Test different application techniques here first.
- Clean Tack Cloths: To remove dust and debris before application, and to clean tools afterwards.
- Spare Roller Covers: Have extras on hand for touch-ups or if the current one wears out.
- Scrapers (optional): For removing excess material during backrolling. Use only if necessary, as they can cause damage.
- Timer: To monitor application speed and ensure even coverage.
- Measuring Tape: To check stroke length and overlap.
- Level (optional): To verify surface flatness before application. If not level, address before proceeding.
- Flashlight or Bright Light Source: To inspect the floor for missed spots or imperfections after application.
Quick rule: Always test your technique and materials on a small area first to avoid costly mistakes.
Visual Checkpoints, Test Patches, and Troubleshooting
Begin with a small test patch to evaluate roller choice, pot life, and current conditions before full-scale work. Compare the texture to your desired smooth finish and adjust as needed. If the patch shows too much texture, pause and reassess the technique or environment.
Develop decision rules for rework or acceptance based on the test outcome. Document what you changed and what you observed, and consult the product instructions if erratic texture persists. Use test patches to guide your final approach rather than guessing on the main area.
How to run a controlled test patch
Before you start your topcoat application, follow this checklist to set up a test patch that mirrors your substrate and environmental conditions.
- Prepare the surface: Clean and prep the test area just like your main floor. This ensures accurate results.
- Match substrate: Make sure the test patch has the same base as your main floor to mimic its behavior.
- Control temperature: Keep the test patch at the same temp as your main floor for reliable results.
- Monitor humidity: Maintain similar humidity levels between the test patch and main floor.
- Use same roller: Test with the exact roller you’ll use on the main floor to check compatibility.
- Record variables: Note down temp, humidity, roller type, and other relevant data for future reference.
- Let it cure: Allow the test patch to cure under the same conditions as your main floor.
- Inspect for orange peel: Check the test patch for orange peel after curing. If present, adjust your application technique or conditions.
Quick rule: If the test patch doesn’t mimic your main floor’s behavior, re-evaluate your approach before proceeding.
Remediation and recoat strategies for orange peel
If you encounter orange peel during application, follow this checklist to troubleshoot and fix the issue.
- Light sanding: If orange peel is minor, lightly sand the affected area with fine-grit sandpaper. Be careful not to damage the flakes.
- Check manufacturer guidance: Consult the topcoat’s technical data sheet for recommended remediation steps.
- Solvent wipe: If allowed by the manufacturer, use a solvent-wetted tack rag to clean the surface before recoating.
- Abrasive vs. buff only: For heavier orange peel, consider using an abrasive pad or light sanding followed by buffing with a soft pad.
- Wait for full cure: Allow any remediated areas to fully cure before applying additional coats.
- Recheck surface: Inspect the area again after curing to ensure orange peel is gone.
- Test patch if needed: If unsure, create a small test patch using your remediation method to confirm its effectiveness.
Quick rule: Always follow manufacturer guidance when troubleshooting orange peel. What works for one topcoat might not work for another.
Long-term maintenance and visual inspection schedule
Regularly inspect your floor to maintain its gloss, texture, and structural integrity with this simple checklist.
- Gloss check: Periodically examine the floor’s gloss level. Dulling may indicate a need for touch-up or maintenance.
- Texture inspection: Check for any changes in the floor’s texture. Roughness can lead to structural issues over time.
- Scratch and chip check: Inspect for scratches, chips, or other damage that could worsen with use.
- Cleanliness: Regularly clean your floor according to the manufacturer’s recommendations to maintain its appearance and longevity.
- Moisture monitoring: Keep an eye on humidity levels in the area. Excessive moisture can affect the floor’s performance over time.
- Temperature control: Maintain consistent temperature in the area to prevent thermal expansion/contraction from causing issues.
- Prompt repairs: Address any minor damage or wear promptly to prevent it from becoming more severe.
Quick rule: Regular, simple maintenance can extend your floor’s lifespan and keep it looking great for years to come.
Conclusion
You’ve learned how to control orange peel by keeping safety, surface prep, and timing front and center. The goal is a durable, smooth topcoat that looks right and lasts, so you don’t waste time or money fixing it later.
Check in this order: confirm the prep is solid and the flakes are held properly, pick a roller with the right nap and diameter, mind the pot life and any induction or working-time cues, monitor the temperature and humidity, apply in steady, overlapping passes, and run a small test patch to verify leveling before committing to the whole floor. Keep tools and workspace protected, stay within the manufacturer’s guidelines for mix and cure, and document the watch points so you can repeat or adjust on the next project.
Common mistakes to avoid are rushing the cure or ignoring ambient conditions, using a roller that’s too aggressive or too soft, and skipping test patches or misreading the surface after the first coat. Safety rules are simple: work in a well-ventilated area, wear appropriate protection, clean spills immediately, and never push a coating beyond its stated pot life or cure window. If the job would require changing coats midstream, or if you see persistent solvent pop or lifting, stop and call a professional rather than chasing a fix that could damage the floor.
If you’re unsure about conditions or large-area consistency, consider bringing in a pro rather than forcing it. With careful prep, steady technique, and respect for the limits of the product, you’ll finish with a durable, good-looking floor—and the confidence to tackle the next project. You’ve got this.
FAQ
How should I check topcoat and flake compatibility to avoid orange peel?
Always read the label or datasheet for both products. Look for compatibility notes and any required primers or scuff steps. If in doubt, contact the manufacturer or check local guidelines before combining products.
What role does roller maintenance play in the final finish?
Worn or dirty rollers can create irregularities. Replace or clean rollers as recommended by the product instructions, and keep new rollers on hand for changeovers during a project.
How can I handle temperature swings and humidity without worsening orange peel?
Plan your coats around stable conditions and use the products’ guidance for acceptable ranges. If the forecast changes, pause and reassess, checking the label for any limits and adjusting drying intervals if needed.