
Introduction
Drying means the surface moisture has evaporated to the point it feels dry to touch, while curing means the plaster has completed its set and is ready for paint or wallpaper. In practice, you want a surface that feels dry and firm rather than cool or damp. Don’t apply paint or wallpaper if the plaster still feels soft or slightly damp.
Expect varying drying times depending on temperature, humidity, and ventilation, and always follow the plaster manufacturer’s guidance. Don’t rush to finish with paint or wallpaper if the surface still feels cool or damp, and avoid edges that stay soft. To check readiness, test a small area by touching and observing for a uniform, hard surface, and consult product instructions or local rules for any required checks.
Key takeaways
- Drying is moisture loss from surface; curing involves chemical changes inside plaster.
- Expect longer times in humid or cool conditions; plan weeks, not days.
- Temperature, humidity, airflow, plaster mix and substrate affect drying and cure.
- Check surface feel, absence of tack, and moisture tests per manufacturer.
- Prime and seal plaster before painting; wallpapering may require additional drying.
- Wear respirator in dusty work; ensure ventilation and avoid trapping moisture.
Table of Contents
- Introduction
- Key takeaways
- Understanding the Difference: Drying Vs Curing for Plaster
- How Long Plaster Takes to Dry and Cure and What Changes Timing
- How to Tell Plaster Is Ready: Visual and Measurable Checkpoints
- When to Paint Vs When to Wallpaper over New Plaster
- Proper Priming, Sealing and Surface Prep for Plaster
- Common Problems, Diagnostics and Practical Fixes
- Tools, Materials Checklist and How to Use Them Well
- Planning, Safety and Cost Implications of Drying and Curing Times
- Conclusion
- FAQ
Understanding the Difference: Drying Vs Curing for Plaster
Drying describes the surface evaporation of water from plaster, leaving the top layer dry to the touch. It does not guarantee full strength or stability beneath. Curing is the chemical process that develops hardness and the plaster’s full strength over time, which is essential before finishing.
In practice, plaster that feels dry may still contain moisture deeper in the substrate. Factors such as temperature, humidity, and plaster type (gypsum or lime) influence both processes. Thickness and surface prep also affect how quickly you can safely decorate with paint or wallpaper.
What ‘dry’ typically refers to on new plaster
When we say ‘dry’ in relation to plaster, it primarily means that the surface moisture has evaporated. This is a crucial step before applying paint or wallpaper.
The plaster will feel cool and firm to touch, with no signs of dampness or tackiness. However, this doesn’t necessarily mean that the plaster has reached its full strength yet; that comes with curing.
Remember, ‘dry’ in this context refers to surface moisture only. The underlying structure may still be gaining strength through a chemical process called curing.
Why the distinction affects paint and wallpaper performance
Insufficient drying or incomplete curing can lead to serious issues with your finished surfaces. Paint may peel, blister, or crack, while wallpaper could lift or stain.
Efflorescence, a white powdery substance on the surface, is often a sign that the plaster hasn’t dried enough. Tackiness indicates incomplete curing, which can lead to adhesion problems with both paint and wallpaper.
To ensure optimal performance of your finishes, it’s crucial to allow sufficient time for both drying and curing before decorating. This will help prevent these common issues and prolong the life of your surfaces.
How Long Plaster Takes to Dry and Cure and What Changes Timing
Drying and curing are distinct phases that impact when you should apply finishes. Surface dryness supports handling, while full cure affects adhesion and long-term performance. Both timelines matter for a durable paint or wallpaper job.
Key variables include plaster type, climate, ventilation, and thickness. Ambient conditions and the condition of the substrate also shift timelines. Use manufacturer guidance as the primary reference, and verify with site observations before coating.
Plaster Type and Application Thickness
The type of plaster used and its depth of application significantly impact drying and curing times.
Gypsum plasters dry quickly but may degrade if overworked. They are ideal for fast-track projects where speed is crucial.
Lime and cement-based plasters take longer to dry due to their slower hydration process, but they offer superior long-term durability. Thicker applications of any plaster type will take longer to dry and cure than thinner ones. Ensure you sand and feather edges for even drying.
Environmental Factors: Temperature, Humidity and Ventilation
Ambient conditions significantly impact plaster drying and curing. Warmer temperatures (ideally within 15-25°C) and lower humidity (<60%) speed up the process.
To optimize conditions:
- Employ temporary heating or dehumidifiers if conditions are too cold or humid, as per product instructions.
- Maintain adequate ventilation to prevent moisture buildup. Check local building codes for specific requirements.
Avoid accelerated drying methods like heat guns or hair dryers, which can cause cracking. Always follow manufacturer guidelines when using such tools.
Substrate, Previous Coatings and Ambient Moisture Sources
The condition of the underlying substrate, residual moisture in plasterboard or walls, and ambient moisture sources can impact drying and curing times.
Before applying plaster:
- Inspect for any residual moisture, previous coatings’ condition, and potential moisture sources like leaks.
- Address any detected moisture issues and allow additional drying time before application.
- Consider using a suitable primer or sealer to prevent moisture migration.
If dampness persists, consult a professional to address potential structural issues.
How to Tell Plaster Is Ready: Visual and Measurable Checkpoints
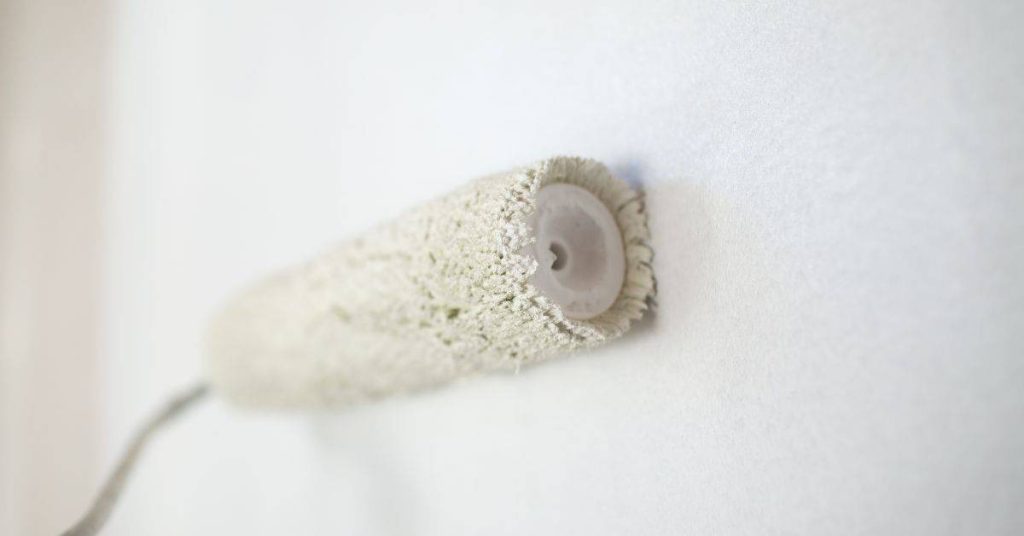
Look for a uniform, dull finish with no damp patches or visible sheen. The surface should not rub off powdery dust when touched. Color should be even, with no dark or water-stained areas.
Test texture with a gentle fingertip or damp cloth to ensure firmness and absence of tackiness. Use a moisture meter in multiple spots and compare readings to manufacturer targets. If the surface remains cold or moist, wait and retest before decorating.
Step-by-Step Process
Follow these steps to accurately determine if your plaster is ready for decoration.
- Prepare the area by ensuring safety, including proper ventilation and protection from dust.
- Perform a quick visual check of the overall condition of the plaster surface. If it appears uniform, dull, and dry, proceed to visual and measurable checkpoints. If signs of moisture or incompleteness are present, allow additional drying time before rechecking.
- Conduct simple on-site tests such as touch, scratch, and smell checks to gauge the plaster’s readiness.
- Use tools for accurate testing, including moisture meters and hygrometers, to measure moisture content and compare readings to manufacturer-specified targets.
- Perform a final check using painter’s tape or a scraper on a small test patch to ensure no future bond issues. If plaster dust or flakes come away, allow extra drying time before proceeding with decoration.
Visual checkpoints and common surface signals
Use this checklist to visually inspect your plaster’s readiness for decoration.
- Uniform color: Check for consistent color across the entire surface. Inconsistencies may indicate residual moisture or incomplete drying.
- Dull appearance: Plaster should have a matte finish, not glossy or shiny. A sheen can indicate trapped moisture.
- Absence of damp patches: Look for any dark or water-stained spots that could signify residual moisture.
- No visible efflorescence: Efflorescence is a white, powdery residue that may appear due to excess moisture. Its presence indicates the need for additional drying time.
- Powder-free surface: Gently touch the plaster; if it leaves a powdery residue or rubs off easily, it’s not yet dry enough.
- No visible cracks or holes: These can indicate incomplete curing and may need to be filled before proceeding with decoration.
- Edges are well-defined: Blurry or wavy edges can signify residual moisture or improper application.
Quick rule: If your plaster passes all these visual checks, proceed with simple on-site tests. If not, allow additional drying time and recheck.
Simple on-site tests (touch, scratch, smell)
These non-technical checks can help you gauge your plaster’s readiness for decoration.
- Fingertip test: Gently press your fingertip onto the plaster. If it feels firm and not tacky or soft, proceed with tools for accurate testing. If it feels crumbly, dusty, or tacky, allow additional drying time.
- Scratch test: Lightly scratch the surface with your fingernail. If it flakes or dusts off easily, the plaster is not yet dry enough. If it scratches smoothly without flaking, proceed to tools for accurate testing.
- Smell test: Sniff the plaster surface. A musty odor can indicate residual moisture and the need for additional drying time.
Quick rule: If your plaster passes these simple tests, proceed with tools for accurate testing. If not, allow additional drying time and recheck.
Tools for accurate testing (moisture meters, hygrometers, professional tests)
Use these tools to accurately measure your plaster’s moisture content and confirm its readiness for decoration.
- Moisture meter: A reliable moisture meter measures the moisture content in materials. Use it on multiple areas, including high-moisture spots near seams or corners. Compare readings to the manufacturer’s specified targets before painting or wallpapering. Follow product calibration and guidance for accurate results.
- Hygrometer: This tool measures relative humidity levels in the air. Use it to ensure ambient conditions are suitable for plaster curing and decoration.
- Professional tests (optional): Services like infrared scanning or nuclear moisture gauges can provide more detailed readings but may require hiring a professional or renting specialized equipment.
When to Paint Vs When to Wallpaper over New Plaster
Decide based on plaster cure status, room use, and desired longevity. Paint generally offers quicker results and easier patching, while wallpaper can disguise minor texture or irregularities. Consider how each finish handles movement and future repairs.
Explain the differences between surface dry, tack-free, and fully cured plaster when planning. Prepare with appropriate primers or sizing and verify compatibility with the chosen finish before applying a coat.
Risks of Decorating Too Soon
Applying paint or wallpaper to new plaster before it’s fully cured can lead to various issues. Premature application can cause finish failure, costly repairs, and reduced longevity.
With Paint: Blistering and adhesion loss are common problems when applied too soon. Plaster that is still damp or alkaline can cause paint to lift or peel.
With Wallpaper: Pastes may not adhere properly on damp or dusty surfaces, leading to bubbling, staining, or even mold growth if moisture becomes trapped behind the paper.
To avoid these issues, perform simple on-site tests like touching, scratching, and smelling the plaster. If it feels cool or damp, delay application until fully cured. Address any signs of cracking or movement before applying your finish.
Preparing New Plaster for Wallpapering
Inadequate preparation can result in poor adhesion, bubbling, or staining when wallpapering new plaster. Ensure the surface is clean, dry, and free of dust before applying.
Lining Paper: For uneven surfaces, apply lining paper to create a smooth base for your wallpaper. This helps achieve better adhesion and a more professional finish.
Adhesives: Choose the appropriate adhesive based on your wallpaper type. Non-woven or pre-pasted wallpapers may require specific adhesives (check instructions).
Priming: Use a suitable primer to seal the plaster and improve adhesion. This step helps prevent moisture from being trapped behind the wallpaper, reducing the risk of mold growth.
Preparing New Plaster for Painting
Inappropriate paint choice or inadequate preparation can lead to poor adhesion, blistering, or discoloration on new plaster. Ensure the surface is clean, dry, and free of dust before painting.
Paint Selection: Choose a suitable paint category such as acrylic or latex for better adhesion and appearance on fresh plaster.
Priming: Apply a compatible primer designed for fresh plaster. This helps seal the surface and improves paint adhesion, especially if the plaster is alkaline or has high moisture content.
Drying Time: Allow proper drying time between coats to ensure optimal results. If you desire quick refreshes and easy touch-ups, choose a paint with good stain-blocking and washability properties.
Proper Priming, Sealing and Surface Prep for Plaster
Primers seal porous plaster and improve adherence, while sealers address stains or moisture risks. Surface repairs should be completed before applying primer. Each step helps create a stable base for final finishes.
Assess plaster condition for cracks, efflorescence, and loose substrate. Plan repairs, choose compatible primers and sealers, and allow adequate dry times between coats before painting or wallpapering.
Choosing the Right Primer or Sealer
Selecting appropriate primers and sealers ensures optimal adhesion, stain prevention, and moisture protection for new plaster. Inspect product packaging for claims of bonding, stain-blocking, or moisture-sealing properties.
If plaster is highly porous or prone to stains, choose a primer with strong bonding and stain-blocking capabilities. If moisture risk is high (e.g., basement, bathroom), consider using a sealer with moisture-blocking properties, such as shellac-based or acrylic/sealer blends.
Always verify product labels/datasheets for compatibility with fresh plaster and intended finish. Follow manufacturer instructions to ensure the best results.
Surface Preparation: Filling, Sanding and Skimming
Preparing the surface by filling, sanding, and skimming ensures a uniform, absorbent base for paint or wallpaper adhesion. Feel the surface to ensure it’s smooth and even; visually inspect for any remaining defects.
If cracks are wide or numerous, consider re-skimming the entire area for a uniform finish. If high spots or unevenness persist after initial sanding, re-sand with finer grit paper and/or apply a thin skim coat to achieve a smooth surface.
Inspect plaster for imperfections, cracks, and high spots. Use appropriate fillers, sandpaper grits, and skimming techniques to address these issues effectively.
Application Best Practices: Coat Sequencing and Drying Checks
Applying coats in the correct sequence and verifying readiness between coats ensures optimal performance of primers, sealers, and final finishes. Perform a quick adhesion test by applying a small piece of painter’s tape to the surface after the first coat; if it pulls off easily without residue, the surface is ready for the next coat.
If plaster is highly porous or absorbs primer quickly, apply additional coats of primer as needed, allowing proper dry time between each. If moisture risk is high or stains are present, apply sealer after primer, following recommended dry times and application techniques.
Always follow manufacturer guidelines for application techniques, coat thickness, and recommended dry times. Use test patches to verify compatibility and performance before proceeding with final finishes.
Common Problems, Diagnostics and Practical Fixes
Watch for tackiness, blistering, powdery dust, and cold patches as signs of insufficient drying or curing. Use moisture readings and visual checks to confirm concerns. Early detection guides effective fixes.
Remedies include staged drying, moisture control, gentle surface cleaning, and targeted repairs. Reassess with moisture tests and allow time for repairs to cure before proceeding with coatings.
Peeling, blistering and adhesion failures
If your paint or wallpaper starts peeling, blistering, or fails to adhere properly, it’s likely due to insufficient drying or curing of the plaster. Before you proceed with any fixes, identify the cause.
Quick check: Gently scratch the surface to test adhesion and smell for dampness. If you suspect moisture, use a moisture meter or visual checks to confirm.
If moisture is present, address the source immediately. Remove any failed finishes, correct the moisture issue, and properly re-prep the surface before attempting to paint or wallpaper again.
Uneven drying, staining and efflorescence
Uneven drying can lead to stains, color variations, and the appearance of salts (efflorescence) on your plaster surface. This is often due to improper mixing, inadequate curing time, or environmental factors.
Quick check: Observe the surface for any color variations, salt deposits, or damp patches. Use pH test strips to confirm the presence of salts.
If salts are present, clean and repair the affected areas before proceeding with painting or wallpapering. Improve drying conditions by ensuring proper ventilation and consistent temperature and humidity levels during curing.
When to call a professional
While many plaster issues can be fixed with DIY methods, there are scenarios where it’s best to seek expert help. These include structural dampness, persistent salts, or large-area failures.
Quick check: Look for persistent dampness, large-area failures, or structural issues that may indicate a more serious problem.
If you find any of these issues, consult a qualified tradesperson immediately. They have the tools and expertise to assess the extent of the damage and moisture sources, and perform necessary repairs safely and efficiently.
Tools, Materials Checklist and How to Use Them Well
Keep a moisture meter, hygrometer, and tactile checks handy to assess readiness. Gather brushes, rollers, trowels, mixing gear, drop cloths, and edge protection for prep work. Have primers and sealers suitable for plaster ready for use.
Include drying aids like fans or dehumidifiers as needed, plus protection for finished surfaces. Follow a logical sequence from prep to patching, sealing, and final finish, to maintain work flow and accuracy.
Essential Measuring Tools and How to Interpret Readings
Before applying paint or wallpaper, it’s crucial to accurately assess the moisture content of your plaster. This ensures optimal drying and prevents decorating issues.
- Moisture Meter: Measures moisture content (MC) in materials. Acceptable MC for new plaster before painting/wallpapering is <16%.
- Hygrometer or Humidity Indicator: Measures relative humidity (RH). Ideal RH for decorating is <50%.
- Tactile Test: Drag a damp finger across the surface. If it feels tacky, allow more drying time.
- Cross-Checking: Verify tool accuracy by using multiple methods or tools.
- High Readings (>16% MC, >50% RH): Allow additional drying time or use moisture-control measures like dehumidifiers or plastic sheeting.
Prep and Finishing Tools: Trowels, Sanders, Brushes and Rollers
The right tools ensure even application and minimize damage to fresh plaster.
- Trowel: For skimming, hold at a 45° angle, apply gentle pressure, and use smooth, even strokes. Lightly mist with water to avoid clogging.
- Sander (Diamond Sanding Blocks or Sandpaper): Start coarse, finish fine. Inspect for cleanliness and sharpness before use.
- Brushes: Use synthetic bristles for latex paints. For wallpaper, use a good quality paintbrush to apply adhesive evenly.
- Rollers: Choose the right nap length (thickness) based on paint type and surface texture. Use an extension pole for even coverage.
- Hawk: Holds plaster or filler while troweling. Keep clean to avoid contamination.
Consumables: Primers, Fillers, Lining Paper and Adhesives
Before applying paint or wallpaper, use the following consumables checklist to ensure reliable results.
- Plaster Patch Kits: For repairing cracks or holes. Follow manufacturer guidelines for application.
- Filler (Skim Coat): Select one suitable for new plaster with good sandability and adhesion.
- Bonding Agent/Primer: Improves paint adhesion. Check label for compatibility with new plaster.
- Sealer/Primer for Plaster: Prevents tannin bleed and improves paint adhesion. Follow manufacturer guidelines.
- Lining Paper (for Wallpaper): Applies evenly to provide a smooth base. Use a primer designed for new plaster.
- Wallpaper Adhesive: Choose one suitable for your wallpaper type. Apply evenly and allow to activate before hanging.
Quick rule: Always check product labels for compatibility with new plaster and follow manufacturer guidelines for mixing and application.
Planning, Safety and Cost Implications of Drying and Curing Times
Understand what happens to plaster during drying and curing, and why both matter for adhesion. Plan with awareness of potential rework if timing is rushed. Build checks into the schedule to prevent premature coating.
Balance safety and costs by weighing the impact of delays against the risk of failures. Use repeatable checks to determine readiness for primer or wallpaper and know when to pause on multi-day jobs.
Scheduling and buffer time strategies
Planning your plaster drying and curing schedule requires careful consideration of timelines and environmental factors. Estimate the total timeline, including drying, curing, and application of primer or wallpaper.
Build in buffers for humidity and temperature swings. These can significantly impact drying and curing times. Regularly review and adjust your schedule based on actual conditions to avoid rushed decorating that may cause rework.
Align your schedule with project milestones, such as applying primer or wallpaper. If environmental conditions change significantly, adjust buffer times accordingly. This ensures you’re allowing sufficient time for proper drying and curing, preventing the need for rework.
Safety and indoor air considerations
Maintaining a safe working environment during plaster drying and curing is crucial. Specify ideal conditions, including temperature range, humidity targets, and ventilation needs. Regularly monitor air quality and ensure proper ventilation is maintained.
Use practical methods to achieve these conditions, such as opening windows or using fans. Implement dust control measures during sanding and apply PPE recommendations when handling primers or adhesives.
Keep occupants and pets away from the work area until conditions are safe. If air quality becomes poor, implement additional ventilation or pause work until conditions improve to ensure safety.
Cost Impacts of Premature Decorating and Long Waits
Premature decorating may result in wasted materials and rework, while excessive delays can extend project durations. Evaluate costs of delaying work (reduced re-dos, improved adhesion) against risks of rushing (peeling, cracking, paint failure).
Implement staged work or temporary ventilation solutions. These strategies balance timely completion with proper drying and curing requirements. Regularly review your budget and adjust plans as necessary to align with projections.
If a budget overrun is impending, reassess your decorating schedule or explore cost-saving measures. This helps minimize budget overruns due to rework or extended timelines.
Conclusion
Plaster drying and curing are critical steps that affect safety, durability, and the final appearance of your walls. By following proper timing, surface prep, and priming, you reduce the risk of cracking, peeling, or paint and wallpaper failures down the line.
To move forward, check in this order: verify finishing times with manufacturer guidance for your plaster mix, inspect surfaces for even dryness and no tackiness, confirm there are no signs of moisture or damp spots, then apply primer only when the surface is truly ready; proceed with sealing and paint or wallpaper according to the product instructions, and always test a small area first before a full cover. If in doubt, document the steps you’ve taken and consult the product labels or a local building authority for any code or material-specific requirements before proceeding.
Common mistakes to avoid include rushing drying with heat or fans that cause uneven drying and cracking, skipping the moisture check or independent humidity tests, and skipping primer or using the wrong primer for newly plastered walls. Safety rules are simple: never apply finishes over plaster while moisture remains and always ventilate the space; work in small sections and allow sufficient time for each stage, especially when humidity or temperature are outside the ideal range. If you encounter persistent dampness, cracking that grows, or coatings that fail to adhere after following the steps, consider bringing in a professional to assess moisture, substrate condition, and suitable primers or plaster repairs, and remember that taking a measured, cautious approach protects you from costly mistakes and long-term damage.
FAQ
Definition of drying and curing for plaster and paint
Drying is moisture leaving the plaster and finish. Curing is the chemical and physical change that gives strength to the plaster and paint film over time. Check product instructions for specific definitions and guidance.
Timeframes for drying and curing plaster before painting or wallpapering
There is no single timeframe that fits all situations. Drying depends on air flow, temperature, humidity, and plaster thickness. Always verify readiness with surface checks or manufacturer guidance before applying paint or wallpaper.
Factors affecting the curing process
Temperature, humidity, ventilation, and plaster thickness all influence drying and curing. Cold or damp conditions can slow drying and affect adhesion. Align room conditions with product instructions and local recommendations.
How to check if plaster is dry enough for surface application
Look for a flat, non-tacky surface with no visible moisture. Use the guidance from the plaster or paint manufacturer to confirm dryness. If unsure, allow more time and ensure good airflow and stable temperature.