
Introduction
DIY block steps involve planning the layout, choosing a fill strategy, and securing safe handrail anchors. This introduction explains the practical approach you can take on a typical backyard or entry path. Think of it as a straight-forward, hands-on project you tackle bit by bit.
Begin by laying out the path on the ground, then check that the rail anchors and blocks sit firmly before any fill. Use a fill method that creates a stable, level base, and follow the guidance on spacing and reinforcement from the block manufacturer. If a requirement matters, verify labels and local guidance before proceeding.
Key takeaways
- Plan layout tightly, confirm slope, setbacks, and doorway clearances before digging.
- Mark control lines precisely, use level string lines for consistent block alignment.
- Prepare subbase and drainage while avoiding excessive moisture retention in soil.
- Fill and compact between blocks in stages, inspecting for voids before locking.
- Install handrail anchors per manufacturer guidelines; verify load paths and code compliance.
- Lock in posts, flashings, and test stability before final cap course.
Table of Contents
- Introduction
- Key takeaways
- Project Overview and Planning Considerations
- Tools and Materials Checklist
- Layout, Measuring, and Setting Control Lines
- Excavation, Subbase Prep, and Drainage
- Fill Strategy and Compaction Between/Inside Blocks
- Laying Block Courses, Cuts, and Capping
- Safe Handrail Anchor Strategies and Compliance
- Installing Handrail Posts, Flashing, and Testing
- Conclusion
- FAQ
Project Overview and Planning Considerations
Plan the project by defining scope, timeline, safety priorities, and required permits or code reviews. Clarify load expectations and whether the steps are for primary access or decorative.
Understanding these choices helps you plan materials, drainage, and anchor design with safety in mind. If the steps are primary access, prioritize slip resistance and a fill strategy that supports drainage; if decorative, focus on appearance but ensure they can safely bear intended loads. Skipping permit checks may result in costly delays or fines; an experienced installer should verify local rules and obtain permits before starting any step construction.
Site assessment and permits
Begin your project by thoroughly inspecting the site where your block steps will be built. Check the slope of the area to ensure it’s safe and suitable for stairs. Inspect existing surfaces to determine if any preparations are needed.
Utilities: Before you start digging, mark out any underground utility lines in the area. Contact your local utility companies if necessary. Ensure there are no conflicts or hazards that could pose a risk during construction.
Local building codes: Always check with your local building department to understand the permit requirements for stairs and railings in your area. Building codes may vary, so it’s crucial to verify the specific rules that apply to your project.
Calculating Total Rise and Step Geometry
Measure the vertical distance (rise) between the top and bottom of your steps. This will help determine the number and size of risers and treads needed.
Risers and Treads: Divide the total rise into consistent riser heights, typically within 7 to 8 inches for residential stairs. Ensure each tread (the horizontal surface of a step) is at least 10 to 12 inches deep for comfortable footing.
Check local building codes and typical residential ranges as a starting point. If your total rise is large, consider incorporating landings or alternative designs for safety and comfort.
Timeline, labor, and budget considerations
Assess the complexity of your block step project to estimate the time and cost involved. Consider factors such as the number of cuts needed, anchor design, and drainage requirements.
Time: Break down your project into manageable tasks, allowing for adequate time for each stage. If your project is complex (e.g., curved stairs), consider hiring a professional to ensure it’s completed efficiently and safely.
Labor and budget: Estimate the cost of materials and labor required for your project. Keep in mind that some tasks may need to be performed by a licensed professional, such as installing handrails or ensuring proper drainage. Schedule inspections or hire a pro as needed to ensure your project meets local building codes.
Tools and Materials Checklist
Prepare a consolidated list of blocks, fill materials, anchors, capstones, tools, and PPE needed for the project. Include notes on sourcing quality units and where to locate manufacturer datasheets or product data sheets. Prioritize frost-rated blocks and stainless fasteners for longevity.
Identify any specialty items that may affect performance, such as drainage components or geotextiles. Use the checklist to confirm compatibility of parts before purchase. Refer to labels and datasheets to verify specifications and compatibility with local conditions.
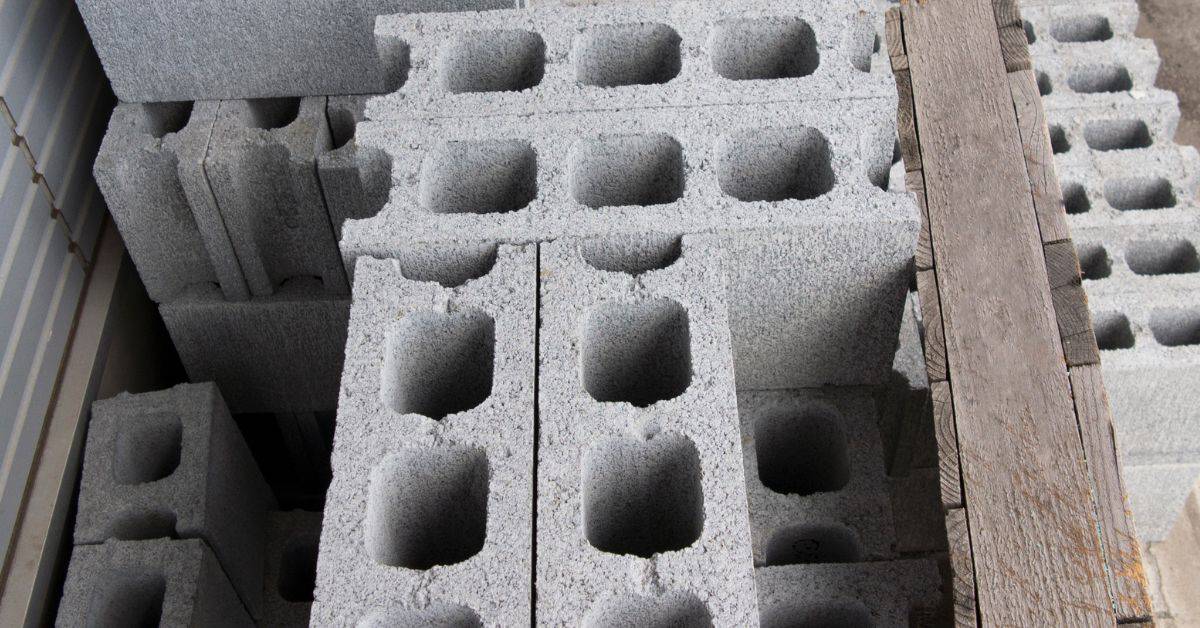
Block types and cap options
Selecting the right blocks and caps ensures your steps are structurally sound and long-lasting.
- Cast Concrete Units: Durable, heavy, and frost-resistant. Check manufacturer’s structural specs and frost ratings.
- Segmental Retaining Wall Blocks: Versatile, interlocking design. Ensure they meet your wall height and load requirements.
- Capstone Styles: Enhance appearance and protect blocks from weathering. Choose a style that complements your project’s aesthetic.
- Frost Ratings: If you live in a cold climate, choose blocks with a frost rating suitable for your area.
- Structural Specs: Verify blocks can withstand the intended load and meet local building codes.
Quick rule: Always check manufacturer’s datasheets to ensure you’re using appropriate blocks and caps for your project’s needs.
Fill, drainage, and reinforcement materials
Choosing the right fill materials ensures stable, long-lasting steps.
- Aggregates: Use for backfill. Check particle size to ensure proper compaction.
- Sand: Use as a base layer. Ensure it’s clean and free of organic matter.
- Geotextile Fabric: Prevents soil migration. Choose a fabric with suitable permeability and strength.
- Concrete Infill: For tall steps, use concrete infill for added stability. Check manufacturer’s specs for strength and setting time.
- Rebar: Use in concrete infill for added reinforcement. Check rebar size to ensure it meets your project’s needs.
Quick rule: Incorrect materials can lead to settling, cracking, or instability. Always consult product specifications.
Tools and safety gear
Having the right tools and safety equipment ensures efficient, safe work.
- Levels: Ensure steps are level. Choose a level with a long enough base for your project.
- Tamper/Plate Compactor: Compact fill materials. Rent or buy based on project size and frequency of use.
- Masonry Saw: Cut blocks accurately. Check blade type to ensure it’s suitable for your block material.
- Drill: For mixing mortar and concrete. Choose a drill with sufficient power for your needs.
- Gloves: Protect hands from cuts and abrasions. Choose gloves that fit well and provide good grip.
- Eye Protection: Shield eyes from debris. Choose safety glasses or goggles that meet ANSI Z87.1 standards.
- Hearing Protection: Reduce noise exposure. Choose earplugs or earmuffs with a suitable Noise Reduction Rating (NRR).
Quick rule: Always ensure tools are in good working condition and wear appropriate PPE when using power tools.
Layout, Measuring, and Setting Control Lines
Describe accurate layout methods using stringlines, story poles, and templates to keep risers and treads uniform from top to bottom. Emphasize the importance of precise measurements and reference points. Plan dry-fitting layouts to catch errors before cutting or setting units.
Explain how to transfer measurements to the site with control lines and stakes. Discuss verifying square and level conditions during layout checks. Remind readers to consult product guides or manufacturer instructions for any layout tolerances or recommended methods.
Establishing start/end points and alignment
Begin by marking your top and bottom reference points accurately. These will serve as the starting and ending elevations for your steps.
Transferring elevations: Use a reliable level or laser level to transfer these elevations across the run at regular intervals. This helps calculate the correct step count and spacing.
Quick check: Ensure consistent step spacing by checking riser heights at multiple points along the run. If steps are out of alignment, remove and re-lay using corrected elevations.
Using story poles and templates
Before installing your steps, create a story pole or cardboard template to maintain uniform riser height and test tread depth. This helps catch errors before cutting or setting units.
- Building the story pole: Use a 2×4 or other straight piece of lumber. Mark desired riser height at regular intervals along its length.
- Creating the template: Draw the step profile on cardboard, ensuring it matches your desired riser and tread dimensions.
- Dry-fitting: Use these tools to lay out steps on the ground, checking for consistency before installation.
Quick rule: If the template doesn’t fit consistently, adjust its dimensions and recheck measurements.
Stringline and level techniques
To keep your steps plumb and level across multiple courses, use laser or line levels and batter boards with a taut stringline. This serves as a constant reference for step alignment.
Setting up the stringline: Attach the stringline to batter boards at each end of the run, ensuring it’s taut and level. Use a line level or laser level to verify its accuracy.
Checking alignment: As you install steps, check their alignment with the stringline at regular intervals. If steps are not plumb or level, remove and re-set using the corrected stringline.
Excavation, Subbase Prep, and Drainage
Excavation should create a trench deep enough for the step height and to allow a stable base material. Install a stable granular base and drainage or geotextile to prevent water buildup and frost-related movement, and verify local frost-line requirements.
Correct base prep reduces movement and settling over time. If soil is soft or high in organic content, use a geotextile layer to separate the base from the ground. If water accumulates, improve drainage or add more base material to promote runoff.
Subgrade Evaluation and Compaction
The first step in ensuring long-term stability of your block steps is assessing the native subgrade. Inspect its strength and compaction level to ensure it can support the weight of the steps and their fill.
Stake: A stable base is crucial for long-term step stability.
Check project-specific base thickness recommendations to determine how much material you’ll need to add if the subgrade is weak or unstable. Consider additional base materials or compaction methods if necessary.
Pro check: Recompact the subgrade after initial testing to ensure it remains stable under pressure.
Installing Drainage and Geotextile
To prevent water accumulation and structural damage, install a proper drainage system around your block steps. Place geotextile fabric at the base to separate the subbase from the soil.
Quick check: Ensure the geotextile fabric type matches project requirements by verifying its datasheet.
Lay out perimeter drains and cover them with a layer of gravel. Ensure there’s proper slope for water runoff and use appropriate gravel size as per label/datasheet instructions.
Pro tip: If the site has a high water table, consider installing additional drainage measures to further protect your steps.
Frost Protection and Seasonal Considerations
To mitigate frost heave and maintain step stability, design your block steps with proper drainage in mind. Refer to local frost-depth guidance to determine if additional measures are required.
Quick check: Assess if additional insulation or heating is needed based on your local climate.
Design for proper drainage, and verify with local building codes to ensure you’re following the correct frost-depth guidelines. If the local frost depth exceeds your designed base thickness, implement additional frost protection measures.
Common mistake: Failure to account for frost heave can lead to step instability over time. Re-evaluate and adjust your design if signs of frost heave appear.
Fill Strategy and Compaction Between/Inside Blocks
Explain options for backfilling and filling hollow cores, including compacted aggregate lifts and poured concrete. Describe how each option influences strength, weight, cost, and drainage. Stress the importance of layering and compacting in increments.
Offer verification methods for density and compaction quality, such as test portions or simple field checks. Remind readers to confirm material specifications and any local guidance before proceeding with fills or pours.
Choosing infill: aggregate vs concrete
The choice of infill material significantly impacts your block steps’ strength, weight, cost, and drainage. Assess your workload and drainage needs before making a decision.
Concrete fill provides superior strength and durability but can be heavier and more expensive. It’s ideal for heavy workloads with minimal drainage requirements.
For lighter to moderate workloads that need good drainage, consider compacted crushed stone or sand-gravel mix. These aggregates are less expensive, lighter, and promote better water flow. Always verify the fill material meets required specifications on the product label or datasheet.
If you encounter issues with strength, weight, cost, or drainage, re-evaluate your infill choice to ensure it suits your project’s needs.
Layered compaction and lift control
Proper compaction in manageable lifts is crucial for structural integrity and longevity. Compact each layer before moving on to the next to avoid overstressing blocks.
For large or heavy blocks, use a plate compactor to achieve even, thorough compaction. Smaller blocks may be adequately compacted using a hand tamper.
Consult product specifications for target density values (found on the label or datasheet). If density tests fail to meet these targets after initial compaction, re-compact the area to ensure proper consolidation.
Regularly inspect and test compaction progress to maintain quality control throughout your project.
Moisture control and curing for concrete fills
Maintaining proper moisture management during placement and curing prevents voids and shrinkage, ensuring a strong, durable infill. Monitor and maintain suitable moisture levels throughout the process.
In hot, dry conditions, consider adding water or using a retarding admixture to prevent rapid setting and excessive evaporation. Always follow concrete mix supplier instructions for optimal results.
When curing in cold temperatures, use protective measures such as insulated blankets or heaters to maintain the required curing temperature. This promotes proper hydration and strength development.
If signs of shrinkage or cracking appear during or after curing, re-wet and re-cure the affected area to address any moisture-related issues.
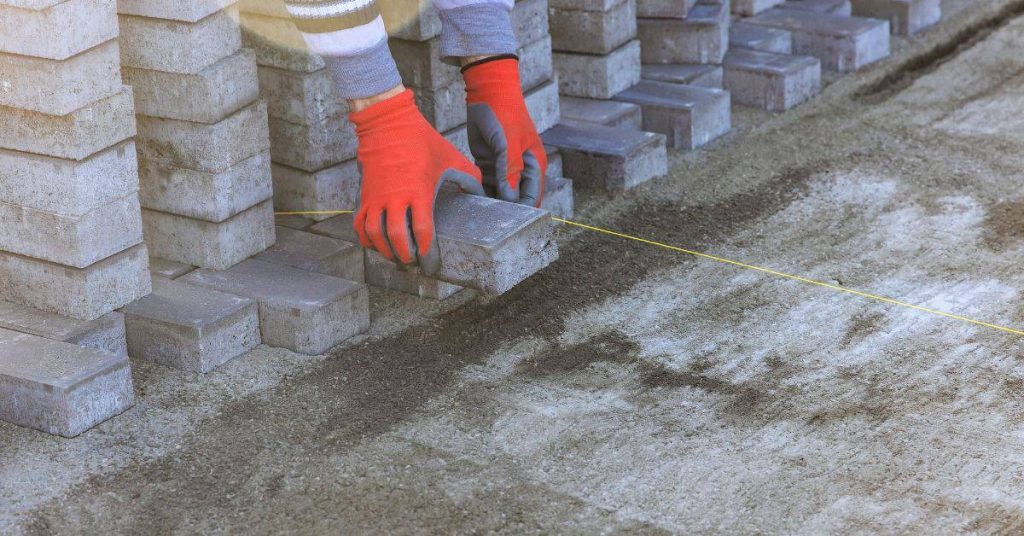
Laying Block Courses, Cuts, and Capping
Walk through steps for dry-fitting and mortar or dry-laid methods for courses. Include techniques for cutting blocks to fit irregular sites and aligning joints. Discuss best practices for installing capstones to resist foot traffic and weather exposure.
Emphasize maintaining consistent riser heights and staggered joints to improve strength. Recommend checking tools and blade availability for accurate cuts. Encourage consulting manufacturer instructions for any specific cutting or jointing recommendations.
Dry-fitting and joint staggering
Before laying your blocks with mortar, dry-fit them first to ensure a proper layout. This helps identify any issues with the blocks or your layout lines.
Stagger joints for added strength by offsetting vertical joints between courses. This distributes weight evenly and prevents weak points in your structure.
Inspect joint alignment during installation. If you notice uneven or inconsistent joints, re-evaluate your layout and adjust as necessary to maintain consistent riser heights.
Cutting and trimming blocks for custom treads
For uneven sites, you may need to cut or trim blocks to achieve consistent tread depth. Use a suitable cutting tool with an appropriate blade type.
Measure carefully and mark the block where you want to make the cut. Test-fit the cut unit to ensure it meets your desired tread depth.
If the test-fit doesn’t meet expectations, re-measure and recut. Always prioritize safety during cutting by wearing appropriate protective gear and ensuring proper blade tension.
Securing caps: mortar, adhesive, or mechanical
Capstones should be securely fastened to resist foot traffic. The method depends on your climate and local conditions.
In mild climates with no freeze-thaw cycling, masonry adhesive may suffice. For colder regions, use a thick mortar bed or mechanical ties to prevent capstone movement.
Inspect capstones after installation for proper seating and levelness. If any are loose, re-secure them immediately to prevent accidents. Always follow manufacturer instructions when using adhesives or mechanical ties.
Safe Handrail Anchor Strategies and Compliance
Intro
Compare embedded posts in filled cores, isolated concrete footings, through-bolts into block backing, and epoxy anchors. Each method transfers load differently and has specific railing strength and height requirements. Always check the anchor’s capacity on its label or datasheet, and confirm with local code rules. If using isolated footings, ensure they are structurally sound.
Select a method based on core fill, footing condition, and surface integrity. When choosing embedded posts in filled cores, verify the core is properly filled and cured. A professional installation helps ensure anchors meet local code and manufacturer capacities.
When to embed posts in filled block vs separate footings
Embedding posts directly into filled block cores can simplify construction, but it’s not always the best option. Consider these factors:
Use embedded posts when:
- Loading requirements are moderate.
- The substrate is stable and supportive.
- Local codes allow for this method.
Opt for separate footings when:
- Loads are high or concentrated.
- Soil conditions are unstable or weak.
- Additional stability is required, such as in areas prone to heavy traffic or extreme weather.
Mechanical anchors, epoxy anchors, and through-bolts
The choice of anchor type depends on substrate conditions and loading requirements. Here’s a comparison:
Epoxy anchors are suitable for:
- Hollow or filled block cores.
- High load transfer needs.
- Corrosion resistance is crucial.
Mechanical anchors or through-bolts can be used when:
- The substrate is solid concrete.
- Loading requirements are moderate.
- Ease of installation and cost-effectiveness are priorities.
Code checks and load considerations
Compliance with local codes and manufacturer recommendations is crucial for safe handrail anchors. Here’s what to verify:
Check with local codes for:
- Handrail height requirements.
- Loading and spacing specifications.
Consult manufacturer datasheets for:
- Anchor load ratings.
- Installation guidelines to ensure anchors can support the expected loads safely.
Installing Handrail Posts, Flashing, and Testing
Install handrail posts with proper flashing, drill and set anchors, shim bases as needed, and seal to protect against weather. After installation, test the posts to ensure they are secure and ready for rail attachment. Address corrosion prevention and flashing details to improve longevity.
A solid install reduces wobble and increases safety, so check that posts are level, plumb, and firmly anchored before proceeding. Gently push on the post to confirm it feels solid; if there is any movement, recheck the anchor installation and tighten as needed. If a post feels loose, recheck the base setup, adjust with shims if necessary, and re-seal to prevent water intrusion. Stake: skipping proper post installation can lead to wobbly handrails and potential safety hazards. Quick check/cue: gently push on the post; it should feel solid and not wobble. Pro check: an experienced installer ensures posts are level, plumb, and securely anchored before proceeding with flashing and testing. If Post feels loose or wobbles, then recheck anchor installation and tighten as needed. Common mistake + fix: if posts are too low, remove, adjust the base, and reinstall; if too high, use shims to level.
Hole drilling, locating solid support, and anchor setting
Before installing handrail posts, ensure you have solid backing in your block steps. For hollow blocks, use blocking or fill the cores with concrete to provide a solid base for your anchors.
Drill holes using an appropriate masonry bit size that matches your chosen anchor. Clean the holes thoroughly to remove any debris and ensure good bond between the anchor and the block.
Properly installed anchors are crucial for secure handrail posts. If anchors pull out easily, re-drill, clean the holes, and use appropriate anchor type and size.
Corrosion protection and base flashing
To prevent water intrusion and corrosion at handrail post bases, use stainless steel fasteners. Stainless steel is resistant to corrosion and will extend the lifespan of your posts.
Before installing flashing, apply a protective sealant around the post bases. This will help direct water away from the posts and further protect against corrosion.
Ensure your flashing is wide enough to effectively divert water away from the post bases. If corrosion occurs, replace affected fasteners with stainless steel and reapply sealant and flashing.
Field testing for lateral stiffness and safety
Before installing handrails, perform simple push/pull tests on your posts to confirm they can resist expected loads. Compare the deflection of each post with adjacent, known-good posts.
Push and pull gently but firmly on each post to check for excessive deflection. Visually inspect the posts for signs of stress or movement.
If a post shows minimal deflection within acceptable limits, proceed with handrail installation. However, if there is excessive deflection or visible stress, consult a professional engineer for evaluation. Reinforcing anchors, adjusting flashing, or consulting a professional may be necessary to ensure safety and code compliance.
Conclusion
With the work framed by careful planning, correct layout, and solid handrail anchoring, your block steps should be safe, durable, and visually steady for years to come.
Before you move on, confirm the control lines are clear and marked, the subbase is properly compacted and drained, the fill between and inside blocks is properly compacted in lifts, each course is aligned and capped, handrail anchors are located and installed per guidance, flashing is in place, and you’ve tested the handrail system in a controlled test area. Follow these steps in the given order and document any deviations for future reference.
Common mistakes to avoid include underestimating subbase requirements or overworking soil, skipping or uneven compaction, misplacing handrail anchors, and rushing cuts or capping without checking fit. Always wear appropriate PPE, test changes in a small area first, avoid irreversible fixes, and verify local code requirements before finalizing installation. If ground conditions are poor, or you encounter unclear code requirements, seek professional help rather than pushing ahead, and remember that careful planning and patient checking protect your investment and safety in the long run.
FAQ
What considerations affect handrail anchor placement on block steps?
Anchor placement should align with the anticipated hand position and the step rise. Check the manufacturer instructions for allowable anchor locations and verify with any local guidance before drilling or setting anchors.
How do you determine fill material and compaction around the handrail anchors?
Use fill that matches the surrounding block work and provide a stable base for anchors. Follow the product labels and manufacturer recommendations for compaction methods and any curing or settling guidance.
What are common attachment methods for handrails to block steps, and what should I verify?
Common methods include through-bolts, anchor sleeves, or epoxy-set anchors. Verify load capacity, compatibility with the anchor type, and any edge-distance requirements on the anchor label or manufacturer instructions.
How should I verify alignment and levelness before pouring or finishing?
Check both horizontal alignment and vertical levelness across the handrail anchors and adjacent blocks. Use a straightedge and level, and adjust as needed before finalizing the fill or cap work, consulting instructions if adjustments affect performance.