
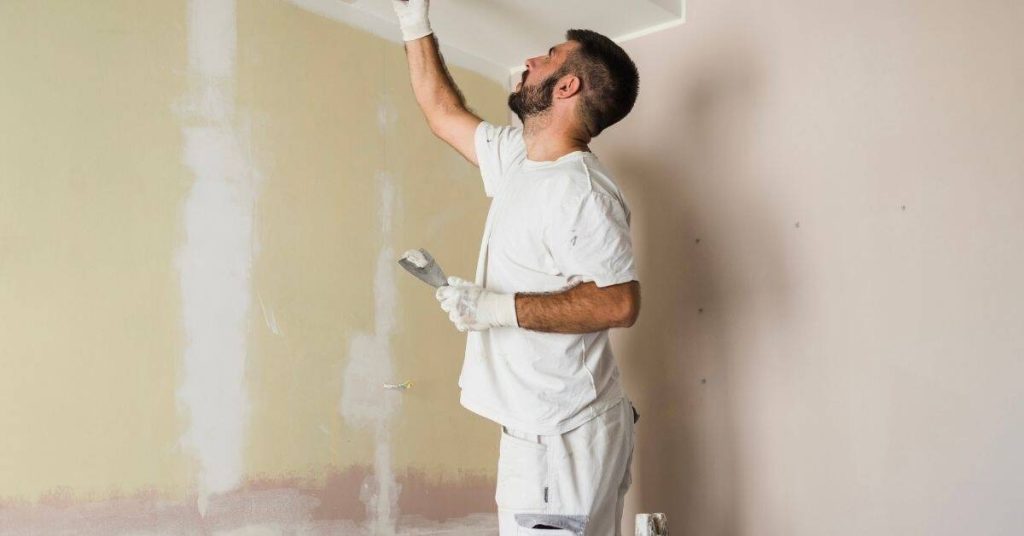
Introduction
Nail pops in plaster are raised spots where the plaster separates from the underlying lath, signaling loose fasteners or movement. Identify each pop by feel and sight, and note how many and where it occurs. Fixing starts with reattaching the lath and securing the plaster to prevent future craters.
To anchor the lath, locate the loose area and use appropriate fasteners after checking the material and any local requirements. Patch the hole by bedding new patch material smooth, feathering edges to blend with surrounding plaster, and letting it set before finishing. Gather basic repair materials such as patch compound, mesh or scrap plaster, and a finishing knife, and follow manufacturer instructions for use.
Key takeaways
- Recognize nail pops vs cracks by slight bulges, fastener shadows, and hollow sounds.
- Choose proper lath anchoring: secure with corrosion-resistant fasteners, spacing, and dowels as needed.
- Prepare patch with clean edges, skim coats, feathered transitions to crater-free blend.
- Use reinforcing lath strips and appropriate fastener methods to prevent future pops.
- Apply fillers in thin, feathered layers; allow cure time per manufacturer guidelines.
- Safety first: wear eye protection, mask dust, and secure area to avoid falling debris.
Table of Contents
- Introduction
- Key takeaways
- Recognizing Nail Pops Vs Other Plaster Defects
- Tools and Materials Checklist
- Safety and Workspace Preparation
- Removing Old Nails and Preparing the Lath
- Anchoring Lath and Choosing Fastening Methods
- Preparing the Plaster Surface for a Crater-Free Patch
- Applying Fillers and Finishing for a Smooth, Crater-Free Result
- Preventing Future Nail Pops, Mistakes to Avoid, and Planning Considerations
- Conclusion
- FAQ
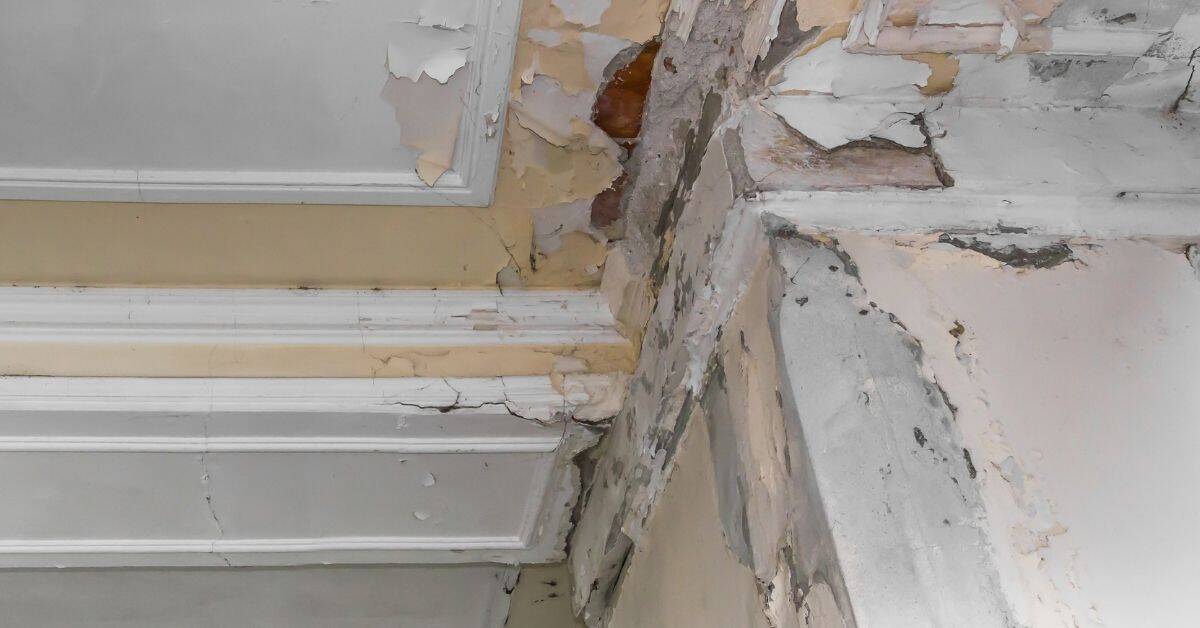
Recognizing Nail Pops Vs Other Plaster Defects
Nail pops are raised nail heads beneath the plaster, often with backfill that creates a visible bulge. They differ from typical cracks or delamination, which follow patterns and lack a pronounced bulge under the surface. Correct diagnosis matters because it guides whether to re-anchor lath, reattach plaster, or simply patch and skim.
Look for quick inspection cues: raised bumps under plaster, tapping sounds that reveal hollow areas, and the wall’s age or patch history. Moisture context helps separate issues from surface flaws or hairline imperfections. Use a simple diagnostic flow to decide when to patch, re-anchor, or investigate structural causes first.
Visual signs and tactile checks
Nail pops in plaster systems manifest as raised bumps on the surface. These are often accompanied by circular discoloration due to moisture trapped under the plaster.
To confirm nail pops, perform a simple pressing and tapping test:
Press gently on the suspected area. If it feels loose or gives way, there’s likely an underlying issue with the lath. Tap lightly around the area. A hollow sound indicates loose plaster or movement in the lath.
When the issue is structural vs cosmetic
Before attempting repairs, it’s crucial to determine if the problem is purely cosmetic (nail pops) or indicative of broader structural issues.
Look for widespread damage, dampness, or new cracks around windows and doors. These could suggest moisture problems or framing shifts that require professional attention.
If the damage is localized and dry, it’s likely nail pops that can be repaired DIY. However, if there are signs of extensive cracks, moisture damage, or framing shifts, consult a professional before proceeding with any repairs to avoid further damage.
Tools and Materials Checklist
Identify core hand and power tools plus safety gear needed for safe lath anchoring, removal of old patches, and crater-free patching. Consider ergonomics and dust control to reduce fatigue and cleanup. Stock a small buffer of fasteners and patch mixes to avoid mid-repair trips.
List material types by function: lath, plaster patch compounds, bonding agents, setting compounds, joint tape, skim coats, primer, and decorative finishes. Note quality tiers and why they matter for longevity and finish. Include pre-work prep and post-work touch-ups as part of a simple workflow.
Essential Tools
Having the right tools ensures efficient, safe, and crater-free repairs.
- Pry bar: Used for removing old patches and accessing lath. Check it’s sturdy and has a comfortable grip.
- Screwdriver/driver set: For anchoring lath and driving screws. Ensure you have the right sizes to fit your fasteners.
- Scraper: To remove old plaster and prepare surfaces. Inspect its blade for sharpness and replace if dull.
- Sanding tool (orbital sander or sanding block): For smoothing surfaces and removing dust. Check the sandpaper grit size; 120-grit is suitable for most plaster work.
- Tape measure: Essential for accurate measurements. Confirm it’s calibrated and in good working order.
- Level: To ensure your patches are even and smooth. Check its accuracy before use.
- Dust mask/respirator: Protects from plaster dust. Ensure it fits well and provides adequate protection.
- Safety glasses: Shields eyes from debris. Check they fit securely and provide full coverage.
Recommended Fillers, Fasteners and Adhesives
Use this checklist to select the right materials for your repair job.
- Plaster repair compound: For filling small holes. Check it’s compatible with your existing plaster and has a suitable working time.
- Setting-type compound: For larger repairs. Follow manufacturer’s instructions for mixing and application.
- Lightweight patch: For deep holes or voids. Ensure it’s designed for use with plaster and can be sanded smooth.
- Plaster anchors: To secure lath. Check they’re suitable for your wall type and have the correct size and thread.
- Screws/nails: For anchoring lath. Ensure they match the anchor’s thread and are long enough to penetrate into studs or joists.
- Plaster adhesive: To bond new plaster to old. Check it’s compatible with your existing plaster and provides a strong bond.
- Joint tape: To reinforce joints and prevent cracking. Ensure it’s designed for use with plaster and can be easily sanded.
- Primer: To prepare surfaces for painting. Check it’s suitable for use on plaster and provides adequate adhesion.
Quick rule: Always check material labels/datasheets for correct usage, safety information, and compatibility with your existing plaster and lath.
Safety and Workspace Preparation
PPE should cover safety glasses, a dust mask or respirator, gloves, and hearing protection when using power tools. Protect skin from plaster dust with proper gloves or barrier cream. Plan a comfortable, compliant work zone before starting.
Control dust with HEPA vacuuming during sanding, damp-mopping, and sealed debris bags. Use plastic barriers to contain the area and ensure adequate ventilation without spreading dust to other rooms. Prepare surfaces and waste management for a clean teardown and patching process.
Personal protective equipment and dust control
Protecting yourself from plaster dust and potential hazards during mechanical work is crucial. Here’s what you’ll need:
- Safety Glasses: Protect your eyes from debris and dust.
- Dust Mask or Respirator: A mask rated for plaster dust will protect your lungs. For power sanding or drilling, use a respirator.
- Gloves: Protect your hands from cuts and abrasions.
- Hearing Protection: Use when operating power tools to prevent hearing damage.
- Skin Protection: Wear long sleeves and pants to protect your skin from plaster dust.
Securing the work area and inspecting the lath
Before starting repairs, secure the work area to ensure safety and efficiency:
Clear the Area: Remove any obstructions from the workspace.
Support Adjacent Finishes: Protect nearby finishes by supporting them with cardboard or plastic sheeting to prevent damage during work.
Once the area is secure, Inspect the Lath. Check for signs of rot, insect damage, or other structural issues. If you find significant damage, consult a professional before proceeding.
Removing Old Nails and Preparing the Lath
Assess plaster and lath to decide whether to remove or retain old nails, focusing on nail pops, rust, and any loosened lath boards. Identify which fasteners cause the issue and plan extractions to preserve plaster integrity. Avoid widening holes or destabilizing the substrate.
Safety and tool considerations include eye protection, dust control, pry bars, nail puller, and checking for hidden electrical or plumbing lines before removal. After removal, monitor for further cracking and evaluate lath stability. Prepare the area for patching by planning reinforcement if needed.
Safe nail extraction techniques
To preserve plaster integrity and minimize hole enlargement while removing old nails, use the following safe techniques:
For loose nails: Use a claw hammer or pry bar to gently lift them out. Apply steady pressure along the nail’s length to avoid further cracking.
For tight nails: Use a nail puller in conjunction with a backing block. Securely position the block behind the plaster, then apply steady leverage and pressure to extract the nail without enlarging the hole.
Repairing or replacing damaged lath strips
Restoring a stable substrate for plaster adhesion involves addressing damaged or missing lath. Here are your options:
For broken but intact lath: Stitch gaps using appropriate fasteners, following manufacturer’s instructions. Ensure new lath is compatible with existing material and structure.
For severely damaged or missing lath: Replace with new lath, matching existing material and securing properly. Inspect lath condition thoroughly and plan repairs accordingly to restore stability.
Anchoring Lath and Choosing Fastening Methods
The revival approach depends on whether existing lath can be re-attached securely or if a new backing is needed. Evaluate plaster condition, lath spacing, and stud layout to decide between mechanical fasteners or adhesives, and consider how each option will perform under vibration. Emphasize proper spacing, bite depth, and compatibility with wood or metal studs so the fix lasts and resists future nail pops.
Skipping proper lath anchoring can lead to recurring failures, so plan surface prep, fastening sequence, and interim supports carefully. Quick checks—feeling for loose lath and listening for hollow spots when tapped—help confirm readiness before patches. A pro-style approach involves assessing plaster health, lath spacing, and stud layout to choose the best anchoring strategy and to set expectations for long-term performance and maintenance.
Fastener and anchor options
The choice of fasteners and anchors significantly impacts the longevity and effectiveness of your lath anchoring. Here are three primary methods:
Mechanical Fasteners: Screws, nails, and specialized lath fasteners provide secure attachment. Verify corrosion resistance, vibration performance, and suitability for your wall assembly (wood vs. metal studs) on the product labels or datasheets.
Adhesives: Construction adhesives can supplement mechanical fasteners or serve as an alternative. Check compatibility with your plaster type (lime vs. Portland), curing times, and humidity requirements.
Anchors: Sleeve anchors, toggle bolts, or masonry anchors secure lath to studs or sheathing. Ensure they distribute load evenly to prevent failure under nail pops.
Placement strategy to avoid future pops
Avoid these common mistakes in lath placement to minimize future nail pops:
- Locate solid backing: Attach fasteners and anchors to solid structures like studs or sheathing for optimal support.
- Stagger fasteners: Distribute load evenly by staggering fasteners, preventing stress concentration in one area.
- Follow manufacturer’s recommendations: Space fasteners according to the manufacturer’s guidelines to ensure even distribution of load.
- Inspect and replace damaged fasteners: Before re-fastening existing lath, check for and replace any damaged nails or screws to maintain structural integrity.
- Maintain original spacing pattern: When re-attaching existing lath, follow the original spacing pattern to preserve the intended load distribution.
By following these strategies, you’ll minimize future nail pops and ensure a more durable plaster repair.
Preparing the Plaster Surface for a Crater-Free Patch
Start with cleaning the surface, removing loose plaster and dust, and addressing moisture issues. Ensure the area is dry before applying patch materials. A clean base improves bond and finish.
Key the edges with a roughened perimeter to create a solid bond, and set up a clean transition to surrounding plaster. Evaluate backer reinforcement options such as mesh or reinforced patches to control sinking and cracking during curing.
Cleaning and Keying the Edges
Begin by removing any loose plaster, dust, or debris from the area using a soft brush or vacuum. This step is crucial for ensuring a strong bond between old and new plaster.
Inspect the surface thoroughly to ensure no dirt or particles remain. If any are found, re-clean the surface.
Next, create a rough, sanded key around the perimeter of the patch area using medium-grit sandpaper. This will provide a good mechanical bond for patching compounds and prevent craters by establishing a clean transition to the surrounding plaster.
Backing Support to Prevent Sinkage
To prevent crater formation during drying and ensure a smooth, even patch, install backing strips, mesh, or boards securely along the perimeter of the patch area. These provide support for compound layers and help maintain the surface level.
Verify that the backing is secure and level before applying any compound. If it’s loose, uneven, or not properly installed, re-secure or replace it to ensure optimal results.
The choice of backing material depends on the size and nature of the patch. Consult product labels or manufacturer instructions for specific recommendations.
Applying Fillers and Finishing for a Smooth, Crater-Free Result
Choose a patch material suited to plaster and lath, and explain why each choice helps avoid craters. Prepare the surface by cleaning, removing loose material, and lightly abrading for better adhesion. Keep expectations realistic for patch performance.
Apply multiple thin coats rather than one thick fill, and feather edges to blend with surrounding texture. Practice the recommended drying times between coats and plan for a finish that matches texture and sheen to minimize visible patches.
Layering, troweling and feathering technique
To achieve a smooth, crater-free result when repairing nail pops in plaster, it’s crucial to apply fill material in thin layers. This technique prevents crater formation due to shrinkage.
Inspect for any missed spots or uneven application after each coat. Ensure each layer is well-bonded to the previous one before applying the next. If you notice craters forming, lightly sand and reapply thinner layers.
Use a flexible trowel or putty knife to apply the compound. Hold it at a 45-degree angle to the surface for better control and smoother application. To feather the edges, gradually reduce the amount of compound on the trowel as you approach the surrounding plaster.
Sanding, priming and texture matching
Proper sanding, priming, and texture matching are essential for a seamless repair. Start by sanding gently with fine-grit sandpaper to remove any excess compound and smooth out the surface. Be careful not to over-sand and create divots.
Inspect for any missed spots or visible trowel marks after sanding. Once satisfied, apply a seam-appropriate primer to ensure uniform absorption of paint. Allow the primer to dry completely before proceeding.
To match the surrounding texture, you can use stipple, knockdown, or smooth skim techniques. For stipple, lightly dab the compound with a brush or roller to create a textured surface. For knockdown, apply the compound and then ‘knock down’ the high spots with a damp sponge. For a smooth skim, use a trowel to apply a thin, even layer of compound.
Preventing Future Nail Pops, Mistakes to Avoid, and Planning Considerations
Long-term prevention centers on reinforcing lath and plaster integrity, addressing moisture or temperature cycles, and planning for future movement in the wall assembly. It covers when to use mechanical anchors, corrosion-resistant nails, or modern patch composites to reduce re-popping and cratering over time. It also highlights avoiding common missteps that lead to lasting flaws.
The practical plan helps DIYers sequence repairs, batch patches to minimize texture mismatches, and stock the right materials for consistent surface finish. Knowing how to test patch color, document texture, and schedule curing windows prevents repeated damage and ensures a smoother, more durable result. Quick cues like a hollow sound or loose plaster guide the workflow, and keeping notes helps maintain texture continuity across multiple panels.
Long-term prevention and maintenance
Maintaining plaster integrity and preventing future nail pops requires regular inspection and targeted reinforcement. Promptly address any identified issues to prevent recurrence.
Regularly inspect walls for signs of moisture, temperature changes, or settling. If detected, implement humidity control measures and reinforce lath as needed.
While regular maintenance may seem time-consuming, it prevents major repairs and reduces long-term costs. Neglecting periodic checks can lead to extensive damage and higher repair expenses.
Common mistakes and how to avoid them
To minimize craters and re-popping, steer clear of these frequent DIY errors:
- Oversized patches: Divide into smaller sections to avoid cratering.
- Inadequate backing: Ensure proper support behind the patch to prevent sinkage.
- Improper fasteners: Use corrosion-resistant nails and mechanical anchors where needed.
- Neglecting drying times or primer/finish compatibility: Allow adequate curing time and ensure finish coats are compatible.
Understanding and correcting these common mistakes will result in a successful, long-lasting repair.
Cost, time-saving choices, and when to hire a professional
Efficiently managing DIY repairs involves evaluating complexity, time investment, and budget. Batch patching for multiple spots can save time and materials.
Inventory necessary materials and set aside adequate space for careful work. If repair is complex or involves structural issues, hire a professional to ensure safety and quality.
If time constraints are tight, prioritize repairs and consider hiring help for efficiency. Weighing DIY vs professional repair based on specific needs is crucial for a successful outcome.
Conclusion
Stabilizing the lath and applying a crater-free patch protects both the structure and the wall’s appearance, and finishing with careful smoothing gives you a durable, seamless repair you can trust. Prioritize safe work habits and deliberate steps so you can complete the job without costly mistakes.
Check the lath and patch sequence in practice: secure loose lath sections, choose fastening methods appropriate for the existing material, clean the work area, dampen or lightly mist dusty surfaces as needed, apply patches and fillers in thin layers, feather edges to blend with the surrounding plaster, let each layer cure, then sand smooth and prime before repainting. Confirm you have tested a small area first, followed by a larger patch once you see evenness, and keep edges tight to prevent future craters.
Common mistakes to avoid include overdriving fasteners or applying too much filler in one shot, which creates high spots or cracks; rushing through sanding or skipping priming, which leads to visible patches; and ignoring safety—always wear eye protection, keep the work area well lit, and work within the limits of your tools and materials. If you’re unsure about lath condition, fastener choices, or patch compatibility with your plaster, pause and check manufacturer guidance or local rules before proceeding.
If the repair area looks unstable, or if you uncover structural concerns beyond the plaster surface, it is wise to call a professional rather than push ahead. With careful steps and steady progress, you can achieve a solid, crater-free finish and restore the wall’s appearance with confidence.
FAQ
How can I identify nail pops in plaster before patching?
Look for small bumps or ridges on the plaster surface that indicate a nail or fastener is proud of the plane. Tap the area gently with a putty knife or screwdriver to listen for a hollow sound, which suggests a void behind the patch. Check nearby studs or lath for raised bits or movement when pressed.
What are reliable methods for anchoring lath to prevent future nail pops?
Use proper lath fasteners that penetrate to a solid anchor point, and space them according to the lath type and product instructions. Drive fasteners perpendicular to the lath and avoid overdriving, which can crush the wood or lath. In soft or deteriorated studs, consider additional mechanical anchors or reinstalling lath on solid backing per manufacturer guidance.
How can I patch holes without creating craters in the plaster?
Clean the hole and bevel the edges slightly to feather the patch. Apply a thin, even skim coat over the repaired area and blend into the surrounding surface before it dries. Build up in light, multiple passes rather than a single thick layer to prevent cratering.
What repair materials and tools are typically needed for this job?
Gather patching plaster or joint compound suitable for plaster repairs, reinforcing mesh or patch sheets if required, and a flexible filler for small gaps. Have a trowel, putty knife, sanding block, and a damp sponge on hand. Always check product labels for application guidelines and compatibility with your plaster and lath.