
Introduction
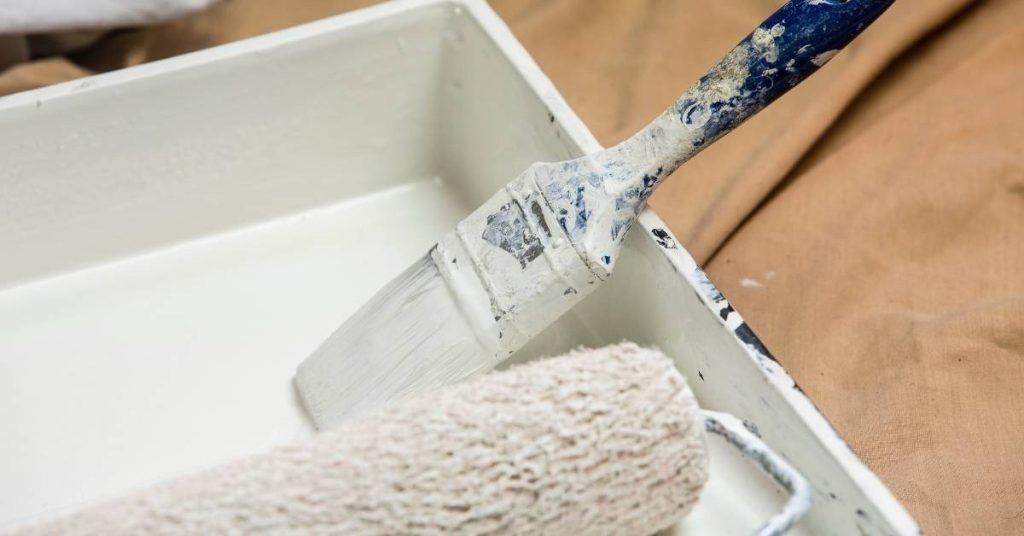
Cutting in on textured walls without tape means achieving a clean, sharp line where the wall and adjacent surface meet by careful brush loading and technique. Start with a small amount of paint on the brush and load along the edge, then steady your hand and work in short, controlled strokes. Keep your wrist loose and follow the texture with light, even contact to avoid digging into the texture or leaving gaps.
Choosing the right brush and technique helps you maintain a sharp edge without tape. Use a brush with the right stiffness for the texture and practice along a scrap area to feel how the brush loads and releases paint. If you see feathering or bleed, adjust your pressure and loading and wipe away any mistakes promptly for a clean edge.
Key takeaways
- Plan wall textures and edge lines before loading brush for consistent results.
- Use proper brush loading: load lightly, tap off excess, avoid overloading corners.
- Maintain sharp edges by rolling bevels and feathering with steady hand.
- Cut-in techniques without tape rely on steady wrist, consistent pressure, and practice.
- Choose the right brushes for texture, stiffness, and precision control.
- Safety: protect eyes, wear gloves, and take breaks to avoid fatigue.
Table of Contents
- Introduction
- Key takeaways
- Planning and Prepping Textured Walls
- Tools and Materials Checklist
- Understanding How Different Textures Affect Cutting-in
- Brush Loading Fundamentals for Textured Walls
- Cutting-in Techniques Without Tape
- Working Corners, Ceilings, and Trim Near Textured Walls
- Troubleshooting, Common Mistakes, and Touch-up Fixes
- Safety, Ergonomics, and Cost-Effective Pro Tips
- Conclusion
- FAQ
Planning and Prepping Textured Walls
Start with a careful assessment of the wall’s condition and texture. Identify the texture type, note any peeling or damaged areas, and check for moisture issues. Look at whether existing coats are glossy or matte to guide primer choices and method. Plan your approach so cutting in will stay smooth from start to finish. Decide if priming is needed based on bare drywall, stains, or glossy finishes, and choose a primer that seals the texture without raising nap or pooling. Think about finish compatibility and how satin or eggshell finishes will interact with the texture to keep edges visible and crisp. Outline tools and edge planning first, then confirm a quick touch-up plan and an inspection checklist.
Next, prep the surface with a light scrub or cleaner to remove dust and contaminants. Remove loose paint with gentle scraping, then wipe down and lightly sand high spots or gouges. Fill deeper gouges with a compatible filler and feather edges for seamless transitions. Protect adjacent surfaces with masking or shields as needed, using tape sparingly where it won’t pull texture. Make masking decisions that respect texture and edge integrity. Include a plan for bedded primer if needed and a simple step-by-step edging approach to keep lines sharp without tape.
Surface assessment and texture mapping
The first step in cutting-in on textured walls is understanding the surface you’re working with. Grab a flashlight and inspect your wall closely.
Identify the type of texture: Is it popcorn, orange peel, or something else? This affects brush choice – synthetic bristles work well for most textures, but natural bristles may be needed for delicate surfaces.
Check the depth and condition of the texture. Deep textures need stiffer brushes to hold their shape. Look for any damage or peeling areas that need extra attention during prep.
Prep checklist (cleaning, patching, and protection)
Before you start cutting-in, follow this prep checklist to ensure a smooth process. It’s best to tackle these steps in order.
- Remove loose paint: Gently scrape off any peeling or flaking paint with a scraper or putty knife.
- Clean the surface: Wipe down walls with a damp cloth and appropriate cleaner (like TSP) to remove dirt, grease, and grime. Let it dry.
- Sand high spots or gouges: Use fine-grit sandpaper to smooth out any rough areas. This helps paint adhere better.
- Fill deeper gouges: Apply a compatible filler, like spackling compound for drywall, and feather the edges for seamless transitions.
- Check moisture issues: Look for water stains or damp spots that may indicate underlying problems. Address these before painting.
- Protect floors and trim: Use drop cloths and plastic sheets to cover floors and baseboards. Painter’s tape can be used sparingly, but avoid pulling off texture.
- Mask edges: Use painter’s shields or minimal tape where feasible to protect adjacent surfaces without disturbing the texture.
- Check existing coats: Determine if existing coats are glossy or matte. Glossy finishes may need priming.
Quick rule: Skipping these steps can lead to poor paint adhesion, visible imperfections, and wasted effort.
Tools and Materials Checklist
Define the exact brush types and edging tools you’ll rely on: an angled sash brush in small widths, synthetic bristles for water-based paints, and a dedicated edging tool or small straightedge for crisp lines on textured surfaces. Consider using a corner or edge guard to protect adjacent surfaces where texture complicates edges. Prepare a practical setup with a small in-progress workspace, a dedicated brush rinse cup, and a pre-loaded tool tray for quick changes.
List essential materials and consumables: primer compatible with textured walls, the chosen topcoat, and the appropriate paint type. Include small mixing buckets, masking or drop cloths, and the recommended cleaner for brush cleanup. Emphasize label checks for nap compatibility and recoat windows, and confirm drying times to avoid edge feathering. Plan for maintenance and storage: clean brushes after use, store damp tools properly, and inspect for wear before reuse. Run a quick test on scrap textured area to verify line sharpness and adjust loading if needed.
Brush options and what to look for
Before you start painting your textured walls, make sure you’ve got the right brush. This checklist will help you choose the best one for the job.
- Shape: Angled or Straight? For textured walls, an angled brush (45°) is usually better as it can get into corners and crevices. A straight edge works well too, but may not reach all areas of the texture.
- Bristle Type: Synthetic or Natural? Synthetic bristles are generally more durable and less likely to absorb water-based paints. Natural bristles are better for oil-based paints but can shed and wear out faster.
- Bristle Stiffness: Medium to Firm Textured walls need a brush that’s stiff enough to hold its shape when painting, but not so hard that it damages the surface. Check by bending the bristles – they should spring back into place.
- Tip Shape: Rounded or Flat? A rounded tip is good for getting into textured areas, while a flat tip can provide better coverage on smooth surfaces. For textured walls, a slightly rounded tip is usually best.
- Bristle Length: Long Enough The bristles should be long enough to reach the bottom of the ferrule (the metal part holding the bristles) when new. This ensures they won’t wear out too quickly.
- Ferrule Size: Match the Job A larger ferrule holds more paint, which can speed up your work. However, it might be too big for detailed areas. Check the size of the ferrule to ensure it’s suitable for your textured wall.
- Handle Length and Comfort: Right for You The handle should be long enough for you to use comfortably without straining your wrist or arm. Check by holding the brush as if painting.
- Price: Within Your Budget While it’s tempting to go for the cheapest option, remember that a good quality brush can last much longer and give better results. Check reviews and compare prices before buying.
Quick rule: Always check the product label or manufacturer instructions to ensure you’re using the right brush for your specific paint type and surface texture.
Auxiliary tools and materials
Before you start your concrete project, make sure to gather these essential auxiliary tools and materials. This checklist will help you ensure you have everything needed for a smooth and successful job.
- Edging Tools: Check that you have straight edge trowels or edgers to create clean, sharp edges on your concrete surfaces. These tools are crucial for preventing ragged edges and ensuring a professional finish.
- Trim Guards: Inspect your trim guards or form ties to ensure they’re in good condition. These protect the edges of your forms from damage and help maintain straight, even lines.
- Extension Poles: Verify that you have extension poles for your tools if needed. These allow you to reach hard-to-get-at areas without straining yourself or compromising safety.
- Cleaning Supplies: Gather a stiff-bristled broom, shovel, and wheelbarrow for mixing and transporting concrete. Also, check that you have a suitable cleaning solution for your chosen concrete sealer.
- Protective Gear: Ensure you have safety glasses, work gloves, and sturdy boots to protect yourself from injuries during the project. Additionally, check local regulations regarding ear protection when using power tools.
- Concrete Finishing Tools: Inspect your bull float, magnesium float, and groover to ensure they’re in good working order. These tools are essential for achieving a smooth, level finish on your concrete surfaces.
- Measuring Tape: Although mentioned earlier, it’s crucial to have an accurate measuring tape to ensure proper mixing of concrete and precise placement of forms.
- Level: Check that you have a 2-4′ level or laser level to ensure your forms are properly aligned and your concrete surface is even.
Quick rule: Always double-check the condition of your tools before starting any task. Dull or damaged tools can lead to poor results, increased effort, and potential injuries.
Understanding How Different Textures Affect Cutting-in
Explain how texture depth changes where the paint contacts the wall, from peaks to valleys, and how that impacts edge formation. Describe how light knockdown, heavy orange peel, or popcorn textures alter contact points and paint pickup. Clarify why texture depth matters for brush control and edge clarity as you approach corners and transitions.
Discuss how texture influences paint pickup and brush or roller loading, and how to tailor your approach to minimize bleed while keeping edges sharp. Identify edge behavior near corners, baseboards, and where two textures meet, with practical checks to prevent wobbly lines without tape. Outline technique adjustments for each texture, including brush angles, pressure, and stroke direction, and suggest tool setups suited to different textures. Include quick testing steps on a sample panel to confirm crispness before applying to walls.
Specific Texture Challenges and Expected Outcomes
Each wall texture presents unique challenges when cutting-in. Understanding these can help you anticipate issues and plan your approach.
Light Knockdown: This texture has shallow peaks and valleys, making it easier to work with. However, gaps between knockdowns may cause slight unevenness in your edge.
Heavy Orange Peel: With deeper valleys and higher peaks, this texture can hide imperfections but also makes creating a crisp edge more challenging. Expect some variation in line thickness.
Popcorn-Style: This texture has the deepest valleys and highest peaks, making it the most difficult to cut-in cleanly. Be prepared for variations in edge sharpness and potential touch-ups.
Paint and Sheen Considerations for Textured Walls
The type of paint and its sheen can significantly impact your cutting-in results on textured walls.
Sheen: Higher sheens (semi-gloss, gloss) will highlight imperfections in your edge, while lower sheens (flat, eggshell) will help hide them. Choose a sheen that matches your desired finish and tolerance for visible edges.
Viscosity: Thicker paints (high-viscosity) can create cleaner lines but may also accentuate texture variations. Thinner paints (low-viscosity) flow better into textures, reducing edge visibility but potentially causing bleed.
Brush Loading Fundamentals for Textured Walls
Describe the loading goal in practical terms: what a usable amount of paint looks like on the brush to reach into texture without dripping or sagging. Explain how to recognize signs of too much or too little paint through a simple visual check and touch feel. Emphasize consistency so you can reproduce the same load on every cut-in across the wall.
Provide a repeatable loading sequence: dab into paint, lift and off-load on the rim, then a quick spin or tap to even out bristles. Explain brush positioning and technique to push paint into texture without over-smoothing peaks, including how to adjust angle and pressure for edge control. Address texture-aware application with guidance on stippling, light sweeping, or cross-hatching as appropriate for different textures, avoiding pooling. Include a testing protocol on a scrap strip to fine-tune thickness and loading if the peaks don’t render cleanly.
How to load and test the brush
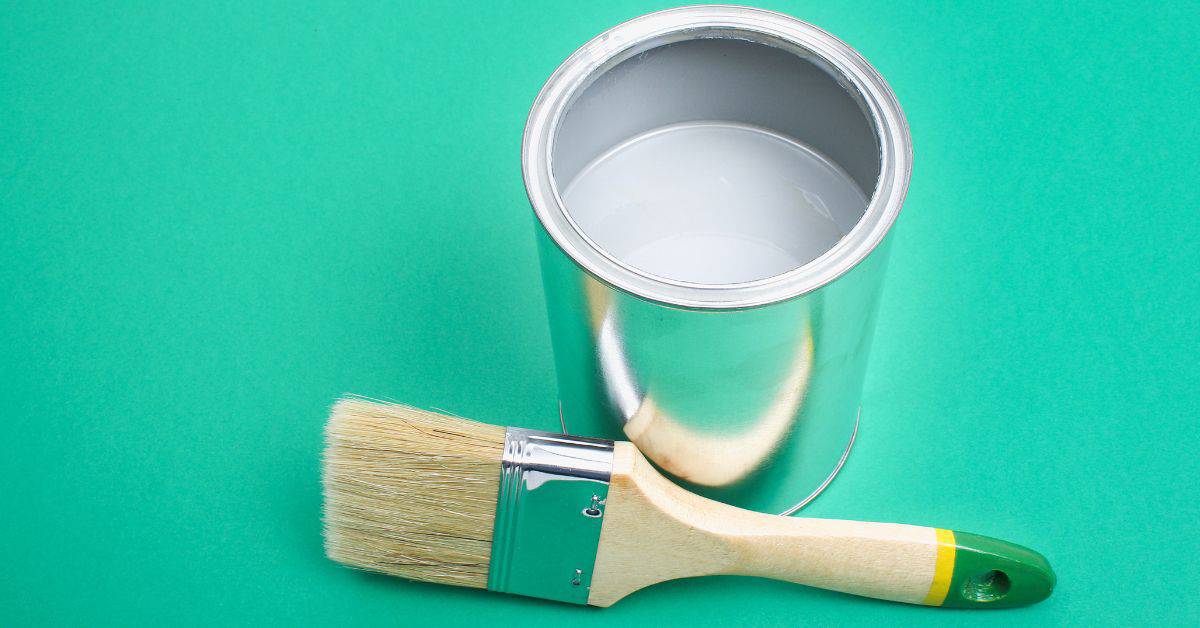
Start by dipping your brush about 1/3 into the paint. Don’t go too deep, or you’ll end up with too much paint.
Next, lift the brush out and tap it gently on the rim of the paint can to remove excess. You should see paint glistening at the tips of the bristles, but not dripping.
Before cutting in, do a quick test stroke on a scrap piece of paper or an inconspicuous area. The brush should leave a smooth, even line with no bare spots or drips.
Maintaining consistent paint flow during long runs
As you’re cutting in, keep an eye on your brush. When the bristles start to feel dry or you notice the paint isn’t flowing smoothly, it’s time to reload.
Dip and off-load just like before. If you’re working on a long stretch, you might need to restroke – lightly drag the brush along the edge you’ve already painted to redistribute the paint.
If your brush starts to feel too stiff or clogged with paint, wipe it clean on a cloth or paper towel. This helps maintain even coverage and prevents over-smoothing.
Cutting-in Techniques Without Tape
Define the goal clearly: crisp, tape-free edges on textured walls with clean color separation at corners and adjacent surfaces, while minimizing spill. Assess texture depth and surface prep, ensuring the area is clean, dry, and lightly dusted. Explain how to adapt technique to irregular textures and edge scenarios to maintain sharp lines without tape.
Detail tools and paint handling for this approach: an angled sash brush, a small edging brush, and the right paint consistency. Describe loading with minimal paint and how to balance brush angle for textured surfaces. Outline core cutting-in techniques using the brush heel, controlled strokes, feathering along the edge, and brief pauses to re-establish the line without overworking texture. Include testing on a scrap area and a plan for touch-ups if needed.
Using brush angle and stroke control as an edging tool
Mastering the art of cutting-in on textured walls without tape involves precise control over your brush. Here’s how to use brush angle and stroke control to follow the contours of your wall.
- Hold the brush at a 45° angle: This allows you to hug the edge while minimizing paint transfer onto adjacent areas. It also helps you feel the texture, guiding your strokes.
- Position your hand close to the bristles: This gives you better control and sensitivity to the wall’s surface. Keep your wrist steady for consistent pressure.
- Use short, steady strokes: Start at the top of the wall, working your way down. Keep your strokes short (about 1-2 inches) and controlled to avoid dragging paint across bumps.
- Follow the texture’s contour: Let the brush bristles follow the natural shape of the texture. This helps you maintain a crisp edge without overworking the area.
- Optional: Use an edging guide (around $10-$20): For straight, consistent edges, consider using an edging guide that attaches to your brush. It’s not necessary but can help beginners achieve professional results.
Feathering, back-brushing, and blending to a sharp edge
Once you’ve established your crisp border using the techniques above, it’s time to feather into the field paint and create a smooth, seamless finish. Here’s how:
Feathering: Start at the outer edge of your cut-in line and use short, controlled strokes to blend the paint into the wall. Work your way in towards the center, using less pressure as you go. This helps create a soft, graduated effect that hides the edge.
Back-brushing: After feathering, switch to a back-and-forth motion with your brush. Start at the outer edge and work your way in, using light strokes to blend any remaining ridges or lines. This technique helps ensure a smooth, even finish.
Blending: As you near the center of the wall, use very light strokes and minimal pressure to blend the paint evenly. The goal is to create a seamless transition between your cut-in line and the field paint, with no visible ridges or lines.
Working Corners, Ceilings, and Trim Near Textured Walls
Distinguish inside corners, outside corners, and ceiling-edge cuts and plan where to use brushes versus small rollers. Set expectations for edge sharpness versus texture compatibility and crew your approach accordingly. Consider safe ladder work and edge preparation near ceiling lines where bulk texture tends to creep into the line.
Discuss close-to-trim challenges and how to maintain crisp lines near casing, baseboard, or crown molding in textured areas. Recommend brush loading and stroke technique with an approximate brush angle and steady, press-and-pull motions. Use light chalk lines or mock lines to guide the edge, and consider temporary edge guards or guard paints as needed. Finish with post-cut-in touch-ups and checks under raking light to confirm sharpness.
Inside and Outside Corner Techniques
When cutting into corners with textured walls, remember: less is more. You want to minimize paint build-up.
Inside Corners: Use a 1.5-2″ angled brush. Hold it at a 45-degree angle to the wall. Start at the top, press lightly, then pull down and out. Work in small sections.
Outside Corners: Similar technique, but start at the bottom, pull up and into the corner. Keep your brush steady and controlled. Don’t overload it; you don’t want bristles splaying.
Cutting In Near Crown Molding and Uneven Ceilings
Crown moldings and uneven ceilings can be tricky. You’ll need to use a small roller or a 1-1.5″ angled brush for these tight spots.
Uneven Ceilings: Use a ladder with a stabilizer. Work in small sections, starting at the highest point. Feather your strokes into the ceiling. If there’s bulk texture, use a light touch to avoid creeping into the line.
Crown Molding: Use a temporary shield or edge guard to protect the molding. Start at the top, pull down and out. Work slowly, using small strokes. If you make a mistake, clean it up immediately with a damp cloth.
Troubleshooting, Common Mistakes, and Touch-up Fixes
Identify common brush-loading errors such as overloaded bristles, splaying, or inadequate loading, and offer quick corrective steps like lightly tapping off excess and redistributing paint along the ferrule. Emphasize edge-control tactics to keep lines crisp without tape through consistent brush angle and feathering. Address texture-specific challenges and when to switch techniques to avoid ragged edges.
Deal with spatter, drips, and rough edges by protecting nearby surfaces and wiping spills promptly. Use a damp rag for edge cleanup and avoid back-rolling along the edge after loading. Provide practical touch-up methods to match texture and blend softened edges with light cross-hatching. Include a concise verification checklist and a simple before/after workflow to guide readers from initial attempt to polished edge.
How to correct a blurred or wobbly edge
If your cut-in line has softened or become wavy, don’t panic. Here’s how to fix it:
Feathering back: Lightly load your brush and gently feather along the affected area, blending the paint into the existing line.
Or, re-cut with a clean, lightly loaded brush: Wait for the paint to dry slightly, then re-cut the edge using a fresh, lightly loaded brush. This will define the line again.
For stubborn edges, try spot-priming and repainting. Lightly sand the area, prime it, let it dry, then carefully re-paint the edge.
Preventing texture drag and roller marks near cut lines
Avoid dragging roller-applied paint into your fresh cut-in edges with these tips:
Wait for the cut-in to dry slightly: Before rolling, let the cut-in line dry just enough that it won’t be disturbed by the roller.
Then, use a light touch when rolling near the edge. Apply gentle pressure and keep your roller cover away from the edge. You can even use an edging guide to maintain a consistent distance.
If you do notice a mark, clean it up promptly. Use a dampened rag to wipe away any excess paint before it dries.
Safety, Ergonomics, and Cost-Effective Pro Tips
Cover ladder safety and fall protection, including ladder height and angle, three-point contact, and workspace clearance. Mention PPE and a buddy system if possible, with clear guidance on maintaining balance and avoiding fatigue. Discuss setup considerations to keep the workflow safe and efficient.
Offer ergonomic painting tips and a workflow that reduces strain: neutral spine, knee and hip alignment, micro-breaks, and an efficient grip. Share tips for edge crisping without tape, such as using the right brush loading and steady, short strokes. Provide time-saving sequencing ideas, like edges first and then flats, plus a lean setup to minimize trips. Suggest cost-effective substitutes for pro results, such as reusable brushes, affordable edging tools, or foam edging for sharp lines, and practical paint management strategies to mimic professional results without specialty tape.
Ladder and workspace safety basics
First, choose the right ladder for your job. A Type III or IV extension ladder is best for cutting in on walls.
Set up your ladder at a 75-degree angle to the wall – it should be one foot out from the wall for every four feet of ladder height.
Always maintain three-point contact while climbing or working: two hands and one foot, or two feet and one hand. And if possible, use a buddy system – have someone spotting you at the bottom.
Wear appropriate PPE (personal protective equipment) like safety glasses and gloves. Clear your workspace of any tripping hazards to prevent slips and falls.
Budget-friendly techniques and professional shortcuts
Invest in a high-quality, reusable brush. A good one will last you years. For edging, consider an affordable angled sash brush or some foam edging tools.
Pre-load your brushes and rollers before starting to minimize back-and-forth trips. Set up a rolling workstation with everything you need within reach.
For paint, batch similar colors together to reduce waste. Use low-cost liners or even plastic bags as drop cloths for protecting floors. It’s all about being smart with your materials.
And remember, preparation is key. Spend time taping off large areas and use painter’s tape for any delicate surfaces. This will save you time and paint in the long run.
Conclusion
Done right, cutting in on textured walls stays clean, durable, and looking good without tape. The payoff is sharp edges that don’t peel and paint that covers evenly in corners you can’t tape off. Safety and a steady plan pay off just as much as technique.
First, run a quick test on a hidden area to match brush loading to the texture, set a light, even load, cut in with a steady, controlled stroke, and keep the working edge damp but not dripping. Start at a corner or known clean area, work methodically along walls and ceilings, wipe excess paint as you go, protect floors and furniture, and keep a clean edge with a small amount of pressure. If a edge looks fuzzy, back off and redo with lighter loading and a crisper pass, then touch up as needed—the goal is smooth, sharp lines without build-up.
Avoid common mistakes like overloading the brush, trying to force a single pass across a textured surface, or ignoring safety gear. Always test first, wear eye protection and a mask where needed, and work in a well-ventilated area. Keep your body balanced to prevent slips or sudden twists, and take breaks to avoid hand fatigue that leads to sloppy lines.
If the texture is very pronounced, or you’re near delicate moldings, consider calling a pro instead of pushing on. A skilled finisher can save time and prevent costly fixes later. Stay disciplined, follow the checks, and you’ll finish with edges that hold up and walls that look sharp for years to come.
FAQ
What’s the best way to cut in on a textured wall without tape?
Load the brush properly and keep a steady hand. Work a narrow strip at a time and use light, even strokes to blend the edge into the texture.
How should I load a brush for sharp edges on texture?
Dip lightly and dab along the edge to avoid pooling. Wipe excess paint off the ferrule and shoulder to prevent it from feathering into the texture.
Which brushes are best for precise cutting on textured walls?
Choose brushes with tight, firm bristles that hold their shape. A brush size that matches the edge you’re painting helps you maintain a clean line without gouging the texture.
Do I need to prime first, and how do I apply primer near edges?
Prime if the surface needs it before topcoat. Apply primer to the edge area with a steady, controlled motion, then go back to the main area once the edge is tacky but not dry. Check the label for recoat times and surface suitability.