
Introduction
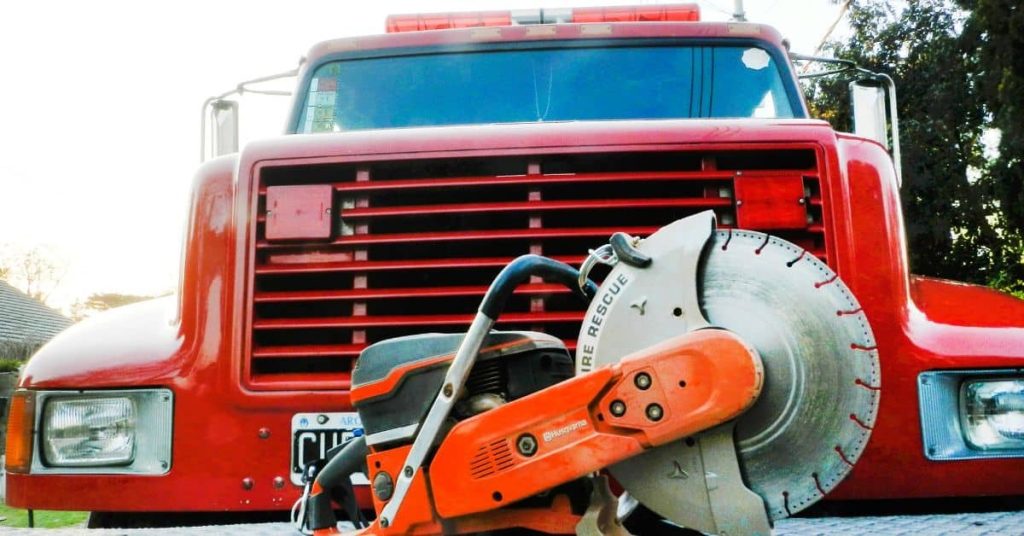
Cutting brick cleanly means controlling the cut with the right blade, steady support, and careful technique. Choose a blade designed for brick and masonry, and pair it with proper support to reduce chipping. Always check the manufacturer instructions and local rules for your tool and material.
Use a suitable diamond blade for brick, and consider the blade type and its intended use as you plan the cut. Provide stable backing, support along the cut, and a slow, steady feed to minimize blowout. If in doubt, follow manufacturer guidance and local codes to stay safe and compliant.
Key takeaways
- Choose a diamond blade rated for masonry and brick to prevent rapid wear.
- Secure support and proper fixturing to minimize blade chatter and blowout risk.
- Always wear eye protection and a dust mask during brick cutting.
- Match blade type to brick hardness and cut direction for cleaner edges.
- Use slow, steady feed and avoid forcing the blade to prevent chipping.
- Inspect blade condition regularly and replace when wear or glazing affects quality.
Table of Contents
- Introduction
- Key takeaways
- Why Use a Diamond Blade for Cutting Brick?
- Diamond Blade Construction: What Matters for Brick Cutting
- Matching Blade Type to Brick and the Cut You Need
- Wet Vs Dry Cutting for Brick: Pros, Cons, and Best Practices
- Tools, Mounting, and Machine Settings That Affect Cut Quality
- Support, Fixturing, and Cutting Technique to Prevent Blowout
- Common Mistakes, Troubleshooting, and Quick Fixes for Chipping/Blowout
- Maintenance, Inspection, and Knowing When to Replace a Blade
- Conclusion
- FAQ
Why Use a Diamond Blade for Cutting Brick?
Diamond blades deliver cleaner edges and a smoother surface compared to abrasive discs or toothed blades. They remove material more quickly, which reduces handling time and the risk of rework on site. This translates to lower labor costs and tighter schedules when cutting brick.
Options include continuous or segmented diamond blades, with varying bond hardness and constructions such as sintered or laser-welded cores. Consider wet versus dry cutting, brick density, and the type of saw you will use, like masonry saws or angle grinders, to match the blade to the task.
Cutting performance and finish
Diamond blades excel in cutting brick due to their unique grinding action. Unlike abrasive discs or toothed blades that tear through material, diamond grit grinds the brick, producing cleaner edges with less spalling.
Match blade bond and rim type to your brick’s hardness for optimal results. Harder bricks require harder blade bonds. Always verify this on the blade label before use.
Common issues like excessive chipping often stem from using a blade bond that’s too hard for the brick. If you encounter this, consider switching to a softer blade bond.
Cost versus lifetime and waste reduction
While diamond blades may have a higher upfront cost compared to abrasive discs or masonry blades, they offer significant long-term savings. Diamond blades last longer and require fewer replacements.
Evaluate total job cost, including blade replacements, rather than focusing solely on the initial price. For jobs requiring many cuts, diamond blades can be more cost-effective in the long run.
Frequent blade replacement is a sign that you might benefit from upgrading to diamond blades. They offer fewer replacement cuts and less waste, minimizing your total job cost.
When non-diamond options still make sense
In certain scenarios, abrasive wheels or masonry blades may be acceptable alternatives to diamond blades. These include situations where budget is very low, the brick is thin and soft, or cuts are infrequent.
Assess your specific needs before deciding on a blade type. If you’re working with a tight budget or making only occasional cuts, abrasive wheels or masonry blades might be sufficient.
However, if you find that these blades wear out quickly or produce poor cut quality, consider upgrading to diamond blades for better performance and longevity.
Diamond Blade Construction: What Matters for Brick Cutting
Diamond crystal size, orientation, and bond type influence heat management, chip control, and edge quality. An open bond can expose more diamond, aiding wear and cooling, while a closed bond can reduce glaze formation and heat buildup that risks blowout.
Metal bond hardness, brick hardness, and steel core configuration affect wear rate and blade rigidity. Laser-welded cores tend to offer better concentricity and balance, which helps prevent edge wobble during cuts. Testing and simple checks, like scoring practice and ensuring proper supports, are important to verify performance before a full job.
Diamond Crystals: Size, Concentration, and Quality
The diamond crystals embedded in a blade significantly impact cut quality and efficiency. Here’s what to consider:
Grit Size: Coarse grit (24-46) is aggressive and ideal for soft bricks or mortar, but may cause chipping. Fine grit (80-150) is slower but smoother, suitable for hard bricks or dense CMUs.
Concentration: High concentration increases diamond exposure and wear rate, good for soft materials. Low concentration reduces wear but may cause glazing on harder materials.
Always check manufacturer specs for grit size and concentration to optimize cut quality and minimize blowout. Adjust based on material hardness for best results.
Metal Bond Hardness and Selection
The metal bond determines diamond exposure, wear rate, and heat management. Here’s how to select the right one:
Soft Bonds: Suitable for soft bricks or mortar, these bonds expose diamonds faster but dissipate heat better.
Hard Bonds: Ideal for hard bricks or dense CMUs, they reduce diamond wear but may cause heat buildup.
Match bond hardness to brick hardness to control wear rate, minimize glazing, and prevent blowout. Monitor cutting for excessive heat buildup as a quick check.
Core Design and Rim Types
The core and rim design affect rigidity, concentricity, wheel balance, and edge smoothness. Here’s how to choose the right one:
Segmented or Turbo Rims: Ideal for aggressive cutting of hard materials, they offer improved chip clearance but may increase edge blowout risk.
Continuous Rims: Suitable for smooth, precise cuts on soft materials, they reduce chipping and blowout but may slow cooling and chip clearance.
Inspect the core for rigidity, verify blade concentricity, and check rim type as indicated by the manufacturer. Select a design suitable for material hardness and required cut quality to minimize chipping and blowout.
Matching Blade Type to Brick and the Cut You Need
Identify brick type and bond hardness to choose the blade rim and bond that match your cut goal. Continuous or laser-welded rims suit precision finishes, while segmented rims or thicker bonds speed up rough cuts. Consider diamond or carbide options where applicable to align with the brick type and expected wear.
Understanding how these choices affect feed rate, kerf, and cooling helps prevent blowout and chipping. For soft or low-density bricks, a precision-focused blade with a smooth finish reduces edge damage; for dense or engineered bricks, a faster cut may require a tougher bond and a rim designed to shed heat. Water cooling and dust management can reduce overheating, and a quick decision framework guides you from brick type to blade selection, minimizing common pitfalls.
Brick material and hardness considerations
The type of brick you’re cutting significantly impacts the blade choice. Harder bricks require tougher blades to prevent rapid wear and maintain cut quality.
- Soft/Low-density bricks: Porous, easy-to-cut materials like clay or calcium silicate bricks benefit from softer bonds (e.g., 60/80) with lower diamond concentration to reduce wear and maintain edge quality. Avoid using blades designed for harder materials to prevent excessive wear and poor cut quality.
- Dense/Engineered bricks: High-density, durable bricks like concrete or engineering bricks need harder bonds (e.g., 100/120) with higher diamond concentration to resist faster wear. Using softer blades can lead to rapid blade degradation and increased cutting effort.
- Frost-resistant bricks: These bricks have a high salt content, requiring resistant bond options (e.g., 120/150) to prevent corrosion and maintain cut quality. Using non-resistant blades can cause premature blade failure and poor cuts.
- Fireclay bricks: High-alumina content in fireclay bricks demands hard, durable bonds (e.g., 120/150) to minimize wear and maintain edge quality. Using softer blades can result in excessive wear and reduced cut life.
- Engineered composite bricks: These bricks combine materials like concrete and clay, requiring a balanced bond (e.g., 80/100) that caters to both the hard and soft components. Using mismatched blades can lead to rapid wear or poor cut quality.
Bond and rim choices to minimize spalling
The bond and rim combination of your blade plays a crucial role in minimizing edge damage and achieving the desired finish. For clean, precise cuts, prioritize continuous rims and finer grits.
For precision cuts on soft bricks, opt for blades with continuous/laser-welded rims featuring fine grit (e.g., 120/150) to achieve smooth, even surfaces. Using segmented rims or coarse grit can result in rough edges and increased spalling.
When cutting dense bricks for rough applications, choose blades with segmented rims or thicker bonds (e.g., 60/80) featuring coarser grit to facilitate faster, aggressive cuts. Using continuous rims or fine grit can lead to excessive blade wear and reduced cut life.
Consider diamond vs. carbide options based on required cut quality and budget constraints. Diamond blades offer superior durability and longevity but come at a higher cost. Carbide-tipped blades are more affordable but have a shorter lifespan and may not provide the same level of precision.
Depth of cut and number of passes
Planning your depth of cut and pass strategy helps minimize blowout risk, improves cut quality, and extends blade life. Always review tool limits to avoid overloading the blade or equipment.
For deep cuts on dense bricks, consider scoring then full-cutting in multiple passes to minimize blowout risk. This approach reduces stress on the blade and allows for better control during cutting. Attempting deep, single-pass cuts can lead to excessive blowout, chipping, or thermal cracking.
When cutting soft bricks with shallow depths, a single pass may be sufficient. However, monitor for signs of blade stress or overheating, as softer materials can still cause rapid wear or excessive heat buildup. If experiencing these issues, consider using multiple passes to reduce risk.
If you encounter excessive blowout, chipping, or thermal cracking, re-evaluate your depth and pass strategy. Adjusting your approach based on brick type and desired final depth can help mitigate these issues and improve overall cutting performance.
Wet Vs Dry Cutting for Brick: Pros, Cons, and Best Practices
Wet cutting provides cooling and dust suppression, often yielding cleaner edges and longer blade life, but it requires a water source and managing splash zones. Dry cutting is simpler on limited sites but can increase heat buildup and dust if not controlled. Assess which method aligns with site constraints and safety requirements.
For common tools, weigh the pros and cons of water use with angle grinders or circular saws, and compare masonry versus diamond-tipped blades. Follow best practices for setup, water flow, dust containment, and kickback prevention tailored to the chosen method.
Advantages of Wet Cutting
Wet cutting brick offers several benefits in terms of reducing damage and improving safety. The primary advantage is the use of water to cool the blade, preventing overheating.
Water also removes slurry, the fine debris produced during cutting. This helps reduce micro-fractures that can lead to chipping and blowout, preserving the brick’s integrity.
Moreover, wet cutting significantly suppresses dust, enhancing worker safety by minimizing inhalation risks. It is crucial to verify your tool’s compatibility with water before use to ensure safe operation.
Dry Cutting Safely
While wet cutting offers several advantages, there are situations where dry cutting is necessary or preferred. To do this safely, follow these guidelines.
Dry cutting is suitable for short cuts or where water access is limited. Ensure you’re using a compatible blade by checking the label or datasheet. Always follow manufacturer guidelines to avoid exceeding blade limits.
Effective dust extraction is crucial when dry cutting. Check your tool’s compatibility with dust extraction systems before use. Additionally, wear appropriate personal protective equipment (PPE) to safeguard against dust inhalation and other potential hazards.
Controlling Heat and Dust
To manage heat and dust efficiently on-site, consider these practical setup options. Always check your tool’s compatibility with added water before use to ensure safe operation.
Water feeds, connected hoses that provide a steady stream of water, offer continuous cooling. They are ideal for longer cuts or when consistent blade cooling is required.
Misters deliver targeted water application, focusing on the cutting area. This can be useful for smaller jobs or where water supply is limited. For both methods, ensure proper drainage to prevent slip hazards.
Local extraction systems, such as wet/dry vacuums, contain dust at the source. They are particularly useful in confined spaces or when working indoors, helping to maintain a clean and safe work environment.
Tools, Mounting, and Machine Settings That Affect Cut Quality
Identify which saws suit your brick-cut tasks, noting typical blade types and the trade-offs in precision versus speed. Brick saws, demo saws, table saws, angle grinders, and circular saws each have unique mounting needs and cut characteristics. Ensure you choose a blade compatible with your tool and intended result.
Stabilize the brick with proper mounting, fences, or jigs to minimize movement and vibration. Consider mounting direction, edge support, RPM compatibility, and how these factors influence blowout and edge fidelity during the cut.
Choosing the Right Saw for Depth and Control
Selecting the appropriate saw is crucial for achieving clean brick cuts. Consider your cutting needs when choosing between different types of saws.
For deep cuts, opt for larger, more powerful saws like demo saws or table saws with bigger blades. These offer greater power but less precision control.
For precise cuts, smaller tools such as brick saws, angle grinders, or circular saws are better suited. They provide improved control but may struggle with deeper cuts.
Re-evaluate your saw choice based on the task at hand and consider blade diameter and power requirements to ensure optimal cut quality.
Arbor, Flange, and Correct Blade Mounting
Properly mounting the blade is essential for preventing wobble, which can lead to chipping and poor cut quality.
First, ensure the arbor is correctly sized for both your saw and blade. Using an incorrectly sized arbor can cause excessive vibration and damage to the tool.
Next, use appropriate flanges to secure the blade in place. Tighten them securely according to your tool’s manual instructions to minimize wobble.
If you encounter issues with the arbor or flanges, consult your tool’s manual, verify the arbor size, and ensure proper tightening to maintain a stable cut.
RPM, Cutting Speed, and Feed Rate Guidance
Matching your blade’s recommended RPM with your saw’s capabilities is crucial for achieving clean cuts. Excessive feed rates can result in poor cut quality or tool damage.
Consult the manufacturer’s recommendations for both RPM and feed rates. If you’re working with fragile brick, consider slowing down your feed rate to prevent chipping.
When unsure about the appropriate RPM or feed rate, err on the side of caution by using slower feeds. This helps maintain cut quality while minimizing the risk of tool damage or excessive wear.
Regularly check and adjust your feed rates as needed to ensure optimal performance and longevity of your tools.
Support, Fixturing, and Cutting Technique to Prevent Blowout
To minimize blowout when cutting brick, set up a solid, continuous backing behind the brick and secure the piece with clamps or wedges without placing clamps on the intended cut line. Use sacrificial spacers to prevent clamp marks, and begin with a shallow score to establish the line before proceeding with staged passes. Stake: Skipping backing support setup may cause edge breakout and uneven cuts.
This approach reduces heat buildup, keeps the blade aligned, and helps prevent spalling by distributing stress across the cut line. Quick check: Feel the backing to ensure it is stable and won’t move during cutting, and choose a blade appropriate for brick, with cooling or dust extraction as needed. Pro check: An experienced installer ensures a solid backing and proper fixturing for uniform results, and if blowout occurs, reassess blade and support and retry with adjusted settings.
Backing and Clamping Strategies
To prevent edge breakout and ensure a clean cut, use a solid, continuous backing behind the brick. Plywood or fiberboard works well, as do sacrificial blocks.
Secure the brick with appropriate clamps or wedges. Avoid placing clamps on the intended cut line to prevent marks. Use sacrificial spacers if needed.
Key: Uniform support and secure clamping minimize breakout and maintain cut accuracy.
Scoring, Plunge Cuts, and Staged Passes
Begin by scoring the face of the brick to establish the cut line. This initial shallow pass helps control chipping.
Perform multiple shallow passes rather than a single deep cut. Aim for 20–40% depth per pass before approaching full depth. This staged cutting technique reduces stress on the brick and minimizes blowout.
Tip: Cut perimeters first to reduce stress on the brick body, then proceed with interior cuts.
Blade Angle, Direction, and Stable Feed Technique
Hold the blade square to the brick’s surface to ensure a clean cut. Maintaining this angle throughout the cut prevents fracture propagation.
Use steady forward motion while cutting. Avoid lateral twisting or sudden changes in feed rate, as these can cause chipping and breakage.
Remember: Proper blade angle, consistent direction, and stable feed technique are crucial for minimizing blowout and achieving a smooth edge.
Common Mistakes, Troubleshooting, and Quick Fixes for Chipping/Blowout
Root causes include using the wrong blade type, dull teeth, insufficient securing, or an overly aggressive feed rate. Identify whether a brick cut requires a diamond blade or a standard masonry blade based on the observed results.
Address securing issues, review bonding choices, and adjust feed rate and speed to reduce chatter. If signs of wear appear, consider blade rotation, re-centering, or switching blades mid-job to preserve cut quality.
Identifying a mismatched or worn blade
A common cause of chipping and blowout in brick cutting is using an incorrect or worn blade. Regularly inspect your blades to ensure they are suitable for the task and in good condition.
Feel the edge of the blade; dull teeth will be less sharp. Observe its performance during cuts. If it struggles, overheats, or produces rough edges, it may be time to replace it.
If your blade shows excessive heat, rough edges, or slows down during cuts, stop work and replace it with a new, matching bond type blade to prevent further damage and maintain cut quality.
Fixes for immediate job rescue (patching and clean-up)
Minor blowouts can be repaired quickly to keep your project on schedule. First, assess the damage. If it’s minor and there’s no structural compromise, you may be able to repair it without stopping work entirely.
For minor chips or cracks, chip back slightly using a tuckpoint tool to fill gaps, or apply cosmetic mortar patch. This will help maintain the appearance of your brickwork while allowing you to continue with your project.
However, if the damage is severe and affects the structural integrity of the brick, stop work immediately and reassess your cutting technique or blade choice before continuing.
Preventing recurring problems on the same job
Consistency in results helps maintain project quality and efficiency. If you’re experiencing recurring blowouts, it’s important to identify the cause and make adjustments accordingly.
After a test cut, evaluate your blade performance and technique. If issues persist despite corrective measures, consider changing your blade type or adjusting cutting parameters such as feed rate or depth of cut.
Document what works for consistent results to help you maintain quality and efficiency throughout the remainder of your project.
Maintenance, Inspection, and Knowing When to Replace a Blade
Perform routine visual checks for cracks, missing teeth, glazing, warping, and balance before use. Early detection helps prevent unexpected failures during cutting.
Use wear indicators to determine end-of-life and follow proper cleaning and dressing steps. Store blades correctly, verify tool compatibility, and have a replacement plan ready to maintain safe, high-quality cuts.
Visual checkpoints and runout inspection
Before each use, perform a quick visual check to identify any critical damage that could compromise safety or cut quality.
- Cracks: Inspect for hairline cracks along the blade’s edge. Cracked blades can shatter during use, posing serious safety risks.
- Segment loss: Check for missing or broken segments. Loss of segments reduces cutting efficiency and can cause uneven cuts.
- Undercutting: Ensure the blade’s undercut is not excessively worn. Severe undercutting can lead to poor cut quality and increased vibration.
- Lateral wobble: Check for lateral movement or wobbling of the blade when spun. Excessive wobble indicates a balance issue that could cause poor cuts and safety hazards.
Quick rule: If any critical damage is found, replace the blade immediately to ensure safety and maintain cut quality.
Dressing, conditioning, and breaking in new blades
Before using a new blade, perform these steps to optimize its performance and longevity.
- Season the blade: Make light cuts into recommended material (e.g., concrete or brick) to break in the diamonds. This helps expose the cutting edges and removes any loose particles.
- Inspect for defects: Check new blades for manufacturing defects such as cracks, chips, or missing segments before use.
- Dress glazed diamonds: If your blade shows signs of glazing (loss of sharpness), dress the blade using recommended methods to restore its cutting edge. Consult the manufacturer’s instructions for specific dressing techniques.
Quick rule: Avoid aggressive dressing or conditioning that can damage the blade and reduce its lifespan.
Storage, cleaning, and handling to prolong life
Proper storage, cleaning, and handling practices extend the life of your blades by preventing warping, corrosion, and accidental damage.
- Clean blade back: After each use, clean the blade’s back (non-cutting side) to remove dust and debris. This prevents grit from accumulating and causing damage during storage.
- Clean arbor: Clean the arbor (shaft) to prevent corrosion and ensure smooth blade mounting and removal.
- Store flat: Store blades in a flat position to prevent warping. Warped blades can cause poor cuts and increased vibration.
- Avoid damp conditions: Store blades in a dry location away from moisture sources to prevent corrosion. Corroded blades can lose their cutting edge and become unsafe to use.
Quick rule: If signs of warping or corrosion are present, replace the blade immediately to ensure safety and maintain cut quality.
Conclusion
Cutting brick cleanly hinges on choosing the right diamond blade, providing solid support, and following a controlled cutting method that minimizes blowout. When you prioritize proper mounting, machine settings, and a deliberate feed, you protect the appearance of the brickwork and reduce the risk of costly damage or personal injury.
Make your next steps count: confirm the blade type matches the brick and the cut you need, secure the brick with appropriate fixturing, prepare the machine for the selected cutting method (wet or dry), run a small test cut on scrap first, then proceed with a steady, measured feed while keeping the blade cool and clear of obstructions, and finally inspect the finished edge for chips or micro-fractures before moving to the next section of work.
Common mistakes to avoid include rushing the cut, using inadequate support that allows the brick to deflect, and neglecting to condition or replace a worn blade. Always follow safety guidelines: wear eye and hand protection, keep hands clear of the cut line, and stop if you notice excessive chipping, unusual vibration, or blade glazing. If the wall or project demands precise tolerances, or if the brick presents unusual hardness or imperfections, consider bringing in a professional rather than forcing a risky, DIY-only solution.
With the right blade, stable setup, and disciplined technique, you can achieve reliable, durable cuts while minimizing blowout. Plan your cut, test first, and proceed deliberately for predictable results you can trust on any brick project.
FAQ
What blade types are best for cutting brick, and how do I choose among them?
For brick cutting, use a diamond blade designed for masonry. Look for blades labeled for brick or masonry work, and check the blade’s ground type and segment design in the manufacturer instructions. If in doubt, compare the intended use and compatibility on the label or datasheet.
What are effective support methods to prevent blade binding and chipping during brick cuts?
Provide steady support along the cut line with a rigid work surface and a straightedge or guide. Use clamps or a fixturing system to keep the brick and guide in place, reducing vibration. Ensure the brick sits flat and fully supported at the cut edge to minimize movement.
How can I minimize blowout when cutting brick, and what techniques help with that?
Use a blade with appropriate segment design for brick and employ a steady, controlled feed. Start with a light cut to establish a groove, then proceed with a full-depth pass if the tool allows. Avoid forcing the blade; let the blade do the work and keep cooling as recommended by the blade maker.
Should I cut brick wet or dry, and what maintenance helps extend blade life?
Follow the blade maker’s guidance for wet or dry operation. If wet cutting is advised, provide a constant water supply to cool the blade and reduce dust. Regularly inspect the blade for wear, clean the segments, and replace the blade when you see glazing or excessive dulling.