
Introduction
Heat, direct sun, and wind can pull moisture from a fresh cement-based stucco patch before it gains enough strength. The answer is not a universal spray schedule: first identify the exact repair product and follow its current technical data sheet. Some cementitious stucco products call for fog or moist curing; acrylic, acrylic-fortified, polymer-modified, and rapid-setting products may have different protection or water-exposure requirements.
This guide explains how to prepare, apply, protect, and inspect a cement-based patch when its instructions call for moist curing. Begin misting only at the stated set stage, use a gentle fog rather than a stream, and stop if water marks, erodes, or loosens the fresh surface.
Key takeaways
- Identify the patch product, substrate, required coat sequence, and curing instructions before mixing.
- Use moist or fog curing only when the product instructions require or permit it; do not apply one misting schedule to every stucco repair.
- Protect fresh work from direct sun and drying wind with a freestanding screen or shade that does not touch the patch.
- Use clean water and a fine fog only after the surface has reached the specified set; never create runoff, puddles, or washout.
- Do not change mix water, add primers, mesh, bonding agents, or admixtures unless the repair product and existing wall system call for them.
- Stop work when weather, substrate condition, or access safety prevents controlled placement and curing.
Table of Contents
- Introduction
- Key takeaways
- Quick Overview and Deciding When to Repair
- Tools and Materials Checklist
- Step-by-Step Application Process for Reliable Patches
- Ideal Environmental Conditions and What to Monitor
- Proper Mist Schedules for Heat and Wind
- Techniques to Prevent Weak Finish and Ensure Bond Strength
- Common Issues in Heat and Wind and Troubleshooting
- Final Inspection, Safety, Durability, and Cost Planning
- Conclusion
- FAQ
Quick Overview and Deciding When to Repair
A patch is appropriate only when the surrounding stucco and the material behind it are sound. Heat and wind make a marginal repair less forgiving because they shorten workable time and accelerate surface drying. Inspect first, then choose a weather window in which the product’s application and protection limits can be met.
When to patch vs. replace or resurface
Use a patch for an isolated, stable defect when you can remove all loose material and restore the required layers with a compatible repair material. A shallow cosmetic repair, a base-coat repair, and a full-thickness opening through a multi-coat stucco system are different jobs; they do not share a universal depth limit or number of lifts.
Stop and obtain qualified evaluation when damage is widespread, the wall moves, cracks recur, water is entering behind the stucco, lath or accessories are exposed or damaged, or a repair crosses a control joint. Large areas and reconstruction of a lath-backed system may require a specified system and code-compliant details rather than a surface patch.
Assessing substrate and existing stucco
Remove loose, hollow-sounding, cracked, dusty, or delaminated material until the remaining edge is sound. Look for staining, mold, efflorescence, soft sheathing, corroded metal, or a musty odor; these can indicate moisture problems that must be corrected before patching. Do not patch over a moving or saturated substrate.
Identify what is already on the wall: cement plaster, a painted surface, an acrylic finish, or another coating. Also note whether the repair reaches lath, a joint, or an edge. Portland-cement plaster systems have requirements for bases, thickness, application, and curing; ASTM’s C926 plaster application standard is useful context, but the repair product and existing wall assembly determine the actual repair detail.
Tools and Materials Checklist
Buy or stage materials only after identifying the product and system. Use the manufacturer’s specified mix water and curing method. Generic hydraulic cement, waterproofing additives, accelerators, retarders, polymers, and bonding agents are not automatic upgrades and can be incompatible with a stucco repair.
Essential Tools and Safety Equipment
- Repair product and current technical data sheet: Confirm permitted thickness, coat sequence, set time, curing, rain protection, and recoat requirements.
- Hawk and appropriate trowels or float: For placing, consolidating, feathering, and matching the existing texture.
- Clean bucket and paddle mixer: For mixing only the quantity that can be placed within the product’s workable period.
- Fine-fog sprayer or nozzle: For controlled curing only where the product permits moist curing.
- Wire brush, scraper, and vacuum or brush: For removal of unsound material and dust.
- Thermometer or infrared thermometer: To check air and wall-surface temperatures separately.
- Freestanding shade cloth or wind screen: To reduce direct sun and drying airflow without touching the repair.
- Safety glasses, gloves, and dust protection required by the product SDS: Cementitious materials and airborne dust can irritate skin, eyes, and lungs.
- Safe access equipment: Use a stable ladder or scaffold suitable for the work; follow applicable local and work-at-height requirements.
Material Selection and Specs Explained
- Cementitious stucco patch or base-coat repair: These commonly require a stated curing period, but the timing and method vary by product.
- Acrylic or acrylic-fortified patch/finish: Do not assume it should be moist-cured. These products can depend on air drying or have limited water-exposure instructions.
- Rapid-setting or polymer-modified repair mortar: Follow its separate mixing, working-time, thickness, and protection instructions.
- Bonding agent, primer, mesh, or lath: Use only when the product instructions, substrate, repair geometry, existing system, or code requires it.
- Clean water: Add only the measured amount the product allows. Extra mix water can alter strength, color, texture, and set.
For example, the technical data for one fast-setting stucco patch specifies misting at defined times after application and warns against erosion during misting; it also has application-temperature and rain limits. Read the manufacturer’s product data before planning the cure, rather than transferring that schedule to another material.
Step-by-Step Application Process for Reliable Patches
Schedule the work for the most controllable part of the day where practical. Have the screen, shade, water, and tools ready before mixing so the fresh patch is not left exposed while you search for equipment.
Step-by-Step Process
- Confirm the system and conditions. Read the technical data sheet; verify air temperature, wall-surface temperature, rain forecast, and the required protection period. Identify whether moist curing is required, permitted, or prohibited.
- Prepare the substrate. Remove unsound material and dust. Prepare or pre-dampen the substrate only as the product directs. If a bonding agent or primer is specified, use the compatible product and follow its drying instructions.
- Set up protection. Place a freestanding windbreak or shade screen so it deflects wind and sun without contacting the wall. Leave room for air circulation; do not seal the patch behind plastic or create a surface that can drip condensation onto it.
- Mix accurately. Measure water and mix time exactly as directed. Do not add water to compensate for heat or wind unless the product explicitly allows that adjustment.
- Place the repair. Apply the specified thickness and number of lifts. Press material into the prepared surface, consolidate with the proper trowel or float, and feather only as the repair system permits. Do not overwork a drying surface.
- Finish at the proper stage. Match texture during the product’s workable window, not after an assumed tack-free time. Protect the texture from wind-blown dust and contact.
- Cure and protect. Once the product reaches its stated set condition, use the approved curing method in the next section. Maintain sun, wind, rain, frost, and impact protection for the stated duration.
- Clean up and document. Clean tools before material hardens as directed. Note the product, mix batch, weather conditions, application time, curing start, and any deviation allowed by the manufacturer.
Surface preparation and priming
Cleaning is essential, but a primer is not a universal response to wind. A hot, absorbent cementitious substrate may need pre-dampening; a painted, dense, or otherwise difficult substrate may need a compatible bonding treatment. Follow the repair system’s substrate-preparation instructions and do not apply a new material over dust, loose paint, standing water, or active moisture intrusion.
Mixing, applying, and consolidating patches
Mix in small batches that can be placed and finished before the material loses workability. Apply each lift at the thickness the product allows, and wait for the stated condition before the next lift or finish coat. If the repair exposes lath or recreates a multi-coat plaster assembly, do not improvise mesh placement or coat thickness; use the required system detail.
Texturing and final finishing touches
Texture and recoat timing are product-dependent. Do not wait for a generic 24- to 72-hour “tack-free” point, and do not assume every repair is ready for paint after 28 days. Before primer, paint, or finish, meet the product’s stated cure, dryness, pH, and recoat conditions. Examine color only after the required drying or cure period, since fresh cementitious material can look different while moisture is still leaving it.
Ideal Environmental Conditions and What to Monitor
Check more than the forecast air temperature. Record air temperature, wall-surface temperature in sun and shade, direct sunlight, humidity, wind, and the chance of rain or frost during the protection period. A sunlit wall can be much hotter than the air, while wind and low humidity can speed moisture loss even when the thermometer seems moderate.
Temperature and humidity guidance
Use the product’s limits, not a universal “ideal” range. Some cementitious products specify a minimum and maximum surface or air temperature during application and early protection; those limits differ by product. A product bulletin for one cementitious scratch-and-brown coat, for example, specifies keeping surface temperatures above 40°F and below 100°F during application and after set. Consult the relevant cementitious base-coat bulletin for its own fog-curing and temperature requirements.
Worker safety is a separate decision. Heat stress depends on sun exposure, airflow, workload, clothing, and PPE as well as temperature and humidity. Provide drinking water, shade, rest, and a way to stop work if anyone develops heat-illness symptoms.
Wind, sun exposure, and localized microclimates
There is no universal wind-speed threshold at which every stucco patch fails. Treat wind as a drying and control problem: if it blows spray away, dries the surface faster than you can manage within the instructions, moves a screen, or makes access unsafe, postpone the work. Hot-weather guidance likewise treats temperature, humidity, and wind as a combined evaporation risk rather than a single trigger. See ACI hot-weather concreting guidance for that combined-condition principle.

Proper Mist Schedules for Heat and Wind
Use this section only when the exact product calls for or permits moist/fog curing. There is no safe all-purpose interval for stucco patches. The correct start time, frequency, and duration may range from specific misting times on a patch product to periodic fogging after initial set on a cementitious base coat; some acrylic finishes should not receive routine moist curing.
| What you observe or confirm | What to do |
|---|---|
| The data sheet does not call for water curing, or it limits water exposure. | Do not create a mist schedule. Use the listed shade, wind, rain, and drying protection instead. |
| The data sheet calls for fogging after set, and the patch is firm enough that a fine fog will not mark it. | Apply a light, even fog at the stated time and for the stated period. Keep the screen in place as needed. |
| The surface is losing moisture rapidly, but remains intact. | Improve shade and wind protection first; increase fogging only as the product permits and only enough to prevent rapid drying. |
| Water runs, puddles, cuts the texture, causes slumping, or produces uneven dark wash marks. | Stop spraying. The application is too heavy, too close, too early, or not permitted for that finish. |
| The patch is badly cracked, dusty, loose, or visibly eroded. | Do not try to rescue it with more water. Assess and remove unsound material before repairing again. |
Initial Curing Phase Misting
Do not mist immediately after application unless the product explicitly says to do so. Wait until the manufacturer’s specified initial or final set, and confirm that the surface is firm enough that water will not mark, slump, or erode it. This is especially important on a fine finish coat or small patch with delicate texture.
Use a fine-fog nozzle held far enough from the wall that droplets land softly. Sweep evenly rather than concentrating on an edge or low spot. The objective is controlled moisture retention, not a wet, shiny surface: there should be no runoff, puddling, streaking, or loss of texture. Do not rub, brush, or touch the patch while it is wet.
Extended Misting for Hot or Windy Days
Continue for the duration and frequency stated by the product. Heat, direct sun, low humidity, and wind may require more protection or more frequent fogging, but only within those instructions. Avoid automatic hourly, overnight, or fixed-duration spray cycles; they can over-wet a finish, leave uneven color, or cause washout.
Check the repair visually through the curing period. A stable texture without powdering, slumping, or erosion is a useful check. If a screen alone controls the rapid drying, that may be preferable to adding more water. Keep rain and condensation from striking the fresh surface.
Adjusting Misting by Patch Thickness and Area Size
Patch thickness and area do not establish their own misting interval. They affect how you plan the work: larger areas need enough labor and equipment to place, finish, and protect the entire section uniformly; thicker or multi-lift repairs need the product’s specified lift thickness and waiting period between coats. Use a wider, gentle spray pattern for a large area only when fog curing is approved, and verify that it reaches edges without creating runoff. Related guidance: Stucco Patch Curing: Misting Schedules That Prevent Weak, Dusty Finish Coats.
Techniques to Prevent Weak Finish and Ensure Bond Strength
A durable repair begins with a sound, correctly prepared substrate and a compatible material. Moist curing cannot correct dust, loose stucco, improper mix water, an incompatible coating, insufficient consolidation, or movement in the wall.
Proper layering, feathering, and timing
Use the manufacturer’s stated maximum lift thickness and coat sequence. A surface skim repair may be placed differently from a base-coat replacement, and a full-thickness repair may require multiple coats and lath-related work. Feather edges carefully where the product and existing texture allow, but do not feather a repair so thin that it falls outside the product’s requirements.
Apply the next lift, finish coat, primer, or paint only when the product specifies. “Lost gloss” is not a reliable universal signal because stucco products and finishes behave differently in heat and wind.
Use of bonding agents and admixtures
Use a bonding agent or primer only when it is compatible with both the substrate and the repair material. Do not add plasticizers, accelerators, retarders, waterproofing additives, or extra polymer without written product approval. In hot conditions, keeping bags cool and shaded, mixing smaller batches, and scheduling work during a cooler period are safer than changing the mix design.
Common Issues in Heat and Wind and Troubleshooting
Recognizing and fixing early-age cracking and dusting
Rapid surface drying: If the patch is still sound but its surface is drying too quickly, improve shade and wind protection and use only the product-approved fogging method. Do not compensate by adding water to the mix or directing a hose at the wall.
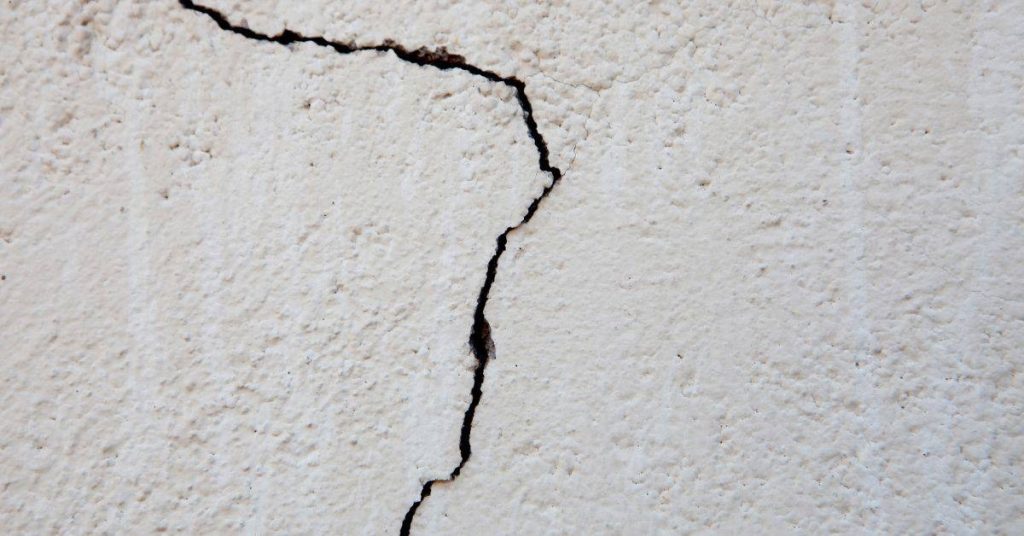
Cracking or dusting: Hairline shrinkage cracking, a powdery surface, or loss of material can result from rapid drying, poor mixing, overworking, an unsuitable substrate, or a product/system problem. Stop adding water if the surface is dusty, cracked beyond minor surface variation, or losing material. If the defect is severe, remove the unsound patch and redo it after correcting the cause. Recurring cracks or cracks associated with movement need professional evaluation.
Adhesion loss, blistering, and finish problems
Delamination or hollow areas: Do not press-and-pull a fresh patch as a bond test. Instead, after the required cure period, inspect for movement, open edges, cracks, and hollow-sounding surrounding stucco without damaging the repair. Loose or failed material must be removed; a new coat over it will not restore bond.
Blisters, washout, or color variation: Blisters can involve trapped moisture or air; washout indicates spraying too early or too heavily. Stop misting, prevent further water contact, and assess the material after it has dried as directed. Do not add arbitrary water or colorant to correct uneven appearance. If rain, moisture intrusion, or incompatibility is suspected, correct that condition before reapplying. Use mesh only where the repair design or system requires it.
Final Inspection, Safety, Durability, and Cost Planning
Final inspection and quality checkpoints
- Cure period: The product’s required curing, drying, and recoat time has elapsed.
- Surface condition: Texture remains intact, with no runoff marks, washout, slumping, powdering, blisters, or open edges.
- Soundness: The patch and its edges are firm and stable; no loose or hollow-sounding adjacent material remains.
- Uniformity: Check for unacceptable ridges, depressions, cracks, and color variation after the stated cure or drying period.
- Next coating: Primer, paint, or finish requirements for cure, dryness, and substrate condition have been met.
Safety measures and working in heat/wind
- Stop if the product’s temperature, rain, frost, or exposure limits cannot be met.
- Stop if wind prevents controlled placement or fogging, destabilizes a screen, or makes ladder or scaffold work unsafe.
- Stop if the substrate is loose, moving, frozen, saturated, or affected by active water intrusion.
- Use eye protection, gloves, and required dust protection while mixing and removing stucco.
- Provide water, shade, rest breaks, and supervision for heat exposure; stop for symptoms of heat illness.
- Do not perform work at height unless access is stable and safe under applicable requirements.
Cost-effective planning and long-term maintenance
- Stage enough shade and wind protection before mixing instead of trying to control rapid drying after placement.
- Mix only manageable batches to reduce waste and avoid placing material after its working time.
- Correct drainage, flashing, sealant, or movement issues that caused damage before treating the patch as complete.
- Keep the product data sheet and a record of the repair for future recoating or warranty questions.
Conclusion
For a cement-based stucco patch in heat and wind, the essential sequence is: identify the product and wall system; prepare sound material; apply the specified lifts; protect the work from sun, wind, and rain; then fog-cure only if, when, and as the data sheet directs. Fine, even fogging after the proper set is very different from keeping every patch constantly wet.
Pause rather than force the job when heat, wind, rain, substrate problems, or unsafe access prevent controlled work. A patch that is washed out, dusty, loose, or badly cracked needs assessment and often removal—not more water.
FAQ
What is the best mist schedule for curing stucco patches in heat and wind?
There is no universal schedule. Follow the current data sheet for the exact product. Begin only at the specified set stage, use a fine fog that does not create runoff or erosion, and adjust only as the product permits when heat, sun, low humidity, or wind causes rapid moisture loss.
How can I protect a patch from wind during the curing process?
Use a freestanding shade cloth or wind screen positioned to deflect sun and airflow without touching the fresh patch. Keep it stable, allow air circulation, and do not seal the repair behind plastic or permit condensation to drip onto the surface.
How do I prevent a weak finish on a stucco patch?
Remove unsound material, use a compatible product, measure mix water accurately, apply the specified lifts, avoid overworking, and follow the stated curing and protection requirements. Moist curing cannot correct a loose substrate, wrong mix, poor bond, or wall movement.
What tools and materials do I need for patching and curing stucco?
Have the repair product and its data sheet, trowels and hawk, clean mixing equipment, a fine-fog sprayer if moist curing is approved, surface-cleaning tools, a thermometer for wall temperature, freestanding shade or wind protection, and required PPE. Use primers, mesh, bonding agents, and additives only when the system calls for them. Related guidance: Stucco Patches on Painted Surfaces: Bonding Agents, Scratch Keys, and When to Strip Paint.