
Introduction
Crumbling plaster at trim is when the plaster around the edge flakes away, leaving gaps and a loose edge. This guide treats the edge like a small repair, not a full wall redo. Check behind the plaster for any loose backing and plan to keep the wall keys intact while you work.
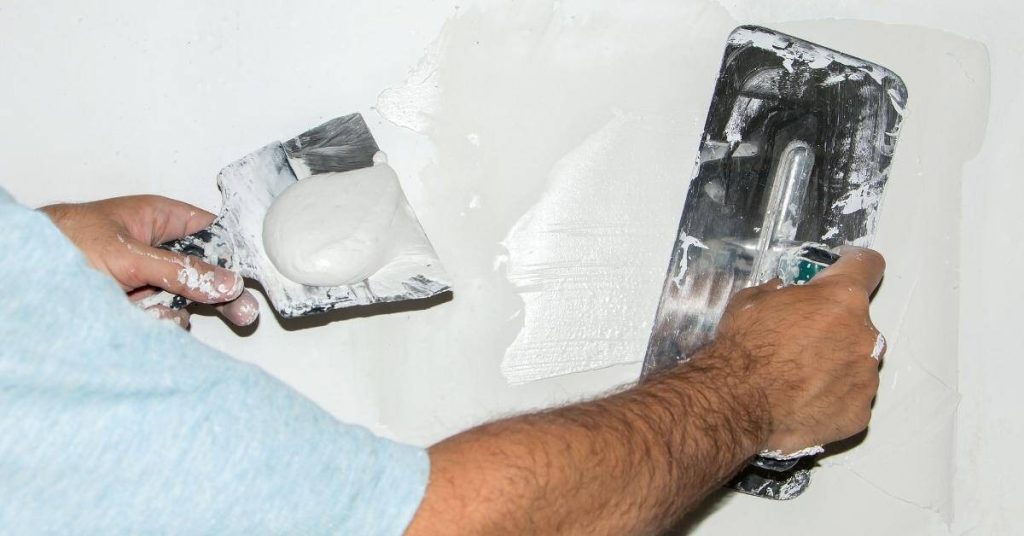
Start by cleaning the edge and dampening it lightly to help the material grab. Apply patch material to rebuild the edge, press it into place, and feather the edge to blend with the rest of the wall. Let it set according to the product label, and reassess if the edge isn’t solid or the keys show signs of damage.
Key takeaways
- Inspect plaster edges for crumbling patterns to avoid compromising wall keys.
- Preserve wall keys by gentle stabilization before any removal or rework.
- Use non-destructive methods first, like bonding agents or patching with compatible plaster.
- Match trim type and substrate to reduce differential movement and cracks.
- Verify material compatibility via labels and manufacturer guidelines before mixing.
- Protect adjacent surfaces, wear eye/hand protection, and follow ventilation needs.
Table of Contents
- Introduction
- Key takeaways
- How to Diagnose Edge Crumbling and Why Preserving Wall Keys Matters
- Common Causes and Types of Trim-Edge Failure
- Tools and Materials Checklist
- Non-Destructive Stabilization: Methods to Re-Bond Loose Plaster Without Breaking Keys
- Edge Repair Techniques Tailored to Trim Type and Damage Pattern
- Material Specs, Compatibility, and Safe Ranges to Check
- Finishing: Sanding, Profiling, Painting, and Visual Blending
- Prevention, Maintenance, and Monitoring After Repair
- Conclusion
- FAQ
How to Diagnose Edge Crumbling and Why Preserving Wall Keys Matters
Begin with a careful visual inspection of the trim edges. Look for fine cracking, hollow sounds when tapped, or areas that move with touch. Differentiate surface chipping from deeper separation that might undermine the keys.
Assess whether the plaster is still gripping the wall keys or if detachment is advancing. Preserving the keys helps maintain the original wall finish and the structural hold that holds the trim in place. When in doubt, check the surface for signs of movement near the edges and plan your approach to protect those keys during repair.
Step-by-Step Process
Follow these practical steps to diagnose edge crumbling and understand why preserving wall keys is crucial.
- Preparation: Gather tools (tapping hammer, screwdriver, putty knife), wear safety glasses. Clear area.
- Safety check: Turn off power at main panel if working near electrical outlets or switches.
- Main work: Tap trim edges gently with hammer. Listen for hollow sound indicating loose plaster.
- Probe test: Use screwdriver tip to probe suspect areas. If it goes in easily, keys are compromised.
- Final check: Inspect entire affected area. Mark or note damaged sections for repair planning.
Visual Checkpoints and Simple Tests
Use this checklist to distinguish loose plaster from solid keys before starting repairs.
- Cracks: Fine cracks at edges may indicate surface damage only. Wider, deeper cracks suggest undermining of keys.
- Hollow sound: Gently tap trim with hammer. A hollow sound indicates loose plaster behind the trim.
- Movement: Try to wiggle or move trim. If it moves easily, keys are likely detached.
- Probe test: Use a screwdriver tip to probe suspect areas. If it goes in easily, keys are compromised.
Quick rule: If any of these tests indicate active detachment, stop and consult a professional before proceeding.
Documenting Damage and Scope
Photograph affected areas to plan non-destructive repairs. Include overall shots and close-ups of damage.
Map affected lengths on a sketch or use masking tape to mark on the wall. This helps plan material needs and repair sequence.
Note: Different materials (wood, metal, vinyl) may require different repair approaches. Document these as well.
Common Causes and Types of Trim-Edge Failure
Identify typical culprits such as impacts, moisture intrusion, vibration, or a weak original keying. Consider how each factor might show up as edge cracking, loosening, or spalling around the trim.
Group failures by severity and cause to guide repair steps. Use this classification to choose methods that preserve keys when possible and escalate only as needed for deeper damage.
Mechanical damage versus material degradation
The cause of trim-edge failure dictates the repair approach. Material choices affect results, so understanding the difference is crucial.
- Impact Damage: Caused by sudden force, like bumps or drops. Use: High-impact resistant materials. Spec/Rating to look for: Impact resistance ratings. Practical Tip/Avoid: Reinforce vulnerable areas.
- Material Degradation: Result of long-term moisture, age, or poor quality. Use: Durable, weather-resistant materials. Spec/Rating to look for: Durability ratings. Practical Tip/Avoid: Regularly inspect and maintain.
- Cracking from Wrong Material: Incorrect material choice can lead to cracking under stress. Use: Compatible materials with suitable expansion/contraction properties. Spec/Rating to look for: Coefficient of thermal expansion (CTE) compatibility.
Trim and substrate interactions
The interaction between trim materials and plaster substrates can drive specific edge failures. Understanding these interactions helps prevent issues.
Timber Trim: Expands/contracts with humidity changes, potentially causing cracking or warping. Solution: Use proper spacing and allow for movement.
MDF Trim: Sensitive to moisture, which can cause swelling or delamination. Solution: Seal edges and use in controlled environments.
Metal Trim: Can conduct heat/cold, leading to condensation and plaster damage. Solution: Insulate and provide proper ventilation.
Tools and Materials Checklist
Keep a concise set of non-destructive tools handy: saws, putty knives, brushes, clamps, and protective gear. Have a few containers and rags ready for small cleanups. Use compatible tools that won’t gouge the plaster or keys.
Prepare essential materials such as mild adhesive options, consolidants, and patching compounds, plus optional rental items for larger jobs. Note alternatives and when to consult the instructions or a supplier for compatibility and safety guidance.
Stabilization and consolidation materials
Use this checklist before applying any repair materials to ensure you’re consolidating loose plaster effectively while preserving wall keys.
- Lime-based adhesive: For historic or traditional plasters. Check product suitability for your specific plaster type.
- Epoxy consolidant: For modern plasters and severe damage. Ensure it’s compatible with your substrate.
- Injection syringe: To apply consolidants into cracks and voids.
- Plaster repair kit: All-in-one kits can be convenient, but ensure they’re suitable for your specific repair needs.
- Aggregates (optional): For adding texture or strength to repairs. Match existing aggregate size if possible.
- Protective gear: Safety glasses, gloves, and a dust mask for handling consolidants.
- Historic plaster testing kit: If unsure about your plaster type, test before applying any consolidant.
- Avoid: Using cement-based products on historic plasters. They can cause damage over time.
Quick rule: Always test a small, hidden area first to ensure compatibility with your existing plaster.
Finishing and blending supplies
Use this checklist after stabilization to seamlessly blend repairs into the surrounding trim.
- Jointing compound: Match existing compound type (e.g., lightweight, all-purpose) for best results.
- Setting-type joint compound: For quick drying and easy sanding. Use sparingly to avoid over-sanding.
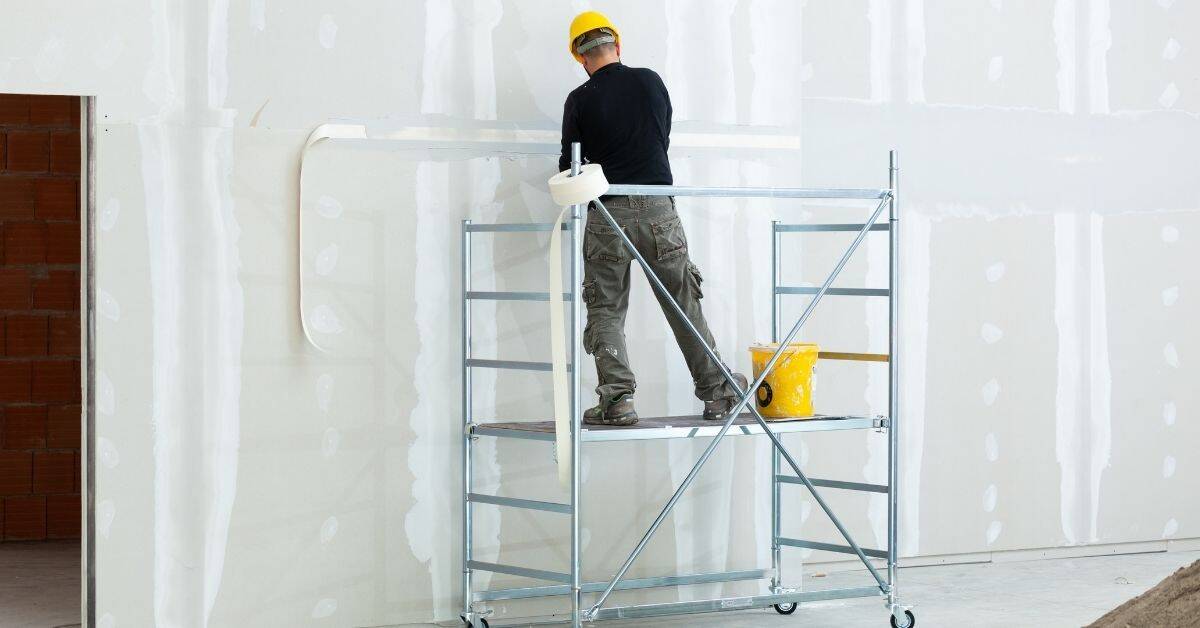
- Paper drywall tape: To reinforce repaired edges and prevent future cracking.
- Edge bead (optional): For creating a clean, sharp edge on wide repairs.
- Sandpaper (120-grit & 220-grit): For smoothing repairs and preparing for paint. Start with coarser grit, then finish with finer.
- Primer-sealer: To seal repaired areas and prepare them for paint.
- Paint (matching existing): To blend repair into surrounding trim.
- Touch-up brush or roller: For applying paint to small, targeted areas.
Quick rule: Always sand lightly between coats of joint compound and before painting to ensure a smooth, seamless finish.
Non-Destructive Stabilization: Methods to Re-Bond Loose Plaster Without Breaking Keys
Explore minimally invasive stabilization methods like adhesive injection or resin consolidation that are aimed at re-bonding without stressing the keys. Focus on methods that can reach the loose edge without removing material.
Keep the original keys intact by choosing stabilization approaches that are compatible with the plaster and trim. If unsure, verify with product labels, manufacturer data, or local guidance before proceeding.
Adhesive injection and suction techniques
First, locate the loose areas. Tap gently with a hammer; hollow sounds indicate voids. Don’t chisel keys – they’re your grip.
Drill small (1/8″ to 3/16″) holes through the plaster into the void, spacing them about 4-6″ apart. Plug the drill bit with a cork or rubber bung between drilling and injecting to prevent adhesive from squirting out.
Mix your chosen adhesive (check manufacturer’s instructions) and load it into a caulking gun or injection pump. Start at the bottom, inject slowly, allowing the adhesive to fill voids and seep back out of lower holes. Use a backing material (like foam or plastic) behind the plaster to close voids by suction. Remove it once cured.
Let it cure as per manufacturer’s guidelines. Once set, patch any remaining holes with matching plaster. Sand and paint as needed.
Choosing a consolidant for historic versus modern plaster
When it comes to choosing a consolidant, you’re dealing with two main types of plaster: historic and modern. Each has its own quirks, so let’s tackle them one at a time.
Historic Plaster: These are usually lime-based and quite porous. You’ll want a consolidant that penetrates deep and forms strong bonds. Look for products with high penetration rates like potassium silicate or sodium silicate. Always check the product label to ensure it’s suitable for your specific historic plaster type.
Modern Plaster: These are typically gypsum-based and less porous. Here, you’ll want a consolidant that bonds well but doesn’t over-saturate the plaster. Silane or siloxane-based products often work well. Again, check the product label for compatibility with your specific modern plaster type.
Regardless of which plaster you have, always do a test patch in an inconspicuous spot first to ensure the consolidant doesn’t discolor or damage your plaster. Follow the manufacturer’s instructions to the letter and give it time to cure properly before making any final decisions.
Edge Repair Techniques Tailored to Trim Type and Damage Pattern
For minor loss, use feathering and skim techniques to rebuild the edge while leaving keys undisturbed. Thin applications should blend into the surrounding surface for a seamless look.
For larger voids, consider localized patching with backing that supports the edge and preserves key alignment. In cases where the trim itself needs adjustment, plan trimming or alignment steps that minimize key disturbance and maintain the original finish where possible.
Feathering and micro-skim for shallow edge loss
For minor losses at the trim’s edge, build up thin coats of plaster to recreate the profile without disturbing the underlying keys.
Start by wetting the damaged area lightly. Use a trowel to apply a thin layer of fresh plaster, feathering it out from the damaged spot onto the surrounding intact surface. This helps blend the new plaster into the old.
Key here is to work quickly and smoothly, using a light touch to avoid dislodging any existing keys.
Let this first layer dry slightly, then apply another thin coat, building up the edge gradually until you’ve restored the original profile. Sand lightly between coats if needed.
Backed patching for larger voids behind trim
When there are larger voids but the keys remain intact, use thin backing plates or foam pads to support your patched plaster layer.
First, clean out any loose material from the void. Then, cut a piece of backing plate or foam pad to fit snugly behind the trim, covering the void.
Apply a thin layer of fresh plaster over the void, pressing it firmly against the backing. This distributes pressure evenly and prevents the patch from cracking or pulling away.
Remember, the goal is to preserve existing keys. So, work carefully and avoid applying too much pressure that could dislodge them.
Trim modification or replacement without key damage
Sometimes, the best way to preserve keys is to work on the trim itself rather than the plaster. Here’s how:
For loose trim, use a utility knife to score along the back edge of the trim. This creates a line for you to snap off the excess material cleanly, avoiding any prying that could damage keys.
For stuck trim, soften the adhesive with heat or a suitable solvent. Then, carefully loosen and remove the trim. If it’s too damaged to reuse, replace it with new trim of the same size and profile.
When reinstalling, use a light touch and minimal adhesive to avoid putting stress on the plaster keys.
Material Specs, Compatibility, and Safe Ranges to Check
Explain the key material properties to verify, such as porosity and surface hardness, and how moisture content can affect adhesion. Emphasize checking batch data or product sheets for compatibility with plaster and trim materials.
List safe ranges or checks to perform before selecting adhesives or compounds, and advise when to consult manufacturer data or a local pro. Do not assume values; verify against official guidance or labels.
Matching compound stiffness and thermal expansion
The repair material’s flexibility must match the existing plaster to prevent future separation. Too hard, it cracks under stress; too soft, it pulls away.
Check: Gently press on the damaged area. If it feels rigid or brittle, you need a flexible compound. If it feels mushy, go for something stiffer.
Thermal expansion matters too. Different materials expand at different rates with temperature changes. Matching this can prevent cracking due to heat.
Moisture and pH considerations
Dry substrates are key for adhesive success. Moisture weakens adhesion and promotes mold growth.
Check: Use a moisture meter to ensure the substrate is dry (below 16% MC). If it’s wet, wait until it dries or use a dehumidifier.
Neutral pH (around 7) is also crucial. Acidic or alkaline substrates can react with adhesives, causing discoloration or loss of adhesion.
Finishing: Sanding, Profiling, Painting, and Visual Blending
Guide proper surface preparation, including a controlled sanding progression that avoids rounding the edge too much. Profile the edge to match the trim’s original contour as you blend repairs in.
Cover priming and painting steps that help hide repairs and restore continuous sightlines. Match sheen and color with careful testing on a hidden area before broader application.
Achieving a crisp trim line without sanding into keys
Sanding is crucial, but it’s easy to damage those fragile plaster keys. Here’s how to avoid it:
Start with fine-grit sandpaper, like 220 or 320. It’ll smooth without digging in.
Use a feathered fill before sanding. This gives you a smooth edge to work on, preserving keys.
Sand lightly and evenly. Go against the grain first, then with it to smooth. Stop when you feel resistance – that’s your key.
Color matching and texture replication
Matching color is obvious, but replicating texture? Here’s how:
First, match the paint sheen. Gloss, semi-gloss, flat – they all show imperfections differently.
For slight texture, use a textured roller or brush. Lightly dab it on. Too much? Wipe off with a damp cloth.
If your plaster has heavy texture, use a spray-on texturizing agent. Apply, let dry, then paint over.
Prevention, Maintenance, and Monitoring After Repair
Adopt preventive practices such as moisture control, avoiding impact on the edge, and securing trims to reduce recurrence. Address underlying moisture or structural issues before finalizing repairs.
Set a simple monitoring routine to catch any recurring movement or new damage early. Check edges after seasonal changes or heavy use and respond promptly to signs of wear.
Quick Inspection Checklist for Homeowners
Regularly inspecting your plaster trim edges helps catch issues early. Use this checklist every 6 months or after heavy weather events.
- New cracks: Even hairline cracks need checking. They can widen over time, leading to bigger problems.
- Movement: Gently push and pull on trim pieces. Any movement means they’re not securely attached.
- Moisture stains: Look for discoloration or dampness. Moisture weakens plaster and promotes mold growth.
- Warping or bulging: These signs indicate moisture damage or improper installation.
- Peeling paint or wallpaper: This could signal underlying plaster issues.
- Trim pieces pulling away from the wall: Even a small gap can allow moisture in, causing further damage.
- Crumbles or powdery residue: These are signs of serious deterioration. Act quickly to prevent further loss.
- Uneven trim lines: This might indicate movement or improper installation, which can lead to bigger issues over time.
Quick rule: The sooner you spot a problem, the easier and cheaper it is to fix. Don’t wait until major work is needed.
Small Fixes to Delay Major Work
While planning full repairs, these temporary stabilization steps can help prevent further damage and buy you time.
Re-adhesive spots: Use a flexible adhesive caulk to reattach any loose trim pieces. This won’t last forever but will delay major work until you’re ready.
Spot consolidation: For small areas of crumbling plaster, use a consolidant like acrylic resin or lime putty. Apply with a brush or syringe, following the manufacturer’s instructions. This strengthens the plaster and slows deterioration.
Remember, these are temporary fixes. They buy you time but don’t replace proper repair work. Always follow up with a full repair as soon as possible.
Conclusion
Safety first and preserve wall keys are non negotiables here. If you keep the edges stable, the repair lasts and the wall looks right, without creating new problems or risking the wall behind the plaster.
First, run the practical checks in order: confirm moisture and staining are under control, verify the trim edge is still bearing on sound backing, test a small area with the non-destructive bonding method, prepare the correct plaster or patching mix that matches the substrate, and then bond, shape, and blend from the key line outward, finishing with clean sanding and careful painting to match the surrounding edge.
Common mistakes to avoid include rushing repairs, using overly aggressive methods that pry at the keys or crumble the edge, and pairing incorrect materials or mixes with the trim type. Always test in a discreet spot, work gradually, and keep your eye on moisture and movement; never force a fix that pulls away or cracks anew.
If you encounter stubborn looseness, widespread crumbling, or signs of moisture intrusion beyond your scope, consider calling a pro. A quick expert check can save materials and preserve key wall structure. Stay methodical, document what you did, and you’ll finish with a solid edge that lasts. You’ve got this.
FAQ
What should I check first if the plaster around trim is crumbling but the wall keys seem intact?
Look for loose edges that can be tapped back into place without removing keys. Check for moisture behind the trim and any staining or soft spots in the wall. If in doubt, test a small area to see how well the plaster re-adheres with gentle pressure.
Can I re-bond loose plaster without removing the trim or damaging the keys?
Yes, you can try non-destructive stabilization methods first, but watch for any signs of key damage or re-crumbling. Use compatible adhesives or mechanical securing methods that won’t pull on the keys. If the keys move or crumble, stop and reassess before proceeding.
What materials should I use for edge repair so it matches the existing plaster?
Use materials labeled for plaster repair and compatible with lime or gypsum plaster as applicable. Always check the product label or manufacturer instructions for mixing ratios and curing times. If you’re unsure, test a small patch and compare it to the surrounding finish before doing a bigger area.
How do I finish repair so the edge looks seamless with the trim?
Feather the repair edge lightly to blend with the surrounding plaster, then smooth with a damp sponge or appropriate tool. Lightly sand once dry to even out texture, then prime and paint to match the trim and wall. Avoid over-sanding that could re-expose the keys or thin the edge too much.