
Introduction
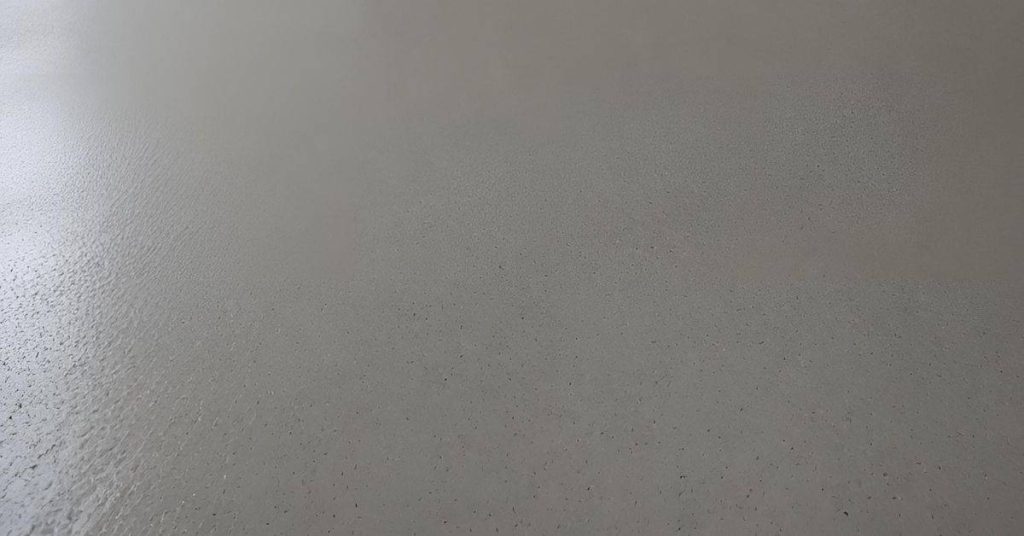
Concrete come-along rakes are hand tools used to even out freshly placed concrete and expose the surface texture. They come in different tooth patterns, sizes, and stiffness, so pick based on the slab size and your finish. Check the manufacturer’s guidance for tooth material and replacement parts.
To prevent aggregate from surfacing, use light, even strokes and keep the rake angle shallow as you work. Work in sections, don’t overwork one area, and periodically lift slightly to keep the surface level. After the job, clean the rake, inspect teeth for wear or damage, and replace bent or worn parts according to manufacturer instructions.
Key takeaways
- Choose the rake teeth pattern based on aggregate size and project type.
- Use sharp-pointed teeth for tight joints; flat-teeth shed larger aggregates better.
- Regularly inspect construction quality and replace bent teeth before use.
- Raking technique: light, even passes to prevent aggregate surfacing during.
- Maintenance: clean blades after each job and lubricate moving joints.
- Safety: wear eye protection and gloves; stay clear of loose concrete.
Table of Contents
- Introduction
- Key takeaways
- What a Come-Along Concrete Rake Is and When to Use It
- Types of Rake Teeth and Patterns — Choosing the Right Geometry
- Materials, Construction Quality, and Durability Factors
- How Teeth and Raking Technique Create or Prevent Aggregate Pull-up
- Proven Techniques to Minimize Pulling Aggregate to the Surface
- Planning and Job-Site Considerations Before Choosing a Rake
- Common Mistakes, Troubleshooting, and Fixes for Pulled Aggregate
- Maintenance, Safety, and Cost Considerations (ROI)
- Conclusion
- FAQ
What a Come-Along Concrete Rake Is and When to Use It
A come-along concrete rake is a hand tool designed to fine tune the surface of fresh concrete. It features a head with teeth and a handle that lets the user guide material without pulling excess aggregate. This rake differs from others by focusing on controlled movement and feathering rather than broad bulk removal.
Use it after screeding and bull floating to refine texture and edge alignment. It helps with gentle feathering, cleanup of rough screed ridges, and preventing aggregate from surfacing when used with proper technique. The tool fits into the workflow between initial leveling and final finishing, guiding the surface toward a uniform feel.
Key parts and terminology (head, teeth, handle, tail)
A come-along concrete rake is made up of several key components:
The head is the business end where the action happens. It’s typically made of steel for durability.
The teeth are what do the work. They’re spaced and shaped to control aggregate movement and texture the surface.
The handle is what you hold onto. It can be straight or offset, depending on your preference and the job at hand. Some come with an optional tail, a small extension that helps reach tight spots.
How come-along rakes differ from other rakes and concrete tools
Come-along rakes are unique in the world of concrete finishing. Here’s how they stack up against other tools:
- Landscape Rakes: These are too flimsy for concrete work, with widely spaced teeth that can’t control aggregate movement.
- Concrete Rakes (Garden Rakes): While similar in appearance, they lack the fine tooth spacing and design needed for precise finishing.
- Bull Floats: These are great for leveling and eliminating large imperfections but can’t texture or control aggregate like a come-along rake.
- Lutes: Lutes are used for edging, not surface texturing. They don’t have the teeth needed to control aggregate movement.
- Optional/Rentable Tools: Consider renting power trowels or laser screeds for large jobs. Prices vary but expect around $100-$200 per day.
Types of Rake Teeth and Patterns — Choosing the Right Geometry
Common rake teeth come in straight, curved, and varied spacing patterns, each suited to different finishes. The choice affects how aggressively the rake engages the surface and how it handles embedded aggregate. Consider head pattern and tooth shape as you plan your pass sequence.
To match finish goals, align pattern with whether you want smooth surfaces, exposed aggregate, or edge control. Pattern options influence lift, resistance, and how much material moves with each pass. Check manufacturer guidance and compatibility with your rake head before committing to a setup.
Tooth shapes and edge profiles (straight, hooked, serrated, paddle)
The shape of the rake teeth significantly impacts how they interact with wet concrete and aggregate. Here are four common tooth shapes:
Straight: These tines are rigid and have a flat edge. They’re great for leveling and spreading concrete but can pull larger aggregate to the surface if used aggressively.
Hooked: Hooked teeth have a curved edge that helps scoop and lift material. They’re useful for consolidating and lifting settled concrete, but they may also bring up aggregate if not used carefully.
Serrated: Serrated teeth have small notches or teeth along their edges. These are designed to grab and lift material efficiently without pulling aggregate to the surface. They’re ideal for finishing work.
Paddle: Paddle teeth have a wide, flat edge similar to a paddle. They’re excellent for leveling and spreading but can also pull aggregate if used improperly.
Tooth spacing, length, and flexibility
The spacing, length, and flexibility of rake teeth determine how much material they can pick up in a single pass. Here’s what to consider:
Spacing: Wider spacing between tines allows for more material pickup but may leave behind low spots. Narrower spacing provides better coverage but picks up less material.
Length: Longer teeth can reach deeper into the concrete, lifting settled material. However, they may also pull larger aggregate to the surface if used aggressively.
Flexibility: Flexible tines can conform to the surface, helping to level and finish. However, they may also bend around larger aggregate instead of lifting it, potentially leaving voids.
Match teeth to task: leveling vs finishing vs cleanup
Different rake teeth are suited to different tasks in the concrete finishing process. Here’s how to match your teeth to the job:
Leveling: For initial leveling and spreading, use straight or paddle teeth with wider spacing. These can handle more material and help establish a smooth base.
Finishing: For final finishing passes, serrated teeth with narrower spacing are ideal. They can smooth the surface without pulling up aggregate.
Cleanup: After initial leveling and before final finishing, hooked or flexible teeth can help consolidate settled concrete and lift any remaining low spots. However, be careful not to pull aggregate to the surface during this stage.
Materials, Construction Quality, and Durability Factors
Head materials like cast or hardened steel offer varying abrasion resistance and durability in wet concrete. Consider how heat, impact, and cleaning affect long-term performance on the job. The choice shapes how often you’ll need replacement teeth or a new head.
Handle options and connection quality matter for grip and fatigue. Look at how the head attaches to the handle and how the joint holds up under repeated scraping. Teeth design, spacing, and material hardness all influence how the rake interacts with concrete and aggregates over time.
Head materials and coatings (steel types, finishes)
The head of your concrete come-along rake takes the brunt of the work. Material choices and protective finishes can make or break its lifespan.
- Cast Iron: Durable, good abrasion resistance. Look for EN-GJL-250 or higher rating. Avoid in extreme heat to prevent cracking.
- Steel Alloys (e.g., 4140): High strength, good wear resistance. Check hardness (HRC 35-40). Not suitable for high-impact tasks.
- Hardened Steel (e.g., AISI 4340): Excellent abrasion resistance, high toughness. Look for HRC 50-60 hardness. Avoid in extreme cold to prevent brittleness.
- Epoxy Coating: Protects against corrosion and chemical attack. Check for ASTM D7091 compliance. Avoid in high-heat areas.
- Galvanization: Prevents rust, extends life. Look for G90 or higher rating. Not suitable for prolonged exposure to harsh chemicals.
Handle materials and ergonomics (wood, fiberglass, metal)
The handle’s material affects grip comfort, weight, and vibration dampening. Here are your options:
- Wood: Traditional, lightweight. Look for hardwoods like hickory or maple. Avoid in wet conditions to prevent warping.
- Fiberglass-Reinforced: Lightweight, durable, good vibration dampening. Check for UV protection. Not suitable for heavy-duty tasks.
- Steel: Heavy-duty, strong. Look for thick-walled tubing. Avoid in cold weather to prevent stiffness.
Build quality indicators to look for when buying
Inspect these features to ensure you’re getting a durable, long-lasting come-along rake:
Welded Joints: Look for clean, smooth welds. Avoid rough or uneven ones.
Heat-Treated Teeth: Check if teeth are heat-treated (HRC 50-60). This improves durability and resistance to deformation.
Replaceable Parts: Some rakes let you replace worn-out parts. This extends the tool’s lifespan significantly.
How Teeth and Raking Technique Create or Prevent Aggregate Pull-up
Teeth engage wet concrete by cutting and guiding material rather than dragging it with force. Sharp versus rounded tips interact differently with the surface and embedded aggregate. The right shape minimizes gouging while controlling movement.
Varying tooth count, width, and tip geometry changes embedment and pull-up risk. Movement patterns like feathering and forward passes affect how aggregate shifts or stays put. Moisture and mix state also steer how the surface behaves under the rake.
How tooth geometry changes shear and lift on the mix
The shape, angle, and spacing of rake teeth determine how they engage wet concrete. Sharp, closely spaced teeth cut through the surface, while rounded, widely spaced ones glide over it.
Sharp teeth apply more force at the tip, shearing paste and lifting aggregate. This can bring embedded aggregate to the surface if not controlled. Rounded teeth distribute force along their length, embedding them deeper but reducing lift.
Hooked or serrated teeth, popular for cleanup tasks, combine both actions. They cut through paste and lift aggregate but also embed themselves deeper due to their shape.
Role of concrete properties (slump, aggregate size, mix design)
Concrete’s slump affects how teeth interact with the surface. High-slump mixes are softer and more cohesive, allowing teeth to embed deeper without pulling aggregate. Low-slump mixes are stiffer, making it harder for teeth to penetrate and increasing pull-up risk.
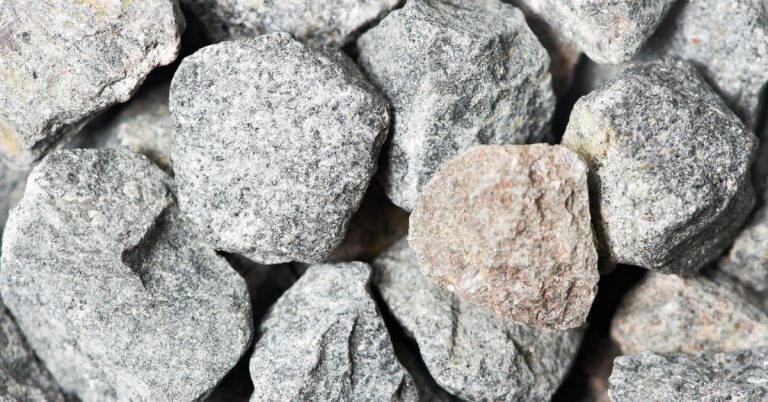
Large aggregate increases the likelihood of pull-up. Larger stones have more surface area exposed at the top, making them easier to lift. Smaller aggregate reduces this risk but can still be pulled up if technique is poor.
Well-graded mixes, with a range of aggregate sizes, are less prone to pull-up. They fill voids between larger stones better, reducing exposure and providing more support for the surface layer.
Proven Techniques to Minimize Pulling Aggregate to the Surface
Set clear goals for rake passes to keep aggregate where it belongs. Aiming for a uniform surface and controlled bleed helps prevent pull-up. Calibrate technique with a test area if you’re unsure.
Prepare the surface and rake with the right tooth configuration. Use steady, overlapping motions and avoid long, choppy strokes. Adjust speed and angle to keep aggregate in place as the surface changes during curing.
Proper raking angle, stroke, and speed
The key to minimizing aggregate exposure is a smooth, consistent rake motion. Here’s how:
Angle: Hold the rake at about 45 degrees to the surface. This helps push concrete rather than scraping it.
Stroke rhythm: Use broad, continuous strokes. Short, choppy ones can lift aggregate. Overlap each pass by a few inches for even coverage.
Speed: Work steadily but not too fast. Rushing can cause you to apply too much pressure and pull up stones.
When to rake relative to bleed water, screeding, and finishing stages
Timing is crucial. Rake too early or late, and you’ll expose aggregate.
After screeding: Wait until the initial slump has bled out before raking. This usually takes 10-15 minutes but can vary with mix design.
Before finishing: Rake just once or twice to level any remaining low spots. Overworking fresh concrete can cause pull-up.
After final finish: If you must rake after the final trowel, do so lightly and briefly to avoid disturbing the surface.
Complementary tools and sequence (screed, bull float, darby, broom)
Using the right tools in order helps reduce aggregate exposure.
- Screed: Levels concrete to depth. Use a straight edge for best results. Rental: $20-$40/day
- Bull float: Smooths and consolidates surface. Use broad, overlapping strokes. Rental: $15-$30/day
- Darby: Levels and smooths after initial set. Works best on concrete with some ‘give’. Rental: $10-$20/day
- Broom: Creates texture for slip resistance. Use a stiff-bristled broom, work it well into the surface.
- Rake: Levels and smooths final spots before finishing. Use lightly to avoid pull-up.
Planning and Job-Site Considerations Before Choosing a Rake
Assess mix characteristics that influence rake choice, such as aggregate and slump, and define the finish goal. These factors guide which rake teeth and patterns will perform best. Verify compatibility with local practices and manufacturer instructions as needed.
Scale the project and access constraints to decide on tool quantity and crew assignments. Consider whether multiple passes or specialty rakes are warranted to hit the target texture. Check site conditions and delivery timing to coordinate tools and tasks.
Match rake choice to aggregate size and finish specification
The size and shape of your concrete mix’s aggregate directly impact the type of come-along rake you’ll need. Larger aggregates require stiffer, more widely spaced teeth to prevent clogging and maintain efficiency.
Exposed-aggregate finishes, where the larger stones are meant to show, demand a rake with fewer but stronger teeth that can handle the bigger rocks without pulling them up or breaking them. Smaller aggregates, on the other hand, call for finer-toothed rakes to ensure proper consolidation and leveling.
For slick or smooth finishes, use rakes with closely spaced, fine teeth that can effectively consolidate the mix without pulling fines to the surface. For textured finishes, consider rakes with coarser teeth or specialty designs that can create the desired pattern.
Crew skill and method standardization
A skilled crew is crucial for consistent results. Before starting, ensure your team knows how to use come-along rakes safely and effectively.
Training should cover proper raking technique, including the correct angle, stroke, and speed. This helps prevent aggregate pull-up and ensures a smooth, level surface. Establish clear method standards for each stage of the pour to minimize mistakes and maximize efficiency.
If your crew is inexperienced or switching tools mid-pour, plan for additional training time. Consider having an experienced team member supervise and guide the less experienced workers.
Rent versus buy and matching tool size to job scale
Deciding whether to rent or buy come-along rakes depends on your project’s frequency, size, and duration.
- Renting for small, infrequent jobs: Renting makes sense if you only need the tools occasionally. It saves storage space and upfront costs. Consider renting premium rakes for better performance and durability.
- Buying for frequent or large-scale projects: If you’re working on multiple projects or a single, extensive job, buying may be more cost-effective in the long run. High-quality rakes can last years with proper maintenance.
- Tool size and crew number: Match the tool size to your project’s scale. Larger jobs may require multiple crews and tools. Consider renting additional rakes or specialty tools for specific tasks, like edging or reaching tight spaces.
- Rentable options and prices: Many rental stores offer come-along rakes in various sizes and styles. Prices vary by tool type and duration of rental. Expect to pay around $20-$50 per day for standard rakes, with specialty tools costing more.
- Maintenance and availability: When renting, ensure the tools are well-maintained and in good working condition. Check availability ahead of time to avoid last-minute scrambling. If buying, factor in storage space and maintenance costs.
Common Mistakes, Troubleshooting, and Fixes for Pulled Aggregate
Look for errors like using the wrong tooth type or uneven pressure, and insufficient surface prep. Assess if the rake is appropriate for the concrete mix or texture you want. Identify anything misaligned that could cause pull-up.
Diagnose by testing a small area and adjusting variables one at a time. Replace bent teeth, tweak spacing, or modify pass frequency and angle as needed. Use corrective finishing or patching techniques to minimize visual impact when pull-up occurs.
Typical DIY and crew errors (over-aggressive raking, wrong teeth)
Here are some common mistakes to avoid when using concrete come-along rakes.
- Using the wrong teeth: Not matching the tooth type to your concrete mix can cause pull-up. Use coarse teeth for rough mixes and fine teeth for smooth finishes.
- Over-aggressive raking: Applying too much pressure or making too many passes can also pull aggregates to the surface. Keep it consistent and moderate.
- Wrong tooth alignment: If teeth aren’t aligned properly, they can’t work together effectively, leading to pull-up. Ensure your rake’s teeth are straight and evenly spaced.
- Excessive speed or uneven passes: Raking too fast or not covering the surface evenly can cause aggregates to rise. Maintain a consistent speed and overlap each pass slightly.
Remember, prevention is better than cure. Train your crew and double-check their work to avoid these common errors.
Repair and remediation techniques for surfaced aggregate
If you’ve ended up with pulled aggregates, here are some practical fixes to consider:
Reworking: If caught early, you can rework the surface by skimming off the top layer of concrete and re-finishing. This works best on fresh pours.
Patching: For larger areas or older surfaces, use a compatible patch or resurfacer to fill in the pulled aggregates. Ensure it matches your existing finish as closely as possible.
Blending: If pull-up is minor and widespread, you can try blending it in with a topcoat or sealant. This won’t fix the problem but can minimize its visual impact.
Maintenance, Safety, and Cost Considerations (ROI)
Establish a routine that includes cleaning, rust prevention, and checking fasteners. A simple pre-job inspection helps spot issues before work begins. Regular upkeep extends tool life and performance on heavy pours.
Prioritize safety with proper PPE and safe handling practices. Consider wear and replacement needs as part of the return on investment, including buy-versus-rent decisions and how maintenance affects total cost of ownership. Plan for storage and record keeping to support reliability and accountability on site.
Maintenance checklist and parts to replace
Before each job, follow this simple maintenance checklist to keep your come-along rake in top shape.
- Clean the rake: Remove concrete residue after use. A wire brush works well.
- Check for rust: Inspect teeth and frame. Apply anti-rust spray if necessary.
- Lubricate moving parts: Grease pivot points to prevent seizing.
- Tighten/adjust teeth: Ensure teeth are secure and aligned properly.
- Inspect teeth: Check for damage or excessive wear. Replace if needed.
- Check frame integrity: Look for cracks, bends, or other signs of damage.
- Test the rake’s bite: Gently pull a small load to ensure proper alignment and function.
- Inspect handles: Check for splinters, cracks, or other issues that could cause injury.
Quick rule: Regular maintenance extends tool life and prevents costly repairs.
Safety precautions and required PPE
Wet concrete can be hazardous. Always prioritize safety when using come-along rakes.
Wear appropriate PPE: Gloves to protect hands, eye protection to prevent debris from entering eyes, and sturdy boots for foot protection.
Maintain proper posture: Keep your back straight and use your legs to lift. Never twist or bend at the waist.
Control the rake angle: Keep it below 45 degrees to minimize kickback risk. Set up a safe work zone, keeping bystanders clear of the raking area. Be cautious when anchoring or pulling material to avoid pinching or jaw failure.
Cost factors, expected lifespan, and when to replace
The cost of a come-along rake depends on its size, quality, and features. Expect to pay between $100-$500 for a good-quality rake.
With proper maintenance, a rake can last 5-10 years. Inspect teeth regularly: replace worn or damaged ones as needed. Check the frame for signs of wear or damage that could compromise its integrity.
The total cost of ownership includes purchase price, maintenance costs, and downtime due to repairs or replacement. Routine care significantly extends tool life, reducing these costs over time.
When to replace: If the frame is severely damaged, teeth are consistently worn out, or the rake fails safety inspections, it’s time for a new one.
Conclusion
Choosing the right teeth and using a steady, controlled rake technique matters for a durable, even finish and for protecting the surface from pull-ups and damage. If you follow the basics with care, you reduce rework, improve appearance, and keep everyone safer on site.
First, verify the project needs and test a small patch before full work. Decide the geometry and material quality, set the rake to a shallow bite and steady angle, and work in uniform passes that cover the area without overworking one spot. Keep the surface clean as you go, and stop to inspect the aggregate exposure after each pass. Use a simple check-in: is what you see in line with the finish you want, and is the surface still free of pulled material? Safety first is non-negotiable—eye protection, gloves, sturdy footwear, and a clear work zone. If you must stop, clean the tool and store it off the work area to avoid trips or slips.
Common mistakes to avoid are using the wrong tooth geometry for the job, rushing the raking pattern, and trying to force the rake when the mix is not set or the surface is too wet. Do not overwork the same spot, and don’t skip a test patch to “save time.” Maintain a steady pace with deliberate passes, and always check for pulled aggregate in a small test area before extending to the whole surface. Also, protect new work from rain or heavy traffic until it’s firm.
If the job is large, complex, or you’re unsure about material compatibility, or you’re dealing with delicate finishes or embedded features, it makes sense to call a pro rather than push ahead. When in doubt, pause, reassess, and plan a safer, smarter approach. Stay confident you can finish strong by sticking to the steps, testing small areas, and prioritizing safety every time you reach for the rake.
FAQ
What are the different types of concrete come-along rakes and their teeth?
There are a few common shapes and tooth patterns. Some have straight teeth for light leveling, others use staggered or curved teeth for better aggregate control. Check the label or instructions to see what pattern matches your job and how heavy the rake is built.
Why is choosing the right teeth important for concrete work?
The tooth geometry affects how the rake cuts into the surface and pulls or leaves aggregate. The wrong teeth can pull extra rock to the surface or gouge too deep. Start with the manufacturer’s guidance and pick a pattern suited to your mix and finish goal.
What techniques help prevent aggregate from surfacing during raking?
Keep a steady, even pass and avoid dragging the rake too aggressively. Use lighter passes to break up the surface without pulling aggregate up. If you see aggregate coming up, switch to a different tooth pattern or adjust your rake angle and speed.
How should I maintain and care for a concrete come-along rake, and what safety steps matter?
Clean off concrete buildup after use and inspect teeth for bending or wear. Lubricate connections if the rake has moving parts, and store it off the ground to prevent rust. Wear eye protection and gloves, and keep bystanders clear when you’re working with a rake to avoid injury. If in doubt, consult the product label or manufacturer instructions for maintenance and safety notes.