
Introduction
Chasing level instead of plumb means building so the wall looks straight horizontally but the verticals are off. This is a common block layout mistake that can hide misalignment until the structure bears load. Remember that plumb is the vertical reference, while level checks the horizontal plane.
To recover quickly, re-check the vertical line, reset your reference, and correct courses before mortar hardens. Learn to adjust with proper tooling for block laying and verify plumb frequently as you go. If a mistake shows up, use the right tools and follow the manufacturer instructions to re-lay sections and maintain alignment.
Key takeaways
- Distinguish plumb from level in block layout to ensure stability and alignment.
- Use string lines and a level to verify vertical alignment before courses.
- Common block mistakes: misaligned corners and inconsistent mortar joints after set.
- Correct errors promptly by probing with plumb line and re-laying affected units.
- Choose appropriate tools for block laying; quality levels and trowels matter.
- Safety: wear eye protection and follow manufacturer guidance when adjusting layout.
Table of Contents
- Introduction
- Key takeaways
- Understanding Plumb Vs Level — Definitions and Why It Matters
- Basic Masonry Layout Principles Every Builder Should Know
- Common Block Layout Mistakes (with Clear Examples)
- Consequences: Structural, Safety, and Cost Implications
- Tools and Materials Checklist for Accurate Layout
- Quick Recovery Techniques When Layout Errors Are Found
- Step-by-Step Correction Methods for Common Scenarios
- Preventive Tips and Best Practices for Novice Diyers
- Conclusion
- FAQ
Understanding Plumb Vs Level — Definitions and Why It Matters
Plumb means vertical alignment along gravity. Level means horizontal alignment relative to the earth’s surface. Think of a hanging pendant for plumb and a horizontal shelf for level to set expectations clearly.
The fundamental difference is geometric: plumb runs straight up and down, while level runs across left to right. Plumb is critical for masonry stability because vertical alignment affects load transfer and joint integrity. When corners aren’t truly plumb, walls can bow or settle unevenly over time.
What ‘Plumb’ Means in Masonry
In masonry, ‘plumb’ refers to a vertical true line that aligns with gravity. Walls must be plumb for proper load transfer and stability.
Imagine a hanging pendant – it’s at rest when it’s perfectly vertical, or plumb. Similarly, your walls should follow this true vertical line.
Plumb is crucial because it ensures that the weight of the wall above is transferred evenly to the foundation below. If a wall is out of plumb, it can lead to structural issues over time.
What ‘Level’ Means and Common Misinterpretations
‘Level’ refers to a horizontal reference that aligns with the earth’s surface. It helps ensure that courses of blocks are aligned horizontally.
Think of a horizontal shelf – it’s level when it’s perfectly horizontal. However, relying solely on a single level point can lead to cumulative vertical errors as you progress along the wall.
While level is important for aesthetic reasons and proper joint alignment, it’s crucial not to compromise plumb in pursuit of level. A wall can be level but still out of plumb, leading to instability.
Why Chasing Level Can Lead You Astray
In block laying, it’s common to focus on matching the level line for each course. However, this approach can compromise wall stability if not done carefully.
Forcing courses to match a single level line can cause blocks to shift out of plumb. This is because the level line doesn’t account for variations in block size or slight imperfections in the foundation.
To avoid this, regularly check corners for squareness and blocks for proper placement. Use vertical references like plumb lines or laser levels alongside your level to ensure both plumb and level are maintained.
If you notice that a wall is out of square or has bowed courses, stop, recheck your plumb and level references, and make necessary adjustments before proceeding.
Basic Masonry Layout Principles Every Builder Should Know
Establish a consistent reference grid using a rough chalk line or string line, and designate setback points to prevent drift in subsequent courses. These anchors keep walls aligned as work progresses. A simple plan helps you stay on track from start to finish.
Staging and progression matter: lay out a workflow with control points and a dry run before actual laying. Differentiate level and plumb: prioritize plumb for walls and columns, with level checks along horizontal runs. Reuse control lines to guide perpendiculars, offsets, and corners, and reestablish them after adjustments.
Setting batter boards and string lines
Begin by setting sturdy batter boards at each corner of your structure. These serve as reliable external references to maintain layout consistency throughout the build.
Stake the batter boards securely into the ground, ensuring they are level and stable. A quick check is to tug gently on them; if they wobble or move, restake them.
Next, stretch a taut string line between opposing batter boards at the desired height for your first course. Check tension regularly; if it sags or moves, tighten or re-stake the batter boards as needed.
Establishing reference lines and benchmarks
Identify reliable benchmarks across your site, such as existing walls or plumbing fixtures. Transfer these points to your layout using a plumb bob or laser level.
Check each benchmark point for consistent height. A pro check involves using a laser level or water level to ensure accuracy. If heights vary significantly, recheck and adjust benchmarks accordingly.
Once benchmarks are established, use them to create reference lines that will guide your layout. These lines should be visible and continuous throughout the build.
Laying out corners and returns properly
The corner-first method locks in alignment early, reducing correction work later. Begin by laying out your corners using a right-angle finder or laser level to ensure accuracy.
A quick check involves using a speed square or triangle tool to verify that corners are square. If not, adjust the layout and recheck.
Once corners are set, lay out your returns (horizontal lines) from these points. Use control lines to maintain consistency between courses and across the entire structure.
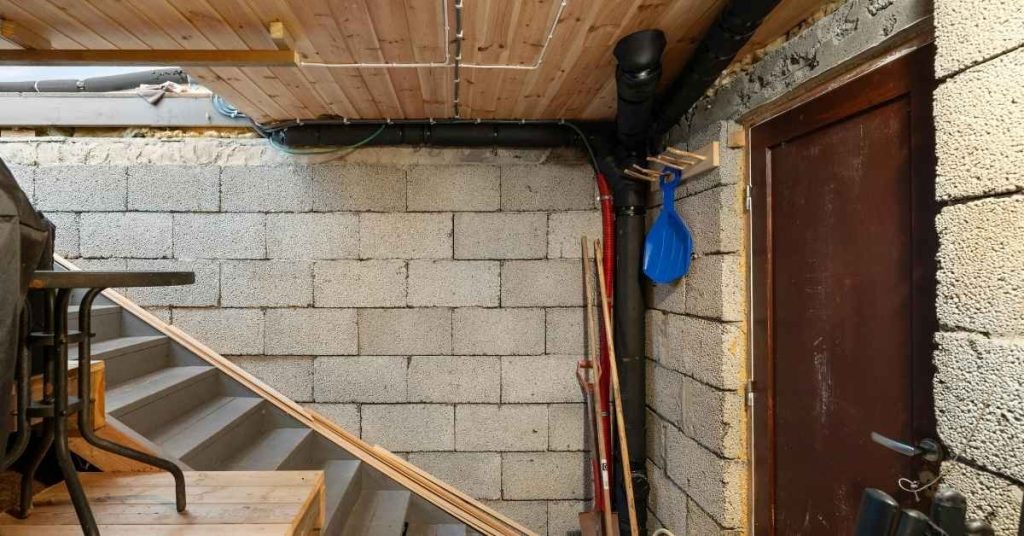
Common Block Layout Mistakes (with Clear Examples)
Identify chasing level versus chasing true plumb with concrete examples like door openings and corridor alignments. Plumb accuracy matters more for structural integrity and finish quality. Don’t rely on a line alone without vertical reference at key transitions.
Frequent misalignments include bowed walls, offset corners, and stepped corners. Quick visual cues and simple checks such as string lines and plumb bob help spot them early. A concise verification checklist keeps drift in check between pours and form setup.
Chasing Level Instead Of Plumb — How It Happens
Misinterpreting temporary levels for permanent plumb is a common mistake that can lead to structural issues and costly rework. For instance, matching the top course of a wall to a temporary level set on an out-of-plumb form can result in a wall that’s not truly plumb.
Quick check: Ensure forms are aligned at multiple heights with a level before setting levels to avoid this mistake.
Pro tip: Always verify that forms are plumb using a plumb bob or laser level for accuracy. If forms are out of plumb, re-align them before setting levels and proceeding.
Out-Of-Plumb Corners And Stacked Errors
Small deviations at corners can multiply along a wall, leading to bowed or stepped walls and structural compromise. Here’s how to avoid this:
- Check corners: Use string lines tied at both ends of the wall to quickly spot any deviation from plumb.
- Pro check: Check all corners with a plumb bob or laser level before and after pouring each section.
If corners are out of plumb, pause work, re-align forms, and correct before proceeding. This will prevent small errors from compounding into major issues.
Inconsistent Mortar Joints And Tie Placement
Irregular joints and misplaced ties can cause blocks to shift, leading to misalignment and loss of control over plumb. To maintain accuracy:
Quick check: Inspect joint consistency visually and with a level at multiple points along the wall.
Pro tip: Ensure mortar beds are consistent in thickness and ties are placed accurately according to plans. If joints or ties are inconsistent, pause work, correct inconsistencies, and re-check before proceeding.
Consequences: Structural, Safety, and Cost Implications
Layout errors that push walls out of plumb affect load paths and joint alignment, risking cracking or block failure. Misaligned walls can compromise long-term performance and vertical consistency. These factors influence future finishes and maintenance needs.
Safety hazards accompany misalignment, including unstable forms and increased fall risks for workers. Cost implications include wasted materials and extra labor for corrections, potentially extending timelines and affecting insurance considerations.
Structural performance and long-term durability impacts
Walls that are out of plumb can compromise the building’s structural integrity by disrupting load paths and causing misaligned joints. This can lead to cracking, especially around corners and openings.
Long-term durability is also at risk as these cracks can allow water intrusion, leading to further damage over time. Regularly inspect walls for signs of cracking or misalignment using a level and corner diagonals. If consistent cracks are found or walls are noticeably out-of-plumb (>1/2″ in 8ft), consider temporary shoring.
Realign blocks, patch as needed, and ensure proper mortar joint alignment before proceeding with construction to mitigate these issues.
Safety risks on site and to occupants
Poor layout can result in safety hazards such as partial collapse, unstable scaffolding, and compromised parapets. Leaning walls or unintended handholds can pose fall risks for workers.
Worker safety during construction is paramount. Regularly inspect scaffolding, forms, and walls for stability using a level and plumb bob. Ensure proper fall protection measures are in place.
If walls lean significantly (>1″ in 8ft) or show signs of instability, implement temporary bracing and safety measures immediately to protect workers and future occupants.
Adjust bracing, realign blocks, and ensure proper formwork before proceeding with concrete pours or infill to prevent these risks.
Cost and schedule penalties of late corrections
Discovering layout errors late in the build process can lead to increased labor costs, material waste, and schedule delays. Rework required for corrections consumes additional resources.
Project budget and timeline are both affected. Estimate additional costs based on rework, wasted materials, and extra labor required for corrections using your project records.
If errors are discovered late in the build process, prioritize remediation, allocate additional resources, and adjust the project timeline accordingly to minimize further delays.
Document all corrections, update project plans, and communicate changes to stakeholders promptly to manage expectations and maintain transparency.

Tools and Materials Checklist for Accurate Layout
Tools for layout accuracy include chalk line or laser level, a reliable level or transit, plumb line, tape measure, stakes and batter boards, string blocks, a straightedge, and a framing square. Use high-contrast marking tools to clearly transfer lines and consider outdoor durability. Calibrate tools regularly.
Material choices and line stability cover pressure-treated batter-board lumber, durable line material, and weather-resistant marking consumables. Choose line thickness and color contrast that stay legible through curing and exposure. Conduct a pre-use check of level and plumb, and test a dry run with strings and stakes.
Essential Tools for Checking Plumb and Level
The accuracy of your layout depends heavily on the reliability of your tools. Here’s a list of essential tools to ensure vertical (plumb) and horizontal (level) accuracy during layout.
- Plumb Bob: A simple yet effective tool for checking vertical alignment. It works by using gravity to indicate true plumb. Tip: Check for any movement or sway that could indicate an unstable setup.
- Spirit Level: A must-have for checking horizontal surfaces. Use it on a straightedge or rule to ensure level lines. Pro tip: Regularly verify tool calibration against a known standard or reference point.
- Laser Level: Provides quick, accurate level lines over long distances. It’s ideal for large projects and hard-to-reach areas. Quick check: Ensure it’s properly leveled and aligned with the target surface.
- Mason’s Line: A string line stretched between two points to create a straight, level reference. It’s useful for long, continuous lines. Tip: Use line blocks or string/line holders to keep the line taut and stable.
- Square: A versatile tool used for checking right angles, squareness of corners, and alignment of walls. Pro check: Regularly verify its accuracy using a known standard square.
- Straightedge: A long, straight piece used to transfer level lines from one surface to another. It’s crucial for maintaining layout accuracy. Quick tip: Use it in conjunction with other tools like the spirit level or laser level.
Materials and Supplies That Influence Layout Accuracy
The consistency of your materials plays a significant role in maintaining layout control. Here are key materials to consider for accurate block layout.
- Consistent Block Size: Uniform block sizes ensure predictable results and minimize layout errors. Pro tip: Perform quick visual checks of blocks before use to ensure consistency.
- Mortar Mix Consistency: A consistent mortar mix provides strong, even bonds between blocks. Quick check: Inspect mortar for consistency and workability throughout the project.
- Quality Ties: Ties help maintain alignment and prevent movement in walls. Use durable ties suitable for your wall type. Tip: Check tie specifications to ensure they’re appropriate for your project’s needs.
- Marking Tools: High-contrast marking tools like chalk or marking paint help transfer layout lines clearly without fading. Pro check: Regularly inspect markings to ensure they remain legible throughout curing and exposure.
- Line Cord/String Material: Choose a durable, weather-resistant line cord or string for your mason’s line. Quick tip: Consider the thickness and color contrast of your line to keep it visible during layout.
Calibration, Maintenance, and Accuracy Checks for Tools
Regular tool calibration and maintenance are crucial for ensuring repeatable results and minimizing errors in your layout work.
- Level and Plumb Verification: Regularly verify the accuracy of your levels and plumb bobs against known standards or reference points. Pro check: Establish a regular schedule for checking tool accuracy on-site.
- Battery Checks: For battery-operated tools like laser levels, regularly check battery life and condition. Quick tip: Carry spare batteries to prevent unexpected tool failures.
- Cleaning and Storage: Regularly clean your tools to remove dirt, dust, or debris that could affect their accuracy. Store them properly to prevent damage. Tip: Use protective cases or covers when not in use to keep tools in good condition.
- Straightedge and Square Checks: Regularly check the straightness of your edges and the squareness of your squares using a known standard. Pro tip: Use a precision straightedge or square for accurate checks.
- Tool Inspection: Perform visual inspections of all tools before use to ensure they’re in good working order. Quick check: Look for signs of wear, damage, or other issues that could affect tool performance.
Quick Recovery Techniques When Layout Errors Are Found
Start with a quick assessment to verify the extent of the out-of-plumb condition and confirm with a secondary check. Document measurements to guide rapid decisions. Secure the area to protect workers and exposed rebar before work resumes.
Use temporary shims, adjustable forms, or re-set batter boards to bring the affected area back to plumb while maintaining alignment with existing lines. Decide whether to adjust the current course, shift subsequent ones, or re-route small sections to minimize rework. Re-check plumb, level, and alignment after intervention.
Assessing the scope of the error quickly
When you discover an out-of-plumb condition mid-build, it’s crucial to assess its extent promptly to minimize rework. Avoid these common mistakes:
- Checking only one point: Verify deviations at multiple locations along and across the wall.
- Assuming a localized issue: Inspect corners and adjacent areas for systemic problems.
- Ignoring minor deviations: Document measurements to guide rapid decision-making.
- Overlooking safety risks: Secure exposed rebar or fresh concrete to prevent further drift.
If deviations are consistent, minor, and localized, proceed with local fixes. If they vary significantly or are severe, consider partial rebuild or systematic correction.
Simple fixes for small out-of-plumb situations
For minor deviations, quick corrective actions can minimize rework and maintain alignment with existing lines. Here’s how:
Temporary shims: Insert thin wedges between the block and its support to bring it back to plumb.
Adjusting the next course: If the deviation is minor, adjust the placement of the next course to compensate.
Re-tensioning lines: If lines have shifted, re-tension them to ensure accurate placement of subsequent courses.
When to dismantle and rebuild — quick decision guide
Choosing between correction in place or partial rebuild depends on the severity, safety risks, and impact on finishes. Consider these factors:
Severity of deviation: If it’s greater than 1/4 inch per foot, consider partial rebuild.
Safety risks: If the out-of-plumb condition poses safety risks to workers or occupants, prioritize safety by rebuilding.
Impact on finishes: If adjacent areas or finishes are affected, consider partial rebuild to maintain aesthetic consistency.
Step-by-Step Correction Methods for Common Scenarios
Typical scenarios include misplumb wall lines, chronic level misalignment, and corner deviations. Use diagnostic checks with a plumb line, laser level, or string lines to identify deviations. Map the plan from the detection point to guide corrections.
Tools and safety prep cover essential items like laser level, chalk line, measuring tape, plumb line, SDS for blocks, and PPE. Follow safety steps and brace work properly. Use ordered workflows: identify, verify, map deviation, adjust with shims or repositioned blocks, relock joints, and recheck.
Step-by-Step Process
This step-by-step process guides you through correcting common block layout mistakes quickly and effectively.
- Prepare site: Clear debris, ensure proper footing, and set up temporary bracing if needed.
- Safety check: Wear appropriate PPE and follow safety guidelines for working at heights or with heavy materials.
- Layout: Establish control lines using laser level, chalk line, or string lines.
- Check plumb and level: Use a plumb bob or laser level to ensure walls are vertical and horizontal.
- Identify deviations: Mark any out-of-plumb or misaligned sections with a marker or chalk.
- Map deviation: Measure and record the extent of each deviation.
- Adjust blocks: Remove affected blocks, pack or shim as needed, and reset them in correct position.
- Relock mortar joints: Apply fresh mortar to re-lock joints and ensure structural integrity.
- Recheck: Verify corrections using initial layout lines and measuring tools.
- Cleanup: Remove temporary bracing, clear debris, and store tools properly.
Correcting a single course that is out of plumb
To correct a single mislaid block without disrupting surrounding courses, follow these steps:
Identify and remove the block: Mark the mislaid block for easy removal. Carefully cut away excess mortar around it using a trowel or chisel. Gently tap the block with a hammer and remove it from the wall.
Inspect and pack/shim as needed: Ensure there are no obstructions preventing proper realignment of the block. If necessary, add packing material behind the block to bring it back into plumb.
Reset and re-lock the joint: Carefully place the block back into position, ensuring it is level and plumb. Apply fresh mortar to re-lock the joint.
Fixing a corner that has drifted from layout
To re-establish accurate corner lines and bring adjoining walls back into alignment, follow these techniques:
Identify and remove affected blocks: Mark the drifted corner for easy reference. Carefully remove blocks from the drifted corner, working from the top down to avoid further disruption.
Re-establish layout lines and reset blocks: Use a laser level or string line to re-establish accurate corner lines. Pack or shim as needed and reset blocks in correct position along the new layout lines.
Re-lock mortar joints: Apply fresh mortar to re-lock joints and ensure structural integrity of the corrected corner.
Bringing a whole wall back to plumb without full rebuild
To minimize disruption and cost while maintaining structural integrity, follow these methods:
Identify extent of deviation and rake back courses: Measure and mark the entire length of the wall, noting where it is out of plumb. Starting from the top, carefully remove blocks in affected courses until you reach a stable section.
Reset control lines and selectively rebuild: Use a laser level or string line to re-establish accurate layout lines for the entire wall. Pack or shim as needed and reset blocks in correct position along the new layout lines, working from the bottom up.
Re-lock mortar joints: Apply fresh mortar to re-lock joints and ensure structural integrity of the corrected wall.
Preventive Tips and Best Practices for Novice Diyers
Clarify the difference between level and plumb and why both matter for structure and alignment. Avoid chasing one at the expense of the other. Keep focus on vertical alignment as a foundation for stability.
Practical checks use simple tools like chalk line, spirit level, and plumb line, with a repeatable workflow to verify both horizontal and vertical accuracy at each course. Prepare the site with a stable subgrade, consistent batter boards, and reliable reference points before laying blocks.
Daily checklist and visual checkpoints
Start each workday by verifying your layout’s integrity with this quick checklist. Early detection of drift helps prevent costly mistakes.
- Inspect previous courses: Look for any signs of misalignment or out-of-plumb blocks at the start of each day. Skipping this step may lead to cumulative errors.
- Check tool calibration: Ensure your level, plumb line, and other tools are properly calibrated before starting work. Incorrect tools can lead to inaccurate readings.
- Re-check measurements: Confirm that your measurements match the plans for the current course. Inaccurate measurements can cause blocks to be laid out of position.
- Verify reference lines: Ensure that your layout strings or chalk lines are still true and accurate. Drifting strings can lead to crooked walls.
- Inspect corners: Check that all corners remain square. Out-of-square corners can cause walls to drift out of plumb.
- Check block quality: Ensure that the blocks are undamaged and uniform in size. Using damaged or inconsistent blocks can lead to alignment issues.
- Inspect mortar joints: Check that mortar joints are consistent in width and depth. Incorrect joints can affect the wall’s stability and appearance.
- Check for settling: Look for any signs of settling or movement in the foundation. Settling can cause walls to become out-of-plumb over time.
Quick rule: If misalignment or out-of-plumb blocks are found, pause work and assess the scope of the error using quick recovery techniques before proceeding.
Communication and staged inspections during layout
Maintain accuracy throughout your project with these simple handover checks and staged inspections at key milestones.
- Handover checks: Establish clear communication protocols between crew members. Regularly inspect each other’s work to catch errors early.
- Staged inspections: Conduct inspections after every 5-10 courses or at significant changes in layout. This helps prevent small errors from becoming major issues.
- Inspect mortar joints: Check that mortar joints are consistent and properly filled. Incorrect joints can affect the wall’s stability and appearance.
- Check for level: Use a level to ensure each course is level before laying the next one. Out-of-level courses can cause walls to lean or become out-of-plumb.
- Verify plumb: Check that all corners remain plumb using a plumb line or level. Out-of-plumb corners can cause walls to drift.
- Inspect block alignment: Ensure that blocks are aligned properly with each other and with the layout strings. Misaligned blocks can cause walls to become out-of-square.
- Check for settling: Look for any signs of settling or movement in the foundation during inspections. Settling can cause walls to become out-of-plumb over time.
Quick rule: If significant misalignment or out-of-plumb blocks are found during inspection, pause work, assess the scope of the error, and correct it using appropriate step-by-step correction methods before proceeding.
When to call a pro and what to expect
Knowing when to seek professional help is crucial for maintaining the structural integrity of your masonry work. Here are signs that warrant immediate attention.
Persistent misalignment: If you find that walls continue to drift out of square or plumb despite your efforts, it’s time to call a professional. This could indicate a more serious underlying issue.
Significant out-of-plumb blocks: A few out-of-plumb blocks can often be corrected with simple fixes. However, if many blocks are significantly out of plumb, it may be best to have a professional assess the situation.
Uneven footing or structural concerns: If you notice that your foundation is uneven, settling, or showing other signs of structural distress, do not attempt to fix it yourself. Contact a licensed mason, structural engineer, or other relevant professional immediately for assessment and advice.
When you contact a professional, expect them to inspect the area, assess the damage, and recommend appropriate solutions. They may suggest interim measures such as temporary support, realignment, or replacement of affected blocks. Always follow their guidance to ensure safety and structural integrity.
Conclusion
Keeping plumb and level is essential for safety, durability, and a neat appearance. When layout errors occur, quick, careful recovery protects the structure and reduces costly fixes later.
To move forward, start by verifying plumb and level with the appropriate tools, recheck reference lines, correct one plane at a time, and recheck after each adjustment. Use tested, clean surfaces and keep mortar and tools organized so you can measure accurately, then proceed with measured corrections and verify before final setting or curing.
Common missteps to avoid include chasing level when you should restore true plumb, skipping checks after each adjustment, and rushing through corrections with damaged or worn tools. Always wear proper PPE, test corrections in a small area first, and avoid making irreversible changes without rechecking alignment and tolerances.
If a situation involves complex angles, substantial out-of-plumb conditions, or structural concerns, consider calling a qualified professional rather than forcing a fix. With careful steps, steady verification, and a conservative approach, you can recover quickly and keep the project safe and solid. Stay deliberate, stay safe, and progress with confidence.
FAQ
What is the difference between plumb and level, and why does it matter for block laying?
Plumb is a vertical alignment. Level is a horizontal reference. Mistakes in either direction can cause alignment issues that affect stability and fit of masonry work.
How can I tell if a block course is not plumb or not level, and what should I do while laying bricks?
Check vertical lines for true plumb and horizontal lines for true level with a straight edge or level. If you spot a deviation, pause, adjust using shims or by rechecking the mortar bed before continuing to prevent a larger correction later.
What tools are most helpful for ensuring plumb and level, and how should I choose them?
Use a reliable spirit level, a plumb bob or a laser level, and a straightedge. Choose tools with clear, readable graduations and ensure they are calibrated and appropriate for the job site conditions.
How can I safely correct a misaligned block at height and recover quickly?
Stop work if you notice a significant deviation. Secure the area, remove or carefully adjust the affected block, and verify surrounding blocks are rechecked before continuing. If needed, consult manufacturer instructions or local guidelines for proper correction methods.