
Introduction
A clear coat over paint is a transparent top layer that protects and seals the surface. It can help durability when applied with proper surface prep, but it can cause peeling if the paint isn’t ready or the film is incompatible.
Check for good adhesion, a clean, dry surface, and a compatible product before sealing. If you’re unsure, test a small area first and review the product label, manufacturer instructions, and any local rules that might apply.
Key takeaways
- Understand clear coats sit over painted surfaces; test compatibility first.
- Choose gloss levels and film thickness suited to traffic and washability.
- Prepare surface by cleaning, scuffing, and allowing full cure before topcoat.
- Wear eye and skin protection; follow ventilation and chemical safety guidelines.
- Test adhesion with a patch check and slight abrasion before full use.
- If peeling starts, halt application, sand back, and re-prime before recoating.
Table of Contents
- Introduction
- Key takeaways
- How Clear Coats Work and Why They’re Used
- When Clear Coats Help: Benefits and Ideal Situations
- When Clear Coats Cause Peeling: Common Failure Modes
- Preparing Painted Surfaces to Avoid Peeling
- Testing Compatibility and Adhesion Before Full Application
- Step-by-Step Application Best Practices
- Troubleshooting Peeling and Repair Methods
- Product Selection, Specs, and Tools Checklist
- Conclusion
- FAQ
How Clear Coats Work and Why They’re Used
Clear coats sit on top of painted surfaces to add a protective layer. They also enhance depth and gloss, making the color look richer and more even. The coating should bond with the underlying paint and resist environmental wear.
In practice, a clear coat serves as a sacrificial shield and a cosmetic finish. It adds chemical and UV resistance when chosen correctly for the system. Always check compatibility with the base paint and the manufacturer’s instructions before proceeding.
What a clear coat does (protection, gloss, UV)
A clear coat’s primary job is to protect your paint. It acts as a barrier against scuffs, scratches, and even chemical stains.
But it doesn’t stop at protection. A good clear coat enhances the gloss of your paint, making it look shinier and more vibrant.
Lastly, clear coats are designed to stabilize your paint against UV damage. They absorb the sun’s harmful rays, preventing your paint from fading or cracking over time.
Types of clear coats and their general properties
Clear coats come in various chemistries, each with its own strengths. Acrylic clear coats are great for durability and UV protection. They’re often used in outdoor settings.
Polyurethane clear coats offer excellent resistance to chemicals and abrasion. They’re a popular choice for high-traffic areas like kitchens or bathrooms.
Catalyzed finishes, on the other hand, cure quickly and provide superior gloss. But they require proper ventilation during application.
Ceramic-infused clear coats are a newer technology. They offer excellent protection against stains and even some forms of bacteria. They’re ideal for surfaces that see heavy use or are prone to staining.
When Clear Coats Help: Benefits and Ideal Situations
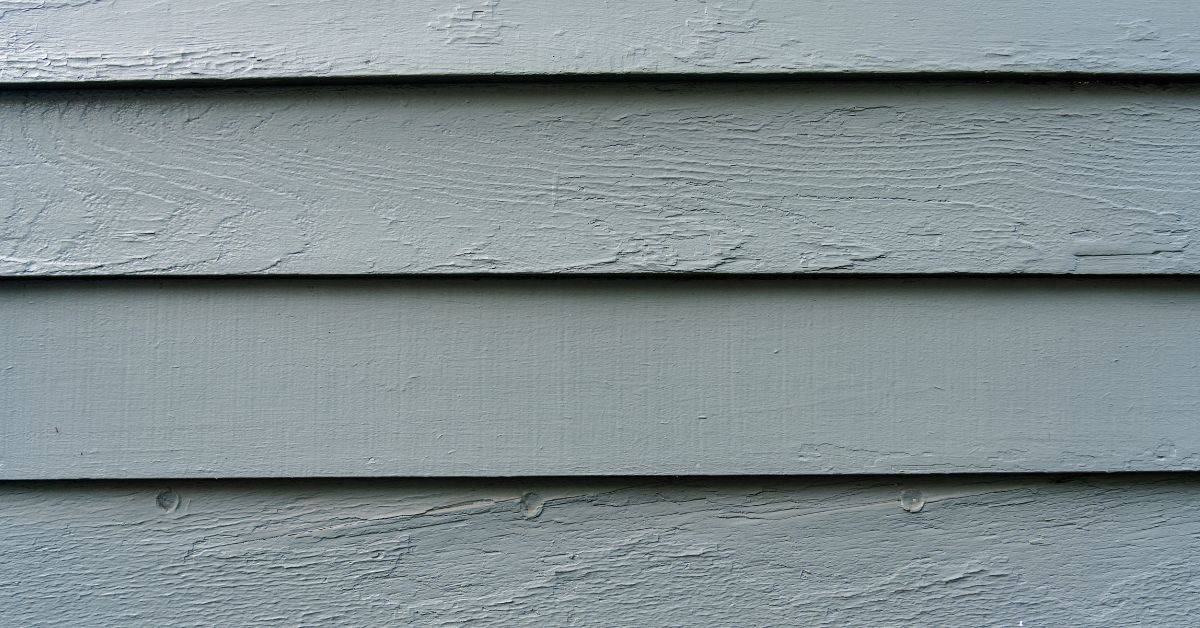
Clear coats can extend the life of exterior painted surfaces and reduce surface wear in high-traffic zones. They help preserve color by limiting UV bleaching and minor staining. Consider them when appearance and longevity are both priorities.
Using a clear coat is beneficial where the painted surface faces weather exposure or abrasion. It can be a good fit for areas that require a uniform finish or enhanced washability. Verify the product data and guidance for your specific environment before applying.
Protection and durability benefits
A clear coat’s primary job is to protect your paint. It forms a barrier that resists chemicals, scratching, and environmental wear.
Think about high-traffic areas or places exposed to harsh weather. A clear coat here can extend the life of your paintwork by years.
When to use: In kitchens, bathrooms, outdoor surfaces, or anywhere that sees heavy foot traffic or exposure to elements.
Aesthetic improvements and gloss options
Clear coats aren’t just about protection. They can also enhance the look of your paint job. They add depth, adjust sheen, and even create a wet-look effect.
Matte clear coats are great for downplaying imperfections and giving a subtle, soft finish. Glossy ones add shine and reflect light, making surfaces appear smoother.
When to choose: Matte for walls with minor flaws or textured surfaces; glossy for smooth surfaces where you want to highlight their sleekness.
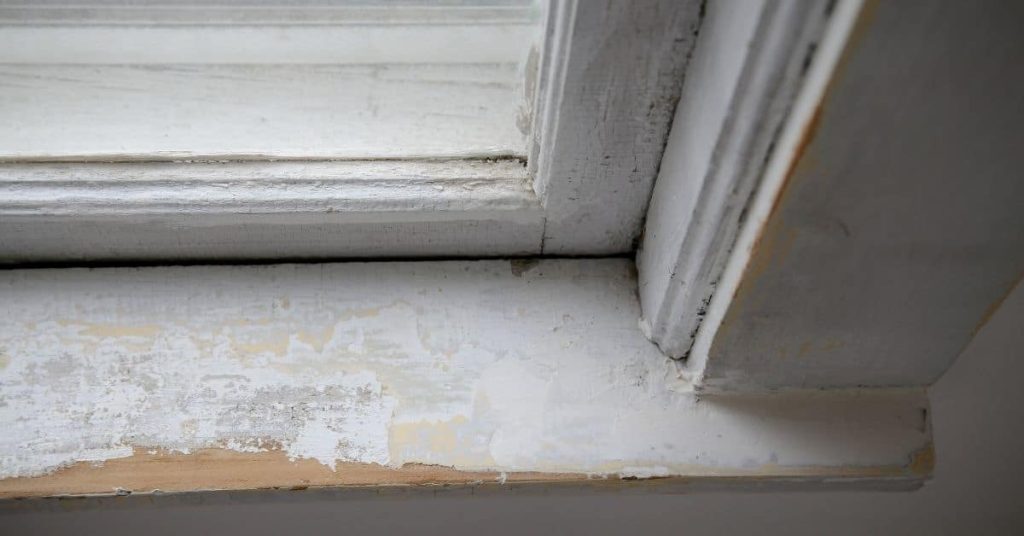
When Clear Coats Cause Peeling: Common Failure Modes
Poor adhesion is a leading cause of peeling after applying a clear coat over paint. Mismatched chemistries between layers can cause solvent attack and bond failure. Application errors, such as improper surface prep, also contribute.
Other contributors include insufficient curing, contamination, or using the wrong hardener or reducer. Always review labels and technical data to match products and follow recommended sequences carefully.
Surface Contamination and Adhesion Loss
Before applying any clear coat, the surface must be clean. Oils, wax, silicone, or failed primers can prevent adhesion, leading to lifting or fish-eyes.
These contaminants create a barrier that stops the clear coat from bonding properly with the underlying paint. As a result, the clear coat may start peeling off over time.
To avoid this: Ensure the surface is clean and free of any contaminants before applying the clear coat. Use appropriate cleaning solutions and allow the surface to dry completely.
Chemical Incompatibility Between Base Paint and Clear Coat
In some cases, incompatible resins or solvents in the clear coat can react with the underlying paint. This can cause delamination, where the clear coat starts to peel off.
The most common issue is using a water-based clear coat over an oil-based paint. The water in the clear coat can cause the oil-based paint to lift and peel.
To prevent this: Always ensure that the clear coat you’re using is compatible with the underlying paint. If you’re unsure, consult the manufacturer’s guidelines or ask a professional for advice.
Application and Curing Mistakes That Lead to Failure
Proper application and curing are crucial to prevent clear coat peeling. Here are some common mistakes to avoid:
- Applying over uncured paint: Applying a clear coat over wet or uncured paint can cause it to peel. Always ensure the underlying paint is completely cured before applying the clear coat.
- Excessive film build: Applying too many coats in one go can lead to excessive film build, which can cause the clear coat to peel. Follow the manufacturer’s guidelines for application and recoat times.
- Wrong recoat windows: Recoating too soon or too late can also cause peeling. Always follow the recommended recoat window specified by the manufacturer.
Remember, patience is key when it comes to applying clear coats. Allowing enough time for each coat to cure properly will help prevent peeling and ensure a long-lasting finish.
Preparing Painted Surfaces to Avoid Peeling
Start with a thorough cleaning to remove dirt, oils, and waxes. Decontaminate the surface using appropriate products and rinse completely. Mechanical keying, such as light scuffing, improves the bond with the clear coat.
Note any incompatibilities or previous coatings before proceeding. Ensure the painted surface is dry and within the environmental conditions listed by the product instructions. Double-check that you are following the prep steps specified by the manufacturer.
Cleaning and decontaminating steps
Before applying a clear coat, it’s crucial to clean your painted surface thoroughly. Oils, waxes, and particulates can hinder adhesion.
Use solvents or detergents recommended by the paint manufacturer. These are designed to remove specific contaminants without damaging the paint.
Never use household cleaning products as they may leave residues that prevent clear coat adhesion.
Wipe the surface with a clean, damp cloth to ensure no residue remains.
Sanding, scuffing, and feathering techniques
Mechanical keying helps clear coats bond better. Start with a medium-grit sandpaper (around 120-150 grit) for most paints.
Lightly sand the surface in the direction of the grain. Be careful not to sand through the paint into the substrate.
Feather the edges with a fine-grit sandpaper (220 grit or higher) to blend them into the main surface and prevent visible lines under the clear coat.
Wipe off dust with a tack cloth after sanding. If your paint is in poor condition, consult the manufacturer for specific sanding recommendations.
Solvent and surface tests to verify readiness
Before applying a clear coat, perform simple solvent wipe tests to confirm your surface is ready. This helps prevent peeling.
Dampen a clean cloth with the recommended solvent (usually the same one used for cleaning). Wipe the surface firmly but gently. If no residue comes off on the cloth, your surface is likely contaminant-free.
Perform a visual check as well. The surface should look uniform and dry to the touch. Any glossy or sticky spots indicate uncured paint or contaminants.
If in doubt, wait 24 hours and retest. It’s better to be patient than risk peeling later on.
Testing Compatibility and Adhesion Before Full Application
Run a small test area to observe how the clear coat interacts with the paint. Look for wrinkling, dulling, or visual separation as warning signs. Use the test results to decide whether to proceed or adjust the system.
Document the results and compare them to the product data sheet and label guidance. If there are any doubts, consult the manufacturer instructions or local code requirements before full coverage.
Crosshatch and Tape Adhesion Tests
Before applying a clear coat over your painted surface, perform simple crosshatch and tape adhesion tests to ensure compatibility. These tests help detect any weak adhesion or incompatibility issues that could lead to peeling.
Crosshatch Test: Lightly score the paint surface with a sharp utility knife in a crisscross pattern, creating small squares about 1/8″ by 1/8″. Apply painter’s tape over the scored area and press firmly. After waiting for 30 seconds, pull off the tape quickly at a 90-degree angle.
If more than 65% of the squares remain on the surface, it passes the test according to industry standards. If not, you may have adhesion issues that need addressing before applying the clear coat.
Small Patch Test and Accelerated Weathering
Apply a small, inconspicuous patch of clear coat on your painted surface to monitor its curing and adhesion over time. This helps identify any issues that might arise before committing to full application.
Observe the patch daily for signs of lifting, wrinkling, or other defects. If everything looks good after 72 hours, consider exposing it to accelerated weathering conditions if possible. You can use a heat lamp or place it in direct sunlight to simulate long-term UV exposure.
Check the patch periodically over the next few weeks. If it remains intact and adheres well, you’re likely safe to proceed with full application. However, if any issues arise, address them before continuing.
Solvent Rub and Blush Tests
Perform solvent rub tests to check for chemical incompatibility between your base paint and clear coat. This test involves using a soft, clean cloth dampened with a suitable solvent (like isopropyl alcohol or mineral spirits) to gently rub the painted surface.
Blushing: If the paint turns white or develops a hazy appearance when rubbed with the solvent-soaked cloth, it’s blushing. This indicates that the clear coat and base paint are not compatible, and you should avoid applying the clear coat.
Softening or Lifting: If the paint softens, lifts, or shows signs of damage under the solvent rub test, it means the clear coat is attacking the base paint. In this case, do not proceed with full application until you’ve addressed the incompatibility issue.
Step-by-Step Application Best Practices
Control the environment to minimize dust and humidity, and follow the temperature guidance on the product label. Mix only as directed and measure components accurately per the data sheet. Use proper spraying technique to avoid runs and choking the finish.
Apply in thin, even coats and allow appropriate cure times between passes as specified. Protect treated areas during curing and avoid exposure to contaminants. Always reference the manufacturer instructions for your exact product mix and sequence.
Step-by-Step Process
Follow these practical steps for a successful clear coat application over paint, ensuring minimal peeling risk.
- Preparation: Check the weather forecast and gather safety gear. Ensure your workspace is well-ventilated.
- Surface Preparation: Refer to our earlier guide on preparing painted surfaces to avoid peeling. Clean, decontaminate, sand, and feather as needed.
- Main Application: Follow manufacturer’s instructions for mixing and thinning. Use a spray gun with the correct tip size. Apply in even, overlapping patterns to achieve an even film build.
- Drying Time: Allow the recommended flash time between coats. Check the product data sheet for specific recoat windows.
- Final Checks & Cleanup: After the final coat has cured, perform a thorough inspection. Clean your spray equipment and workspace.
Recommended environmental conditions and ventilation
Check your product data sheet for optimal application conditions. Typically, clear coats perform best in temperatures between 70°F to 85°F (21°C to 29°C) with humidity below 85%.
Ventilation is crucial. Ensure your workspace has adequate airflow. For indoor projects, use fans or open windows and doors.
If unsure about conditions, consult the manufacturer or a local paint professional for advice tailored to your specific product.
Mixing, thinning, and spray technique fundamentals
Understand your clear coat’s pot life. Mix only what you can apply within that time frame.
Choose the right reducer for thinning. Follow manufacturer guidelines to achieve the correct viscosity for spraying.
Set up your spray gun properly. Use the recommended tip size and maintain a consistent distance from the surface (usually 6-10 inches). Apply in even, overlapping ‘W’ or ‘M’ patterns to ensure an even film build.
Flash times, recoat windows, and curing guidance
Respect flash times. These are the recommended intervals between coats. Rushing can lead to entrapment and adhesion loss.
Follow manufacturer guidelines for recoat windows. Applying too soon can cause peeling, while waiting too long may result in poor intercoat adhesion.
Allow your final coat to cure properly before handling or exposing it to harsh conditions. Curing times vary by product and environment, so check the data sheet for specifics.
Troubleshooting Peeling and Repair Methods
Assess the extent of peeling: whether it’s localized or widespread, and whether the substrate is sound. Determine if you can repair or if a full strip and refinish is required. Document findings to guide your next steps.
For repairs, consider feathering, re-sealing, or applying a fresh clear coat in proper sequence. In some cases, removal and reapplication of the entire system may be the best option. Rely on product labels and technical notes for compatible repair methods.
How to remove failed clear coat safely
Removing a failed clear coat can be done using mechanical or chemical methods. Always wear appropriate PPE, including gloves, safety glasses, and a respirator.
Mechanical removal: Use sandpaper (120-grit or finer) to lightly sand the surface. This helps to break the bond between the clear coat and the paint. Be careful not to sand through to the paint layer.
Chemical removal: Apply a stripper designed for clear coats, following the manufacturer’s instructions. Work in small sections, then use a scraper or putty knife to remove the softened clear coat. Rinse with water and allow to dry before proceeding.
Repair workflow: spot repair vs full refinish
The extent of peeling will determine your repair method. For minor issues, a spot repair may be sufficient.
Spot sanding and re-clearing: Lightly sand the affected area using 220-grit sandpaper, then wipe clean with a tack cloth. Apply clear coat to the spot, blending it into the surrounding area.
Feathering and blending: For larger areas, use a gradual feathering technique with your sander to blend the repair into the existing clear coat. Apply clear coat, ensuring even coverage.
If peeling is extensive or inconsistent, full stripping and refinishing may be necessary.
When to consult a pro or replace the substrate
Knowing when to call in a professional is crucial. Extensive delamination and structural paint failure are signs that you may need expert help.
Extensive delamination: If more than 50% of the clear coat is peeling, it’s likely that the entire surface needs to be stripped and refinished. This is a big job that may require professional assistance.
Structural paint failure: Cracking or bubbling paint indicates serious underlying issues. These problems often require professional diagnosis and repair before refinishing can begin.
In some cases, the substrate itself may be at fault. If this is the case, it’s best to consult with a professional who can assess the situation and recommend appropriate action.
Product Selection, Specs, and Tools Checklist
Choose products that are compatible with the base paint and the environment. Read the key spec terms on the label and data sheet to understand adhesion, cure, and compatibility. Build a practical toolkit with the essentials for surface prep, application, and cleanup.
Keep notes on batch numbers, shelf life, and any required primers or activators. When in doubt, verify with the manufacturer instructions or local rules to ensure you meet the applicable standards. Confirm tool compatibility with the chosen finish and spray equipment.
Choosing compatible paint and clear coat chemistries
Before you start, ensure your paint and clear coat are compatible to avoid peeling.
- Check datasheets: Look for technical datasheets from both manufacturers. They should list compatible products.
- Cross-reference charts: Some manufacturers provide cross-reference charts showing approved combinations.
- Recommended system pairings: Manufacturers often suggest specific paint and clear coat pairs that work well together.
- Avoid mixing brands: Different brands may have different chemical compositions, which can lead to incompatibility.
- Check drying times: Ensure the paint is fully dry before applying the clear coat to prevent lifting.
- Match sheens: Clear coats should match or be slightly glossier than the underlying paint for best results.
- Avoid oil-based on water-based: Oil-based paints and clear coats can’t be used over water-based ones due to different chemical compositions.
- Check temperature and humidity: Both products should have similar application requirements.
Quick rule: Always follow manufacturer guidelines for compatible products and application conditions.
Material specs and standards explained
Understanding material specifications helps ensure you’re using the right product for your job.
- VOC (Volatile Organic Compounds): Check VOC levels to ensure compliance with local regulations. Lower is better for indoor use.
- Solids content: Higher solids content means more pigment and less solvent, resulting in better coverage and durability.
- Hardness (Knoop or Sward): Hardness indicates the clear coat’s resistance to marring and scratching. Higher is better for high-traffic areas.
- Gloss level: Check the gloss level to ensure it matches your desired finish.
- Pot life: Pot life is how long a mixed product remains usable before it starts to thicken or harden. Longer pot life means more working time.
- Recommended cure measures: Follow the manufacturer’s recommended curing methods and times for optimal performance.
- Flash point: Check the flash point, especially if you’re using spray equipment. It should be above your working temperature to prevent fire hazards.
- Safety Data Sheet (SDS): Always review the SDS for handling and storage guidelines.
Quick rule: Always check the product data sheet for exact values and follow manufacturer recommendations.
Tools and materials checklist and visual checkpoints
Having the right tools and checking your surface ensures a successful clear coat application.
- Spray equipment: Ensure your spray gun, tips, and hoses are in good condition. Use appropriate tip sizes for your product.
- Respirator: Use a respirator with a particulate filter to protect against paint and clear coat particles.
- Safety glasses: Protect your eyes from debris and overspray.
- Sandpaper grades: Have 120-grit, 180-grit, and 220-grit sandpaper for surface preparation and smoothing.
- Cleaners: Use appropriate cleaners to remove dirt, grease, and contaminants from the surface.
- Tack cloth: Use a tack cloth to remove dust after sanding.
- Surface readiness: Inspect your surface for any defects, cracks, or peeling. Sand and clean as needed.
- Proper film build: Apply clear coat in even, overlapping passes to ensure consistent coverage and proper film build.
Quick rule: Always inspect your surface and tools before starting to avoid issues during application.
Conclusion
Clear coats add protection and a smoother finish when you match the product to the job, prepare the surface correctly, and test first. The payoff is a durable, blemish-resistant coat that keeps paint looking fresh and minimizes peeling risks.
To follow through, treat the work like a controlled process: check compatibility and adhesion on a small area, clean and lightly sand the painted surface, remove dust, and wipe with a suitable cleaner; choose the right clear coat for the paint and environment, apply in the right temperature and humidity range, apply in thin coats with proper drying times, and inspect between coats before the final cure. If you’re unsure, test a small patch, then proceed gradually rather than dumping on a large area.
Two common mistakes to avoid are skipping surface prep and skipping adhesion testing, which invites peeling later. Don’t rush and don’t apply over unknown finishes—safety and patience save you costly fixes. If you’re unsure about the coating compatibility, or you’re dealing with thick old paint, either consult the product’s guidelines or bring in a pro to avoid irreversible damage.
If the job involves tricky substrates, uncertain compatibility, or repeated peeling issues, or you’re close to critical surfaces, consider professional help instead of forcing an on-your-own fix. Stay deliberate, stay safe, and you’ll finish with a durable finish that preserves both look and value.
FAQ
Should I use a clear coat over all painted surfaces, or only in certain areas?
Only use clear coats where there is wear, moisture exposure, or where you want extra UV protection. For high-traffic spots or exterior wood, a clear topcoat can help; for delicate finishes, test first. Follow the paint and clear coat labels for compatibility.
What signs tell me a clear coat will peel over painted surfaces?
Peeling usually shows up as small chips or flaking where the surface flexes or gets moisture. If the paint is poorly adhered or chalky, a clear coat may trap moisture and peel. Do a compatibility test before committing to the full job.
How do I prep painted surfaces before applying a clear coat?
Clean the surface to remove dirt and wax. Lightly abrade to roughen the surface and improve adhesion. Wipe clean and let it dry fully, then follow the clear coat’s directions for any additional prep steps.
What are safe, practical steps to apply a clear coat over painted surfaces?
Follow the manufacturer’s instructions on thinning, mixing, and drying times. Apply in thin, even coats and avoid heavy coats that trap solvents. Allow the surface to cure between coats and protect from dust and moisture during curing.