
Introduction
Clear breathable sealers let moisture escape from stucco while preserving its color. As a DIYer, you want to understand when a finish is appropriate and when it’s better to skip it. This article gives a practical, hands-on view of sealing colored stucco without turning it into a mystery.
Surface prep matters: clean, dry, and repair cracks before you apply anything. Choose a breathable sealer and follow the manufacturer’s instructions for coverage and method, since options vary. Dry time and cleanup are part of the job, so check the label for how long to wait and how to clean brushes or rags safely.
Key takeaways
- Inspect stucco surface for cracks, sheen, or moisture before choosing a sealer.
- Choose breathable sealers to allow vapor escape without trapping moisture.
- Apply with consistent technique, using a roller or sprayer per manufacturer.
- Wait for clear weather; avoid sealing during rain, frost, or high humidity.
- Inspect cured film for uniform appearance and recoat only within window.
- Cleanup promptly with recommended solvent or water rinse; dispose according to labels.
Table of Contents
- Introduction
- Key takeaways
- When to Seal Vs When to Leave Colored Stucco Alone
- Types of Clear Breathable Sealers and How They Work
- Surface Preparation and Visual Checkpoints
- Application Best Practices and Tools Checklist
- Drying Time, Recoat Windows, and Weather Considerations
- Cleanup, Safety, and Label Warnings
- Cost Comparison and How to Choose the Right Product
- Common Mistakes, Troubleshooting, and Long-Term Maintenance
- Conclusion
- FAQ
When to Seal Vs When to Leave Colored Stucco Alone
Start by weighing age, pigment type, and any existing coatings. Look for a clear balance between color protection and breathability. Use a simple decision framework to guide your choice.
Consider surface condition and texture. Assess whether sealing might darken or mute color, or cause blotching on certain finishes. If the stucco is older or has irregular porosity, test patches before deciding.
Signs you should seal
Sealing colored stucco can extend its lifespan, but it’s not always the right choice. Here are signs that suggest sealing is a good idea:
Consistent efflorescence: If your stucco often has white salt deposits (efflorescence), sealing can help prevent this by reducing water absorption.
Powdering or frequent staining: Stucco that’s losing its surface material (powdering) or stains easily may benefit from sealing to protect the substrate and enhance color retention.
Water absorption: If your stucco absorbs water quickly, sealing can help slow this process, reducing the risk of damage from freeze-thaw cycles or prolonged moisture exposure.
Signs you should not seal (or postpone)
While sealing can protect colored stucco, it’s not always the best course of action. Here are red flags to watch for:
Recent paint or color-integrated stucco: If your stucco has been recently painted or is part of a color-integrated system, sealing may alter the appearance or trap moisture beneath the finish.
Active moisture problems: Sealing over wet or damp areas can trap moisture, leading to further damage and potential mold growth. Address any active moisture issues before sealing.
Hairline cracks or failing substrate: Sealing over hairline cracks may cause them to widen as the stucco expands and contracts with temperature changes. Similarly, sealing a failing substrate can trap moisture and accelerate its deterioration.
Quick decision checklist
Use this checklist on-site to help decide whether to test, defer, or proceed with sealing your colored stucco:
- Check age: Is the stucco more than a year old? Sealing too soon can trap moisture and cause damage.
- Inspect surface: Are there any hairline cracks, active moisture problems, or signs of substrate failure?
- Evaluate pigment type: Some pigments are more sensitive to sealing than others. Research your specific pigment if unsure.
- Assess existing coatings: Are there any recent paint jobs or color-integrated systems that could be affected by sealing?
- Test for moisture: Use a moisture meter to ensure the substrate is dry before proceeding with sealing.
- Check climate: Is the temperature and humidity suitable for your chosen sealer’s application and cure requirements?
- Perform small tests: Conduct color, adhesion, and moisture/vapor transmission tests on a small area before full-scale sealing.
- Consider re-coat compatibility: If you plan to recoat after sealing, ensure the sealer is compatible with your chosen finish.
Quick rule: If any red flags are present or test results are inconclusive, it’s best to postpone sealing until the issues can be addressed.
Types of Clear Breathable Sealers and How They Work
Understand the difference between penetrating chemistries and film-forming options. Breathability matters when vapor transfer is needed to prevent moisture buildup. Use this as a quick screening tool for colored stucco.
Compare silane/siloxane, acrylic, and penetrating water-repellents for how they treat moisture and appearance. Note potential whitening or sheen changes on painted or pigmented surfaces. Always check compatibility with existing finishes and local rules before choosing.
Penetrating vs Film-forming Sealers
Sealers for colored stucco come in two main types: penetrating and film-forming. The difference lies in how they protect your surface.
Penetrating sealers, like silane/siloxane or penetrating water-repellents, soak into the stucco to repel water below the surface. They generally preserve vapor permeability, allowing moisture vapor to escape naturally.
On the other hand, film-forming sealers, often acrylic-based, create a surface barrier that can change appearance and reduce breathability. While they offer excellent protection against water intrusion, they may not be suitable for all stucco surfaces.
What ‘Breathable’ Means for Stucco
‘Breathable’ in the context of sealers refers to their ability to allow moisture vapor to pass through. For colored stucco, breathability is crucial.
Stucco absorbs and releases moisture naturally due to temperature and humidity changes. If this process is hindered, trapped moisture can lead to issues like mildew growth or even structural damage over time.
Breathable sealers help maintain this natural process by repelling water while still allowing vapor transmission. This ensures your colored stucco stays looking good and performing well for longer.
Compatibility and Test Patches
Before applying any sealer, it’s crucial to check its compatibility with your colored stucco. Always test a small, inconspicuous area first.
Apply the sealer to a hidden spot or behind an object where it won’t be visible. Observe for any color change, darkening, or sheen over 24-48 hours. This helps you avoid potential issues with your finished surface.
If the test patch looks good, proceed with application. But if there are signs of incompatibility, consider a different sealer or consult a professional to ensure your colored stucco stays protected and looking great.
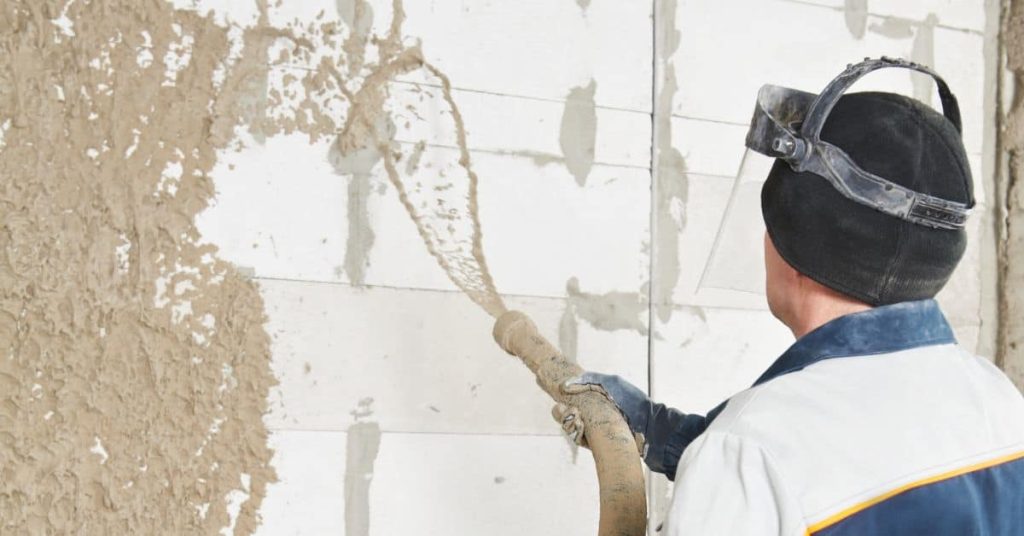
Surface Preparation and Visual Checkpoints
Tailor the cleaning to your texture and color; use safe detergents and low-pressure washing. Be gentle with decorative elements to avoid color fading. Plan for a clean, dry surface before anything is applied.
Identify and repair defects with breathable, compatible products. Remove efflorescence and mineral deposits without abrading the substrate. Do moisture testing and readiness checks to avoid sealing in moisture.
Cleaning and contaminant removal
Before sealing, it’s crucial to clean your colored stucco surface thoroughly. Here’s a checklist to ensure contaminants won’t compromise the sealer.
- Remove dirt: Use low-pressure washing (under 1200 PSI) with a mild detergent to avoid damaging decorative textures or fading color.
- Tackle stains: For tough stains, use poultices specifically designed for stucco. Follow the manufacturer’s instructions carefully.
- Eliminate mold: If you spot any mold, treat it with a specialized mold remover before sealing to prevent recurrence.
- Avoid efflorescence: Remove any white, powdery deposits (efflorescence) using a soft brush or gentle scrubbing. Be careful not to abrade the substrate.
- Check for oil spots: Inspect for any oil stains from construction or nearby vegetation. These can be removed with appropriate cleaners.
- Inspect for mildew: Look for any signs of mildew, which can grow in damp areas and compromise the sealer’s effectiveness.
Quick rule: Always follow manufacturer guidelines when using cleaners to avoid damaging your colored stucco surface.
Repairing cracks and delamination
Before applying a sealer, it’s essential to repair any cracks or delaminated areas on your colored stucco surface. Here’s how:
- Inspect for cracks: Look for hairline cracks (even small ones can affect sealer performance) and larger gaps.
- Check for delamination: Gently tap the stucco with a hammer. If it sounds hollow, there might be delamination underneath.
- Repair hairline cracks: Use a breathable, colored acrylic caulk or paintable crack filler to repair these tiny gaps.
- Fix larger cracks and delaminated areas: Apply a breathable, compatible stucco patching compound. Allow it to cure completely before sealing.
Quick rule: Always ensure repairs are fully cured before applying any sealer to prevent trapping moisture.
Moisture and surface readiness checks
Before sealing, it’s vital to confirm your colored stucco surface is dry and ready for the sealer. Here are some simple checks:
- Perform a touch test: Gently touch the surface. If it feels cool or damp, it might not be dry enough.
- Look for dampness: Inspect corners and edges where moisture can hide. Check for any signs of water damage or mold.
- Use a digital moisture meter: Measure the moisture content in the substrate. Most sealers require surfaces to be below 15-20% MC (moisture content).
- Check for proper curing: Ensure any repairs or new stucco has cured according to manufacturer guidelines before sealing.
Quick rule: Always apply sealers to dry, cured surfaces as per the manufacturer’s instructions to avoid trapping moisture.
Application Best Practices and Tools Checklist
Clarify when sealing is appropriate for colored stucco and how pigment-rich finishes react. If in doubt, verify with the product label or manufacturer instructions. Choose a method that suits the texture and your workflow.
Provide step-by-step application methods for spray, roller, and brush. Focus on even film formation and avoiding pooling. Use the tools and PPE listed on the label and plan for cleanups and safety.
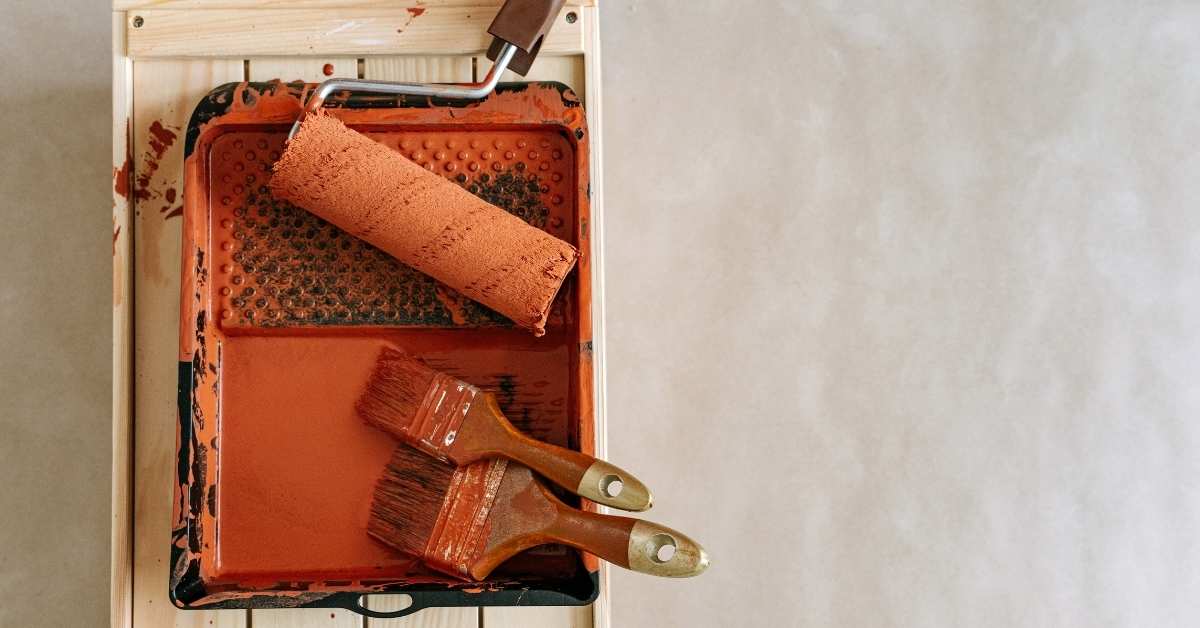
Tools and materials checklist
Before you start applying your concrete sealer, use this checklist to ensure you have everything you need. This will help you avoid common mistakes and achieve a professional finish.
- Concrete Sealer: Check the label for coverage rate and make sure you’ve got enough for your project. A gallon typically covers about 200-400 sq.ft., but check the specific product.
- Application Equipment: You’ll need a sprayer or roller. For large areas, a sprayer is faster and more efficient. For small jobs or touch-ups, a roller might be better. Check your equipment to ensure it’s clean and in good working order.
- Personal Protective Equipment (PPE): Safety first! Check you have gloves, safety glasses, and protective clothing. Some sealers may require a respirator; check the product label.
- Drop Cloths: Inspect your drop cloths to ensure they’re clean and free of any debris that could scratch or contaminate the surface.
- Brushes (optional): For touch-ups, you’ll need a good quality brush. Check it’s in good condition with no missing bristles.
- Test Patch Materials: Before sealing the entire area, do a test patch to check for any adverse reactions and to practice your application technique.
- Tape (optional): If you’re sealing against a wall or other surface, use painter’s tape to protect it from overspray or drips. Check the tape is in good condition and not too old.
- Cleaning Supplies: Before sealing, your concrete must be clean. Check you have a suitable cleaner (like muriatic acid for acidic stains) and a stiff-bristled broom or brush to scrub with.
Quick rule: Always check the manufacturer’s instructions for specific product details and safety precautions before starting any application. It’s your best guide to a successful job.
Application technique and coverage tips
Use this checklist before you start applying your concrete mix to ensure even application, proper coverage, and avoid common mistakes.
- Check mix consistency: The mix should be workable but not watery. If it’s too dry, add water; if too wet, add cement or aggregates (check product label for correct ratios).
- Use a straight edge: For leveling and screeding, use a 2×4 or straightedge to ensure even application and remove excess material.
- Apply in manageable sections: Divide your pour into smaller sections to maintain control over the mix’s consistency and workability.
- Overlap technique: Start from one corner, apply a 3-4″ thick layer, then overlap this by 2-3″ as you move forward. This ensures full coverage and avoids thin spots (check manufacturer instructions for specific overlap recommendations).
- Avoid excess buildup: Keep your application even to prevent excessive material in one area, which can lead to cracking or delamination.
- Calculate coverage: Use the product label’s yield information (e.g., “covers 80 sq. ft. at 1/2″ thickness”) and your project’s dimensions to estimate how much material you’ll need. Adjust for waste and overlaps.
- Check for air pockets: As you apply, use a bullfloat or darby to break up any air pockets that form on the surface (you should hear a popping sound).
- Finish with a smooth edge: Use an edger tool to create a clean, vertical finish along walls and forms.
Quick rule: Always remember: even application, proper overlap, no excess buildup. This will help you achieve a strong, durable concrete surface that lasts.
Test patch protocol
Before applying concrete to your entire project, it’s crucial to perform a test patch. This helps you ensure the right mix, appearance, adhesion, and water repellency. Here’s a simple checklist to guide you through:
- Prepare test area: Choose a small, hidden spot that mimics your project’s conditions.
- Mix concrete: Follow the same mixing process and ratios as your full application. Check mixing techniques if needed.
- Pour test patch: Pour a small amount of concrete into your test area, ensuring it’s level and compacted properly.
- Check initial appearance: Inspect the fresh concrete for any color or texture variations. It should match your expectations based on your materials checklist.
- Allow curing: Let the test patch cure for at least 24 hours, following the same conditions as your project.
- Evaluate cured appearance: Once cured, check if the color and texture match your desired finish. If not, adjust your mix design or consult with a professional.
- Adhesion test: Perform a simple adhesion test by pressing firmly on the patch with a trowel or scraper. The concrete should feel solid and well-adhered. If it feels weak or crumbles, recheck your mix design and preparation.
- Water repellency test: Sprinkle some water onto the test patch. It should bead up and not absorb immediately. If it does, consider adding a water-repellent admixture to your mix.
Quick rule: Always perform a test patch before starting any major concrete project. It’s a small investment of time and materials that can save you from costly rework down the line.
Drying Time, Recoat Windows, and Weather Considerations
Describe how temperature and humidity influence drying and cure without giving fixed times. Highlight that exact figures come from the manufacturer’s data sheet. Use this to plan a weather-safe window for your project.
Explain dew point and moisture risks that affect readiness. Outline practical steps if weather changes interrupt a project. Always consult the product label for precise recoat guidance.
Best weather conditions for sealing
Sealing your stucco in the right weather is crucial. You want dry, moderate temperature, and low humidity.
Rain can ruin a seal. It can trap moisture under it, causing peeling or bubbling. So, avoid sealing before rain.
Freeze-thaw cycles can also damage your seal. If temps drop below freezing after you’ve sealed, the water in the sealer can expand and crack the seal. So, no sealing when frost is expected.
Ideal conditions are 50-85°F (10-29°C) with low humidity. Check your product label for specific recommendations.
Typical drying and recoat guidance
Drying times vary by sealer type and conditions. Water-based sealers dry faster in warm, dry conditions. Solvent-based or acrylic sealers can take longer.
In ideal conditions (65-75°F/18-24°C, 40-60% RH), expect your sealer to be dry to touch in a few hours. But it might need 24-48 hours before you can recoat.
Cool or humid conditions can extend drying and recoat times. Allow extra time – up to several days – if it’s chilly or damp.
Always follow your product label’s recoat window. It’ll tell you the minimum and maximum time before you can apply another coat. If weather changes interrupt this, wait for conditions to improve.
Scheduling and contingency planning
Sealing stucco often takes a few days. Plan ahead with buffer days for unexpected weather.
If rain’s forecast, protect your sealed area. You can use tarps or plastic sheeting to keep off any drizzle. But don’t trap moisture – make sure air can circulate.
Wind can carry contaminants that can mess up your seal. If it’s windy, consider rescheduling. Or, if you must proceed, protect your sealed area from wind-blown debris.
Monitor weather forecasts and adjust your schedule as needed. And always check the product label for precise drying and recoat times.
Cleanup, Safety, and Label Warnings
Cover PPE, ventilation, and safe handling during and after application. Ensure good airflow to minimize fume exposure and keep the work area safe. Follow local disposal rules for containers and rags.
Teach how to read warnings on labels and SDS sheets, including first-aid measures and storage requirements. When unusual conditions arise, contact the manufacturer or a professional with project details in hand.
Personal protective equipment and ventilation
Safety first, buddy. Here’s what you need to protect yourself during application and drying.
- Gloves: Use chemical-resistant gloves. They’re cheap and protect your hands from sealers. Tip: Don’t skimp on quality. $5 gloves are worth it.
- Eye protection: Safety glasses with side shields will do. If you’re spraying, use a face shield too. Tip: Wear them all the time, not just when applying.
- Respirator: Some sealers have strong fumes. Use an N95 or P100 respirator if needed. Rentals available. Around $20/day.
- Ventilation: Keep windows open, use fans for cross-ventilation. Don’t seal up the area tight. Tip: Airflow helps dry faster too.
- Adequate airflow: During application and drying, keep the area well-ventilated to minimize fume inhalation. Tip: If you feel dizzy, get some fresh air immediately.
Clean-up and disposal basics
Once you’re done, it’s time to clean up. Here’s how:
Tools: Water-based sealers can be cleaned with water. Solvent-based ones need solvents like mineral spirits or acetone. Always follow the label.
Containers: Close them tight after use, store upright if possible. Don’t mix empty containers with trash.
Disposal: Follow local regulations. Some places have hazardous waste days. Others require special disposal for sealers and solvents. Always check first.
Common label warnings explained
Product labels have warnings to keep you safe. Here’s what they mean:
Flammability: If it says ‘flammable’, keep away from heat sources and open flames. Don’t smoke while applying.
Respiratory hazards: Some sealers have strong fumes. Use a respirator if needed, ventilate well. If you feel dizzy, stop work immediately.
Environmental cautions: Some sealers are harmful to aquatic life. Don’t let them enter waterways. If there’s a spill, absorb and dispose of properly.
If you’re unsure about any warning, stop, ventilate the area, and contact the manufacturer or a professional for advice.
Cost Comparison and How to Choose the Right Product
Explain true cost per area by considering yield, coverage, and long-term maintenance. Provide a simple way to estimate total project cost without guessing about hidden fees. Use this to compare options rationally.
Assess attributes beyond price such as finish appearance and odor. Consider compatibility with colored stucco and breathability effects. Use a straightforward checklist to verify warranty and label details before purchasing.
Calculating cost per square foot
The true cost of a sealer isn’t just the price tag. You need to know how much you’ll use and what coverage it provides.
First, find the product’s coverage rate on the technical data sheet. It might say ‘covers up to 200 sq ft per gallon’.
Now, divide the container size (in gallons) by the coverage rate:
Cost per sq ft = Container size / Coverage rate
For example, a 1-gallon sealer at 200 sq ft coverage would be $5/sq ft.
Pro tip: Consider your stucco’s porosity. More porous surfaces need more product, raising the cost per square foot.
Value factors beyond price
Price isn’t everything. Here’s what else to consider:
Durability and Lifespan: Check expected lifespan under DIY conditions. Some sealers last 5-10 years, others just 2-3.
Breathability Performance: Ensure the sealer allows moisture to escape (breathable). This prevents mold and peeling.
UV Resistance: For outdoor surfaces, UV resistance is crucial. It keeps your stucco looking fresh longer.
Warranty and Maintenance: Longer warranties and lower maintenance needs mean better long-term value. Read the fine print on both.
When to hire a pro vs DIY
DIY is great, but pros have their place:
Large Façades: High-rise buildings or sprawling walls need safety gear and expertise. Hire a pro.
Complex Scaffolding Needs: If you can’t safely reach the area, call in the cavalry.
Moisture Issues: Complex moisture problems might need professional diagnosis and treatment before sealing.
Pro tip: Even if you DIY, consider hiring a pro for an initial inspection or to check your work.
Common Mistakes, Troubleshooting, and Long-Term Maintenance
Identify frequent missteps like sealing wet stucco or skipping patch tests. Offer practical corrective actions without rushing the job. Use a simple plan to prevent repeat issues.
Provide troubleshooting steps for peeling, whitening, or streaking after sealing. Emphasize a patch-test workflow before full sealing. Outline a maintenance and reseal inspection approach focused on indicators rather than a rigid calendar.
Common application and planning mistakes
Before you start sealing your colored stucco, avoid these common pitfalls.
- Sealing too soon: Stucco needs to cure. Wait at least 28 days before sealing.
- Skipping patch tests: Test sealers on small areas first to check compatibility and aesthetics.
- High-pressure washing: This can damage stucco. Use low pressure when cleaning.
- Over-applying: Too much sealer can lead to issues. Follow manufacturer’s guidelines.
Remember, patience and careful planning are key to a successful seal job.
Troubleshooting appearance or performance issues
If your sealed stucco isn’t looking or performing as expected, here’s how to diagnose and fix the problem.
Darkening: This could be due to over-application. Clean off excess sealer and allow it to dry properly before reapplying.
Poor repellency: Check if you’ve applied the sealer correctly. If not, consult the manufacturer’s instructions or contact a professional.
Spotting: This could be due to contaminants in the stucco. Clean the area thoroughly before resealing.
Long-term inspection and reseal guidance
Regularly inspect your sealed stucco to ensure it’s performing as expected. Here’s a simple checklist.
- Stain migration: Check for signs of stains moving through the sealer. If so, it might be time to reseal.
- Efflorescence: Look for white, powdery deposits. These can compromise the seal and should be removed before resealing.
- Moisture behind finish: Check for signs of moisture. If present, address the source before resealing.
- Visible wear: Inspect for signs of wear or damage. Reseal as needed.
Quick rule: Don’t wait until there’s a problem to check your seal. Regular inspections can prevent bigger issues down the line.
Conclusion
The bottom line is simple: using a clear breathable sealer correctly protects color, preserves the look, and keeps water from getting behind the finish. Do it safely and at the right time, and you’ll avoid costly repairs and enjoy durable results for years.
To move from plan to finish, act like this: inspect the surface for cracks and damage, choose a breathable sealer and test a small area, clean and prep per the product instructions, wait for proper drying conditions, apply in thin even coats with the right tools, recoat only within the specified window, and keep an eye on weather and humidity for the full cure. Work in a simple, repeatable sequence and document any tweaks so you know what to repeat on the next area.
Avoid these mistakes: sealing a dirty or damp wall, choosing a non breathable or incompatible sealer, applying thick coats or skipping the prep, and ignoring the label’s drying and recoat windows. Always wear PPE, follow the product warnings, and test on a small area first before committing to the whole project. If anything looks or feels off—wet spots, soft or crumbling stucco, or unusually long drying times—stop and reassess.
If the project involves extensive damage, complex weather windows, or you’re unsure about the stucco condition, call a professional. Otherwise, stay disciplined with prep, follow the manufacturer guidance, and you’ll finish strong with a durable, good‑looking result. You’ve got this—keep it steady, and seal with confidence.
FAQ
What surface prep steps are essential before sealing colored stucco?
Clean the surface to remove dirt, dust, and loose particles. Repair any cracks or damaged patches, then let the area dry fully before applying sealer. Test a small area first to confirm the finish looks right and the sealer penetrates as expected.
Which application method works best for clear breathable sealers on stucco?
Use a low-pressure sprayer or a brush for even coverage. Back-roll or back-brush after spraying to ensure the product penetrates and to control streaks. Avoid heavy sags by applying thin, even coats and following the product label’s guidance.
How long does drying time usually require after sealing, and what affects it?
Drying time depends on weather, surface moisture, and the sealer. Plan for the surface to feel dry to the touch before any traffic, and allow full cure as per the label before exposing it to rain or heavy use. If in doubt, check the product instructions and local conditions.
What cleaning steps should I follow after using sealant products?
Clean tools promptly according to the product label. Wipe up spills quickly and dispose of rags safely per local rules. Store opened containers in a cool, dry place away from heat and flames.