
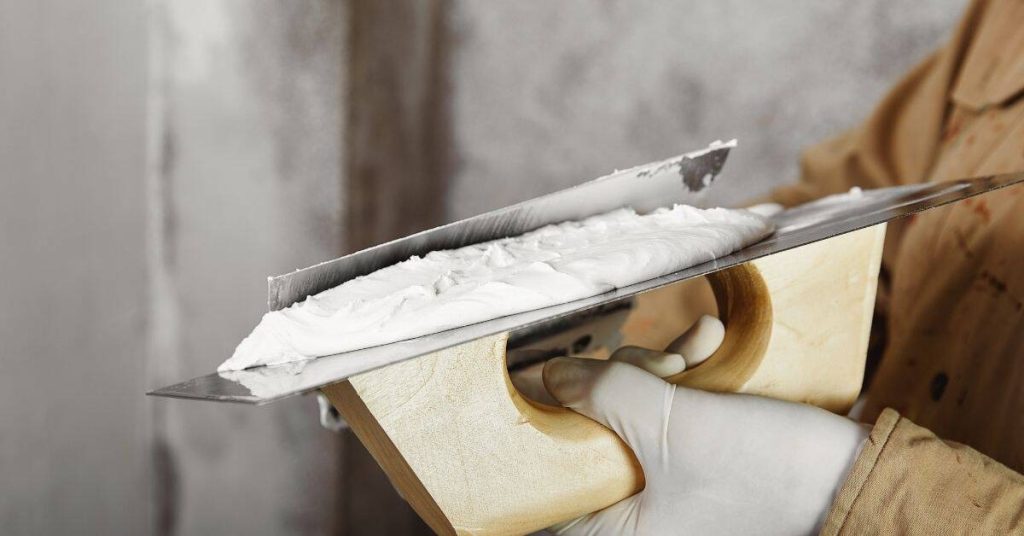
Introduction
Clay plaster can give a bathroom a warm, textured finish, but it is not a universal wet-area finish. Use it only in a location, on a substrate, and with a primer and sealer that the exact product manufacturer approves.
The exact product technical data sheet and installation instructions control. Before starting, verify permitted substrates, primer, coat thickness, number of coats, mixing water, drying and recoat intervals, environmental limits, compatible sealer, sealer cure, cleaning restrictions, and permitted water exposure. If the manufacturer does not expressly approve the bathroom location or substrate assembly, obtain written approval or choose another finish.
Clay Plaster Bathroom Timeline: Step-by-Step Duration
There is no reliable universal “10–35 day” clay-plaster schedule. The project duration is the sum of preparation, any repairs or waterproofing work, each coat’s application and drying time, sealing, and the named products’ final cure. Do not count application time as drying time.
Plan the schedule in this order
| Stage | What happens | Move on only when |
|---|---|---|
| 1. Assess and prepare | Classify the wall location; correct leaks, dampness, mold, failed caulk, loose finishes, and substrate defects. Complete any required waterproofing assembly first. | The substrate is sound, clean, dry, and approved for the plaster system. |
| 2. Prime | Apply only the specified primer or bonding treatment. | The primer has reached its stated dry or recoat condition. |
| 3. Apply coat 1 | Mix and apply at the product-specified thickness and finish it as directed. | The manufacturer’s stated drying check is met. |
| 4. Apply later coats | Apply the specified second or finish coat; repeat the dry-check between coats. | The finished plaster is ready for the approved sealer, if one is required. |
| 5. Seal | Test first, then apply the compatible sealer at its stated coverage and number of coats. | Its dry, recoat, and final-cure requirements have elapsed. |
| 6. Return the room to use | Reinstall fixtures and resume normal use. | The plaster and sealer manufacturers allow it; do not shower, splash, steam-clean, or clean the finish sooner. |
Record the temperature, relative humidity, product batch, mix ratio, and coat thickness as you work. The data sheet—not a generic humidity target—sets application and drying conditions. Keep the exhaust fan working and avoid uncontrolled drafts, direct heat, or added moisture unless the manufacturer specifically permits them.
Key takeaways
Plan the job around approved water exposure and product-specific dry and cure intervals, not around a fixed number of days.
- Use clay plaster on dry walls, ceilings, and only those occasional-splash areas the manufacturer expressly permits.
- Do not use ordinary clay plaster as a shower enclosure, tub-surround, or steam-room lining; a sealer does not make an unsuitable finish waterproof.
- Stop before plastering over active leaks, dampness, mold, failed waterproofing, or an unapproved substrate.
- Use the system’s specified primer, coat thickness, mixing method, and compatible sealer; proprietary clay, cement, gypsum, lime, and tadelakt systems are not interchangeable.
- Wear the PPE required by the product safety data sheet, control dust, and ventilate the work area.
Table of Contents
- Introduction
- Key takeaways
- Why Choose Clay Plaster for Bathrooms?
- Where Clay Plaster Works — Appropriate Bathroom Locations
- Where Clay Plaster Fails — Prohibited or High-Risk Locations
- Application Process for Bathrooms
- Safe Sealing Options and Compatibility
- Tools and Materials Checklist and Material Specs Explained
- Common Pitfalls, Safety Precautions, and Troubleshooting
- Cost, Maintenance, and Lifecycle Comparison
- Conclusion
- FAQ
Why Choose Clay Plaster for Bathrooms?
Clay plaster offers a warm, tactile, low-sheen finish and can absorb and release some airborne moisture. That humidity-buffering behavior may improve comfort, but it does not keep a bathroom mold-free or replace leak repair, cleaning, ventilation, or drying after bathing.
Benefits: aesthetics and hygroscopic performance
Clay finishes can create seamless color and texture on suitable walls and ceilings. Some products are intended for bathrooms with occasional high humidity, but their permitted exposure and approved substrates vary by system. Review the manufacturer’s bathroom-use and substrate limitations before choosing the finish.
Drawbacks: durability and water exposure limits
Clay plaster is not equivalent to glazed tile, a shower membrane, or a waterproof cladding system. Repeated wetting can stain, soften, erode, or loosen it, and abrasion can wear a textured finish. Use it only where it can dry between normal bathroom use. Related guidance: Clay Plaster in Bathrooms: Where It Works, Where It Fails, and Safe Sealing Options.
Where Clay Plaster Works — Appropriate Bathroom Locations
Suitable locations are usually dry bathroom walls, ceilings, powder rooms, and high walls that receive no direct spray and can dry after bathing. A vanity wall or backsplash is an occasional-splash area only if the named plaster and sealer manufacturer expressly permits that exposure. Otherwise, use a splashback or a different finish.
Dry and low-splash zones (ceilings, high walls)
Use a functioning exhaust fan that vents outdoors, and correct persistent condensation before finishing. For long-term mold control, moisture control remains the priority; the EPA recommends keeping indoor relative humidity below 60%, ideally 30–50%, while the plaster product may require different limits during application and drying.
Accented walls and decorative areas
An accent wall away from the shower is often the most practical use. Make a test patch over the actual prepared substrate, let it dry as specified, and check adhesion, color, texture, and the sealer’s appearance before committing to the full wall. Related guidance: Skim Coating over Painted Plaster: How to Test Adhesion Before Committing.
Where Clay Plaster Fails — Prohibited or High-Risk Locations
Avoid ordinary clay plaster inside shower enclosures, on tub surrounds used with a showerhead, in steam rooms, and anywhere with direct or repeated water contact. Manufacturers of clay plaster systems commonly exclude shower interiors even when a sealer is used because continuous water exposure can eventually degrade the plaster; see these clay-plaster wet-area limitations.
Direct-water areas (showers, tub surrounds)
A sealer may reduce staining, absorption, or surface wear. It does not turn an unapproved clay finish into a waterproof shower lining. If a surface is inside a shower, above a tub with a showerhead, or otherwise receives direct and repeated water, use a complete waterproof backing or lining system accepted by local requirements and the finish manufacturer—or select a finish designed for that assembly. The IRC identifies listed liners and bonded waterproof membranes for built-up shower receptors; review the applicable shower waterproofing requirements with the local authority or qualified installer.
Enclosed high-humidity spaces and steam rooms
Steam rooms and poorly ventilated bathrooms keep finishes wet for too long. The main risks are repeated moisture exposure, erosion, inadequate waterproofing, incompatible layers, and substrate movement—not a generic claim that clay’s temperature movement is the primary failure mechanism. Choose a system rated for the actual exposure.
Application Process for Bathrooms
Work only after the room location, substrate assembly, and products have been approved. Do not treat a “moisture barrier” as a substitute for a complete waterproof shower assembly. Plywood, ordinary gypsum board, cement board, masonry, painted walls, and mixed substrates each require specific written approval from the plaster-system manufacturer. Related guidance: Simplifying Your Renovation: Applying One-Coat Plaster to Cement Board.
Surface prep and substrate compatibility
Isolate plumbing as needed and investigate active leaks, damp substrates, condensation, mold, failed caulk, defective shower pans, and failed waterproofing before plastering. Do not cover wet or mold-contaminated material to solve the problem: correct the moisture source, clean or remove damaged material as appropriate, and dry the assembly first. The EPA’s mold and moisture guidance similarly emphasizes fixing water problems before finishing surfaces.
Once the substrate is approved, remove loose material, dust, grease, and unsound coatings; repair defects with the specified repair material; and apply the required primer. If disturbing old paint, use appropriate lead-safe precautions. Confirm the surface is rigid, clean, dry, and adequately bonded before starting the test patch.
Mixing, applying layers, and curing
- Read the exact product instructions and safety data sheet. Measure water and powder only as directed; do not substitute a concrete mix design, a generic ratio, or a cement-plaster procedure.
- Mix a manageable batch in a clean bucket with the recommended tool. Let it stand or remix only if the instructions require it.
- Apply the first coat with the specified trowel or float at the stated thickness. Do not assume a scratch coat, one-inch lift, shovel, bull float, or wet-burlap curing method applies to clay plaster.
- Allow the coat to reach the manufacturer’s dry condition before recoating. Color change alone is not enough unless the product instructions identify it as the check.
- Apply subsequent and finish coats at the required thickness and use only the stated surface treatment. Keep the room within the specified temperature, humidity, and ventilation range.
- After the final coat is dry, apply the approved sealer if the system requires one. Protect the finish from splash, steam, abrasion, cleaning, and fixture work until both products reach their stated final cure.

Safe Sealing Options and Compatibility
Choose a sealer by the exact plaster manufacturer’s approval, not by broad labels such as “breathable,” “natural,” “wax,” “oil,” “silicate,” or “acrylic.” Those formulations vary in water resistance, vapor behavior, appearance, maintenance, and compatibility. A product’s technical data should state where it may be used, how it is applied, coverage, drying and recoat intervals, final cure, and cleaning limits.
Choose and test the approved system
Make a sample on the actual plaster and substrate. Apply the proposed sealer at the stated coverage and number of coats, then inspect it after the stated cure for color shift, tackiness, whitening, pooling, uneven sheen, and adhesion. Stop if the sample softens the surface, changes the finish unacceptably, or fails the manufacturer’s check.
Sealing process and ongoing inspection
Apply only after the final plaster coat is ready under its instructions. Keep edges, transitions, and adjacent waterproof joints complete where the assembly requires them. Inspect the finished wall periodically for loss of the sealer’s stated performance, clouding, peeling, softening, stains, cracks, or persistent dampness. Recoat only when the sealer manufacturer specifies or inspection indicates that it is needed; there is no universal resealing interval.
Tools and Materials Checklist and Material Specs Explained
Assemble product-specific materials before opening the plaster: the approved plaster, primer, sealer, repair material, clean water, masking and drop cloths, and a hygrometer and thermometer. Use the mixing and application tools stated in the instructions.
Essential and Optional Tools
- Mixing bucket and measuring equipment: Keep water and powder quantities consistent with the product instructions.
- Trowels, hawk, float, straightedge, scraper, and sponge: Use the tools appropriate to the finish; keep them clean between batches.
- Drill and paddle mixer: Use only if the product instructions permit mechanical mixing.
- Masking, drop cloths, and cleaning supplies: Protect fixtures, floors, and adjacent finishes.
- Thermometer and hygrometer: Record room conditions against the technical data sheet.
- Gloves, eye protection, work clothing, and dust protection: Select PPE required by the product safety data sheet, especially while handling dry powder or sanding.
Material Specs and Standards to Check
- System identity: Confirm this is the named clay-plaster system. Do not substitute lime, cement, gypsum, tadelakt, or a generic plaster product.
- Approved assembly: Verify the exact substrate, primer, repair products, number of coats, coat thickness, and any reinforcement.
- Mixing and working time: Use only the manufacturer’s stated water quantity, rest time, mixing method, and usable working time.
- Environmental limits: Follow the stated temperature, relative-humidity, ventilation, drying, and recoat requirements.
- Sealer compatibility: Confirm the exact sealer, coverage, number of coats, drying, final cure, cleaning method, and allowed water exposure.
Quick rule: If a specification is not in the product documentation or written manufacturer approval, do not assume a generic plaster specification applies.
Common Pitfalls, Safety Precautions, and Troubleshooting
The common failures are using clay plaster in direct-water areas, applying over a damp or weak substrate, using an unapproved primer or sealer, applying coats too thickly or too soon, and trying to solve a hidden moisture problem by coating over it.
Installation safety (dust control, ventilation, PPE)
Protect floors and fixtures, control powder dust, and ventilate the room without creating drying conditions outside the product limits. Wear gloves, eye protection, and the dust protection specified by the safety data sheet. Keep electrical work, plumbing repairs, and water isolation within your competence; hire qualified trades where needed.
Troubleshooting adhesion, cracking, and staining
Softening, erosion, staining, blistering, or persistent dampness: Stop wet use and find the moisture source. Do not merely add more sealer.
Peeling or delamination: Remove failed material, assess the substrate and primer, and repair only after compatibility and dryness are confirmed.
Cracking: Check coat thickness, drying conditions, substrate movement, joints, and moisture. Hairline surface cracks may be repairable under the product instructions; wider, recurring, or moving cracks need further assessment.
Whitening, tackiness, or uneven sheen after sealing: Stop and consult the sealer manufacturer. These can indicate excessive application, moisture, incompatible layers, or an incomplete cure.
Cost, Maintenance, and Lifecycle Comparison
Budget from actual product quantities and local quotations rather than generic per-square-foot ranges. Include substrate repair, waterproofing work where applicable, primer, plaster, sealer, tools, samples, ventilation improvements, and the time the bathroom cannot be used normally.
Cost factors and budgeting considerations
Costs rise when walls need stabilization, plumbing or waterproofing defects need repair, multiple samples are needed, or an experienced installer is required. A low-splash accent wall is generally a simpler scope than a room with uncertain backing or moisture conditions.
Long-term maintenance and repair strategy
Use the cleaner and maintenance method specified for the sealer and plaster. Keep bathroom ventilation operating during and after bathing, wipe accidental splashes from any permitted low-splash finish, and inspect for discoloration, soft spots, cracks, or failed transitions. Small repairs must use compatible materials; recurring damage calls for moisture diagnosis rather than repeated cosmetic patching.
Conclusion
A successful clay-plaster bathroom project starts with the location decision. Keep ordinary clay plaster out of direct-water and steam zones, solve moisture and waterproofing defects before finishing, and follow the exact system documentation for every coat and cure interval.
If the backing, water exposure, waterproofing, or product compatibility is uncertain, stop and obtain written manufacturer guidance or professional assessment. That decision is safer and less costly than repairing a failed wet-area finish.
FAQ
How long before I can use the bathroom?
Use the plaster and sealer manufacturers’ stated dry, recoat, and final-cure periods. Until both products allow wet use, do not shower, splash, steam-clean, clean the surface, or install fixtures against it. If the instructions do not say, obtain written confirmation.
Can a sealer make clay plaster suitable for a shower?
No. A sealer can provide the specific surface protection documented for that product, but it does not make an unapproved clay-plaster system a waterproof shower or tub-surround lining.
What should make me stop the project?
Stop for active leaks, a damp or mold-contaminated substrate, failed shower waterproofing, uncertain backing, structural movement, or unapproved direct-water exposure. Refer concealed moisture damage, plumbing faults, shower waterproofing, code questions, and extensive mold remediation to qualified professionals.