
Introduction
Dusting after cure on clay plaster happens when a chalky top layer appears due to how you mixed and compacted the plaster. It can stem from under-compact or too much water in the mix, which pulls fines to the surface as the plaster dries. Check moisture content, aggregate fineness, and how the mixture was compacted to decide which path to fix.
Look at placement and curing cues like temperature, timing of set, and how the plaster feels when you touch it. To prevent recurrence, verify guidance on the mix, monitor moisture at the site, and confirm aggregate grading and moisture content as you work. If cracking or dusting persists, seal joints and rework only the surface according to manufacturer instructions and local rules.
Key takeaways
- Check plaster surface for uniform dusting patterns and note whether under- or over-wetting suspected.
- Verify aggregate moisture, fineness, and grade control before remixed plaster is applied.
- Monitor air content and paste workability during mixing and placement.
- Control placement timing and curing conditions to reduce premature drying and cracks.
- Document field findings, tests, and adjustments for QA and future reference.
- Safety: wear respirator or dust mask during sanding and dust removal; avoid inhalation.
Table of Contents
- Introduction
- Key takeaways
- What Is Dusting on Cured Clay Plaster?
- How Under-Compaction Causes Dusting
- How Too Much Water (over-Wetting/Weak Paste) Causes Dusting
- Step-by-Step Field Diagnostics to Determine the Root Cause
- On-Site Remediation Strategies (Temporary and Permanent)
- Preventing Dusting: Mix Control, Placement, Finishing, and Curing Best Practices
- Quality Assurance, Testing, and Documentation for Plaster Projects
- Costs, Safety, and When to Call a Specialist
- Conclusion
- FAQ
What Is Dusting on Cured Clay Plaster?
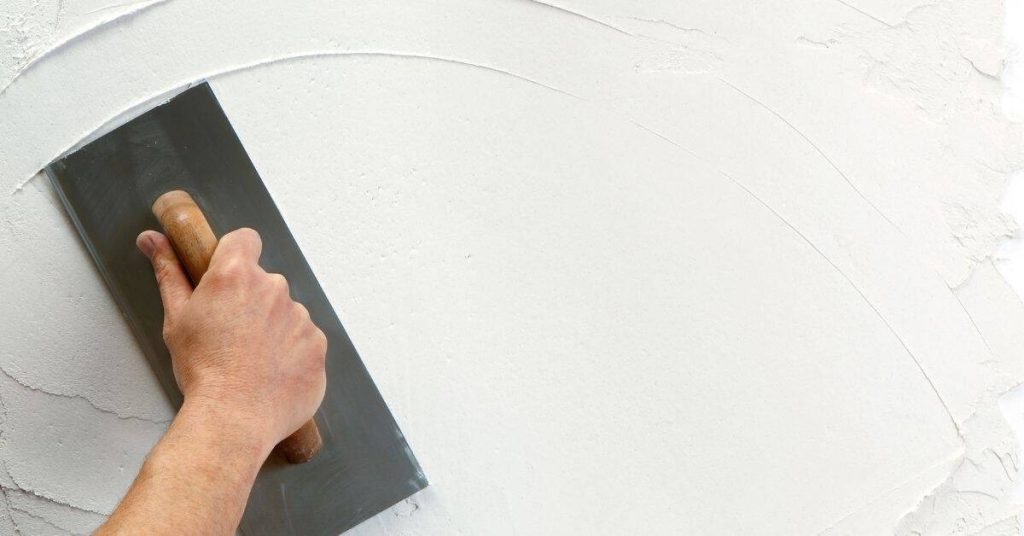
Dusting on cured clay plaster is a thin, powdery film that can rub off. It often shows up as a surface dusting or fine particles at edges and corners. You’ll notice a powdery residue, a duller sheen, and a chalky hand-feel when it’s present.
This condition is distinct from efflorescence, paint bloom, or natural bloom. Efflorescence forms crusty salt deposits, while paint bloom is a moisture-driven film on painted surfaces. Natural bloom appears as crusts rather than a uniform dust. Look for dusting in high-traffic zones, joints, and exposed faces where the film rubs away easily with a dry cloth. Quick field checks and photos help document the symptoms before any cleaning or repair. Frame the diagnosis by linking the dusting to likely causes such as under-compaction or over-wetting, so you know what to test next.
Visual and Tactile Symptoms
Dusting on cured clay plaster presents itself with clear visual and tactile signs. First, you’ll notice a thin, powdery film covering the surface. This residue can be easily rubbed off, leaving behind a dusty handprint or a clean surface where it was removed.
The affected area may also appear dull or lack its usual sheen. The chalky feel under your fingers is another telltale sign of dusting. Unlike a fully cured surface, the powdery layer should rub off more easily.
How Dusting Differs from Salt Bloom/Efflorescence and Surface Contamination
Dusting is distinct from other surface issues like efflorescence, natural bloom, or paint bloom. Efflorescence appears as white, crystalline salt deposits that form crusts, while dusting consists of loose clay fines that can be easily wiped away.
Natural bloom and paint bloom are also different. Natural bloom forms due to mineral deposits appearing as crusts, not a uniform powder. Paint bloom is a moisture-driven film on painted surfaces, not a result of under-compaction or excess water in the plaster itself.
Correctly identifying dusting is crucial because its causes—under-compaction or too much water—require specific remediation steps unlike those for efflorescence or other surface contaminants.
How Under-Compaction Causes Dusting
Under-compaction shows up as a loose surface layer with high porosity that dusts easily when abraded. It corresponds to low surface density and fines that shed from the top lamina. You’ll often see an easier rub-off than a fully cured, solid surface.
Common fault points include placement techniques, insufficient consolidation during settling, and finishing methods that leave surface voids or weak bonds. The mechanics involve loosely bonded surface laminae releasing fines as water content and workability interact. Curing movement can make surface separation worse, increasing dusting potential. During inspection, check the texture (rough, matte), perform a light abrasion test, and listen for a pale, hollow sound when tapped. If under-compaction is suspected, plan consolidation and skim coat steps as fixes.
Typical signs that point to poor consolidation
Under-compaction in clay plaster often leaves telltale signs. Keep an eye out for these during and after application.
Localized soft spots: These indicate insufficient consolidation, leaving areas with low density and weak bonds.
Hollow sounds when tapped: A dull thud instead of a solid sound indicates voids and loose surface layers. Tap the wall gently with a trowel or knuckle to listen for this.
Variable hardness across a wall: Inconsistent compaction leads to areas that feel softer or harder than others when touched lightly.
Visual checkpoints and simple on-site checks
Before you start probing, use these quick, non-destructive checks to assess the surface. Do this after the clay plaster has cured but before any final finishes.
- Inspect texture: A rough, matte surface can indicate under-compaction and high porosity.
- Abrasion test: Gently rub a damp cloth or your fingertip across the surface. If it releases dust easily, there’s likely under-compaction.
- Compare to adjacent areas: Check for inconsistencies in texture and hardness against well-formed patches nearby.
- Tap test: Gently tap the wall with a trowel or knuckle. A dull thud instead of a solid sound indicates voids and loose surface layers.
- Look for settling cracks: Shrinkage cracks near the surface can signal under-compaction and excessive drying.
- Check corners and edges: These areas are particularly susceptible to poor consolidation due to uneven application.
- Inspect joints and seams: Loose or crumbly material here can indicate insufficient consolidation.
- Perform a small scrape or probe: If visual checks suggest under-compaction, carefully remove a small amount of material to confirm weak layers. Be cautious not to damage the surface further.
Quick rule: Always perform these checks before applying any final finishes. It’s easier and cheaper to address issues now than after painting or tiling.
How Too Much Water (over-Wetting/Weak Paste) Causes Dusting
Excess water or over-mixing increases paste content and yields a finer, weaker surface layer that powders easily. This top film may bleed or settle, leaving an under-supported, dust-prone layer. Expect a fragile, powdery finish if water content was driven high during mixing or application.
Substrate moisture, vapor movement, and capillary action influence how bleed-out and drying develop the top coat. Signs of over-wetting include shine, surface slickness, excessive bleeding, and erratic set. Powdering, micro-powder release, and color contrast between the top film and substrate are common cues. Differentiate this from under-compaction by testing for surface hardness and observing texture, then adjust mix, curing, and moisture management accordingly.
Signs that implicate excess water rather than compaction
If your clay plaster is dusting after cure, it’s crucial to figure out if too much water or under-compaction is the culprit. Here are some signs pointing towards over-wetting:
Uniform soft surface across well-formed areas suggests excess water. Water makes the paste spread easily but weakens the final film.
Visible drying rings indicate that water has bled out, leaving a weaker top layer prone to powdering. This is typical of over-wetted plaster.
During early cure, check for any tacky or gummy residues. These are signs of excess water not fully incorporated into the mix. Also, consider if wetter batches or wetter weather during application might be linked to your dusting issue.
Moisture-related diagnostic indicators
Excess water in clay plaster can lead to moisture-related issues that contribute to dusting. Here are some simple ways to diagnose these problems:
Perform a plastic-sheet condensation check. Place a plastic sheet on the affected area overnight. If it’s moist or foggy under the sheet in the morning, there’s excess moisture.
Feel and compare the surface temperature of dusting areas with non-dusting ones. Excess water can cause a cooler, damper feel, even after cure.
If available, use a moisture meter or consider lab moisture analysis to quantify the excess water in your plaster. These tools can help confirm if too much water is indeed causing your dusting problem.
Step-by-Step Field Diagnostics to Determine the Root Cause
Begin with a visual map of surface characteristics, noting laitance, crust thickness, color shifts, and mottling or shiny patches. Classify zones by appearance and photograph with scale, keeping disturbance to a minimum. This guides the subsequent tests.
Next, run quick non-destructive checks for finish uniformity, surface hardness with a light finger press, and a simple drag test to observe dust carry. Then perform moisture-focused checks using a handheld hygrometer and shallow damp-dry swipes to gauge evaporation and capillary action. If results stay ambiguous, consider small destructive samples with precise locations to assess depth-wise moisture and compaction while minimizing disturbance.
Step-by-Step Process
The following steps guide you through a practical field diagnostic process to determine if dusting on your cured clay plaster is due to under-compaction or too much water.
- Prepare and ensure safety: Wear appropriate PPE, keep tools clean, and maintain good lighting. Why: Safety first, and clean tools minimize disturbance.
- Visual mapping: Note laitance, crust thickness, color shifts, mottling, or shiny patches. Photograph with scale for documentation. Why: Identify problem zones and track progress.
- Quick non-destructive checks: Judge finish uniformity, test surface hardness, and observe dust carry during scrubbing. Why: Initial signs of compaction issues or over-wetting.
- Moisture-focused quick tests: Use a hygrometer for surface/subsurface moisture, perform damp-dry swipe, and trace capillary rise. Why: Pinpoint moisture-related problems.
- Targeted mechanical observations: Assess pull-off resistance, knife test bond integrity, and gauge adhesion by indentation. Why: Confirm inconsistent compaction or water distribution.
- Small destructive samples (if needed): Extract micro-slices for depth-wise assessment. Document locations, amounts, and handling. Why: Clarify root cause with minimal disturbance.
Quick triage: mapping and comparison
Begin by mapping dusting severity across your plaster surface. Note areas with the same batch, different batches, protected vs exposed zones.
Timing: Record when dusting started and any weather changes during application.
Compare affected areas to unaffected ones. This helps identify if the issue is localized or widespread. If localized, check if it’s due to specific conditions in that area (e.g., exposure, protection).
Simple on-site tests to run (non-destructive then small-sample)
Start with non-destructive tests: Tap the surface to listen for hollowness, rub gently with your thumb to check for powdering, and place a plastic sheet to observe condensation. Why: Initial signs of under-compaction or over-wetting.
Perform a gentle water solubility test by applying water to a small area. If it dissolves easily, you may have over-wetted the plaster.
If results remain unclear, take a small scrape/core sample to inspect layer integrity. Note: Document precisely where and how much you removed to minimize long-term disturbance.
When to escalate: If particle-size analysis, soluble salts testing, or organic content checks are needed, send samples to a lab for further analysis.
On-Site Remediation Strategies (Temporary and Permanent)
Start by diagnosing root cause—under-compaction vs excess water—and map options from quick spot repairs to panel-wide remediation. Choose breathable, clay-compatible approaches and patch-test before larger applications. Plan both temporary stabilization and long-term fixes.
Temporary steps include crack sealing, surface leveling, moisture management, and breathable stabilizers that limit water ingress while allowing moisture movement. For permanent work, use durable, breathable patches or lime-cement-clay blends suitable for repaired sections, with careful batching and application thickness to maintain panel integrity. Always patch-test first and monitor adhesion, shrinkage, and dusting behavior over time.
Fixes when under-compaction is the cause
If your diagnosis points to under-compacted clay plaster, it’s time for some hands-on work. Here are your options:
Re-compact: If the plaster is still wet and reworkable, gently tamp down the surface with a trowel or float to consolidate it. Be careful not to overwork it.
Peel back and reapply: For dry or semi-dry under-compacted areas, carefully peel off the weak top layer using a sharp tool like a utility knife. Then, reapply a thin bonded skim coat of clay plaster after proper surface preparation.
Remember, patience is key. Allow each repair step to cure properly before moving on to the next.
Fixes when excess water/weak paste is the cause
Too much water in your clay plaster mix can lead to a weak, dusty surface. Here’s how to address this:
Controlled drying: Allow the affected area to dry slowly and evenly. This helps prevent rapid moisture loss that could cause further damage.
Remove loose fines: Gently brush off any loose clay particles from the surface using a soft-bristle brush. Be careful not to scrub too hard and dislodge more material.
Apply a breathable consolidant or compatible skim coat, but patch test first. This ensures compatibility with your existing plaster and prevents trapping moisture, which could lead to further issues.
Preventing Dusting: Mix Control, Placement, Finishing, and Curing Best Practices
Upstream controls start with consistent material prep, stable plasticity, and moisture testing to stabilize the base before mixing. Define target water control ranges and adjust for site conditions to reduce dusting risk. Clarify how to sample and verify base conditions before you begin.
Proportioning and water management require repeatable mix ratios and measured water additions. Set limits for water-to-material balance and adapt for humidity and temperature. Establish placement methods, thickness control, and calm compaction that avoids surface dusting, then time finishing to when the surface is properly set. Implement curing and drying regimes that minimize shrinkage cracking and dusting tendencies, accounting for temperature swings and wind exposure. Use quick field checks to differentiate under- vs over-watering and adjust the next batch as needed.
Mix and materials guidance
The right mix of materials is crucial for a durable, dust-free concrete finish. Here’s what you need to know:
- Concrete mix (e.g., 4000 psi): Look for strength class on the bag. Cheaper mixes may not last. Tip: Use 3000-5000 psi for most residential jobs.
- Sand: Clean, sharp sand is best. Avoid clay-heavy sands that can cause dusting and weak bonds. Tip: Check the label or ask at the store.
- Clay blend (optional): Some mixes include clay for better workability. If not, consider adding a small amount. Tip: Start with 1-2% of the cement weight.
- Fibers or natural stabilizers: These improve durability and reduce cracking. Tip: Use as directed on the package; overuse can weaken concrete.
- Water reducer (optional): Reduces water needed, improving strength. Tip: Start with small amounts to avoid weakening concrete.
- Pigments: For colored concrete. Tip: Check compatibility with other materials and follow manufacturer’s instructions.
Pro tip: Buy materials from reputable sources, store in a dry place, and mix only what you need to avoid waste and degradation.
Placement, compaction and finishing techniques
Once you’ve got your mix right (see Mix and materials guidance), it’s time to place, compact, and finish that concrete. Here’s how:
Layering: Pour in thin layers, no more than 3-4 inches deep at a time. This lets you compact each layer properly.
Compaction: Use a vibrating screed or a hand tamper to compact each layer as you go. Check base compaction before placing the next layer. You want it solid, no soft spots. Remember, proper compaction drives out air and helps prevent dusting later on.
Timing your trowel/floating passes: After the last layer is placed and compacted, wait for bleed water to disappear before floating (usually 15-30 minutes). Then, use a magnesium or wood float to remove any remaining bleed water and bring fines to the surface. Follow up with steel troweling after another 15-30 minutes to give your concrete that smooth finish.
For final texture, you’ve got options: smooth (using power trowel), exposed aggregate, or broomed for a textured look. Choose based on what you need and the local climate. But remember, the smoother the surface, the more susceptible it is to dusting if not properly cured.
Curing, drying and weather planning
Once your plaster is placed, it’s a race against time to protect it from rain and rapid drying. Here’s how:
Check the forecast. Plan your work around dry spells. Don’t risk it if rain’s on the way.
Use breathable protection like burlap or Hessian cloth, not plastic. Plastic traps moisture and can cause problems. Drape it over the area at night or when it’s not being worked on.
Staged drying. Let your plaster dry slowly. Keep it moist for the first few days with a fine mist of water. Then gradually reduce watering as it dries out. This helps avoid cracks from rapid drying.
Quality Assurance, Testing, and Documentation for Plaster Projects
Create a site-specific QA/QC plan with defined roles, acceptance criteria, documentation templates, and timing for pre-application, during, and post-cure checks. This structure helps trace dusting to causes like under-compaction or excess water. Keep the plan practical for DIY work as well as professional projects.
Set up trial panels and performance benchmarks, including substrate prep, mix proportions, humidity targets, and visual/functional acceptance criteria for dusting and cohesion. Maintain rigorous documentation with site logs, material certifications, batch records, and photos to capture deviations and actions taken. Record moisture content, bleed rates, plaster thickness, and cure conditions, plus any lab tests that support root-cause tracing. Develop a simple non-conformance workflow and data-analysis plan to synthesize results into a clear improvement path.
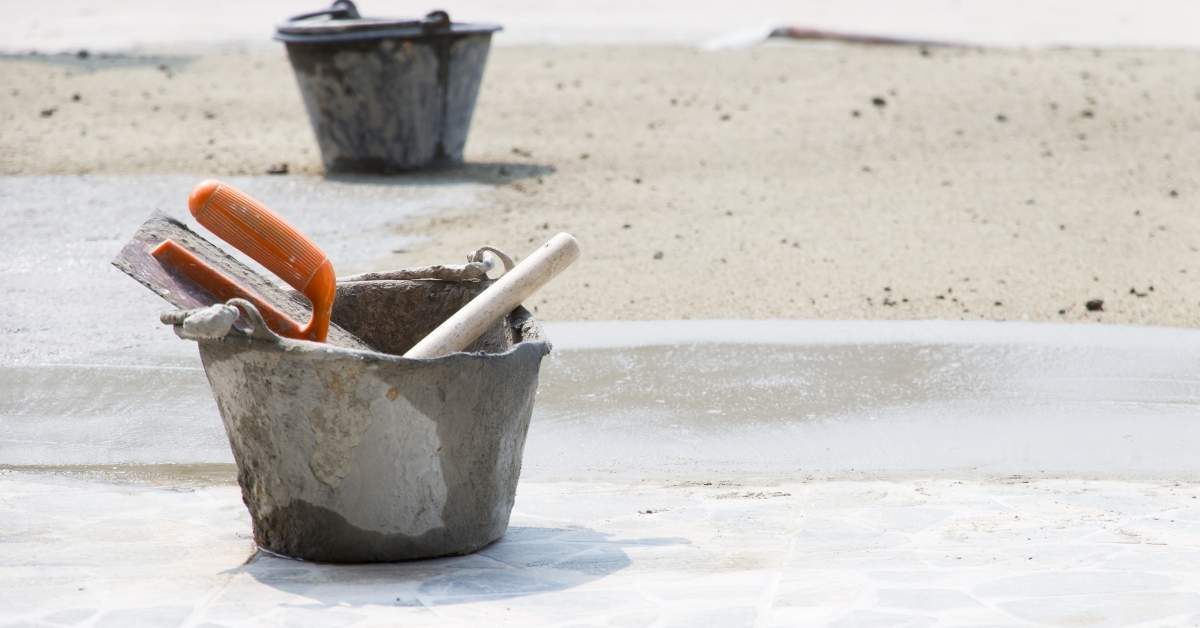
Tools, tests and materials checklist for on-site QA
Before you start your clay plaster project, make sure you have these tools and materials ready to ensure quality assurance (QA) on site.
- Non-destructive testing tools: Tap hammer to check compaction, moisture meter to measure substrate and plaster moisture, plastic sheet and scraper for surface checks.
- Sample containers: Airtight bags or jars for collecting plaster samples for lab tests.
- Safety gear: Gloves, safety glasses, and ear protection.
- Lab analyses: Request moisture content at application, bleed/water loss rates, compressive strength tests to support root-cause tracing.
- Tape measure: To ensure plaster thickness is consistent and within specified range.
- Thermometer and hygrometer: To monitor temperature and humidity during curing.
- Camera: To document trial panels, acceptance checks, and any issues that arise.
- Notebook or tablet: For recording site logs, observations, and actions taken.
Quick rule: Having these tools ready ensures you can diagnose problems early and take corrective action promptly.
Acceptance criteria and trial-panel protocol
To ensure your clay plaster project meets quality standards, establish clear acceptance criteria and run trial panels before full-scale application. Here’s how:
First, define visual and tactile acceptance criteria for surface dusting and cohesion. This could include minimal visible dusting, no flaking or crumbling, and a smooth, consistent texture.
Next, prepare trial panels of specified size (e.g., 2′ x 2′) on representative substrates with varying mix proportions to test different scenarios. Document substrate preparation, mix proportions, humidity/temperature targets for each panel.
After application and cure, perform adhesion/dust transfer checks. Gently rub the surface with a damp cloth or use a pull-off adhesion tester. If dusting occurs, note the severity and compare it to your acceptance criteria. Use these trial results to make evidence-based decisions about mix proportions, compaction techniques, and curing regimens for full-scale application.
Costs, Safety, and When to Call a Specialist
Identify the main cost drivers for remediation and prevention, including materials, labor, containment, disposal, and equipment, with rough ranges for DIY versus professional services. Plan budget and scope before starting remediation work. Consider how patch tests and staged repairs influence overall cost and timeline.
Prioritize safety with a dust-control plan and proper PPE, including respirators and eye/skin protection. Implement ventilation strategies and dust suppression methods and follow MSDS guidance for materials used. Use clear criteria to decide when to perform testing or call in a specialist or lab, especially with persistent dusting, high RH readings, or uncertain material provenance. Document safety measures for homeowner awareness and insurance compliance, and plan preventive measures to reduce future remediation needs.
Typical decision points to engage a pro or lab
When you’re dealing with plaster dusting, it’s not always clear when to tackle the problem yourself and when to call in the pros. Here are some typical situations where engaging a specialist or lab analysis is warranted:
Widespread issues: If the plaster dusting isn’t isolated to one small area but is happening throughout your home, it might be indicative of a larger underlying problem that requires professional attention.
Structural or moisture-source issues: Persistent plaster dusting could be due to structural problems or hidden moisture sources. A specialist can help identify these issues and recommend appropriate repairs.
Historic fabric or finished surfaces at risk: If your home has historic features or delicate finishes, attempting DIY remediation could potentially cause more harm than good. In such cases, it’s best to hire a professional who understands how to work with these materials.
Health and safety precautions during diagnosis and repair
Plaster dusting can pose health risks, so it’s crucial to take necessary precautions when diagnosing and repairing the issue. Here are some key safety measures:
Personal Protective Equipment (PPE): Always wear a respirator or dust mask, gloves, and protective clothing when working with plaster dust. Safety glasses or goggles can also protect your eyes from debris.
Ventilation: Ensure adequate ventilation in the work area to minimize dust exposure. If possible, use fans to direct dust away from you while working.
Consult MSDS and follow local regulations: Before using any consolidants or sealers, consult the Material Safety Data Sheet (MSDS) for proper handling and safety guidelines. Always follow local regulations and manufacturer instructions when applying these products.
Conclusion
Dusting on cured clay plaster is a signal you must act with care: fix it now to protect durability, look, and your safety. Follow the diagnostic steps you’ve learned, test in a small area first, and avoid rushing repairs that can trap moisture or loosen the finish.
In practical terms, confirm the root cause by assessing moisture and compaction, then apply the appropriate on-site remediation and finished care. Start with a quick visual check, then spot-test a small section to see if under- or over-wetting is the culprit, adjust mix and application practices, and document what you did and the results before scaling up. Prioritize safety at every stage, keep water control tight, and verify cure conditions before covering or returning space to service. Focus on testing in a small area first, use the least invasive fix that addresses the root cause, and record outcomes so you can repeat or adjust as needed.
Common mistakes to avoid are rushing to a permanent fix without confirming the cause, applying more water or more material than the surface can tolerate, and skipping safety steps like adequate ventilation, personal protection, and controlled curing. A simple safety rule: work small, test often, and never introduce moisture or material beyond what the surface can handle in a single pass. If you’re not sure after the checks, don’t push through a guess—call a specialist rather than risking irreversible damage.
When to call a professional is clear: if the diagnostic results are inconclusive, if repairs involve complex moisture management, or if the project scope exceeds your comfort with field testing and documentation. A pro can confirm the diagnosis, manage moisture control across the wall, and ensure you meet finishing and curing standards. Stay steady, follow the checks, and your plaster will stay durable and true.
FAQ
How do aggregate properties influence dusting after curing?
Moisture content, particle fineness, and proper grade control affect how the surface dries and dusts. Always check the product label and manufacturer instructions for aggregate specs, and use simple field checks like moisture and feel tests as a guide.
What should I know about mix water and air content for dusting risk?
A paste that’s too wet or mixed with improper water-to-cement ratios can cure with a weaker surface that dusts. Review the mix design and any local guidance, and confirm with the bag or datasheet what to expect for w/cm and air content targets.
How do placement and curing conditions affect dusting?
Temperature, wind, and how soon you finish and cure matter. Keep temps within a reasonable range and avoid fast drying or overly slow curing. Check actual curing recommendations from the plaster product and follow local best practices.
What about QA, cracking, and preventing dusting during curing?
Batch tolerances and crack management govern long-term surface performance. Set realistic batching tolerances, monitor mixing and placement, and seal cracks or joints as specified by the product instructions and local practices. If you see early cracks, don’t ignore them—address per the manufacturer guidance and local rules.