
Introduction
Caulk for concrete block joints is a flexible sealant used to close gaps between concrete blocks to keep out water and air. Choosing the right sealant starts with the joint type and weather exposure, then applying it with the right tools. Keep in mind it should bond to masonry, cure properly, and be compatible with any coatings you plan to use.
Polyurethane, hybrid, and silicone each have pros and limits that affect durability and ease of use. I’ll focus on how they behave during installation, weather resistance, and what to check on the label or instructions before you buy. Always verify local rules and product specs to match your project, and avoid guessing when in doubt.
Key takeaways
- Assess movement expectations; polyurethane offers strong adhesion but requires proper joint prep.
- Silicone remains highly durable outdoors; ensure substrate compatibility and vapor barriers.
- Hybrid caulk balances adhesion and tooling ease, good for varied concrete joints.
- Proper joint preparation is critical: clean, dry, dust-free surfaces before caulking.
- Ventilation and skin protection; avoid strong odors and minimize exposure during curing.
- Paintability and cleanup vary; check label for surface prep and overcoat timelines.
Table of Contents
- Introduction
- Key takeaways
- Why Caulk Choice Matters for Concrete Block Joints
- Quick Primer on Caulk Chemistries: Polyurethane, Hybrid, Silicone
- Performance Comparison: Adhesion, Flexibility, and Durability
- Practical Considerations: Cure, Paintability, Odor, Cleanup, and Vocs
- Joint Preparation and Correct Application for Concrete Block Joints
- Key Specs and Numbers That Matter (Without a Datasheet)
- Maintenance, Inspection, Troubleshooting, and Common Problems
- Choosing the Right Caulk: Decision Guide for Common Scenarios
- Conclusion
- FAQ
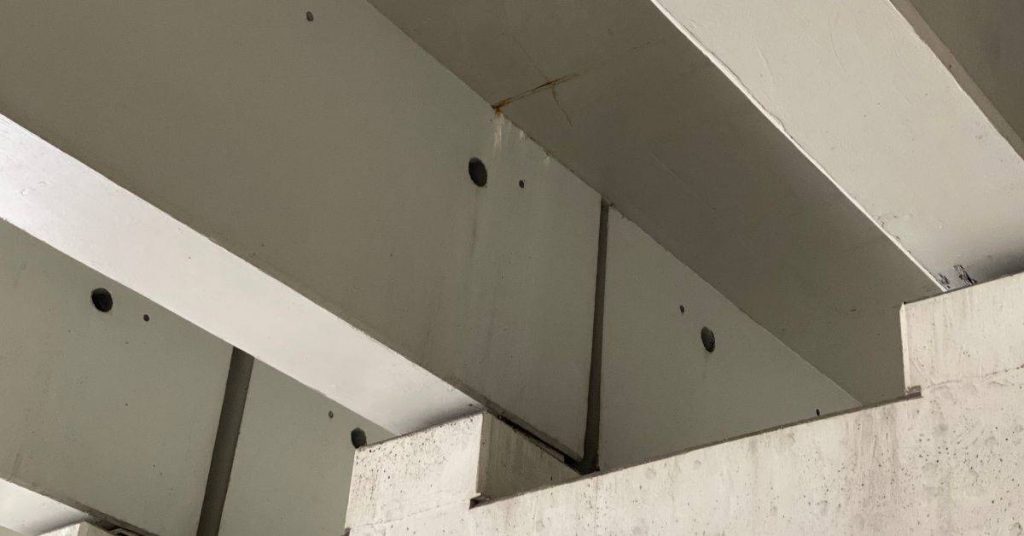
Why Caulk Choice Matters for Concrete Block Joints
Caulk in block joints is more than filler; it’s a last line of defense against water intrusion and uncontrolled movement. The right sealant accommodates joint expansion, contraction, and masonry settling without failing prematurely. Using the wrong type often leads to cracking, peeling, and higher lifecycle costs down the road.
When you pick a sealant, think about where the joint lives, how much movement it sees, and what the exterior elements will do to it over time. A poor choice can invite moisture into cavities, efflorescence, and interior damage to finishes. Check labels and manufacturer notes to confirm suitability for CMU surfaces and expected movement ranges.
Functions of sealant in masonry joints
Sealants play a crucial role in concrete block construction. They’re not just there to fill gaps, they’ve got jobs to do that keep your walls standing and looking good.
Moisture Control: Sealants stop water from seeping into the joints. This prevents damage like efflorescence (those white stains) and mold growth.
Thermal Movement Sealing: Concrete blocks expand and contract with temperature changes. A good sealant accommodates this movement, preventing cracks that let in water and air.
Airtightness & Mortar Deterioration Prevention: Sealants keep out cold air in winter and hot air in summer, saving you money on heating and cooling. They also prevent mortar from washing out or crumbling due to water intrusion.
Consequences of wrong sealant selection
Pick the wrong caulk, and you’re asking for trouble. Here’s what can happen:
Loss of Adhesion: The sealant might not stick to the block surface or mortar, leaving gaps where water and air can get in.
Tearing & Staining: Some caulks can’t handle thermal movement. They’ll crack, tear, or stain as your walls expand and contract.
Accelerated Joint or Wall Damage: Water and air getting into the wrong places can cause joints to deteriorate faster. This weakens the wall, leading to bigger problems down the line.
Quick Primer on Caulk Chemistries: Polyurethane, Hybrid, Silicone
Polyurethane is a tough option that sticks well to masonry and handles movement, but it can be harder to install and cleaner up. Hybrid caulks blend polymers for a balance of adhesion and usability, often with better tooling and cleanup. Silicone is known for resilience in weather but may require priming on some substrates and can be harder to paint.
Label cues to look for include the chemistry class name and common trade names. Read the product data sheets or manufacturer instructions to confirm application surfaces, cure times, and whether painting is possible. Practical note: verify compatibility with CMU blocks and any coatings you plan to apply later.
Polyurethane: overview and typical strengths
Polyurethane caulk is a popular choice for concrete block joints. It’s known for its strong adhesion to porous surfaces like concrete. That means it sticks well, reducing the risk of peeling or cracking.
Durability is another key strength. Polyurethane caulks can last a long time, even in harsh conditions. They’re resistant to UV rays and extreme temperatures, making them great for outdoor use.
They also have good elasticity, which means they can stretch and bend without breaking. This makes them ideal for joints that experience movement due to temperature changes or settling.
Hybrid (MS/polyether/polyurethane blends): overview and typical strengths
Hybrid caulks are a mix of different chemistries, aiming to combine their best features. They’re often a blend of MS polymers, polyethers, and polyurethanes.
The promise of hybrids is that they offer combined benefits. They can stick well (like polyurethane), be flexible (like silicone), and even accept paint (unlike some silicones). This makes them versatile for various applications.
Hybrids often outperform single-chemistry options in terms of flexibility and paintability. However, they might not match the pure polyurethane’s durability or adhesion strength to porous surfaces.
Silicone: overview and typical strengths
Silicone caulk is known for its excellent weather resistance. It can withstand harsh outdoor conditions, making it great for exterior use on concrete blocks.
Flexibility is another key strength of silicone. It can stretch and compress more than other types, making it ideal for joints that experience a lot of movement.
However, silicones have some limitations. They don’t stick as well to some surfaces as polyurethanes do. Also, they’re not typically paintable, which might limit their use in certain applications.
Performance Comparison: Adhesion, Flexibility, and Durability
Adhesion to concrete and mortar is foundational; without it, joints delaminate under freeze-thaw and vibration. Flexibility determines how well the joint handles joint movement without tearing or pulling away. Durability covers wear from sun, rain, and abrasion near doorways and window openings.
In practice, no one sealant wins on every front. Expect polyurethane to excel in adhesion and movement but monitor for UV exposure issues. Silicone often lasts longer in harsh climates but may require priming or coating if you need to paint later.
Adhesion to concrete and porous masonry
When it comes to caulking concrete block joints, adhesion is key. You want a sealant that sticks like glue.
The main factors affecting adhesion are your substrate’s porosity and how well you prep the surface. Concrete is naturally porous, but if it’s too smooth or contaminated with dirt, grease, or old paint, the caulk won’t bond properly.
Primer can help improve adhesion. But remember, not all primers work with every chemistry. Use one that’s compatible with your chosen sealant.
Polyurethane and hybrid sealants typically have the best initial adhesion to bare concrete. Silicone, on the other hand, relies more on mechanical interlocking than chemical bonding.
Elasticity and movement capability
Concrete blocks expand and contract with temperature changes. Joints need to accommodate this movement without cracking the sealant.
This is where elasticity comes in. It’s a measure of how much a sealant can stretch and return to its original shape without breaking.
Silicone is the most elastic, making it ideal for high-movement joints. Polyurethane also has good elasticity, but it may not be as flexible in extreme temperatures. Hybrid sealants offer a balance between the two.
Remember, even with elastic sealants, excessive movement can cause joint failure. So, ensure your blocks are properly aligned and supported during installation.
Long-term durability and weathering
Exterior concrete block walls take a beating from the elements. Your caulk needs to hold up against UV rays, moisture cycling, and extreme temperatures.
UV resistance is crucial for preventing sealant degradation. Polyurethane and hybrid sealants typically have better UV resistance than silicone, but they may discolor over time.
Moisture cycling can cause sealants to swell and shrink, leading to joint failure. Silicone is more resistant to moisture cycling than polyurethane or hybrid sealants, making it a good choice for areas with high humidity or frequent rain.
Aging also plays a role in durability. Polyurethane and hybrid sealants tend to age better on exterior walls, maintaining their elasticity and adhesion over time. Silicone may become brittle and lose its flexibility as it ages.
Practical Considerations: Cure, Paintability, Odor, Cleanup, and Vocs
Choosing the right sealant means looking at cure, paintability, odor, cleanup, and VOCs—these habits vary by chemistry. Don’t expect one product to do it all in every situation. Check the label or datasheet for specifics like cure window, VOC limits, and painting options.
As a DIYer, you need to know how long you can work with it, whether you can paint over it, and how to clean up without making a mess. Odor and disposal rules matter, and local household hazardous waste rules apply for disposal. If you’re unsure about numbers or instructions, check the manufacturer’s guidance and use safe ranges or signs to judge when it’s ready and when it’s not.
Cure behavior and temperature sensitivity
The cure process is crucial for sealant performance. Here’s what you need to know:
Skin time – This is how long it takes for the caulk to dry to the touch. It varies by chemistry:
- Polyurethane: 1-2 hours
- Hybrid: 30 minutes to 1 hour
- Silicone: 30 minutes or less
Full cure – This is when the caulk reaches its full performance potential. It’s affected by temperature and joint depth:
– Temperature: Warmer temps speed up curing. Ideal is 75°F (24°C). Below 50°F (10°C), curing slows significantly.
– Joint depth: Deeper joints take longer to cure due to less exposure to air.
Paintability and finishing
Painting caulked joints can enhance aesthetics. Here’s how each chemistry handles paint:
– Polyurethane: Accepts paint well once fully cured. No priming needed.
– Hybrid: Generally paintable, but may require a primer for better adhesion and to seal the surface.
– Silicone: Not typically painted due to poor paint adhesion. Special primers or paints designed for silicone may be used, but results vary.
Always test a small area first before painting entire joints.
Cleanup, odors, and environmental health considerations
Safety during application and cleanup is paramount. Here’s what to consider:
Cleanup:
- Polyurethane: Use soap and water or mineral spirits.
- Hybrid: Similar to polyurethane.
- Silicone: Requires specialized solvents like denatured alcohol or silicone removers.
Odors: Most sealants have some odor during application. Ensure proper ventilation:
– Open windows
– Use fans
– Consider wearing a respirator for prolonged exposure.
VOCs/Environmental Health: Check product labels and MSDS sheets for VOC content and potential health hazards. Lower VOCs mean less harsh odors and better indoor air quality.
Joint Preparation and Correct Application for Concrete Block Joints
Start with a clean, dry joint surface free of dust, oil, and old sealant. A compatible primer or surface treatment may be required on CMU surfaces; follow the product data sheet. Use a proper backer rod to control depth and ensure a solid base for the caulk.
Tool the bead with a rounded pointing tool or compatible spreader to produce a smooth, continuous seal. Protect adjacent masonry from excess sealant and clean up while the bead is still workable. Always verify surface prep steps per manufacturer instructions and label guidance.
Surface preparation and use of primers
Before applying caulk to your concrete block joints, it’s crucial to prepare the surface properly. This ensures maximum adhesion and longevity of your sealant.
Start by cleaning the joint using a wire brush or a mechanical cleaner. Remove any loose material, dirt, or debris. You can use a solvent like acetone or denatured alcohol for tougher stains. Always follow safety guidelines when handling solvents.
Check for moisture. Caulk doesn’t adhere well to wet surfaces. Use a moisture meter if you’re unsure. If the reading is above 15%, allow the surface to dry or use a primer designed for high-moisture areas.
Based on your chosen caulk’s instructions, apply a primer to enhance adhesion and seal the porous concrete block surface. Primers also help prevent mold and mildew growth.
Backer rods, joint geometry, and sizing rules
Backer rods are crucial for maintaining a consistent joint depth and preventing over-application of caulk. They also provide additional insulation.
Select the right size backer rod based on your joint width. The general rule is to use a rod that’s 1/3 the width of the joint. For example, if your joint is 1/2 inch wide, use a 1/8 inch rod.
Place the backer rod in the joint using a caulk gun or your fingers. Ensure it’s centered and fully seated at the bottom of the joint.
Joint geometry matters. The ideal joint depth-to-width ratio is 3:1. This allows for proper caulk application and tooling, ensuring a long-lasting seal. For instance, a 1/2 inch wide joint should be at least 1 1/2 inches deep.
Application techniques and tooling tips
Applying caulk to your concrete block joints requires the right technique. Here are some best practices and practical tips:
- Gun technique: Hold the caulk gun at a 45-degree angle to the joint. Apply steady, even pressure to create a smooth bead.
- Tooling angle: Use a caulk tool or your finger at a 45-degree angle to the surface. This helps force the caulk into the joint and creates a smooth finish.
- Tooling time: Tool the caulk within 10-15 minutes of application for best results. This ensures the caulk is still pliable enough to be shaped but firm enough to hold its form.
- Optional tools: Consider renting a caulk gun with an adjustable cartridge warmer for cold weather applications, or a caulk tool with interchangeable tips for various joint sizes and shapes. Prices range from $20-$50 per day.
- Avoid common errors: Don’t apply caulk in extreme temperatures (below 40°F or above 90°F). Also, avoid overfilling the joint as this can lead to excess caulk oozing out and creating a messy finish.
Key Specs and Numbers That Matter (Without a Datasheet)
Look for stated adhesion to concrete or masonry and the range of movement the sealant claims to handle. Check tolerances for joint width and depth and any required backer rod specifications. Note cure time windows in terms of handling and functional cure rather than final cure alone.
Interpret terms like “flexible,” “weather resistant,” and “paintable” by cross-checking with the label and product data sheet. If a claim seems vague, verify with the manufacturer instructions or your local building authority for interpretation guidance. Do not rely on marketing alone for critical joint performance expectations.
Key performance terms and test results to check
When choosing a caulk for your concrete block joints, understanding key performance terms and their corresponding test results is crucial. These terms help you evaluate the sealant’s suitability for your project.
Adhesion Testing: This measures how well the caulk sticks to the concrete surface. For masonry joints, high adhesion is vital to prevent peeling or flaking. Look for products with good adhesion ratings, typically on a scale of 0-5.
Movement Capability (Elasticity): Masonry joints expand and contract due to temperature changes and moisture absorption. The caulk must accommodate this movement without cracking or breaking. Check elongation/tensile strength results, usually expressed in percentages. Higher percentages indicate greater flexibility.
Weathering Ratings: These tests simulate long-term exposure to sunlight, heat, cold, and moisture. A good weathering rating ensures the caulk maintains its performance over time. Look for products with high weathering resistance ratings.
How to verify manufacturer claims and select certified products
Manufacturer claims can be enticing, but it’s essential to verify them before making a purchase. Here’s how to ensure you’re selecting certified products with proven performance:
Check Independent Test Reports: Many manufacturers provide test results from independent labs. These reports validate the product’s performance claims and help you make informed decisions.
Certifications and Industry Standards: Look for certifications from recognized organizations like ASTM International or EN standards in Europe. These certifications ensure the product meets specific quality and performance criteria. Some relevant standards include ASTM C834 (Sealants) and EN 15689 (Joint Sealants).
Always compare these verifications across different products to select the one that best suits your needs and ensures top-notch performance for your concrete block joints.
Maintenance, Inspection, Troubleshooting, and Common Problems
Inspect joints periodically for cracking, peeling, or loss of adhesion, especially after seasonal temperature shifts. Early signs of failure include hairline cracks or water seepage at the bead ends. Plan repairs before moisture penetrates the wall system.
For repairs, select a compatible sealant and prepare the joint properly to restore seal performance. Recaulking may require removing old material and re-prepping the joint according to the chosen product’s guidelines. Always consult manufacturer instructions when choosing a repair approach.
Visual checkpoints and inspection schedule
Regularly inspect your concrete block joints to ensure they’re performing as expected. Use this checklist to guide you.
- Cracks: Look for hairline or wider cracks. They can let water in, leading to further damage.
- Adhesion gaps: Check if the sealant has pulled away from the joint faces. This leaves gaps that can collect debris and hold moisture.
- Staining: Inspect for discoloration or staining on the surface of the sealant. It could indicate a chemical reaction or water intrusion.
- Joint movement: Gently push and pull on the joint faces to ensure they’re still firmly bonded together.
- Mold or mildew: Look for signs of fungal growth, which can cause sealant failure over time.
- Weathering: Check if the sealant has become brittle, lost its flexibility, or shows other signs of degradation due to weather exposure.
- Debris accumulation: Inspect for dirt, dust, or other debris that could be collecting in the joint and causing issues.
- Joint geometry: Ensure the joint remains straight and hasn’t shifted or moved out of alignment.
Quick rule: Inspect joints every 6 months for interior applications, and every 3-4 months for exterior areas with high traffic or exposure to harsh weather conditions.
Troubleshooting failures and repair strategies
When you spot a problem, act quickly to prevent minor issues from becoming major ones. Here’s how:
- Adhesion loss: If the sealant is pulling away from the joint faces, you’ll need to remove it and reapply. Use a suitable solvent or remover first.
- Shrinkage: If the sealant has shrunk back from the joint, exposing the concrete, you can use a patch repair kit designed for your sealant type.
- Staining: Light staining may be cleaned off with mild soap and water. Heavy staining or discoloration might require replacing the sealant entirely.
- Cracking: Small cracks can often be patched using a caulk-specific repair product. Wider cracks may need professional attention.
- Mold or mildew: If you find fungal growth, clean it off with a solution of bleach and water (1 part bleach to 3 parts water), then let the area dry before reapplying sealant.
- Debris accumulation: Remove any collected debris using a stiff brush or vacuum. Then, reapply sealant if necessary.
- Joint movement: If the joint faces are moving independently, it could indicate structural issues that need professional assessment.
Quick rule: The sooner you address a problem, the easier and cheaper it is to fix. Don’t wait for minor issues to become major ones.
Choosing the Right Caulk: Decision Guide for Common Scenarios
Exterior blocks with high exposure benefit from sealants with strong weather resistance and good movement capability. Interior joints may prioritize paintability and cleanability, depending on the finish you plan. In high-movement areas, lean toward adhesives with superior flexibility and long-term resilience.
Balance is key: trade-offs between adhesion, ease of use, and finish options will drive the best pick for your project. Use labels, data sheets, and instructions to confirm compatibility with CMU and any coatings or finishes you intend to apply. When in doubt, confirm with the manufacturer instructions or local rules to avoid a mismatched choice.
Quick selection matrix by job condition
When choosing a caulk for your concrete block joints, consider these factors:
Movement: Polyurethane and hybrid sealants are flexible and can handle high movement. Silicone is less flexible but still suitable for low to moderate movement.
Paintability: If you plan to paint the caulked joints, choose a polyurethane or hybrid sealant. They’re designed for painting. Silicone isn’t typically painted.
Exposure: For exterior or high-moisture areas, silicone is your best bet due to its water resistance. Polyurethane and hybrid can be used indoors but may not perform as well outdoors.
Cost, lifespan, and total-cost-of-ownership considerations
Balancing upfront costs with long-term performance is key:
Upfront cost: Silicone is usually the cheapest option. Polyurethane and hybrid are more expensive but offer better performance in many cases.
Lifespan: Silicone has a longer lifespan, often lasting 20+ years. Polyurethane and hybrid typically last around 5-10 years but can be painted and touched up.
Total-cost-of-ownership: Consider how often you’ll need to maintain or replace the caulk. While silicone has a longer lifespan, it may not be paintable, leading to more frequent replacement if you want to change the color.
Example use-cases and recommended approaches
Here are some common scenarios:
Above-grade exterior block wall: Choose silicone. It’s water-resistant, can handle low to moderate movement, and won’t be painted.
Interior control joint (e.g., between a concrete floor and wall): Go for polyurethane or hybrid. These can handle high movement, are paintable, and suitable for interior use. Prep the surface well to ensure good adhesion.
Exterior block wall with painted finish: Use a hybrid sealant. It’s flexible, paintable, and offers decent water resistance. Prime the surface first for better performance.
Conclusion
Getting this right protects your block joints from water intrusion, cracking, and costly repairs, while keeping the look clean and the project durable. The choice you make matters for safety, cure behavior, and long-term performance, so lock in a sensible plan and follow it steadily.
First, verify the joint needs sealing, then pick a caulk type that fits the setting, clean and prep the joint thoroughly, clamp or mask as needed, apply in the proper temperatures, tool and smooth for a tight seal, cure with good ventilation, and test a small patch before committing to the whole job. Keep the work area tidy, read and follow the product directions, and don’t rush cure times or paint compatibility checks.
Common mistakes to avoid are using the wrong chemistry for the joint movement, skipping proper joint prep, or overfilling and gouging the joint so it can’t flex. Don’t skip masking or cleaning, don’t rush cure, and don’t ignore ventilation or odor warnings. Always work in a safe, well-ventilated area and wear gloves when handling caulk and cleaners.
If you’re facing significant movement, persistent leaks, or high-stress conditions on a load‑bearing wall, consider bringing in a pro. For most DIY jobs, a careful prep, correct material choice, and disciplined application will deliver a lasting seal and keep you on budget. Stay practical, stay patient, and you’ll finish with a job that looks good and performs.
FAQ
Which caulk is best for concrete block joints in a DIY project?
Choose based on movement, exposure, and paint needs. Check the product label and manufacturer instructions for block joints, and confirm what the local environment requires.
How do I know when to use polyurethane, hybrid, or silicone for a joint?
Polyurethane handles movement well and grabs to rough surfaces. Silicone stays flexible and resists moisture longer, but may be harder to paint. Hybrid is a middle option; read the label to confirm cure and adhesion guidance.
Can I paint over these caulks, and what should I look for on the label?
Many caulks can be painted after full cure, but not all. Look for paint compatibility notes on the label or manufacturer instructions and follow curing times exactly before painting.
What common mistakes should I avoid when applying caulk to block joints?
Avoid overforcing the bead, skipping joint prep, or rushing cure times. Clean edges well, tool smoothly, and respect the product’s recommended cure and surface prep steps as listed by the manufacturer.