

Introduction
Brick chimney caps and spark arrestors are protective covers on top of a masonry chimney that help contain embers, reduce water intrusion, and influence draft, sizing, and attachment should fit the chimney opening and flue arrangement.
Choose from material options that resist heat and weather, and plan for proper alignment and secure attachment to withstand wind. Installation steps include confirming clearance, sealing or flashing as needed, and ensuring the cap sits squarely to avoid gaps that affect draft. Routine maintenance should include periodic inspection for corrosion, loose fasteners, and any signs of water intrusion or damage that could compromise performance.
Key takeaways
- Choose brick chimney caps with corrosion-resistant material and proper cap type.
- Verify sizing fits flue dimensions and accounts for spark arrestor mesh.
- Attach with flashing-friendly methods and seal edges to prevent leaks.
- Assess airflow tradeoffs: finer mesh reduces embers but may restrict draft.
- Inspect draft performance through testing and adjust geometry and wind exposure.
- Follow safety: use gloves, stable ladder, and avoid working atop wet surfaces.
Table of Contents
- Introduction
- Key takeaways
- Quick Overview: Purpose, Components, and Cap Types
- Sizing Guidelines for Brick Chimneys and Flues
- Attachment Methods and Flashing-Friendly Installation
- Spark Arrestor Mesh Sizes, Airflow Tradeoffs, and Regulations
- Draft Considerations: Geometry, Wind, and Performance Testing
- Step-by-Step Installation Checklist and Common Mistakes to Avoid
- Maintenance Schedule, Inspection Points, and Tools Checklist
- Materials, Climate Considerations, Cost, and ROI
- Conclusion
- FAQ
Quick Overview: Purpose, Components, and Cap Types
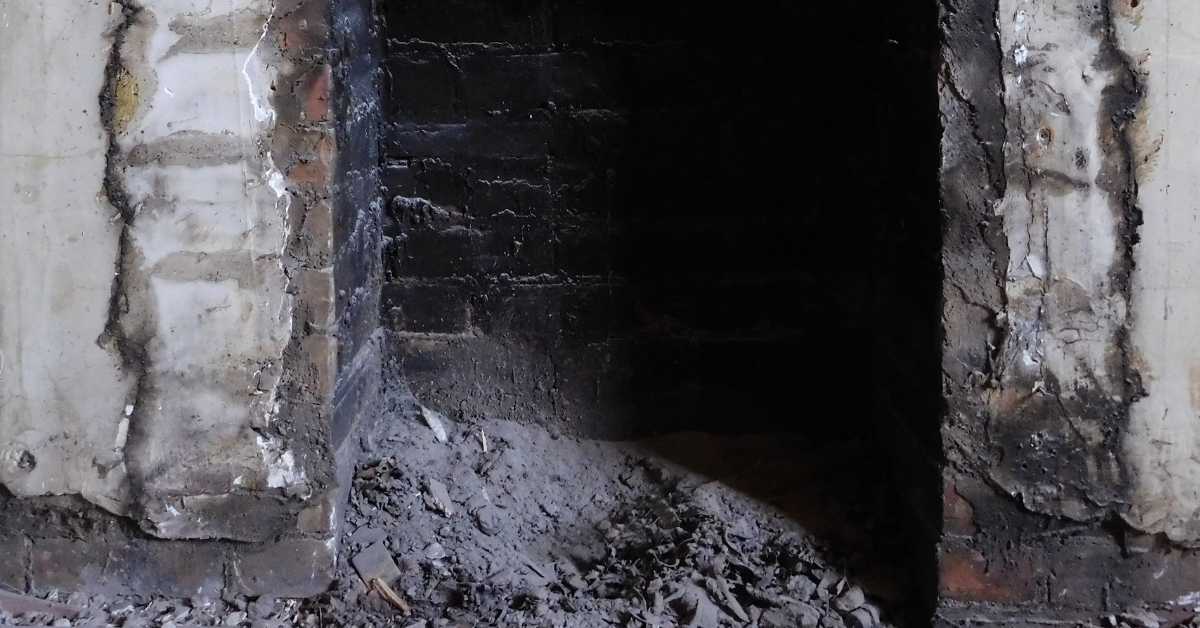
Brick chimney caps and spark arrestors perform distinct protective roles on a chimney system. Caps shield the crown from weather while arrestors trap embers to reduce fire risk, and both help control drafts and moisture intrusion.
Key components include the top itself, the skirt or band, the screen, and the fasteners that secure everything in place. Typical cap types include single-flue top-mount, multi-flue top-mount, band-around brick-mounted, and decorative or specialty designs, each suited to different chimney configurations and aesthetics. This overview helps set expectations for sizing, fit, and compatibility with brickwork in your climate and home layout.
Cap types explained
Brick chimney caps come in various materials and designs to suit different needs. The choice depends on your chimney’s construction, aesthetic preferences, and local climate.
Black Caps: Typically made of galvanized steel or aluminum, black caps are durable and affordable. They blend well with most brickwork but may require periodic painting to maintain their appearance.
Stainless Steel Caps: More expensive than black caps, stainless steel offers superior corrosion resistance, making them ideal for coastal regions or areas with high humidity. Their sleek look complements modern architecture.
Copper Caps: Copper provides excellent weathering properties and develops a unique patina over time. It’s often used in historic restorations or for a distinctive look in new constructions. However, it’s more expensive than other materials.
Band-Around Caps: These caps wrap around the chimney and are secured with screws or bolts. They’re suitable for brick-mounted chimneys and provide good stability against high winds.
Top-Mount Caps: Top-mount caps sit on top of the chimney, held in place by gravity or light fasteners. They’re easy to install but may not be as secure in windy areas. They’re commonly used with single-flue and multi-flue chimneys.
Spark arrestor basics and when they are required
A spark arrestor is a screen that fits over the top of your chimney cap, preventing sparks and embers from escaping. It’s crucial for fire safety, especially in areas prone to wildfires or with nearby combustible materials.
Spark arrestors are typically made of stainless steel wire mesh or expanded metal. They should be checked regularly and cleaned as needed to ensure proper airflow and prevent blockages.
In some jurisdictions, spark arrestors are required by law, especially in areas at high risk of wildfires. Always check local building codes and regulations before installing a chimney cap.
Even if not required, it’s strongly recommended to install a spark arrestor for added safety. It can help prevent chimney fires and reduce the risk of sparks igniting nearby materials or spreading to neighboring properties.
Sizing Guidelines for Brick Chimneys and Flues
Understand three cap types and what you measure: inner diameter for single-flue and multi-flue units, outer dimensions for proper overhang, and centering relative to the brick face. The goal is a snug fit that avoids gaps and unnecessary overhangs capable of letting weather in.
Measurement steps include planning timing, gathering flue specs, confirming outer dimensions of the brickwork, and marking measurements from inside the flue outward. Use practical fit checks to confirm the cap sits flush with crown, and that mortar joints show no gaps. Maintain a small clearance for spark arrestor components and weather seals as applicable.
Measuring single-flue brick chimneys
Begin by measuring the dimensions of your tile opening at the top of the chimney. For square openings, measure both width and height. For round openings, measure the diameter.
Pro tip: Confirm the shape of your opening before measuring to ensure accurate sizing.
Next, measure the dimensions of your chimney crown from the top. This will help you determine if a band-around cap is necessary or if a top-mount cap will suffice.
Common mistake: Re-measure if your initial measurements don’t match or if the cap doesn’t fit flush with the crown to prevent water ingress and draft issues.
Measuring multi-flue and top-mount caps
When measuring for multi-flue or top-mount caps, it’s crucial to measure the full footprint of your chimney top, including all flues. Use a tape measure or laser measure to get accurate dimensions.
Pro tip: Account for any offsets, crowns, or decorative tops that may affect cap size and need to be included in your measurements.
For multi-flue caps, ensure that the cap covers all flues evenly. For top-mount caps, make sure it sits flush with the chimney crown to prevent water damage.
Common mistake: Re-measure if the cap doesn’t cover all flues or sits unevenly on the crown to maintain draft efficiency and prevent water damage.
Liner, flue tile and clearance considerations
If your chimney has a metal liner, size your cap based on the dimensions of the liner. Consult the manufacturer’s guidelines for minimum clearances above the flue to ensure safety and optimal performance.
Pro tip: Measure from the top of the flue or liner to the chimney crown to ensure it meets local codes and regulations.
If your chimney has flue tiles, measure the inner diameter of the tile opening at the top of the chimney. Ensure that there is adequate clearance between the cap and the flue tiles to prevent obstruction of smoke flow.
Common mistake: Re-measure if clearances are insufficient or if the cap doesn’t fit properly over the flue or liner to ensure safety and optimal performance.
Attachment Methods and Flashing-Friendly Installation
Different attachment methods for brick chimney caps—band-around with masonry anchors, bolts to flue tile, and top-mount with straps or bolts—each have strong points and limitations depending on crown material and chimney width. They must interface with crowns and flashing in ways that minimize water paths and maintain seal integrity around the flue. Expect trade-offs in ease of retrofit, wind resistance, and long-term corrosion performance.
Choosing the right method matters for DIY durability and leak prevention. A properly matched method aligns with the existing flashing system and crown surface, requires appropriate sealant and corrosion-resistant hardware, and considers surface prep and step-by-step flashing integration to prevent water intrusion. Quick checks include sizing hardware, verifying compatibility with crown materials, and planning for potential retrofit adjustments on multi-flue or wide flat surfaces, so seals stay intact over time.
Band-around (brick-mounted) vs top-mount fastenings
When choosing between band-around and top-mount chimney caps, consider your specific installation needs. Band-around caps are preferred for retrofits and multi-flue chimneys due to minimal tile penetration.
Band-around caps distribute load evenly across the masonry, reducing stress on individual bricks. They are secured using bands that wrap around the chimney and are anchored with masonry screws or bolts. This method is ideal for existing structures where damaging flue tiles is a concern.
Top-mount caps, on the other hand, are anchored directly to the flue tile and are easier to install in new construction projects with single-flue chimneys. However, they may require more penetration into the flue tile, which could potentially damage it if not installed properly.
Fasteners, corrosion resistance, and sealing
To ensure longevity and prevent water intrusion, use corrosion-resistant hardware and compatible sealants when installing your chimney cap.
Corrosion-resistant hardware, such as stainless steel or galvanized fasteners, extends the lifespan of your cap by preventing rust and other forms of degradation. This is particularly important in high moisture or coastal environments.
When selecting a sealant, choose one that is compatible with both your cap material and the environment it will be exposed to. For example, silicone or butyl-based sealants are typically suitable for most applications. If you frequently experience temperature changes, consider using a heat-resistant sealant.
It’s crucial to avoid mixing incompatible metals as this can lead to galvanic corrosion. Always check your hardware and cap materials before installation to ensure compatibility.
Spark Arrestor Mesh Sizes, Airflow Tradeoffs, and Regulations
Spark Arrestor Selection
Select spark arrestors based on mesh size and opening dimensions to balance ember containment with airflow efficiency. Consider mesh geometry, wire gauge, maintenance needs, and creosote buildup risk. Consult local wildfire or building codes and manufacturer instructions for guidance.
Practical selection depends on chimney type, cap diameter, and roof pitch, ensuring compatibility with spark arrestor assemblies. Key checks include:
- Ensuring the mesh fits snugly without restricting airflow excessively
- Considering climate-related corrosion resistance when choosing materials
For optimal performance:
- Verify cap diameter and review local codes, documenting compliance
- Consider smaller mesh openings like 3/8″ or 1/2″ for ember containment if cap diameter is under 12 inches
- Adjust for steep roofs to maintain draft efficiency
If backpressure or smoking occurs, reassess mesh size or geometry and verify proper installation and clearance.
Mesh size tradeoffs: draft vs ember blocking
Choosing the right spark arrestor mesh size is a balance between maintaining adequate airflow for efficient chimney operation and ensuring effective ember containment for safety. Finer mesh offers better ember blocking but may restrict airflow, potentially leading to creosote buildup if your chimney’s draft is marginal.
If you’re considering finer mesh, be aware that it can slightly reduce airflow. Always check datasheets or labels to compare mesh sizes and consider having a professional evaluate your chimney’s draft performance before making a decision.
On the other hand, coarser mesh allows for better airflow, reducing creosote buildup, but may not provide the same level of ember safety. It’s crucial to strike a balance based on your specific needs and conditions.
Checking local code and wildfire-resistance rules
Before selecting a spark arrestor mesh, ensure it meets your region’s requirements for fire safety. In high wildfire risk areas, local or state regulations may mandate specific mesh sizes or materials to resist embers and sparks.
Start by reviewing manufacturer’s compliance information, as they often publish details about their products’ suitability for different regions. Additionally, consult your local building codes or wildfire-resistant construction guidelines for specific requirements.
If you’re unsure, consider consulting a professional familiar with local regulations to ensure your chosen mesh complies and obtain any necessary approvals. Failing to do so could result in non-compliance penalties or increased fire risk.
Draft Considerations: Geometry, Wind, and Performance Testing
Explain how cap height, overhang, screen area, and geometry influence updraft and downdraft, including how different heights interact with wind exposure. Taller caps can alter the stack effect and susceptibility to gusts, while shorter designs may respond differently to driving winds.
Analyze wind behavior, including direction, gusts, and crosswinds, and how overhangs or domed shapes can mitigate or worsen pressure. Suggest practical testing approaches, from smoke tests to simple flame behavior observations, and indicate when formal testing or professional input is warranted.
How cap geometry and screen area affect draft
The geometry of your chimney cap and the open area above your flue significantly impact updraft and overall chimney performance. Maintaining adequate free area is crucial to prevent backpuffing and ensure efficient drafting.
Cap geometry plays a vital role in channeling air up the chimney. A streamlined, aerodynamic cap design can improve updraft, enhancing your chimney’s performance. However, if the cap geometry restricts airflow or creates turbulence, it may worsen draft and lead to poor performance.
Screen area is another critical factor. If the screen area is restricted or obstructed by debris like bird nests, backpressure can occur, worsening draft and potentially causing safety hazards. To mitigate this, ensure your cap allows sufficient airflow through open mesh or louvers, and regularly inspect for obstructions.
Wind-driven downdrafts and anti-downdraft solutions
Windy conditions can cause downdraft, leading to smoke spillage and safety hazards. In windy locations, it’s essential to consider cap designs or add-on devices that mitigate backflow and improve draft performance.
Common causes of downdraft include high winds, gusts, crosswinds, and vortex shedding around the cap. Overhangs or domed shapes can either mitigate or worsen neutral or negative pressure depending on their design. If your area consistently experiences high wind speeds, consider aerodynamic or anti-downdraft caps to help mitigate backflow.
If downdraft problems persist after installing an anti-downdraft cap, consult a professional for formal draft testing and further recommendations. They can provide tailored solutions based on your specific chimney configuration and local wind conditions.
Step-by-Step Installation Checklist and Common Mistakes to Avoid
Present a safety-first installation sequence that guides a layperson from site prep and measurements to final checks. Emphasize structural integrity, PPE use, and a logical order of operations to minimize risk.
Include precise steps for determining cap size, flue diameter, and crown condition, plus clearances to combustibles. Compare mounting options for brick, stone, or chase installations, and specify appropriate fasteners and sealants. Discuss spark arrestor compatibility, cap geometry, and how wind protection affects draft, followed by common errors to avoid and quick fixes. End with a safety checklist for post-install inspection.
Step-by-Step Installation Process
The following steps outline a safe and effective installation of your chimney cap.
- Preparation: Inspect the chimney for any damage, ensure it’s structurally sound. Gather all necessary tools and materials including PPE (personal protective equipment).
- Measurements: Confirm flue diameter matches cap size. Check crown condition and ensure clearances to combustibles meet local codes.
- Dry Fit: Place the cap on the chimney to ensure a snug, wobble-free fit. Verify weatherproofing is intact.
- Attachment: Using appropriate fasteners and sealants, secure the cap according to material (brick, stone, chase) and manufacturer’s instructions. Integrate flashing where applicable.
- Final Checks: Inspect all fasteners for tightness. Perform a smoke test and visual check for leaks before using the chimney.
DIY Installation Visual Checkpoints
Use this checklist during installation to ensure accuracy and security of your chimney cap.
- Measurements: Verify flue diameter matches cap size. Ensure clearances meet local codes.
- Level Placement: Check the cap is level on the chimney crown before securing.
- Gap Inspection: Ensure there are no gaps between the cap and chimney that could allow water or debris entry.
- Fastener Selection: Use appropriate fasteners for your material (masonry screws, mechanical anchors, brackets) and verify they’re corrosion-resistant.
- Sealant Application: Apply sealant around fasteners and any joints to prevent water intrusion. Check manufacturer’s instructions for recommended sealants.
- Flashing Integration: If using flashing, ensure it’s properly integrated with the cap and chimney to prevent leaks.
- Mesh Inspection: For spark arrestors, verify mesh size meets local regulations and provides adequate draft.
- Cap Fit: Ensure the cap fits snugly without wobbling before securing. Tighten or replace fasteners if necessary.
Quick rule: If any checkpoint fails, correct it or consult a professional immediately.
Common Mistakes and How to Fix Them
These are common mistakes to avoid during chimney cap installation. Learn from them to ensure a successful project.
- Undersized Cap: Using a cap that’s too small can lead to poor draft and instability. Replace with correctly sized cap.
- Loose Fasteners: Loose fasteners can cause the cap to wobble or fall off. Tighten or replace them immediately.
- Incompatible Sealants: Using the wrong sealant can lead to water intrusion and damage. Check manufacturer’s instructions for recommended sealants.
- Insufficient Clearance: Not maintaining clearances to combustibles can pose a fire risk. Ensure you meet local codes.
If unsure about any aspect of the installation, always consult a professional to avoid costly mistakes and ensure safety.
Maintenance Schedule, Inspection Points, and Tools Checklist
Establish a practical maintenance cadence that aligns with seasons and use, including fall pre-season prep, post-winter inspection, and a routine interval for cleaning and minor repairs. Conduct a detailed visual check for outer cap integrity, spark arrestor condition, mortar or base deterioration, rust or corrosion on metal parts, cracks or gaps, moisture intrusion, and any creosote buildup if accessible.
Why it matters: regular care helps prevent leaks and blockages that threaten safety and function, and a documented log supports timely follow-up. A quick on-site check—ensuring the cap is securely attached with no loose pieces—becomes the first step, while an experienced installer would visually inspect all components for wear, including cracks, rust, or missing parts. If more than 25% of the spark arrestor screen is damaged or missing, replace the entire spark arrestor, and if water intrusion is observed around the base or cap, inspect and repair flashing, caulking, or mortar as needed. Use common-sense tools and safety practices, and note seasonal reminders and warranty considerations in a written record.
Seasonal Inspection and Cleaning Tasks
Regularly inspect your chimney cap after harsh weather conditions or heavy use to ensure it remains functional and safe.
- Post-winter inspection: Check for corrosion, loose bolts, blocked mesh, animal entry points, and creosote buildup. Neglecting this can lead to chimney blockages, poor draft, or even a chimney fire.
- Post-storm check: Inspect for any damage caused by high winds, heavy rain, or snow. Delayed repairs can result in moisture intrusion and structural damage.
- Mesh cleaning: Gently remove leaves, bird nests, and other debris from the mesh using gloved hands, a brush, or vacuum. Regular cleaning prevents blockages that could cause smoke to back up into your home.
- Drainage path check: Ensure water can flow freely through the chimney cap’s drainage paths. Blockages here can lead to moisture buildup and damage.
- Creosote removal: If accessible, use a chimney cleaning solution to remove creosote buildup from the chimney cap and flue. Creosote is highly flammable and its accumulation increases the risk of chimney fires.
Quick rule: Inspect your chimney cap at least twice a year – after winter and post-storm seasons – to maintain optimal performance and safety.
Tools and Materials Checklist for Owners
Having the right tools ensures safe, effective installation, maintenance, and inspection of your chimney cap.
- Ladder: A stable, secure extension ladder is essential for accessing your roof. Ensure it’s tall enough to reach the chimney safely.
- Tape measure: Measure twice, cut once – use a tape measure to ensure accurate fitting of your cap and any necessary repairs.
- Safety gear: Wear non-slip footwear, gloves, and eye protection when working on your roof. A harness can provide additional safety if required.
- Screwdrivers/wrenches: These are necessary for removing/installing fasteners. Use the correct size to avoid stripping or damaging them.
- Corrosion-resistant fasteners: Use stainless steel or galvanized screws and bolts to prevent corrosion, ensuring your cap remains securely attached.
- High-temp sealant: Apply a high-temperature silicone or caulk around the base of the chimney cap to prevent water intrusion. Check manufacturer’s instructions for application specifics.
Materials, Climate Considerations, Cost, and ROI
Compare material options such as stainless steel, copper, galvanized, and painted finishes in terms of durability, maintenance, corrosion resistance, and appearance. Each option has a different balance of longevity and upkeep.
Link material choices to climate considerations like coastal salt exposure, freeze-thaw cycles, desert dust, and wildfire-prone areas, noting recommended protective measures. Discuss installation implications related to material behavior and potential coatings. Consider cost implications and basic ROI concepts to guide selection, and offer guidance for choosing a suitable option for various homes and regions.
Material Pros and Cons by Climate
The material you choose for your chimney cap significantly impacts its durability, maintenance needs, and appearance. Matching the material to your region’s climate ensures optimal performance and longevity.
- Stainless Steel: Highly durable and resistant to corrosion. Ideal for coastal regions with salt exposure. Look for 304 or 316 grade stainless steel. Avoid areas with high heat, as stainless can retain heat and cause issues.
- Copper: Offers a unique patina over time and excellent corrosion resistance. Suitable for cold regions with freeze-thaw cycles. Expect some expansion and contraction due to temperature changes.
- Galvanized Steel: Affordable and durable, but susceptible to rusting in coastal areas without proper coating. Good for dry, desert climates. Apply a protective coating for added protection.
- Painted Steel: Customizable appearance and good corrosion resistance with an anti-corrosive primer. Ideal for northern regions with freeze-thaw cycles. Regular touch-ups may be required in harsh environments.
- Coated Options (e.g., Galvalume): Offers enhanced corrosion resistance compared to galvanized steel. Suitable for various climates, but check local availability and suitability with suppliers.
Economic Benefits and Replacement Decision-Making
A well-maintained chimney cap prevents costly masonry and flue repairs, making it a wise investment. Understanding the economic aspects helps in informed decision-making regarding repair or replacement.
Initially, consider the cap’s price, expected lifespan, and annual maintenance costs to calculate its total cost of ownership. Regularly inspecting and cleaning your cap extends its lifespan and reduces repair costs.
If your cap is damaged or underperforming, evaluate whether repair or replacement is more cost-effective. High repair costs or an aging cap may warrant replacement. Consider lower-maintenance materials for future replacements if regular maintenance is costly.
Pro tip: Get local cost estimates for repair, replacement, and annual maintenance to make a well-informed decision.
Conclusion
Getting the chimney cap, spark arrestor, and draft considerations right protects the home, preserves the chimney, and keeps the surroundings looking finished. When sized correctly, attached securely, and tested for draft, the system remains durable and visually tidy.
First, verify sizing and attachment in practical terms: confirm the cap matches the brick opening and flue dimensions, choose a spark arrestor that fits the mesh size and local debris expectations, plan a flashing-friendly attachment, and perform a simple draft check after installation. Then proceed in a steady sequence: measure, select components, prep the opening, install with proper flashing, fit the mesh, and conduct a draft test in light wind and calm conditions before finalizing.
Avoid common mistakes such as underestimating the impact of wind on draft, sealing around flashing in a way that traps moisture, over-tightening fasteners, or selecting mesh that is too coarse for the expected debris. Practice safe handling, test the system in stages, and never compromise flashing or waterproofing to save time. If in doubt about sizing, flashing compatibility, or local regulations, pause and verify with product labels, manufacturer instructions, or local building rules before proceeding.
When to call a professional: if brick damage is evident, if the chimney has unusual geometry, or if you cannot safely access the roof for flashing inspection. Otherwise, follow the steps above with careful measurement, controlled testing, and clear documentation, and you will have a reliable, low-maintenance cap and arrestor that stands up to weather and helps airflow behave predictably.
FAQ
What material options exist for brick chimney caps and spark arrestors, and how do they differ?
Common options include stainless steel, galvanized steel, and copper. Stainless steel resists corrosion well, copper develops a patina and lasts a long time, and galvanized steel is usually more affordable but may corrode faster in harsh climates. Check manufacturer instructions for corrosion resistance and suitability to your chimney size.
Why choose a standard chimney cap for a brick chimney, and what benefits does it provide?
A standard cap helps shield the flue from rain, debris, and animals while allowing proper draft. It can also reduce water intrusion into the brick and help prevent damage to the interior of the chimney. Proper sizing and attachment ensure stable performance over time.
What is the typical installation process for a brick chimney cap, and what should I confirm before starting?
Confirm cap size matches the flue opening and that flashing or mortar joints will not be compromised. Use appropriate fasteners, sealant, and, if needed, flashing while following the cap manufacturer’s mounting instructions. Avoid loosening existing brickwork or weakening the chimney structure.
What maintenance tips help ensure long-lasting performance of chimney caps and spark arrestors?
Inspect for corrosion, loose fasteners, and damaged mesh regularly. Clean debris from the crown, cap lip, and surrounding area to maintain airflow. Replace any degraded components per the manufacturer’s guidance and local conditions.