

Introduction
Brake caliper paint is a coating applied to the caliper to improve corrosion resistance and appearance.
This article covers how to prep the surface, choose the right paint, and apply it safely in a DIY setting.
Common problems include peeling, chipping, or uneven finish, which usually point to surface prep or curing issues.
Always check the product label and follow manufacturer instructions for prep, heat resistance, and curing times, and verify local rules before starting.
Key takeaways
- Inspect calipers for rust, leaks, and wear; repair or replace as needed.
- Clean thoroughly with degreaser; remove all oils and brake dust before painting.
- Mask components and joints to protect rubber seals and adjacent finishes.
- Apply even coats after cooling; wear PPE and ventilate the workspace.
- Test adhesion on a hidden spot; check heat resistance after gradual braking tests.
- Maintain calipers by regular cleaning and re-coating when paint dulls or chips.
Table of Contents
- Introduction
- Key takeaways
- When and Why to Paint Brake Calipers
- Tools and Materials Checklist
- Prep: Cleaning, Degreasing, and Surface Repair
- Masking, Disassembly, and Paint Application Methods
- Tests to Evaluate Adhesion, Durability, and Heat Resistance
- Common Problems and Step-by-Step Fixes
- Visual Checkpoints and Quality Standards
- Maintenance, Longevity, and Preventive Tips
- Conclusion
- FAQ
When and Why to Paint Brake Calipers
Paint is often used to protect calipers from corrosion and to refresh their look. It can also restore a worn or faded finish to something near original. Start by inspecting the caliper condition to decide if painting is appropriate.
Consider aesthetics, corrosion status, and whether the hardware needs attention before painting. If the calipers show deep rust, leaks, or loose components, address those issues first. Always verify manufacturer guidance or local rules before proceeding.
Assessing caliper condition before painting
Before you grab that paintbrush, it’s crucial to check your brake calipers’ condition. Paint won’t fix underlying issues, and you don’t want to waste time or money on a quick fix.
Start by checking for leaks. If there are any, they’ll usually be around the pistons or at the bleeder valve. A leak could indicate a worn-out seal that needs replacing before painting.
Look out for pitting, too. This is when small holes form in the caliper due to corrosion. Pitted calipers can’t be painted over, as the paint won’t stick properly and will flake off over time. If you find any pitting, it’s best to replace the caliper.
Seized pistons are another issue to watch for. If a piston doesn’t move smoothly when you press the brake pedal, it’s seized. This needs fixing before painting. Lastly, check for any structural damage. Bent or cracked calipers need replacing, not painting.
Performance and heat considerations
Brake calipers get hot – really hot. That’s why it’s important to choose a paint that can handle high temperatures without breaking down or peeling.
The main job of your brake calipers is to dissipate heat from the brake pads and rotors. If you use the wrong paint, it could insulate the caliper instead of letting heat escape. This can lead to reduced performance and even warping of the rotor.
Always check the manufacturer’s temperature rating for any paint you’re considering. It should be able to withstand at least 500°F (260°C). If it can’t, keep looking.
Also, consider the paint’s color. Dark colors absorb more heat than lighter ones. So, if your car spends a lot of time in direct sunlight, you might want to stick with lighter shades.
Tools and Materials Checklist
Gather a basic set of hand tools, PPE, and selected paints designed for automotive use. Include brushes or a spray device, along with masking supplies to protect adjacent parts. Have rust remover or prep products on hand if needed.
Keep optional shop tools handy for a cleaner job, such as a drill with a small stainless wire brush and a shop vacuum. Check product labels for compatible primers, topcoats, and cure times. If unsure, consult the manufacturer instructions or local guidance before purchasing.
Essential PPE and Safety Gear
Before you start painting, ensure you’re protected from brake dust and paint fumes.
- Respirator: Use a half-face respirator with P100 filters to protect against brake dust and paint fumes.
- Gloves: Wear nitrile gloves to protect your hands from chemicals. Change them if they become contaminated.
- Eye Protection: Use safety glasses or goggles to shield your eyes from debris and splashes.
- Ventilation: Work in a well-ventilated area, preferably with a fan blowing away from you. If working indoors, use a respirator.
- Coveralls: Wear disposable coveralls to protect your clothing and make cleanup easier.
- Safety Glasses: For added eye protection, consider using safety glasses with side shields.
- Hearing Protection: If using power tools like sanders or grinders, wear earplugs or earmuffs.
Quick rule: Always prioritize your safety. Don’t skip any PPE items to minimize health risks.
Paint Types and Compatible Primers
Choose the right paint and primer for optimal adhesion and performance.
- Heat-Rated Caliper Paint: For most applications, use heat-rated caliper paint designed to withstand high temperatures. Check the label for temperature ratings.
- High-Temp Enamel: If you can’t find heat-rated caliper paint, use high-temp enamel paint rated for 500°F (260°C) or higher.
- Ceramic Coatings: For added protection and easier cleaning, consider ceramic coatings designed for brake calipers. Check compatibility with your chosen primer.
- Primer Selection: Match the primer to your paint type. Use a self-etching primer for better adhesion on bare metal or use a universal primer if unsure.
Quick rule: Always match the primer to the paint type and check temperature ratings to ensure durability.
Prep: Cleaning, Degreasing, and Surface Repair
Begin with a thorough cleaning to remove brake dust, grease, and old wax. Use an appropriate degreaser and a clean cloth, then rinse if the product allows. Let the surface dry completely before moving on.
Inspect for rust, pitting, or damaged hardware and plan repairs or replacements as needed. If you see loose pins or seals, address them prior to painting. Always follow the product label for removal and compatibility notes.
Safe brake-dust removal and cleaning methods
Brake dust is abrasive and can cause lung irritation if inhaled. Avoid using compressed air to remove it, as this can create a dust cloud.
Instead, use approved brake cleaners designed for this purpose. Spray them on, let them soak, then wipe off with a clean cloth or brush.
Never use household cleaning products like bleach or ammonia, as they can damage the caliper’s finish and cause corrosion.
For tougher grime, try a wet-cleaning method. Soak a cloth in brake cleaner, wrap it around the caliper, secure with tape, and let it soak for 15-30 minutes before scrubbing and wiping off.
Rust and old-paint removal techniques
To remove rust and old paint, start with mechanical methods. A wire brush or sandpaper can scrub away loose material.
For heavier rust, consider media blasting. This uses compressed air to propel a fine abrasive (like glass beads or aluminum oxide) onto the surface, removing rust and old paint quickly.
Chemical strippers can also help, but they may not be necessary if you’ve already removed loose material mechanically. Always follow manufacturer instructions when using chemicals.
If you’re down to bare metal, make sure it’s clean and free of any remaining rust or contaminants before painting.
Masking, Disassembly, and Paint Application Methods
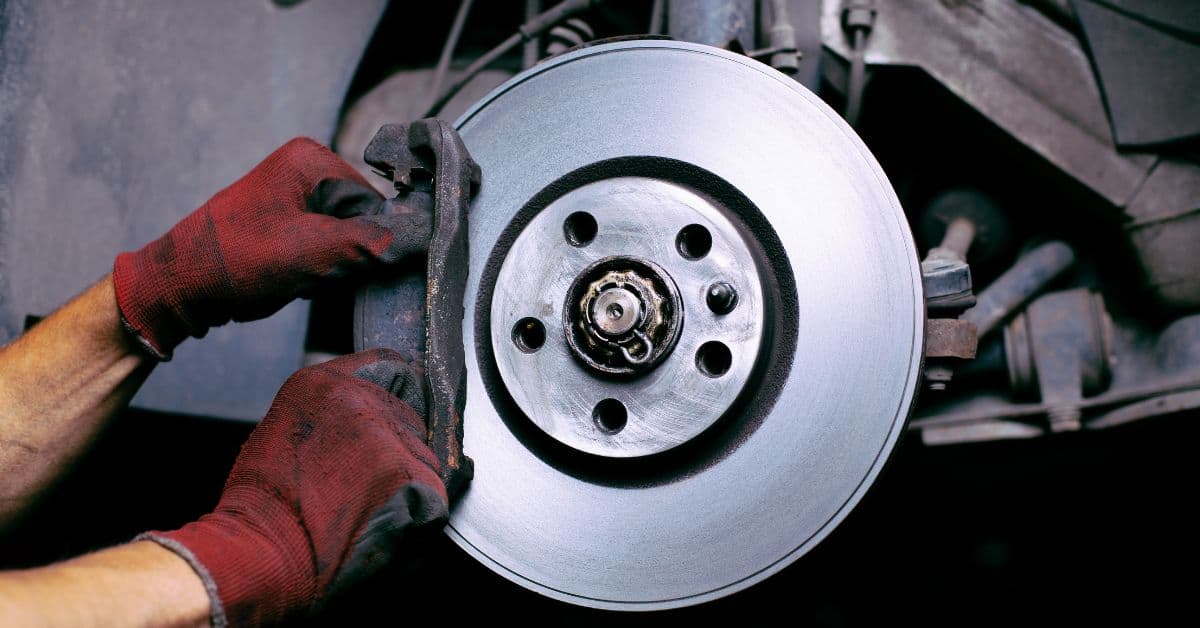
Mask carefully to protect rotors, pads, and lines, using painter’s tape and high-temp masking materials. Consider whether removing the caliper will simplify masking and improve coverage. Decide between spray, brush, or ceramic coatings based on your setup and expertise.
Understand the pros and cons: spray can give even coats but requires good ventilation; brush work offers control in tight areas; ceramic options may provide durability but can need careful curing. Always verify masking guidelines and application instructions on the product label or manufacturer sheet.
Effective masking and protecting brake components
Before you start painting, protect the areas around your calipers. Here’s what to mask:
- Rotor faces: Use high-temp tape or plugs to cover them. Overspray here can cause braking issues.
- Pads: Protect them with cardboard or plastic sheets held in place by tape.
- Hoses and lines: Cover these with plastic bags secured by rubber bands to keep paint off.
Remember, high-temp tape is crucial. Regular masking tape won’t withstand the heat of your brakes.
Painting workflow and layering technique
Applying paint in thin, even coats is key to a smooth finish. Here’s how:
- Start with a thin base coat. This primes the surface for better adhesion.
- Let it flash – wait about 10-15 minutes before applying the next coat. This gives the paint time to set but not dry completely.
- Apply subsequent coats, maintaining an even distance and motion. This helps prevent runs or orange peel.
- After each coat, let it flash again before moving on. Most paints require 3-4 thin coats for full coverage.
Be patient. Thin coats may seem slow, but they’ll give you a professional-looking finish with no runs or drips.
Tests to Evaluate Adhesion, Durability, and Heat Resistance
After curing, perform simple adhesion checks by gently testing a small area to ensure the paint sticks without peeling. Look for a uniform film with no chipping along edges. Refer to the product’s curing guidelines for heat resistance expectations.
Ensure the painted surface won’t contaminate braking components by inspecting for bleed-through or tackiness. If in doubt, consult the paint data sheet or manufacturer instructions for proper post-cure handling. Verify any local rules or guidance that may apply to automotive finishes.
Adhesion test and visual inspection checklist
Use this checklist after painting to ensure your caliper paint has adhered properly.
- Check for pinholes: Look closely at the painted surface. Pinholes can lead to rusting and paint failure.
- Inspect for lifting: Gently press on the paint. Any lifting indicates poor adhesion.
- Perform tape test: Apply painter’s tape, let it sit, then pull it off. If paint comes off, it hasn’t cured properly.
- Examine edges: Check where the paint meets masked a