
Introduction
The best trowel angles for beginner plasterers are the angles that keep the blade nearly flat against the surface to reduce gouges. Maintain a steady, light pressure and smooth motion to minimize digging into the plaster. Start with small, even passes and check your work as you go.
Different trowel types and edge shapes affect finish quality, so choose a blade you can control with confidence and use the corresponding technique to avoid gouges and lap marks. Focus on consistent angles, gradual builds, and keeping the trowel moving smoothly to blend sections without creating ridges. When in doubt, consult manufacturer instructions and verify with the product label for allowed practices and care.
Key takeaways
- Choose trowels with rounded corners and appropriate blade width to reduce gouges.
- Angle the trowel correctly during application to control pressure and lay down evenly.
- Avoid lap marks by layering thin coats and feathering edges with consistent strokes.
- Understand plastering workflow: preparation, priming, application, and final smoothing in sequence.
- Different trowels exist: finishing, warding, and margin styles suited to beginners.
- Safety: wear eye protection and masks; clean tools to prevent injuries and glare.
Table of Contents
- Introduction
- Key takeaways
- Understanding Trowel Angles and Why They Matter
- Types of Trowels and Best Choices for Beginners
- Techniques to Avoid Gouges and Lap Marks
- Common Beginner Mistakes and How to Fix Them
- Tools, Materials, and Prep Checklist
- Achieving a Professional Finish: Workflow and Visual Checkpoints
- Safety, Costs, and Project Planning
- Conclusion
- FAQ
Understanding Trowel Angles and Why They Matter
Angles define how much surface the trowel contacts and how force is distributed across the blade. Different attitudes promote more or less material spread, which in turn affects setup speed and the workability of the mix. The angle you hold can change the contact area, influencing friction, slip, and how quickly the plaster or mortar starts to set. Visual tests and touch cues help confirm whether an angle is giving you the intended contact without overloading the edge.
Finish quality hinges on choosing angles that minimize gouges and lap marks while maintaining a consistent thickness. For plaster and concrete pours, the risk of visible ridges grows if the angle is too shallow or too steep for the task. Try safe, task-specific ranges and calibrate on a small patch, noting how the material responds when you adjust the blade. Keep an eye on the feedback through the handle and the surface response to verify you are within a workable window.
How angle influences thickness and finish
The trowel’s angle determines how much material it deposits or scrapes off, affecting the final surface quality. A shallow angle, close to horizontal, allows more material to be deposited, potentially leading to thicker coverage but also increased risk of ridges and unevenness.
Conversely, a steep angle, closer to vertical, scrapes off excess material, resulting in thinner coverage. However, if the angle is too steep, it may scrape off too much material, leaving the surface thin or bare spots.
To achieve an even finish with consistent thickness, adjust your trowel’s angle based on the material and desired outcome. For instance, when floating, use a shallower angle to fill in low spots; for feathering or cutting, use a steeper angle to smooth out high spots.
The mechanics behind gouges and lap marks
Gouges and lap marks are common issues that can mar the finish of your plaster or concrete work. They result from improper pressure, blade condition, and trowel angle.
When the blade edge is dull or damaged, it creates increased friction with the surface, leading to deep grooves called gouges. To prevent this, regularly inspect your trowel’s blade and sharpen it as needed.
Excessive pressure applied while using a trowel at too shallow an angle can cause overlapping ridges known as lap marks. To avoid this, ensure you’re using the correct angle for the task at hand and adjust your pressure accordingly. Additionally, maintain proper material consistency to facilitate smooth application.
Regularly check your trowel’s handle feedback during use. If it feels too stiff or resistant, you may be applying excessive pressure. Conversely, if it feels too loose or light, you might not be applying enough pressure. Adjust as needed for optimal results.
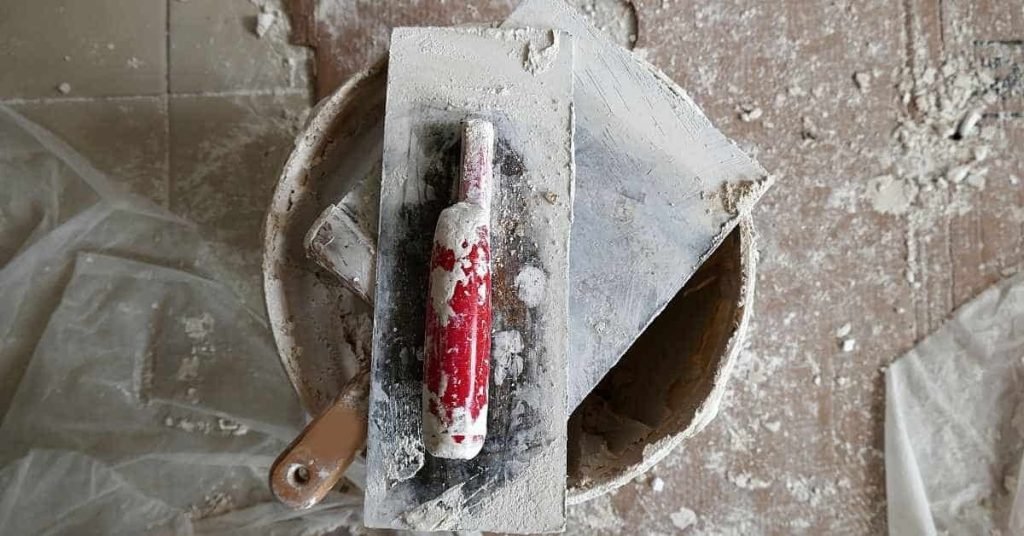
Types of Trowels and Best Choices for Beginners
Common plastering trowels include finishing, plastering or letting, margin, and corner varieties. Each shape and edge type changes how you control the blade and where you can reach. Handle ergonomics also influence how you maintain a steady angle during long passes. Consider how edge profile and blade rigidity affect your ability to avoid gouges and lap marks at different tasks.
Trowel size and stiffness influence performance when approaching corners or sweeping strokes. A stiffer blade offers crisp control, while a slightly more flexible one can reduce edge chatter and make feathering seams smoother. For beginners, seek versatile options that balance rigidity for control with enough give to prevent sharp conflicts with the substrate. Remember to test angles on a small patch to confirm comfort and accuracy before full use.
Finishing vs. Plastering vs. Bucket and Margin Trowels
Plastering trowels come in various shapes and sizes, each designed for specific tasks. Understanding their differences helps you choose the right tool for the job and apply appropriate angles.
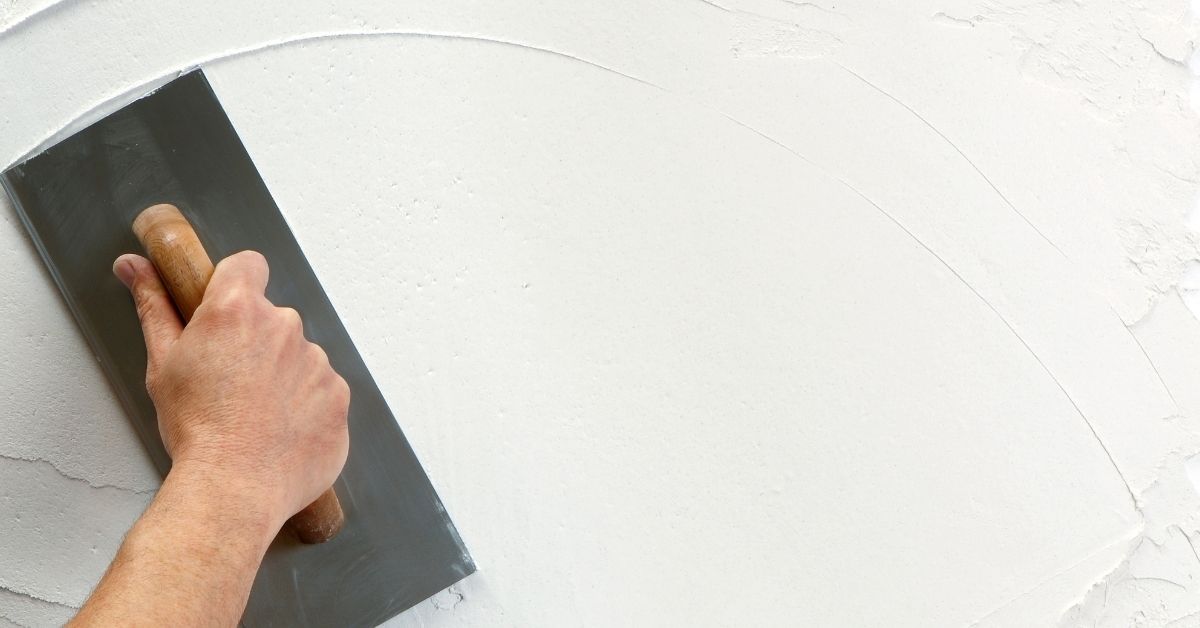
Finishing trowels have a square blade, ideal for applying the final coat and smoothing surfaces. They are used at near-vertical angles to achieve a smooth finish. For best results, ensure the blade is straight and sharp.
Plastering/letting trowels, with their rounded blades, are perfect for filling large areas and setting initial coats. They are used at shallow angles to spread plaster evenly. Check the trowel’s edge for any nicks or dull spots before use.
Margin trowels, with their narrow blades, are designed for tight spots and corners. They allow you to work at various angles, depending on the area’s shape and size. Always test a small patch first to ensure the tool’s suitability.
Blade Materials and Handle Ergonomics
Choosing the right blade material and handle shape is crucial for maintaining consistent angles, reducing fatigue, and achieving a quality finish.
- Stainless Steel Blades: Durable and resistant to corrosion. Ideal for jobs where edge durability and longevity are priorities. Check the blade’s straightness and sharpness before use.
- Carbon Steel Blades: Lighter and more flexible than stainless steel. They provide better control but require more care to prevent rust. Inspect blades regularly for any signs of wear or damage.
- Wooden Handles: Offer a secure grip and reduce hand fatigue. Ensure the handle is smooth with no rough edges that could cause discomfort during use.
- Rubberized Handles: Provide excellent grip, even when wet. They are ideal for jobs where slip resistance is crucial. Check for any cracks or wear on the handle before starting work.
- Ergonomic Handles: Designed to fit the hand comfortably, reducing strain and fatigue during prolonged use. Ensure the handle’s shape suits your hand size for optimal control.
Techniques to Avoid Gouges and Lap Marks
Develop a consistent stroke pattern that favors smooth, fluid passes with feathered edges. This approach helps reduce the chance of creating gouges or abrupt transitions that lead to lap marks. Practice keeping the blade nearly parallel to the surface on each pass, adjusting only as needed for the task at hand. Flexibility in technique supports uniform results across varying sections.
Overlapping and maintaining a wet edge are essential. Use a disciplined sequence and try to maintain a steady film height to avoid thickened areas. Control blade pressure across passes, reserving lighter pressure for the final stroke to prevent new gouges. Regular blade maintenance, including cleaning and addressing nicks, helps sustain consistent contact and finish quality.
Stroke patterns and overlap best practices
Consistent stroke direction and overlap amount are key to minimizing lap marks. Start at the top of the wall or ceiling, working your way down in a ‘Z’ or ‘M’ pattern. This ensures even coverage and reduces the likelihood of lap lines.
Overlap each pass by about 60-70%. This helps maintain a uniform film height and prevents visible seams. Too little overlap can lead to thin spots, while too much can cause ridges.
Feather your edges to reduce lap marks. As you approach the end of a stroke, lighten pressure and angle your trowel slightly to create a smooth transition to the next pass.
If lap marks appear, adjust your stroke pattern or overlap percentage. Rework affected areas, ensuring proper feathering and overlap.
Controlling pressure, speed, and tilt
Maintaining consistent pressure and stroke speed helps prevent gouges and ensures even coverage. Apply light to medium pressure across the surface, reducing it as you approach corners or edges.
Stroke at a steady pace, neither too fast nor too slow. If you’re leaving ridges or thin spots, adjust your speed accordingly. Too fast can cause skips, while too slow may lead to overworking the mortar and causing it to set too quickly.
Keep your trowel angle consistent as well. Vary your tilt slightly for different effects, but avoid excessive tilting which can cause gouges or uneven coverage.
If gouges appear, reduce pressure and/or slow down your stroke speed. Lightly rework affected areas, ensuring proper pressure and speed.
Wet edge management and timing
Maintaining a wet edge is crucial to prevent lap marks and ensure seamless blending. Work in continuous, planned sections, moving from one area to the next before the mortar begins to set.
Before moving to an adjacent area, re-wet your trowel and blend the seam. This helps create a smooth transition between areas. Use a ‘feathering’ motion, spreading mortar from wet to dry to ensure proper blending.
If you notice any dry areas or unblended seams, rewet and blend before moving on. Once an area has been blended, move quickly to the next section to maintain a continuous flow of work.
Plan your sections carefully to avoid moving from a dry area to a fresh, open area. This can cause lap marks and make blending difficult.
Common Beginner Mistakes and How to Fix Them
Most new plasterers start with incorrect trowel angles, overworking the material, uneven pressure, or using dirty blades. Each misstep can degrade the surface with visible scratches, ridges, or dry patches. Understanding the symptom helps you locate the underlying angle or handling issue that needs adjustment.
For fixes, learn to re-angle mid-stroke when needed and pause to test for consistency. Re-wipe or re-skim to salvage gouges or lap marks, and develop a routine to keep tools clean between passes. A clear step-by-step workflow supports steady progress, from setup through finishing passes, with targeted short repairs as needed.
Repairing Gouges and Scratches
Gouges and scratches can mar an otherwise smooth plaster finish. To repair these:
Pause work immediately upon detection to prevent further damage.
For tiny gouges, apply a light skim coat of fresh plaster, feathering the edges to blend with surrounding texture. Use consistent angle and light pressure to avoid creating new ridges.
If the gouge is deeper, you may need to re-wipe or re-skim the area using the same technique, ensuring the plaster is well-worked into the depression.
Blending Out Lap Marks and Ridges
Lap marks and ridges can occur when plaster dries unevenly or is applied in overlapping passes. To blend them out:
Pause work as soon as you notice these lines to prevent them from becoming more pronounced.
For fresh lap marks, rewet the affected area and use light trowel passes at a consistent angle to smooth out the lines. If necessary, apply a thin skim coat, ensuring edges are feathered into surrounding texture.
Allow proper drying time between each step. For dried lap marks, lightly sand the area before rewetting and reapplying plaster.
Tools, Materials, and Prep Checklist
Different trowels and related tools influence how you hold and move the blade. Steel, carbon steel, and aluminum trowels each behave differently under load, affecting control and the angles you can safely apply. Hawks and floats also play a role in sustaining a steady angle across passes and preventing accidental gouges.
Prep work includes mixer setup, jointing tools, PPE, and surface conditioning. Verify plaster mix consistency and substrate readiness before starting, and keep the work area clean and dry to protect angle control. A brief pre-check routine helps establish a reliable starting point for your first patch and supports consistent results through the job.
Tools and PPE every beginner should have
Having the right tools and safety gear is crucial for maintaining consistent trowel angles and preventing accidents.
- Steel Trowels (6″ – 12″): Essential for applying and spreading plaster. Key spec: Blade thickness affects flexibility; thicker blades are more rigid. Jobsite tip: Start with a smaller size for better control.
- Hawk (14″ – 18″): Holds plaster mix, supports trowel during passes. Key spec: Size influences comfort and stability; larger hawks offer more support but can be heavier. Jobsite tip: Ensure the hawk is clean to prevent contamination.
- Floats (12″ – 18″): Smooths and levels plaster surface. Key spec: Plastic floats are lighter, steel floats offer better durability. Jobsite tip: Use a float with a comfortable handle for reduced hand fatigue.
- Drill/Mixer (variable speed): Mixes plaster to consistent consistency. Key spec: Speed control helps manage set time; slower speeds prevent overmixing. Jobsite tip: Regularly clean the mixer paddle to maintain efficiency.
- Jointing Tools (spur or jointing knives): Finishes joints and removes excess plaster. Key spec: Blade size affects cut depth; larger blades remove more material at once. Jobsite tip: Use a sharp blade for cleaner cuts and better finish.
- Safety Glasses: Protects eyes from debris and splashes. Jobsite tip: Wear safety glasses with side shields for full protection.
- Dust Mask/Respirator: Filters out plaster dust, prevents inhalation. Key spec: Choose a mask rated for plaster dust; some masks offer better comfort or fit. Jobsite tip: Ensure the mask fits properly for maximum protection.
- Work Gloves: Protects hands from cuts and abrasions. Key spec: Choose gloves with good grip to maintain control of tools. Jobsite tip: Regularly inspect gloves for wear or damage.
- Knee Pads: Provides cushioning and support when working on knees. Jobsite tip: Wear knee pads with adjustable straps for a secure fit.
Material selection and mixing tips
Choosing the right materials and preparing them correctly is vital for achieving smooth, consistent plaster application with proper trowel angles.
- Plaster Mix: Key ingredient for creating a solid, durable finish. Spec to look for: Check the label for recommended water-to-plaster ratio; this affects set time and consistency. Practical tip: Follow manufacturer instructions for mixing; under-mixing can lead to weak spots.
- Plaster Additives: Enhance performance or add color to plaster mix. Spec to look for: Choose additives designed for your specific plaster type; some additives may affect set time. Practical tip: Additives should be mixed into the plaster before application for even distribution.
- Water: Essential for mixing and adjusting plaster consistency. Practical tip: Use clean, fresh water to prevent contamination or delays in setting time.
- Primer/Sealer: Prepares substrate surface, improves adhesion. Spec to look for: Choose a primer suitable for your substrate type; some primers offer mildew resistance. Practical tip: Apply primer evenly and allow it to dry as recommended before plastering.
- Keying Agent: Enhances substrate adhesion by creating a rough surface. Spec to look for: Choose a keying agent suitable for your substrate; some agents may require additional preparation steps. Practical tip: Apply keying agent evenly and allow it to dry before plastering.
- Plaster Retarder: Delays set time, useful for large areas or hot conditions. Spec to look for: Choose a retarder suitable for your plaster type; some retarders may affect final finish. Practical tip: Apply retarder evenly and allow it to penetrate before mixing and applying plaster.
Achieving a Professional Finish: Workflow and Visual Checkpoints
Establish a practical sequence from prep through base and finish coats, noting how environmental factors affect workability. A clear workflow reduces waste and helps you anticipate when a change in angle is needed to maintain a wet edge. Map out the steps so you can proceed with confidence from one stage to the next.
Use precise visual checkpoints to verify smoothness, uniform texture, and absence of marks. Raking light, consistent sheen, and feathered edges are useful indicators of progress. After each pass, perform a quick defect check and decide whether a repair, recoat, or light sanding is appropriate for the next stage.
Step-by-Step Workflow for a Smooth Wall
Follow this sequence of passes and angle transitions to minimize lap marks and rework, ensuring an efficient progression from prep to finish.
- Preparation: Ensure walls are clean, dry, and primed. Check: No visible defects or dust.
- Base Coat: Apply with trowel at a 45° angle. Reason: Promotes even coverage and adhesion. Quick check: Consistent thickness and no missed spots.
- Angle Transition: For the second base coat pass, tilt trowel to 60°. Reason: Reduces lap marks. Check: Smooth transition between passes.
- Cure Time: Allow base coat to cure according to manufacturer’s instructions. Pro check: Even coverage and proper workability.
- Finish Coat: Apply at a 60° angle, feathering edges. Reason: Ensures smooth finish and hides trowel marks. Check: Consistent sheen and no visible ridges.
- Angle Transition: For the second finish coat pass, switch to a 45° angle. Reason: Helps blend edges and reduce lap marks. Quick check: Smooth overlap.
- Final Inspection: Check for any gouges, ridges, or missed spots before final cure. Common mistake + fix: Address defects using repair techniques if necessary.
Visual and Tactile Checkpoints for Quality Control
Use this checklist at each stage to catch problems early, ensuring a professional finish.
- Raking Light Inspection: Use raking light to reveal any imperfections. Check: No visible gouges or lap marks.
- Edge Feathering: Ensure edges are feathered and blended into the wall. Check: Consistent texture at edges.
- Smoothness: Run your hand over the surface to feel for any ridges or unevenness. Quick check: No rough spots or waviness.
- Consistent Sheen: Check for even sheen across the entire surface. Check: No dull or shiny spots.
- Circular or Wavy Marks: Look for any circular or wavy patterns. Check: Absence of such marks indicates proper application technique.
- Gouges, Pinholes, Dips, or Ridges: Inspect for these defects. If present: Assess severity and repair if necessary before proceeding.
- Uneven Texture or Sheen: Check for any inconsistencies in texture or sheen. If detected: Inspect for missed spots, overworked areas, or improper mixing; address as needed.
- Proper Cure Time: Allow sufficient cure time between coats according to manufacturer’s instructions. Check: No tackiness or softness.
Quick rule: Regularly inspect your work using this checklist to ensure a high-quality finish and prevent rework.
Safety, Costs, and Project Planning
Safe handling of sharp trowels and stable ladder or scaffold setup reduces the risk of gouges and injuries. Wear appropriate PPE and maintain a clean, organized workspace to support stable angle control. Well-managed tool care minimizes slips and equipment damage during the project.
Technique choices influence material waste and labor time. Practicing efficient angles and minimizing rework helps control costs while preserving quality. Plan for test patches and learning time, and build a realistic schedule with milestones to manage weather, cure times, and multiple coats.
Safety best practices for using trowels
When working with sharp trowels, safety should always be your top priority. Always maintain a secure grip with your fingers behind the blade to prevent slips and cuts.
Wear appropriate PPE, including gloves, eye protection, and long sleeves, to protect yourself from injuries. Regularly inspect your tools for nicks or dull edges, and address any issues promptly to prevent tool damage.
If working at height, ensure ladders or scaffolds are secure, use tie-offs when necessary, and maintain three points of contact at all times to minimize the risk of falls.
Cost and time impacts of poor technique
Poor plastering techniques can lead to increased material waste, labor hours, and overall project costs. Gouges, lap marks, and over-troweling are common issues that can arise from inexperience or rushing through the job.
Estimate additional material required for test patches and touch-ups before starting your project to account for potential rework. Monitor your work closely for signs of poor technique, such as gouges or lap marks, and address any issues promptly to prevent further waste and rework.
Repairing gouges and scratches, and blending out lap marks and ridges can be time-consuming tasks that add to labor hours. By maintaining a smooth finish throughout the process, you can minimize these additional costs and keep your project on schedule.
Conclusion
Good finishing depends on solid trowel angles, careful technique, and disciplined preparation to protect both the work and the installer—this is where safety, durability, and appearance meet practical outcomes.
Begin by validating the plan and your tools: test your chosen trowel on a scrap area, confirm the blade angle stays consistent through each pass, maintain a steady, moderate pace, wipe and re-load as needed, work in small, overlapping sections, and use a straight edge or guide to check level and flatness as you go. Follow the manufacturer’s instructions for your trowel and compounds, test periodically in an inconspicuous spot, and keep your workspace clean to prevent gouges. Remember to wear appropriate safety gear and ventilate, especially when mixing or applying finish coats.
Common mistakes to avoid include overworking the surface, which can push ridges and gouges into the plaster, and applying too much water or compound, which weakens adhesion and creates lap marks. Don’t skip prep or gloss over corners, and always re-check with a straight edge after each major stage. Keep safety rules in mind: stable footing, clean tools, eye protection, and proper ventilation, and never rush a set or dry time—plan the workflow and respect cure times.
If you encounter persistent trouble beyond small-area testing—deep gouges, uneven corners, or consistent lap marks—consider professional help before proceeding. When it makes sense to hire in, do so early to prevent costly repairs. With careful steps, clear checks, and patience, you can achieve a durable, professional-looking finish that stands up to use and time.
FAQ
What are the different types of trowels for plastering and how do they affect the finish?
Common plaster trowels include flat steel blades for smoothing and finishing, and finishing trowels with a thinner, flexible edge for a smoother surface. There are also hawk-and-trowel setups used to hold material as you apply it. Choose a blade that feels balanced in your hand and suits the plaster mix you are using.
Different finishes may benefit from specific blade flex and width. Always follow the manufacturer instructions for your chosen trowel and plaster, and test on a scrap area before working on the main surface.
How do trowel angles influence the finish and how should you choose angles for a smooth surface?
Holding the blade at a light to moderate angle helps spread plaster evenly without digging. A shallower angle reduces gouging; a slightly steeper angle can help press material into the surface when needed. Adjust the angle as you work to maintain a consistent finish.
Consult the trowel and plaster instructions for recommended practices, and practice on a small area to find a comfortable, repeatable angle that yields a smooth result.
What techniques help prevent gouges in plaster when finishing?
Apply consistent pressure and use deliberate, straight strokes. Avoid twisting the blade or lifting it aggressively as you pull back; keep the blade moving smoothly to avoid creating digs. If a gouge appears, feather it with a light pass from a different angle using a clean edge.
Keep the trowel clean and free of dried material to prevent catching on the surface. Work in manageable sections and re-check the surface with a straightedge if needed.
How can you prevent lap marks during plaster application?
Maintain a continuous, wet edge by working in sections that you can finish before the material pastes over. Slight overlaps between passes help blend edges without creating visible lines. Keep the surface damp but not pooling to avoid streaks.
Timing matters: plan the work so you move at a steady pace and rework any areas that show a line while the plaster is still workable. Follow the plaster manufacturer’s guidance on open and set times for your product.