

Introduction
Choose fastener spacing and corrosion-resistant lath anchors tailored to coastal conditions to prevent rust and secure the installation.
You’ll learn practical spacing guidelines, material options designed for salt exposure, and simple tips to maintain lath assemblies in a marine environment.
Key takeaways
- Choose corrosion-resistant screws or nails rated for marine salt exposure.
- Space lath at 8–12 inches on center for windy coastal sites.
- Use ceramic-coated or stainless fasteners to minimize corrosion risk in coastal environments.
- Apply proper flashing and sealants to prevent moisture intrusion behind lath.
- Inspect quarterly for rust, corrosion pits and loose or shifted lath.
- Budget higher for coatings, maintenance, and potential fastener replacements over time.
Table of Contents
- Introduction
- Key takeaways
- Fastener types explained — pros, cons and best uses for lath
- Corrosion-resistant materials and coatings for coastal exposure
- Coastal-specific requirements and service-life expectations
- Installation best practices for lath on coastal projects
- Tools, consumables and project checklist for DIY coastal lath work
- Code, standards and inspector considerations
- Common failure modes, troubleshooting and repairs
- Cost comparison and DIY budgeting for coastal corrosion options
- Conclusion
- FAQ
Fastener types explained — pros, cons and best uses for lath
Staples, ring-shank nails, smooth nails, self-tapping screws, and lath-specific screws each play a distinct role in lath systems, with wood or metal lath, plaster, and cement backing—especially in salty, humid coastal environments. Staples offer light-duty hold but lower pull-out and shear strength, while ring-shank nails bite more firmly into wood and plaster; smooth nails provide steady grip with easier removal, and screws deliver superior corrosion resistance in metal lath or when moisture is a concern. For coastal DIY, reserve staples for light wood-lath work, use ring-shank or smooth nails for general framing, and turn to self-tapping or lath-specific screws when metal lath or moisture concerns demand reliability.
Follow rough installation guidelines: choose appropriate sizes and gauges, space fasteners evenly, and drive with steady technique while avoiding overdriving or predrilling where not required. Consider compatibility and transition tips to avoid galvanic corrosion by matching metals, adding a moisture barrier, and selecting fasteners that pair well with the chosen lath and plaster system. Understanding these trade‑offs helps you choose the right fastener for the job, saving time and reducing long-term maintenance in challenging coastal conditions.
Staples vs nails vs screws — holding power and pull-out resistance
Staples bite quickly and are fast to install, but they have the weakest pull-out resistance. Under shear — side-to-side forces like foot traffic or wind — staples can work on heavy lath, but they’ll let go sooner under vibration or sustained load.
Ring-shank nails grip better than smooth nails because the rings lock into the substrate. They’re a good middle ground for wood framing where you expect movement. Screws give the best pull-out resistance and are the go-to where wind, vibration or heavy finishes are expected. Use screws or ring-shank nails on exterior work or metal framing; avoid relying on staples where a failure would cause cracking or delamination.
Specialty fasteners (lath washers, neoprene-sealed screws, self-drilling anchors)
Lath washers, neoprene-sealed screws and self-drilling anchors solve practical problems you’ll hit on site. They improve load distribution, prevent water intrusion, and make attachment to metal or masonry reliable without predrilling.
Use lath washers when nailing into thin metal or paper-backed lath to stop pull-through and spread the load. Neoprene-sealed screws are worth the extra cost on masonry or exterior metal to keep moisture out. Self-drilling anchors save time on thin gage steel and hollow block—pick the proper diameter and corrosion-rated finish for your environment.
Compatibility with lath materials
Not all fasteners pair well with every lath. Match the fastener style, length and coating to the lath type and the backing material to avoid cracking, staining or a weak bond.
- Expanded metal lath Use ring-shank nails or screws long enough to reach the framing. Look for corrosion-resistant finishes. Avoid staples that can deform the mesh and cause loose spots.
- Paper-backed lath Use corrosion-resistant screws or ring-shank nails; the paper traps moisture. Choose fasteners that won’t tear the paper and space them per manufacturer specs to prevent blistering.
- Fiberglass lath Use stainless or hot-dipped galvanized screws. Check the manufacturer’s pull-out spec; fiberglass relies on a clean, secure anchor to prevent cracking of the finish coat.
- Steel framing Use self-drilling screws or TEK screws sized for the gage. Look for zinc or stainless plating. Do not use standard nails— they won’t hold and will strip thin steel.
- Masonry or CMU Use neoprene-sealed screws with anchors or masonry screws rated for the substrate. Select anchors sized to the lath and block. Wrong fasteners lead to loose lath and hairline cracks in the plaster.
- Exterior applications Pick hot-dipped galvanized or stainless fasteners. Corrosion-resistant coatings prevent rust stains and loss of hold. Using plain steel will lead to staining and premature failure.
- Thin-gage lath Use washers with screws or ring-shank nails to prevent pull-through. Avoid heavy, blunt staples that distort the metal and create weak spots.
| Lath type | Recommended fastener | Coating/finish | Environment considerations | Quick on-site tip |
|---|---|---|---|---|
| Expanded metal lath | Ring-shank nails or screws long enough to reach framing | Corrosion-resistant finishes (galvanized, stainless) | Coastal and splash zones; avoid staples that deform mesh | Confirm embedment depth before set; check for pull-through at edges |
| Paper-backed lath | Screws or ring-shank nails | Corrosion-resistant; avoid tearing paper | Moisture-prone environments; space per spec to prevent blistering | Pre-drill pilot if required by lath manufacturer |
| Fiberglass lath | Screws (stainless or HDG) | Stainless or hot-dipped galvanized | Low tolerance to movement; verify pull-out specs | Check pull-out values with manufacturer; anchor into solid backing |
| Steel framing | Self-drilling or TEK screws | Zinc or stainless plating | Thin steel requires robust fasteners; avoid plain nails | Use pilot spacing per spec; avoid over-torquing |
| Masonry or CMU | Neoprene-sealed screws with anchors or masonry screws | Coated or stainless; epoxy/urethane where needed | High moisture contact; ensure proper anchor sizing | Seal joints and check for pull-through at lath-to-wall joints |
| Exterior applications | HDG or stainless fasteners | Coatings suitable for coastal exposure | Salt spray zones; inspect for coating wear | Carry spare coated fasteners for touch-ups after wind events |
Corrosion-resistant materials and coatings for coastal exposure
Salt spray drives corrosion in coastal settings through galvanic action between dissimilar metals, crevice moisture traps, and repeated wetting, so fastener selection must favor materials and coatings that resist these processes. Stainless steels offer different balances of cost, strength, and corrosion resistance: 304 for budget-friendly non-worsening coastal use, 316 for higher resistance to salt and humidity, and duplex grades where long-term exposure demands excellent strength and low maintenance. Hot-dip galvanizing classes such as G60 and G90 provide robust coating weights for splash zones, but epoxy or polyurethane polymer coatings, zinc-rich systems, and lacquered or yellow-chromate plated fasteners expand options where aesthetic or additional corrosion barriers are desired.
In practice, choose fastener material to substrate compatibility, substrate geometry, and anticipated splash frequency, then pair with coatings that suit the expected salt exposure and service life to minimize maintenance windows. Knowing when HDG underperforms—e.g., in chronic immersion or highly aggressive splash zones—helps you plan for coating touch-ups or alternative alloys, while polymer coatings and plated options add an extra barrier that can simplify DIY projects. Regular inspection intervals, straightforward replacement triggers, and cautious budgeting for coatings and spare fasteners will improve durability and reduce project downtime in coastal environments.
Stainless steel: 304 vs 316 vs 316L
304 is a decent general-purpose stainless but it struggles with chlorides—think salt spray and sea air. In coastal use you’ll see surface pitting sooner on 304 than on marine grades.
316 and 316L contain molybdenum, which boosts resistance to chloride attack. Use 316 for structural fittings, handrails, and any exposed hardware within a few miles of the shoreline. Choose 316L (lower carbon) where welding is required to reduce corrosion at welds.
304 is cheaper and fine for sheltered, low-risk spots. If you want fewer callbacks and longer life in true coastal exposure, spend a bit more on 316/316L up front.
Galvanizing and specialty coatings (G90, HDG, mechanical zinc, polymer)
G90 is the sheet-metal zinc coating spec you see on flashing and some brackets. It’s thin but economical for non-critical parts. Hot-dip galvanizing (HDG) gives a much thicker, metallurgical zinc layer—better for structural fasteners and exposed steel.
Mechanical zinc plating is thinner than HDG and can fail faster in salt air. Polymer or polymer-plus-zinc coated fasteners add a sacrificial layer plus a barrier coat and work well in splash zones. For buried or constantly wet connections, prefer HDG or polymer-coated fasteners rated for coastal use.
Pick coatings based on exposure: G90 for sheltered applications, HDG for long-term exterior steel, and polymer/zinc-plated fasteners where you need extra barrier protection.
Hybrid options and cost-performance tradeoffs
You can mix materials to balance budget and life. Example: use 316 stainless for exposed rails and HDG bolts where strength matters, then G90 or polymer-coated parts in less critical spots. That gets most of the benefit without every part being premium stainless.
Typical per-fastener costs (approx): zinc-plated lag or screw $0.25–$1; HDG bolt or anchor $1–$4; polymer-coated coastal fastener $1–$6; 316 stainless fastener $3–$12 or more. Service life in coastal settings: zinc-plated months–3 years, HDG 5–20+ years, polymer-coated 3–15 years, 316 stainless 10–30+ years depending on exposure.
Rule of thumb: spend more where failure costs more. Use stainless for visible or safety-critical items, HDG for structural connections, and coated fasteners for moderate exposure to stretch your budget.
Coastal-specific requirements and service-life expectations
Coastal exposure is categorized into immediate shore, near shore, and inland zones, defined by how far salt spray reaches, typical humidity, and distance from the water line. Salt spray accelerates corrosion differently for hot-dipped galvanized, stainless steel, and polymer-coated fasteners, and performance also hinges on the lath-to-concrete interface and overall moisture exposure. A practical matrix contrasts lifespans by material and zone, offering rough ranges such as interior inland use extending to roughly a decade, near-shore environments reducing that window, and immediate-shore exposure often limiting life to only a few years, with clear guidance on inspection intervals and maintenance needs.
For a DIY reader, this matters because choosing the right fastener from the outset reduces premature failures and rework in corrosive coastal climates. It supports practical decision-making through a simple selection approach: match zone, coating, and substrate with expected lifespan, plan inspections at reasonable intervals, and apply proven maintenance measures such as protective coatings, periodic washing, and moisture barriers or elevated anchors when needed. In real jobs, understanding these distinctions helps you set realistic expectations for service life, budget maintenance, and safety, while avoiding over- or under-engineering fasteners for coastal exposure.
How chloride exposure shortens fastener life
Chloride salts from seawater punch holes in protective films and coatings. Once that barrier is breached, pitting and crevice corrosion start fast and localize damage. Small pits grow under loads and cause sudden failure.
Galvanized coatings can last years in mild coastal zones but fail quickly in the immediate shore zone. Stainless grades resist general rust better, but lower grades like 304 will still pit near the ocean. Expect measured service life to drop from decades to just a few years when chlorides are constant and unchecked.
Maintenance schedule and inspection checklist
Walk the job at least twice a year in near-shore areas and quarterly right on the waterfront. Look for white salt deposits, flaking coatings, loose fasteners, and any staining or black pits at heads and joints.
Tighten suspicious fasteners, replace any with visible pitting, and touch up scratches with the correct coating. Document each visit and swap poor-performing materials quickly; prevention saves expensive rebuilding later.
When to choose marine-grade materials
Material choice decides how long the job lasts and how often you’ll be climbing ladders. Pick up-front based on exposure, height, and how long you want the warranty to hold.
- Immediate shore Use 316 stainless or duplex stainless. Look for mill certificates and high pitting resistance numbers. Wrong material will pit and stain quickly.
- Near shore Use hot-dip galvanized plus stainless in critical spots. Spec G90 or better and combine with sealants. The wrong pick will corrode at joints and lose clamping force.
- Inland but salt-affected Use coated stainless or higher-galvanize. Check coating thickness and compatibility. Wrong fasteners will show surface rust and discolor finishes.
- High structures Use duplex or 316L stainless. Seek documented chloride corrosion resistance and supplier warranties. Inferior metals can crack or fail under vibration.
- Decorative exposed areas Use stainless with polished finish or thermally blued coatings. Ask for passivation and appropriate finish grade. Cheap metals will stain and ruin the appearance.
- Buried or hidden joints Use marine-grade stainless and protective sleeves. Verify crevice corrosion specs and use sealants. Low-grade parts will corrode unseen and cause structural issues.
- Long warranty desired Specify materials with proven coastal track records and written life estimates. Get manufacturer test data and extended guarantees. Wrong choices shorten warranty validity and increase callbacks.
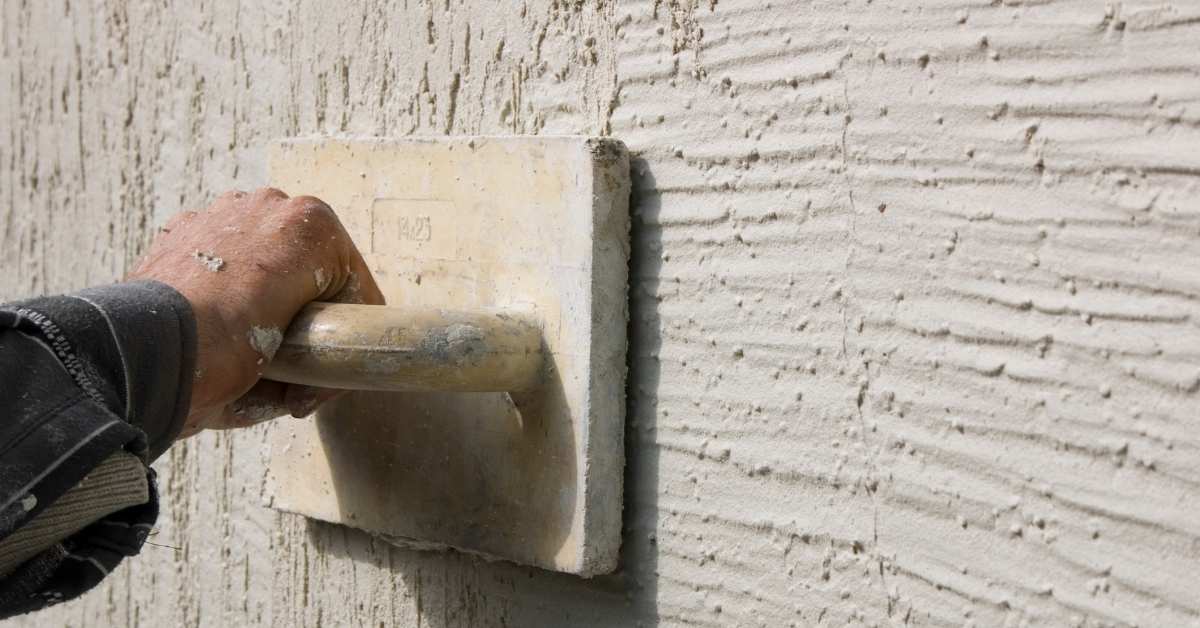
Installation best practices for lath on coastal projects
Coastal installation best practices for lath focus on selecting corrosion-resistant fasteners (such as stainless steel or hot-dip galvanized options), establishing appropriate spacing, and ensuring correct drive depth to avoid distortion or breakage. Proper lath tensioning is addressed through methods that prevent sag, wrinkling, or flutter, including temporary supports and a careful sequence of tightening. Edge sealing and flashing integration are emphasized to minimize water ingress, with moisture barriers designed for edge exposure along corners and openings.
This guidance helps you build durable, long-lasting exterior surfaces in wind-prone, salt-air environments by outlining practical steps for fastener placement, tension control, and edge sealing that stand up to coastal curing conditions. Understanding these details reduces call-backs and protects substrate integrity while maintaining appearance and performance under challenging coastal conditions. A practical approach also supports timely inspections after installation, ensuring moisture barriers remain intact and that edge seals perform as designed during seasonal changes.
Fastening technique and avoiding overdriving
Fastener mistakes are common on coastal jobs and they bite later. Know what overdriven, underdriven, and improperly placed fasteners look like so you don’t create corrosion points or poor hold.
- Correct drive depth – Too deep crushes the lath; too shallow leaves pull-out risk. Set your driver clutch so the head sits flush or just proud of the lath.
- Consistent spacing – Random spacing concentrates loads and water entry. Mark fastener lines before driving and follow the layout.
- Avoid bending wire – Bent or distorted lath at the fastener weakens bond. Use straight pulls and drive perpendicular to the surface.
- Watch tool settings – High torque will overdrive stainless or galvanized screws. Test on scrap and adjust torque and depth stops.
- Replace damaged fasteners – Scratched or discolored screws corrode faster. Discard and replace any with coating damage.
Drive with intention: consistent depth, steady spacing, and checked tool settings. That cuts leaks and failures on coastal walls.
Edge, corner, and termination details
Edges and corners are where water and wind test your work. Add extra fasteners near perimeters and lap lath properly so the system ties into flashings and control joints.
At terminations, overlap lath a full 1–1½ inches and secure the overlap with staggered fasteners. At inside and outside corners use corner beads or reinforced lath to keep a clean line and avoid thin spots in the finish. Never leave gaps where the lath meets flashing; seal and mechanically fasten through the flashing into solid substrate.
Tie control joints and movement joints into the lath by stopping the lath short of the joint and anchoring to a backing strip, then bring the finish to the joint per manufacturer directions. Reinforce exposed edges with stainless or similarly rated edge trim to prevent rust at fastened terminations.
Handling, storage and pre-install prep for lath and fasteners
Keep materials dry and off the ground. Salt air accelerates corrosion, so store lath and fasteners in a covered, ventilated area and avoid prolonged exposure before installation.
Inspect coatings and packaging on delivery. If bundles are wet, dry them on racks and recheck for white rust or flakes. Only use fasteners with full coastal-rated coatings or stainless; reject any showing surface corrosion or damaged heads.
On the day of install open a few boxes at a time, stage only what you need, and use clean tools. Small prep steps reduce scrap and help the system last in the coastal environment.

Tools, consumables and project checklist for DIY coastal lath work
Plan and prep for coastal lath work with a practical toolkit, a corrosion‑resistant fastener plan, a PPE and safety routine, and a reliable ladders/scaffolding setup tailored to salty, windy sites. Expect precise guidance on hand tools such as tape measures, levels, chalk lines, and pry bars, plus power tools like hammer drills, SDS rotary hammers, impact drivers, and angle grinders, with recommended speeds, hammer modes, and bit types for coastal concrete. The project checklist covers fasteners, lath, plaster mesh, masonry adhesive or mastic, sealants, replacement bits, washers, and consumables, with per‑board or per‑square‑foot counts and simple labeling for easy stock control.
A thorough inventory and workflow help you pre‑size materials, on‑site stock take, spare fasteners and bits, and corrosion‑control supplies, while keeping packaging waste and hazardous residues out of the coastal environment. Safety and access planning—eye and face protection, cut‑resistant gloves, dust masks or respirators, hearing protection, fall protection, and stable ladder or scaffold procedures—stays compliant and reduces risk in challenging wind and salt spray conditions. Considering weather windows, concrete curing times in coastal conditions, decontamination and disposal of packaging, and a clear storage plan helps DIYers finish on schedule with reliable results and less rework.
Essential tools and recommended models/settings
Keep the kit lean and reliable. Pick tools that tolerate salt air and are easy to service on the job.
- Coil siding nailer Fast, consistent for metal lath. Set air to 90–110 psi depending on nail length; check drive depth each morning. Rent one if you’re doing a small job — expect $40–80/day.
- Cordless impact Use for screws and strapping fasteners. Medium torque setting (30–60 Nm) prevents stripping; use 18V brushless for battery life. Buy a reputable brand — $150–350 for a decent kit.
- Hammer and punch For one-off nails and adjustments. 16–20 oz curved-claw hammer and a center punch for locating fasteners. Keep spare heads and check for rust after coastal use.
- Tape measure 25 ft with magnetic hook. Locking, easy-read blade for quick runs and cut layouts. Replace if blade starts to corrode — accuracy matters.
- Level and laser 4 ft spirit level plus cross-line laser. Use level for short runs and laser to align multiple walls. Batteries and calibration check daily.
- Tin snips & nibbler For cutting lath and trim. Offset snips for straight cuts; nibblers for cleaner corners. Wear cut-resistant gloves and keep blades sharp.
- Drill bits & taps Metal drill set and self-drilling screws. Match bit size to screw shank; use a slow drill speed to avoid heat. Keep extra bits — they’ll dull faster with stainless.
- Caulking gun & sealants Cartridge gun and marine-grade sealant. Use for joints and starter tracks; silicone or polyurethane rated for salt air. Store cartridges out of direct sun.
- Shop vacuum & wire brush Clean corrosion and debris before fixing lath. Use a stainless-steel wire brush for salt buildup and vac to clear dust. Keeps fasteners seating properly and prevents hidden corrosion.
Fastener quantities and ordering checklist
Calculate fasteners by area and attachment pattern, then add spares for waste. For metal lath expect roughly 6–10 fasteners per square metre when fastening to studs or furring, more if using closer spacing or heavy-duty anchors.
Example: a 10 m² wall at 8 fasteners/m² needs 80 fasteners. Add a 15–20% contingency for damaged fasteners, mis-drives and layout changes — round up to the nearest box size. For specialty anchors or stainless steel screws, buy an extra box per trade day; corrosion-prone coastal jobs often require full boxes of corrosion-resistant fasteners.
Also order starter track, closure strips and backing washers by wall length. Label fastener types on your purchase list so you don’t mix coatings or grades on site — consistency prevents premature corrosion and rework.
Safety, PPE and ladder/staging tips
Respect fall risk and metal hazards. Use the right gear and set up staging so handling long lath isn’t a two-person balancing act at height.
Wear eye protection, cut-resistant gloves and a dust mask when brushing or cutting corroded metal; flying corrosion and sharp edges are common. Use non-slip footwear and hard hats when working below others. For ladders, tie them off, maintain three points of contact and don’t overreach — move the ladder or use a small scaffold.
Use guardrails or a harness when working above 2 metres or where local regs require fall protection. When lifting long panels, have a spotter and use panel lifts or rolling staging to reduce strain and prevent dropping material off the edge.
Code, standards and inspector considerations
Coastal projects require careful alignment with applicable building codes (IBC/IRC and local amendments) and the ASTM standards that govern lath, plaster bases, and finish systems. Key references include ASTM C1063 for metal lath, ASTM C847 for plaster bases, and the C926/C1063 family for plastering and base coats, with attention to corrosion resistance and salt spray exposure. Inspections focus on corrosion-control measures, proper lath material (galvanized, aluminized, or stainless) and fasteners, embedded depth, spacing, and thicknesses, as well as flashing, waterproofing, and overlap details that ensure a durable bond between lath, base, and finish coats.
Also covered are required tests and verifications such as pre-construction submittals, material certifications, field sample panels, thickness gauging, and any inspector-mandated pull tests or adhesion checks for plaster on lath in coastal zones. Understanding these points helps you spot common coastal deficiencies—insufficient corrosion protection, poor lath-to-sheathing attachment, inadequate flashing or drainage, and moisture intrusion risks—and highlights the need to coordinate with waterproofing, flashing, and substrate prep to keep the system compatible in salt-laden environments.
Key ASTM and ICC references explained
Think of the standards as the recipe. ASTM C1063 and C847 set the rules for lath attachment, fastener length, spacing and base requirements. The ICC codes point to those ASTM details and add wind and weather requirements for coastal zones.
For a DIY job: use corrosion-resistant fasteners and metal lath per the spec, keep fastener spacing and embedment depths per the referenced clauses, and follow recommended joint treatment. Measure twice and pick materials rated for salt air — that’s the main callout in both ASTM and ICC.
Typical inspection issues and how to preempt them
Inspectors commonly flag wrong fastener type, incorrect spacing, insufficient embedment in framing, and non-approved coatings or backing. They also look for poor lath continuity at corners and improper flashing around openings.
Before you call for an inspection, take clear photos of fastener pattern, close-ups of fastener heads showing corrosion-resistant markings, and shots of flashing and weep screeds in place. Have your product data sheets and any ASTM/ICC references on hand to show compliance.
When to consult a structural or code professional
Call a pro when you’re in a high-wind or high-corrosion coastal band, doing multi-story work, or changing structural elements. If the job needs a permit or a manufacturer warranty depends on engineer-stamped details, get the expert involved early.
If you hit unexpected rot, compromised framing, or wide gaps that change attachment patterns, stop and bring in a structural or code pro. Their sign-off saves rework and keeps inspections smooth.
Common failure modes, troubleshooting and repairs
Coastal framing failures cluster around corrosion-driven issues, pop-outs or spalling of plaster or lathed surfaces, delamination between lath and substrate, and mechanical pull-through under load. This section summarizes the key signs, a straightforward diagnostic workflow, and practical repair options you can perform in a DIY setting. Expect a simple visual checklist (fastener head corrosion, staining, loose lath, visible gaps), moisture assessment (surface dampness, efflorescence, condensation), and light non-destructive tests (tapping for delamination, gentle pull tests) to confirm the problem before selecting replacement fasteners, re-fastening with proper spacing, re-lathing, or epoxy repairs.
Coastal conditions accelerate corrosion and rot, so early detection saves labor and avoids costly failures. Following the diagnostic workflow helps you map affected areas, select corrosion-resistant fasteners, and apply compatible coatings and lath repairs that extend the life of the structure. Regular inspections after storms and a simple repair log keep you ahead of moisture ingress and substrate fatigue, documenting affected areas for repair planning and monitoring corrosion progression and fix effectiveness. This habit helps you prioritize repairs after storms and manage coastal wear over time.
Recognizing corrosion vs mechanical failure
Look for telltale signs before you start tearing things apart. Rust staining, reddish or brown streaks on the lath or plaster, and pitted or swollen fastener shafts point to corrosion. Fractured heads, clean metal breaks, or fasteners bent off at the substrate usually mean a mechanical overload or pull-through.
Do a simple probe test: use a screwdriver or small pry bar to test several fasteners. Corroded screws will often spin out or shred; mechanically failed ones often snap or pull straight through with visible deformation. Check surrounding material for softening — that suggests water and corrosion, not just a one-off mechanical hit.
Repair methods for corroded fasteners and delaminated lath
First, remove the failed fasteners and any loose plaster or rusted fragments. If the lath is intact but loose, drive new stainless retrofit fasteners through the lath into solid backing. For severely corroded or missing lath, cut out the damaged area and fit a new piece of lath, bedding the edges so the plaster can key in.
When replacing fasteners, use longer stainless screws that pass into solid framing and avoid reusing corroded holes. For small patch areas, re-tack the edges and apply a bonding coat before finishing. If the substrate has lost strength, reinforce with blocking or backer material before refastening.
Preventing recurrence — retrofits and protective measures
Long-term fixes start with materials that resist the environment. Swap out mild steel for 316 stainless fasteners in coastal or high-moisture locations. Where full replacement isn’t practical, use sacrificial coatings or rated stainless washers to limit direct contact between incompatible metals.
Address the cause: improve drainage, repair flashings, and seal penetration points so water can’t reach the lath and fasteners. Finally, schedule periodic inspections—catching early rust or loose areas saves a lot of repair time down the road.
Cost comparison and DIY budgeting for coastal corrosion options
This section breaks down clear cost-per-fastener and cost-per-wall-area metrics for coastal framing options—304 and 316 stainless, hot-dip galvanized, and polymer-coated—so you can compare typical screw or nail sizes used in coastal DIY projects and see how materials and coatings affect price per deck board or per fence wall. It also includes simple budgets and sample project scenarios, such as a 6×8 ft deck or a 4×4 ft planter wall, with itemized line items for materials, fasteners, and coatings to illustrate how quick calculations scale from fasteners to wall area. You’ll find practical calculation templates for estimating fastener counts and converting those totals to per-square-foot costs, plus notes on service life expectations to help justify price differences.
Why this matters for a DIY jobsite is that knowing the cost drivers helps you balance initial expense against longevity in salt spray, humidity, and corrosion-prone coastal climates. The guidance supports you in choosing within a budget while aiming for a given lifespan, and highlights real-world considerations like availability, lead times, installation ease, potential misfits, coating compatibility, and warranty implications. With these context anchors, you can translate per-fastener and per-wall-area figures into actionable budgets and material lists that align with project scope and local conditions without overinvesting in materials you won’t need or won’t benefit from in your environment.
Per-fastener cost table and break-even analysis
Typical retail ranges you’ll see at big-box or specialty suppliers: plain hot-dipped galvanized (HDG) lag screws and nails about $0.10–$0.50 each, polymer-coated fasteners about $0.30–$1.00, 304 stainless about $0.80–$2.00, and 316 stainless about $1.50–$4.00 depending on size and head type.
To decide if the extra cost is worth it, compare expected service life. If HDG lasts 5 years on your coast-facing deck and 316 lasts 25 years, you’re paying a premium but replacing HDG five times over the same span. Break-even happens when the cumulative replacement plus labor costs exceed the higher upfront cost.
Quick rule of thumb: if the higher-cost fastener is more than 2–3 times the cheaper option but doubles the service life, you’re usually ahead only if labor or replacement access is expensive. If labor is cheap and you plan frequent maintenance, the cheaper option can make sense.
Budget-friendly strategies that still resist corrosion
Use a hybrid approach: install 316 stainless at critical wet or splash zones and structural connections, then use HDG or polymer-coated fasteners in low-exposure areas. That gets most of the durability where it matters while keeping costs down.
Buy smart: get bulk packs for common sizes, shop trade suppliers or online wholesale to cut per-piece price, and match fastener finish to the material (don’t mix dissimilar metals without isolation). Small projects often save the most by standardizing on two fastener types instead of a dozen special pieces.
Also prioritize good installation: proper sealing, isolation washers, and tight fits slow corrosion and stretch the life of lower-cost fasteners, so you get better value without overspending on every piece.
Warranty, resale and long-term value considerations
Manufacturers and paint warranties often require corrosion-resistant fasteners in coastal zones. Using the specified grade (usually 316 in harsh salt-air areas) helps avoid denied claims and expensive repairs down the road. Keep receipts and supplier spec sheets with job records.
For resale, visible rust around decks, railings or siding is a red flag to buyers. Investing in higher-grade fasteners can improve curb appeal and reduce inspection notes, which can translate to higher offers or fewer negotiation hits.
Think long term: lower maintenance, fewer callbacks, and stronger warranty protection can justify a higher upfront spend. If you plan to keep the property more than a few years, the long-life choice often pays back in reduced labor and better resale outcomes.

Conclusion
Coastal environments demand fasteners and lath practices that resist salt, moisture, and cycles of drying and wetting; getting this right protects structure, appearance, and your budget. Stay focused on solid material choices, proper coating, correct spacing, and honest inspections so your project lasts years without surprises.
First, confirm you’re using corrosion-resistant lath fasteners and coatings suited to your shore exposure, verify coating and material compatibility, check spacing and nail patterns in the project’s rough sequence, review local code and inspector expectations, prep and clean surfaces, and work methodically in a clean, dry area with the right PPE before you drive a single fastener. Do a final walk-through with your project checklist in hand, test a small area to verify adhesion and fit, and document any deviations or measurements for the rest of the job.
Common mistakes to avoid are underestimating salt exposure, using mismatched coatings or untreated metal, and skipping a full inspection before closing up. Always wear eye protection, gloves, and a dust mask when cutting or grinding, and never force fasteners into damp or rusty lath. If you’re unsure about coating compatibility with your substrate, or if local inspectors flag concerns, don’t push ahead—call in a pro to verify the details and ensure code compliance. When you stay disciplined, you’ll finish safely, on budget, and with a durable coastal finish you can be proud of.
FAQ
1. How should I space lath fasteners for a coastal project?
Keep fasteners about 6 to 8 inches apart along every stud line and every other row of lath. Don’t skip fasteners in the field or corners. Bad spacing invites gaps and loose lath, and that’s a headache you don’t want.
2. What fastener materials resist salt air best?
Use corrosion-resistant type fasteners. For concrete or masonry, hot-dip galvanized or stainless steel works well. Aluminum is good too, but check compatibility with the lath and mortar you’re using.
3. Can I reuse old fasteners in a coastal build?
No. Old or corroded fasteners fail sooner in salty air. Replace them with new, rated fasteners designed for exterior use.
4. What should I do to prevent corrosion at joints and edges?
Seal joints and edges with exterior-grade mortar and corrosion-friendly coatings. Inspect regularly and replace any rusty fasteners immediately. Don’t ignore a rusty nut or screw sticking out.